
Oh, hello there, fellow cookie lover! Are you ready to talk about one of life’s greatest pleasures? Today, we’re diving headfirst into the magical world of s’mores, but with a twist that lets you enjoy all that campfire goodness right from your own kitchen. We’re making Gooey Chocolate Marshmallow S’mores Cookies, and trust me, these aren’t just any s’mores cookies. We’ve cracked the code to getting those marshmallows perfectly soft and melty inside the cookie, creating pockets of irresistible gooiness in every single bite. Forget crumbly, hard centers – these are all about that perfect pull! If you’ve ever struggled with baking cookies where the middle seems to vanish or harden into a sugary rock, you’re going to love the simple yet brilliant trick that makes all the difference here.
Why These S’mores Cookies Are a Must-Bake
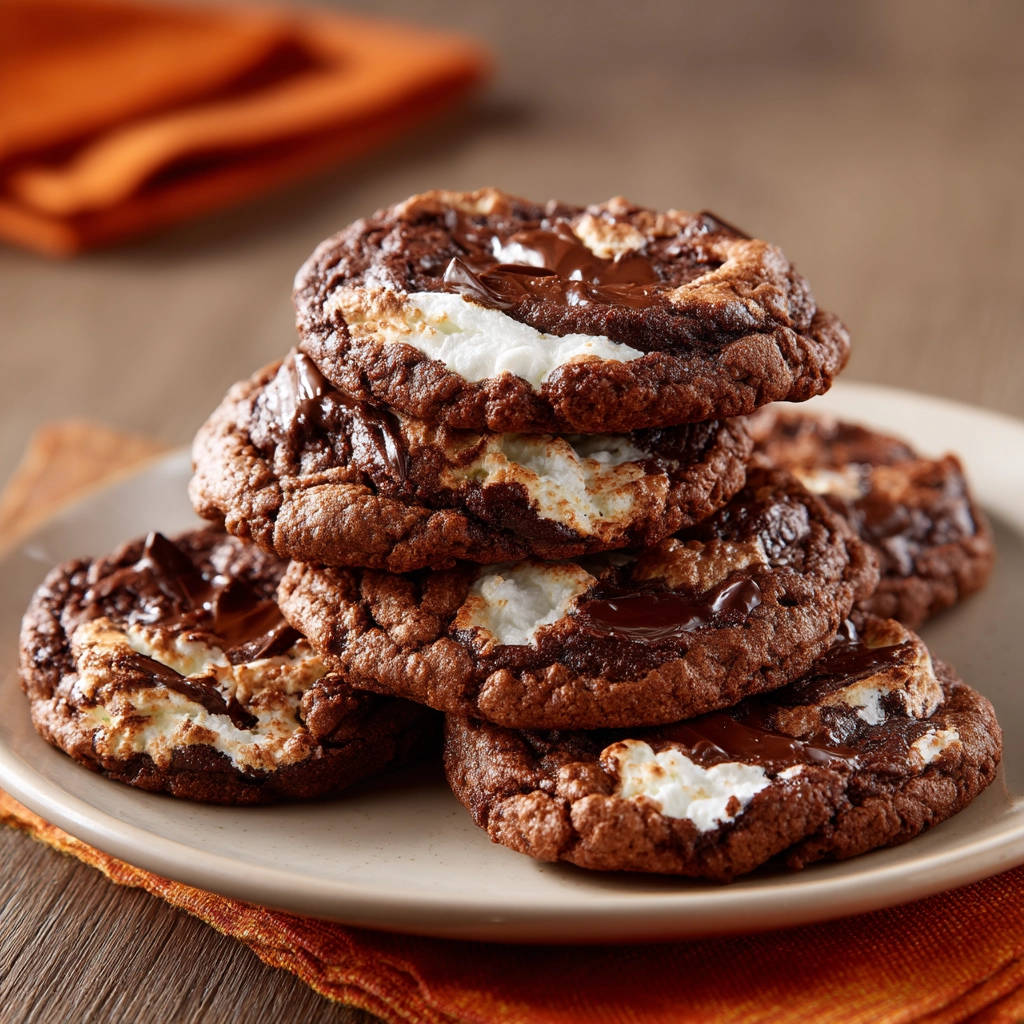
Picture this: a rich, chocolatey cookie base studded with delicious chocolate chips, giving you that classic double-chocolate hit. But the real magic happens when you bite into the center and discover that warm, stretchy, perfectly melted marshmallow surprise. It’s the ultimate s’mores experience, no campfire required!
Here’s why this recipe will become your new favorite:
- Unmatched Gooeyness: Our special technique ensures the marshmallows melt beautifully without disappearing.
- Deep Chocolate Flavor: The cocoa powder and chocolate chips create a rich, decadent base.
- Simple & Quick: With minimal prep and a short baking time, you can have these cookies ready in under 30 minutes.
- Crowd-Pleaser: Kids and adults alike are absolutely obsessed with these s’mores treats.
- Perfect Texture: They have slightly crisp edges and wonderfully soft, tender, ultra-gooey centers.
These cookies are so good, they might just distract you from making other delicious baked goods for a while! Though if you’re in the mood for something equally delightful and easy, you might want to try our easy no-bake chocolate cream loaf or maybe even our fudgy brownies.
Gathering Your Ingredients for Gooey S’mores Perfection
Creating the perfect cookie starts with understanding the role each ingredient plays. For these Gooey Chocolate Marshmallow S’mores Cookies, we’re using a lineup of pantry staples that come together to form a rich, tender, and deeply chocolatey base designed specifically to cradle those pockets of melty marshmallow.
Let’s take a look at what you’ll need:
- Unsalted Butter, Softened: Using unsalted butter gives you control over the salt level. Softened butter is crucial for creaming with the sugars, which incorporates air into the dough for a lighter, more tender cookie. Make sure it’s soft, but not melted!
- Granulated Sugar & Packed Light Brown Sugar: The combination of both sugars is key. Granulated sugar helps with spread and crispness around the edges, while light brown sugar adds moisture, chewiness, and a lovely hint of molasses flavor that complements the s’mores theme. Always pack your brown sugar firmly into the measuring cup!
- Large Egg: Eggs act as a binder, holding everything together, and also contribute to the cookie’s structure and richness. A large egg is standard for most cookie recipes.
- Vanilla Extract: A teaspoon of good quality vanilla extract enhances all the other flavors, especially the chocolate. It’s a non-negotiable flavor booster!
- All-Purpose Flour: The foundation of our cookie’s structure. Measure your flour correctly by spooning it into the measuring cup and leveling it off – scooping directly can result in too much flour and a dry cookie.
- Unsweetened Cocoa Powder: This provides the essential chocolate flavor for our s’mores cookie base. Use natural unsweetened cocoa powder for the best results and interaction with the baking soda.
- Baking Soda: Our leavening agent. It reacts with the acidic brown sugar and cocoa powder to help the cookies spread and rise slightly, giving them that perfect cookie texture.
- Salt: Just a touch of salt balances the sweetness and brings out the rich chocolate flavors. Don’t skip it!
- Chocolate Chips or Chunks: For extra pockets of melted chocolate! You can use semi-sweet, milk, or dark chocolate chips, or chop up your favorite chocolate bar into chunks for varied melting textures.
- Mini Marshmallows, or Large Marshmallows Cut into 1/2 inch pieces: These are the stars of the s’mores show! Mini marshmallows are easiest, but cutting larger marshmallows works just as well and can sometimes give you even larger pockets of gooey goodness. Having them readily available and prepared is important for the key step!
Having all your ingredients measured and ready to go before you start mixing makes the baking process smooth and enjoyable. This recipe makes about 18 cookies, which seems like a lot until you realize how quickly they disappear!
Prep time for these beauties is only about 15 minutes, and they bake up in just 9 minutes, meaning you can be sinking your teeth into warm, gooey s’mores cookies in around 24 minutes total! Now that’s quick satisfaction.
Crafting Your Gooey S’mores Cookies: Step-by-Step Deliciousness
Okay, ingredients gathered? Fantastic! Now let’s walk through the simple steps to turn these humble ingredients into the most incredible Gooey Chocolate Marshmallow S’mores Cookies you’ve ever tasted. Remember, the magic is in the technique, especially when it comes to those marshmallows!
Follow these steps carefully, and you’ll be rewarded with cookie perfection:
- Preheat your oven to 350°F (175°C). This ensures your oven is at the correct temperature from the moment the cookies go in, promoting even baking and preventing the dough from sitting on a cool sheet. Line your baking sheets with parchment paper. Parchment paper is your best friend here – it prevents sticking (especially with gooey marshmallows!) and makes cleanup a breeze.
- In a large mixing bowl, combine your softened unsalted butter, granulated sugar, and packed light brown sugar. Using an electric mixer (handheld or stand mixer) is recommended for this step. Beat them together on medium speed until the mixture is light and fluffy. This creaming process is vital as it incorporates air into the butter and sugars, which helps the cookies rise and creates a tender texture. You’ll see the color lighten and the volume increase slightly.
- Add the large egg and the vanilla extract to the creamed butter and sugar mixture. Beat again until everything is well combined and the mixture looks smooth. Scrape down the sides of the bowl with a spatula to make sure all ingredients are incorporated.
- In a separate medium bowl, whisk together the dry ingredients: all-purpose flour, unsweetened cocoa powder, baking soda, and salt. Whisking ensures the leavening agent (baking soda) and salt are evenly distributed throughout the flour and cocoa, so you don’t end up with uneven pockets in your cookies.
- Now, gradually add the dry ingredients to the wet ingredients. Mix on low speed or by hand with a spatula until they are just combined. You’ll see streaks of flour disappearing into the dough. Stop mixing as soon as you no longer see dry flour. Overmixing at this stage can develop the gluten in the flour too much, resulting in tougher cookies.
- Stir in the chocolate chips or chunks. You can do this with the mixer on low speed for just a few seconds or, preferably, by hand with a spatula or wooden spoon. Distribute them throughout the dough evenly.
- Here is the secret step for those perfectly gooey centers! Take about 2 tablespoons of dough per cookie. Form it into a ball, but don’t make it perfectly smooth. Now, and this is key, gently press several marshmallow pieces directly into the center and onto the top surface of the dough ball. You want the marshmallows to be visible and integrated right on the surface or just beneath it, not completely hidden inside the dough. This placement allows the marshmallows to melt and puff up right where they need to be for ultimate gooiness, exposed slightly to the oven’s heat. Repeat this process with the remaining dough and marshmallow pieces.
- Place the prepared cookie dough balls about 2 inches apart on the parchment-lined baking sheets. Give them enough space, as they will spread slightly in the oven.
- Bake for 8 to 10 minutes. The exact time will depend on your oven and how large you made your cookies. You’re looking for visual cues: the edges should look set and slightly golden, while the centers still appear very soft and perhaps a bit shiny. Most importantly, the marshmallows on top should be puffy and starting to melt and get golden brown. Baking for just the right amount of time ensures the edges are baked while the marshmallow centers remain soft and gooey, rather than hardening or evaporating.
- Once they come out of the oven, let the cookies cool on the baking sheet for a few minutes. They will be very delicate and soft in the center, especially around the melted marshmallow pockets, and need this time to set up slightly before you move them. After a few minutes, you can carefully transfer them to a wire rack using a spatula to cool completely, although they are truly divine when enjoyed warm with those stretchy, gooey centers!
And there you have it! Your very own batch of warm, chocolatey, perfectly gooey s’mores cookies. Get ready for that satisfying stretch of marshmallow!
Tips for Perfect S’mores Cookies Every Time
While the recipe itself is straightforward, a few little tips can help ensure your Gooey Chocolate Marshmallow S’mores Cookies turn out absolutely perfect, just like the ones in your dreams.
- Don’t Overmix: As mentioned in the steps, mixing the dry ingredients into the wet should be done gently and only until just combined. Overmixing develops gluten, leading to tougher cookies.
- Softened Butter is Key: Ensure your butter is properly softened. It should give slightly when pressed but not be melted or greasy. Cold butter won’t cream properly, and melted butter will result in a flat, greasy cookie.
- Marshmallow Placement is Non-Negotiable: Seriously, this is the secret! Pressing the marshmallows into the surface of the dough ball (step 7) rather than hiding them deep inside is what guarantees you get those visible, gooey, melted pockets instead of hollow spots or hard candy-like centers.
- Watch the Oven: Oven temperatures can vary. Keep an eye on your cookies during the last few minutes of baking. They are done when the edges are set, but the centers still look soft and the marshmallows are puffy and starting to brown slightly. Underbaking slightly is better than overbaking if you want ultimate gooiness.
- Cooling Time Matters: Those few minutes on the hot baking sheet after coming out of the oven allow the cookies to finish setting. Don’t try to move them too soon, or they might fall apart.
- Use Quality Ingredients: While simple, the quality of your chocolate and cocoa powder will significantly impact the final flavor. Use chocolate you enjoy eating!
- Mini vs. Cut Marshmallows: Both work! Mini marshmallows are convenient. Cutting larger marshmallows can sometimes give you bigger, more dramatic gooey pockets, but make sure they are cut cleanly.
- Dealing with Sticky Marshmallows: If your cut marshmallows are super sticky, you can toss them with a tiny bit of cornstarch or powdered sugar before pressing them into the dough balls.
These tips, combined with the specific marshmallow placement technique, will have you baking irresistible s’mores cookies that are the envy of everyone!
Serving Suggestions for Your S’mores Masterpiece
These Gooey Chocolate Marshmallow S’mores Cookies are pretty perfect on their own, especially served warm. However, there are a few ways to elevate the experience:
- Classic Milk Pairing: Nothing beats a tall, cold glass of milk with warm cookies. It’s a timeless combination.
- Ice Cream Companion: Top a warm cookie with a scoop of vanilla ice cream. The contrast of warm cookie and cold, melting ice cream is heavenly. Feeling adventurous? Try it with our creamy chocolate chip ice cream for a double-chocolate sensation!
- Hot Chocolate Heaven: Enjoy them with a steaming mug of hot chocolate, especially on a chilly evening.
- Cookie Sundaes: Go all out and make a cookie sundae! Place a warm cookie in a bowl, top with ice cream, hot fudge, whipped cream, and maybe a sprinkle of graham cracker crumbs.
However you choose to enjoy them, these cookies are guaranteed to bring smiles.
Your Gooey S’mores Cookie Questions Answered (FAQ)
Got questions? It’s totally normal! Here are some common queries about making these deliciously gooey chocolate marshmallow s’mores cookies.
Can I use different types of chocolate chips?
Absolutely! This recipe works well with milk chocolate chips, semi-sweet, or dark chocolate chips. You can even use a mix! Chocolate chunks are also fantastic as they create bigger pockets of melted chocolate throughout the cookie.
Can I use large marshmallows instead of mini?
Yes, you can! The recipe notes that you can cut larger marshmallows into 1/2-inch pieces. Just ensure they are cut cleanly so they don’t stick too much, and use the same technique of pressing them into the surface of the dough balls.
My marshmallows disappeared or got hard. What happened?
This is the exact problem this recipe’s key technique solves! Marshmallows can disappear or harden if they are completely enclosed inside the dough (they kind of evaporate or turn into a sugary liquid) or if they are overbaked. The trick is to press them into the surface of the dough so they are exposed to the heat, allowing them to puff and melt outwards, staying gooey. Also, ensure you’re not overbaking the cookies – bake just until the edges are set and the marshmallows look puffy and lightly golden.
How should I store these cookies?
Store cooled cookies in an airtight container at room temperature. Because of the gooey marshmallow centers, they might stick together slightly, so you might want to layer them between pieces of parchment paper if stacking. They are best enjoyed within 2-3 days for optimal gooeyness.
Can I make the cookie dough ahead of time?
Yes! You can prepare the dough, roll it into balls (without adding marshmallows yet if chilling for longer), and refrigerate for up to 2-3 days, or freeze for up to 3 months. If chilling, let the dough sit at room temperature for 10-15 minutes before adding marshmallows and baking. If freezing, let the dough balls thaw slightly before adding marshmallows and baking as directed, adding a minute or two to the bake time if needed.
Can I add graham cracker crumbs to the dough?
While delicious, adding graham cracker crumbs directly into the dough can change the cookie’s texture significantly, sometimes making it drier or more crumbly. The traditional s’mores experience relies on the gooey marshmallow and chocolate within the cookie base, combined with the implied flavor of graham cracker. If you really want that graham cracker element, you could sprinkle a few crumbs on top of the cookies right before baking, or serve them with graham cracker pieces for dunking!
Enjoy Your Homemade Gooey S’mores Cookies!
There you have it – the secret to perfectly Gooey Chocolate Marshmallow S’mores Cookies! This recipe proves you don’t need a campfire to enjoy that classic combination of chocolate and marshmallow. The simple trick of pressing the marshmallows onto the surface makes all the difference, ensuring every cookie is a pocket of delicious, melted joy.
Whether you’re making them for a party, a cozy night in, or just because you deserve a treat, these cookies are guaranteed to satisfy. So go ahead, gather your ingredients, get baking, and prepare to experience s’mores bliss in cookie form!
Give this recipe a try, and let us know in the comments what you thought! We love hearing from you.
S’mores Cookies
Course: DessertCuisine: AmericanDifficulty: medium450
kcalGet the secret to perfectly Gooey Chocolate Marshmallow S’mores Cookies! Rich chocolate, melty marshmallows, and easy to make in under 30 mins.
Ingredients
1/2 cup (1 stick) unsalted butter, softened
1/2 cup granulated sugar
1/2 cup packed light brown sugar
1 large egg
1 teaspoon vanilla extract
1 cup all-purpose flour
1/3 cup unsweetened cocoa powder
1/2 teaspoon baking soda
1/4 teaspoon salt
1 cup chocolate chips or chunks
1 cup mini marshmallows, or large marshmallows cut into 1/2 inch pieces
Directions
- Preheat oven to 350°F (175°C). Line baking sheets with parchment paper.
- In a large bowl, cream together the softened butter, granulated sugar, and brown sugar until light and fluffy.
- Beat in the egg and vanilla extract until well combined.
- In a separate medium bowl, whisk together the flour, cocoa powder, baking soda, and salt.
- Gradually add the dry ingredients to the wet ingredients, mixing until just combined. Do not overmix.
- Stir in the chocolate chips or chunks.
- This is the key step for gooey centers: Take about 2 tablespoons of dough and form it into a ball. Gently press several marshmallow pieces directly into the center and top of the dough ball. You want the marshmallows visible and integrated right on the surface or just beneath. Repeat with remaining dough and marshmallows.
- Place cookie dough balls about 2 inches apart on the prepared baking sheets.
- Bake for 8 to 10 minutes, or until the edges are set but the centers still look soft and the marshmallows are puffy and starting to melt. Baking just until the edges are set ensures the marshmallows don’t get too hard or disappear completely.
- Let cookies cool on the baking sheet for a few minutes before transferring to a wire rack to cool completely. The centers will be very soft and gooey when hot. Enjoy!


