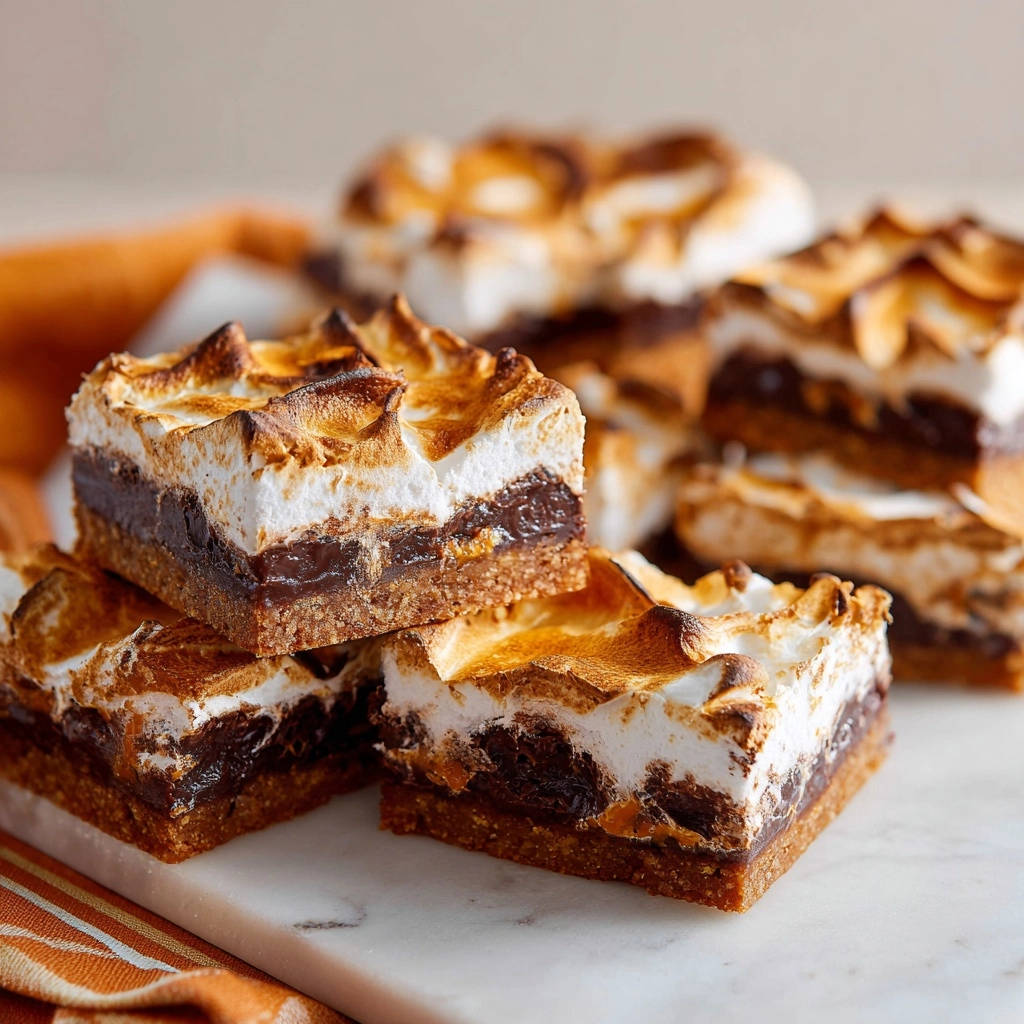
Achieving that perfectly golden, bubbly marshmallow top on s’mores bars can feel like a culinary tightrope walk – often ending in frustration or a scorched mess. As a recipe writer, I’ve spent years perfecting desserts, and these Gooey S’mores Bars finally crack the code, delivering that irresistible toasted finish without needing a single torch.
Get ready for a treat that’s effortlessly gooey, richly chocolatey, and crowned with gorgeously browned marshmallow, guaranteed to delight every s’mores lover.
Why These Gooey S’mores Bars Are Your New Favorite Treat
Mastering the Golden Marshmallow Top (Without a Torch!)
The standout feature of this recipe is the simple, foolproof method for achieving perfectly toasted marshmallows. You’ll get that campfire-like char and puff without any special equipment.
This technique leverages your oven’s broiler for consistent, beautiful results every time, eliminating guesswork and burnt surprises.
The Irresistible Gooey, Chocolatey Layers
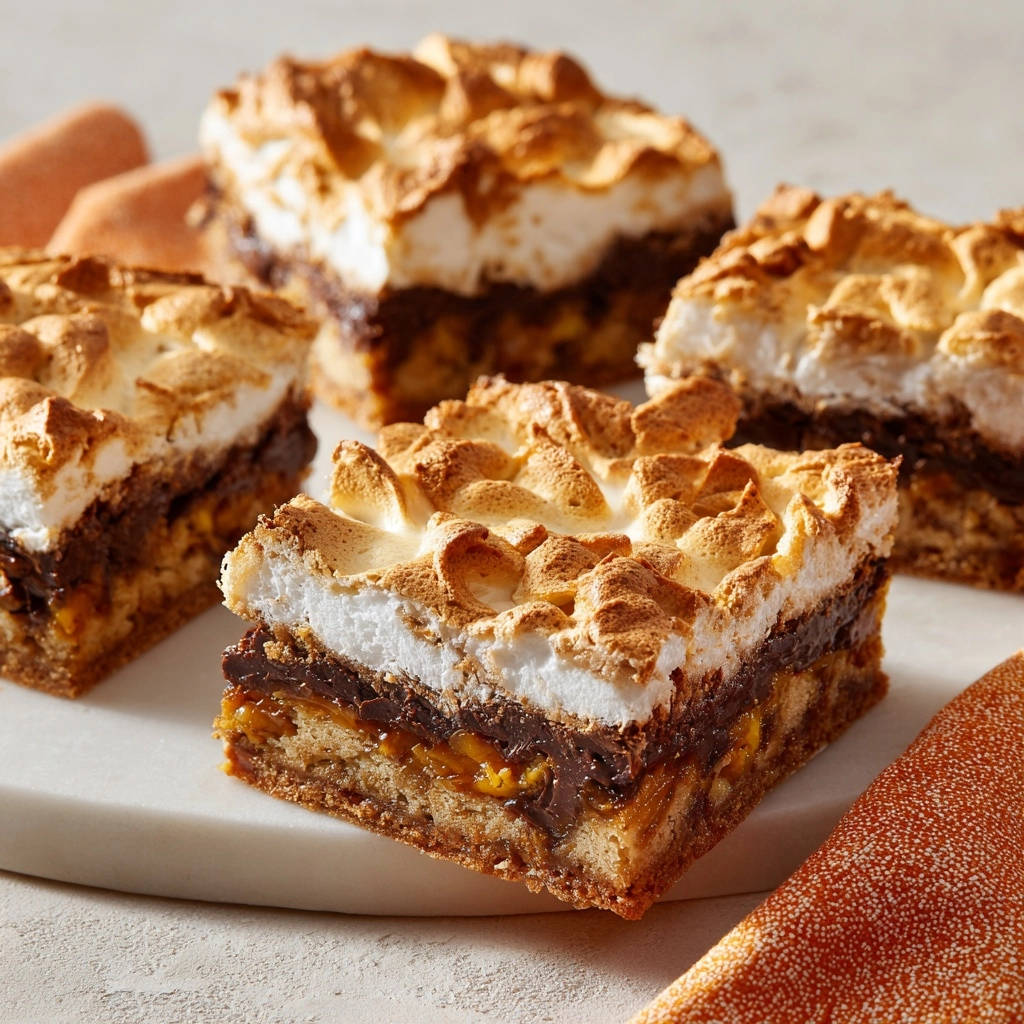
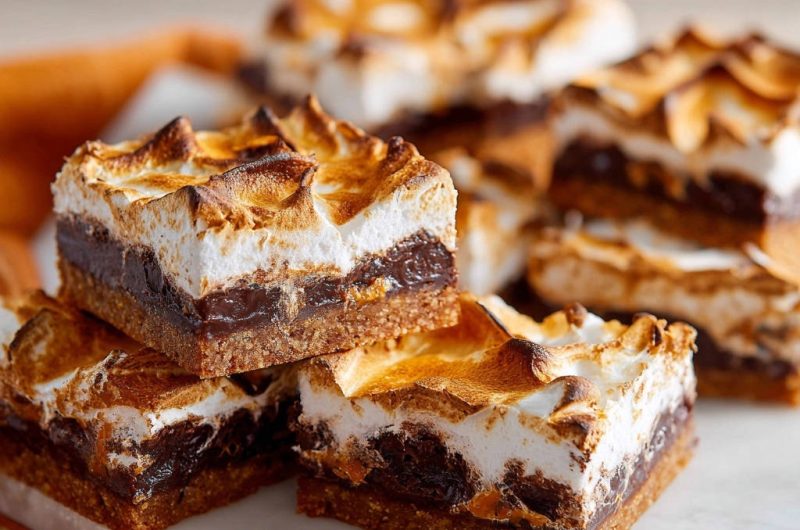
Beneath the toasted marshmallow lies a luscious, rich chocolate filling that’s perfectly gooey. Sweetened condensed milk is the secret to this wonderfully soft, chewy texture that contrasts beautifully with the crispy crust.
It’s a decadent layer that truly captures the essence of classic s’mores.
Effortless Prep for Maximum Reward
Despite their impressive appearance and flavor, these Gooey S’mores Bars are surprisingly simple to prepare. With minimal prep time and straightforward steps, they’re accessible for bakers of all skill levels.
This recipe delivers maximum reward for minimal effort, making it ideal for impromptu treats or last-minute gatherings.
Gather Your Sweet Symphony: Ingredients for Gooey S’mores Bars
Quality ingredients are the foundation of any great dessert. Here’s a closer look at what you’ll need and why each component is essential for perfect Gooey S’mores Bars.
The Crumbly Foundation: Graham Cracker Crust Essentials
Graham Cracker Crumbs (1½ cups): About 10 full sheets, crushed finely. These form the quintessential s’mores base, offering a subtly sweet, crisp texture. Ensure they’re uniform for an even crust.
Granulated Sugar (¼ cup): Adds a touch of sweetness to the crust and aids in binding the crumbs together.
Unsalted Butter, Melted (½ cup/1 stick): Crucial for binding the graham cracker crumbs into a cohesive crust. Using unsalted butter allows you to control the overall saltiness of the bars.
Melting Moments: Chocolate & Sweetened Condensed Milk
Semi-Sweet Chocolate Chips (2 cups): Provide a balanced chocolate flavor that’s neither too bitter nor overly sweet. Their consistent size helps them melt smoothly.
Sweetened Condensed Milk (14-ounce can): This is the magic ingredient for the supremely gooey, chewy chocolate layer. It melts into the chocolate, creating a rich, fudgy consistency that truly sets these bars apart.
Unsalted Butter, Melted (2 tablespoons): A small amount of butter added to the chocolate layer ensures a silky-smooth texture and adds a touch of richness.
Pillowy Perfection: The Marshmallow Topping
Mini Marshmallows (5 cups): Mini marshmallows are ideal for this recipe. Their smaller size allows for even coverage and quick, uniform toasting under the broiler, creating those signature puffed peaks.
Essential Tools for S’mores Bar Success
Having the right tools ready makes the baking process smooth and enjoyable. These are the essentials for creating perfect Gooey S’mores Bars.
Baking Pan and Lining Secrets
9×13 Inch Baking Pan: A standard size that’s perfect for a generous batch of these bars. It ensures even baking and easy portioning.
Parchment Paper with Overhang: This is a critical secret for easy removal. Lining your pan and leaving an overhang on the sides allows you to effortlessly lift the entire slab of bars once cooled.
Mixing Bowls and Spatulas
You’ll need a medium bowl for mixing the crust ingredients and a microwave-safe bowl for melting the chocolate. A sturdy spatula is essential for pressing the crust and spreading the chocolate evenly.
The Broiler’s Role: Your Secret Weapon
The broiler is your key piece of equipment for achieving that perfectly toasted marshmallow top without a torch. Familiarize yourself with your oven’s broiler setting before you begin, as it’s a powerful and fast-acting heat source.
Your Step-by-Step Guide to Irresistible Gooey S’mores Bars
Follow these precise steps to create stunning, perfectly toasted Gooey S’mores Bars that will disappear in a flash.
Prepping Your Pan and Perfecting the Crust
- Preheat Oven & Prep Pan:
Preheat your oven to 350°F (175°C) to ensure an even bake. Line a 9×13 inch baking pan with parchment paper, leaving generous overhang on the sides. This overhang is your secret to effortless removal later.
Lightly grease the parchment paper to prevent any sticking, even with the parchment barrier.
- Assemble the Crust:
In a medium bowl, combine the graham cracker crumbs, granulated sugar, and ½ cup of melted butter. Mix thoroughly until the crumbs are uniformly moistened and resemble wet sand, with no dry spots.
Press this mixture firmly and evenly into the bottom of your prepared pan. A flat-bottomed measuring cup or the back of a spoon works perfectly for this, creating a compact base.
- Bake the Crust:
Bake the crust for 8-10 minutes, or until the edges appear lightly golden brown and it smells faintly toasted. This initial bake sets the crust, ensuring it remains sturdy and delicious, preventing it from becoming soggy later.
Remove the pan from the oven and set it aside; keep the oven on if you’re immediately preparing the chocolate layer while the crust cools slightly.
Crafting the Smooth Chocolate Layer
- Melt the Chocolate Mixture:
In a separate microwave-safe bowl, combine the semi-sweet chocolate chips, sweetened condensed milk, and the remaining 2 tablespoons of melted butter. This blend will create your decadent, gooey filling.
Microwave on high for 1 minute, then stir well with a spatula, ensuring you reach the bottom of the bowl. Continue microwaving in 30-second intervals, stirring thoroughly after each, until the chocolate is completely melted and beautifully smooth. This typically takes 1.5 to 2.5 minutes total; be patient and stir well after each burst.
- Layer the Chocolate:
Pour the warm, melted chocolate mixture evenly over the slightly cooled graham cracker crust in the pan. Use a spatula to gently spread it out, ensuring the entire surface of the crust is covered edge-to-edge. Work quickly, as the chocolate will start to set as it cools.
The Magic of Marshmallow: Achieving Golden Perfection
- Add Marshmallows:
Evenly sprinkle the mini marshmallows over the warm chocolate layer, creating a thick, pillowy blanket. Make sure they cover the chocolate completely for the ultimate gooey, toasted marshmallow experience in every bite.
- Broil for Golden Perfection:
This is the moment for that perfect top! Place the baking pan back into the oven. Crucially, switch your oven to the BROIL setting (High) and position your oven rack to the second position from the top, typically 6-8 inches from the broiler element. This distance is vital for even browning without burning.
Watch it like a hawk! Broil the marshmallows for only 1 to 2 minutes. They will puff up and brown incredibly quickly, so do not step away from the oven for even a second. The instant they are puffed, achieve a beautiful golden brown color, and show some lovely toasted peaks, immediately remove the pan. Every oven broiler is different and can be unpredictable, so constant vigilance is your absolute best friend here to prevent burning.
Cooling and Cutting for Clean Slices
- Cool Completely:
Allow the bars to cool completely in the pan on a wire rack. This step is absolutely non-negotiable for clean, defined slices and to ensure the chocolate layer fully sets. Rushing this will result in a messy, sticky situation!
Depending on your kitchen’s temperature, this can take a couple of hours or more. For best results, allow them to cool at room temperature.
- Lift and Cut:
Once fully cooled and firm, use the parchment paper overhang to gently lift the entire slab of s’mores bars out of the pan and transfer it to a cutting board. Using a sharp knife that has been lightly oiled or run under hot water and wiped clean, cut into desired squares. Clean the knife between cuts for the neatest edges.
Pro Tips for Your Best Gooey S’mores Bars Yet
Elevate your Gooey S’mores Bars with these expert tips, ensuring every batch is a resounding success.
Achieving Uniform Crumb Crust
For a perfectly even and sturdy base, use the bottom of a flat-bottomed measuring cup or a clean, flat glass to press the graham cracker mixture firmly and uniformly into the pan. This compression prevents the crust from being too crumbly or falling apart when cut.
Melting Chocolate Like a Pro
When melting the chocolate mixture, always use short microwave intervals (30 seconds) and stir diligently between each. This prevents the chocolate from overheating and seizing, ensuring a smooth, spreadable consistency that melts beautifully into the sweetened condensed milk.
Mastering the Broiler (Safety First!)
The broiler works quickly and intensely. Always pre-position your oven rack before turning on the broiler. Never leave the oven unattended while broiling marshmallows – they can go from perfectly golden to burnt in mere seconds. Trust your eyes, not the timer, for ideal browning.
Cooling Completely for Picture-Perfect Bars
Patience is paramount! Allowing the bars to cool completely, preferably at room temperature, is crucial for the chocolate layer to set properly. This ensures clean, non-sticky cuts and helps the bars maintain their structural integrity, making them easy to handle and serve.
Gooey S’mores Bars Troubleshooting: Common Questions Solved
Even seasoned bakers encounter hiccups. Here are solutions to common issues you might face when making Gooey S’mores Bars.
Why Did My Marshmallows Burn?
The most common culprit is broiling for too long or having the oven rack too close to the broiler element. Broilers are powerful, and every oven’s broiler performs differently. Always position the rack on the second highest setting (6-8 inches from the heat) and watch continuously. Remove the bars the moment they reach your desired golden hue.
My Crust is Too Crumbly/Hard
If your crust is too crumbly, it might lack enough melted butter or wasn’t pressed firmly enough into the pan. For a hard crust, it was likely baked too long or at too high a temperature. Ensure accurate measurements and firmly pack the mixture before baking for the specified time.
The Chocolate Layer is Too Stiff/Not Spreading
This usually happens if the chocolate mixture was overheated or allowed to cool too much before spreading. Overheated chocolate can seize, becoming thick and grainy. If it cools too fast, it will set prematurely. Ensure gentle melting and spread the mixture immediately after it’s smooth and fluid.
Beyond the Classic: Creative Twists & Serving Ideas
While the classic Gooey S’mores Bars are irresistible, feel free to experiment with these creative variations and serving suggestions.
Customizing Your Chocolate Layer
Experiment with different chocolate types! Use a blend of semi-sweet and milk chocolate for a sweeter profile, or incorporate dark chocolate chips for a richer, less sweet bar. A pinch of instant espresso powder can also enhance the chocolate flavor without adding a coffee taste.
Adding Extra S’mores Fun
Before baking, sprinkle in some chopped nuts like pecans or walnuts for added texture. After cooling, you could drizzle them with a bit of extra melted chocolate, sprinkle on some colorful sprinkles, or add a luxurious swirl of homemade salted caramel sauce for an extra layer of indulgence. For another fun s’mores twist, try our Amazing S’mores Cookies!
Serving Suggestions for Any Occasion
These bars are versatile! Serve them slightly warm with a scoop of vanilla bean ice cream for an elevated dessert experience, allowing the chocolate to be extra gooey. Or, once fully cooled and cut, they make perfect portable treats for potlucks, parties, or lunchboxes.
Store, Share, & Savor: Tips for Freshness
Keep your Gooey S’mores Bars fresh and delicious for days with these simple storage tips.
How to Store Your Gooey S’mores Bars
Store these bars in an airtight container at room temperature for up to 2-3 days. For longer freshness, you can refrigerate them for up to 5 days. Just bring them back to room temperature before serving for the best texture.
Can I Make Them Ahead?
Absolutely! Gooey S’mores Bars are an excellent make-ahead dessert. You can prepare them a day in advance, allow them to cool completely, and then store them in an airtight container until serving. This makes them perfect for entertaining.
Freezing for Future Cravings
To freeze, cut the cooled bars into individual squares. Wrap each bar tightly in plastic wrap, then place them in a freezer-safe airtight container or bag. They can be frozen for up to 1 month. Thaw at room temperature for a few hours before enjoying.
Your Gooey S’mores Bars Questions Answered
Here are quick answers to some common inquiries about making and enjoying these delightful s’mores bars.
Can I use different types of marshmallows?
While mini marshmallows are recommended for their even coverage and fast browning, you can use larger marshmallows if cut into smaller pieces. Be aware that larger pieces may brown less uniformly and might require closer monitoring under the broiler.
Is a broiler essential for this recipe?
Yes, the broiler is essential for achieving the signature golden, puffed, and slightly charred marshmallow top without a kitchen torch. Other oven settings like baking or toasting will not provide the intense, direct heat needed for this effect, and the marshmallows will simply melt rather than toast.
How long do these bars last?
When stored in an airtight container at room temperature, Gooey S’mores Bars will remain fresh for about 2 to 3 days. If refrigerated, their freshness can extend up to 5 days, though the crust may soften slightly.
Can I make this recipe gluten-free?
Yes, you can easily make this recipe gluten-free by substituting regular graham cracker crumbs with gluten-free graham cracker crumbs. Ensure all other ingredients, like chocolate chips, are certified gluten-free if you have severe dietary restrictions.
Whip Up Joy: Your New Favorite Gooey S’mores Bars Await!
There you have it – the ultimate guide to creating unbelievably delicious and perfectly toasted Gooey S’mores Bars, all without the fuss of a campfire or a torch. This recipe is your ticket to a dessert that’s rich, gooey, and satisfying in every single bite.
I encourage you to try this recipe for yourself and experience the magic. Get ready to impress your friends and family with these irresistible treats that are sure to become a cherished favorite in your baking repertoire!
Gooey S’mores Bars
Course: DessertCuisine: American CuisineDifficulty: easy16
servings15
minutes25
minutes40
minutesAmerican Cuisine
Ingredients
1 and 1/2 cups graham cracker crumbs (about 10 full sheets)
1/4 cup granulated sugar
1/2 cup (1 stick) unsalted butter, melted
2 cups semi-sweet chocolate chips
1 (14 ounce) can sweetened condensed milk
2 tablespoons unsalted butter, melted
5 cups mini marshmallows
Directions
- Preheat your oven to 350°F (175°C). Line a 9×13 inch baking pan with parchment paper, leaving an overhang on the sides to easily lift the bars out later. Lightly grease the parchment paper.
- In a medium bowl, combine the graham cracker crumbs, 1/4 cup granulated sugar, and 1/2 cup melted butter. Mix until well combined and crumbly. Press this mixture firmly and evenly into the bottom of the prepared baking pan to form the crust.
- Bake the crust for 8-10 minutes, or until lightly golden brown. Remove from oven and set aside.
- While the crust bakes, combine the semi-sweet chocolate chips, sweetened condensed milk, and 2 tablespoons melted butter in a microwave-safe bowl. Microwave on high for 1 minute, then stir. Continue microwaving in 30-second intervals, stirring after each, until the chocolate is completely melted and smooth. This typically takes 1.5 to 2.5 minutes total.
- Pour the melted chocolate mixture evenly over the warm graham cracker crust in the pan. Spread it out with a spatula to cover the entire surface.
- Evenly sprinkle the mini marshmallows over the chocolate layer, making sure to cover it completely.
- The Key to Perfect Marshmallow: This is where we get that beautiful golden top without burning! Place the baking pan back into the oven. Switch your oven to the BROIL setting (High). Crucially, position your oven rack to the second position from the top, about 6-8 inches from the broiler element.
- Watch it like a hawk! Broil the marshmallows for 1 to 2 minutes. They will brown very quickly, so do not walk away from the oven. As soon as the marshmallows are puffed and have achieved a beautiful golden brown color with some toasted peaks, immediately remove the pan from the oven. Every oven broiler is different, so vigilance is your best friend here.
- Let the bars cool completely in the pan on a wire rack before lifting them out using the parchment paper overhang. Once cooled, cut into squares and serve.
Notes
- Watch marshmallows very closely under the broiler as they brown quickly.