Alright, friends, let’s talk wraps. There’s nothing quite like a warm, satisfying wrap packed with delicious grilled chicken and vibrant veggies, right? But here’s the thing: have you ever bitten into what should be a perfect wrap, only to find the bottom has gone disastrously soggy? Ugh, it’s the worst! It loses all its structural integrity and just feels… floppy. I used to battle this exact problem with my veggie-filled wraps constantly.
You crave those beautiful grill marks on the tortilla and a sturdy bite that holds all that goodness inside. For the longest time, I thought it was just an unavoidable consequence of mixing juicy ingredients with soft tortillas. But after some trial and error, I finally cracked the code! I discovered a super simple trick that makes all the difference, ensuring your grilled chicken and veggie wraps stay perfectly intact, beautifully grilled, and bursting with amazing flavor from start to finish.
This recipe for grilled chicken and veggie wraps isn’t just about assembling ingredients; it’s about mastering a technique that guarantees success every time. It’s become a go-to in my kitchen for a healthy, quick, and incredibly satisfying meal.
Why You’ll Absolutely Love These Grilled Chicken Veggie Wraps
Beyond solving the dreaded soggy wrap dilemma, these wraps offer so much to love. They’re packed with nutrients, easy to customize, and surprisingly quick to pull together on a weeknight.
- No More Soggy Bottoms: The game-changing trick ensures your wraps have structural integrity.
- Full of Flavor: Chicken and a colorful medley of vegetables are tossed in a simple yet powerful spice blend that really wakes everything up.
- Nutrient-Packed: Lean protein from the chicken and a generous serving of vitamins and fiber from the vegetables make this a wholesome meal.
- Quick & Easy: With minimal prep and cooking time, you can have these on the table in under an hour.
- Versatile: The filling is fantastic as is, but easily adaptable to whatever veggies you have on hand.
- Perfect for Grilling Indoors or Out: While a grill pan works beautifully, you can definitely take this recipe outside to your outdoor grill for extra smoky flavor.
Gathering Your Delicious Ingredients
Putting together a flavorful and sturdy wrap starts with selecting great ingredients. We’re focusing on fresh, vibrant vegetables and lean protein, all brought together with a simple, aromatic seasoning blend.
Here’s what you’ll need, with a few notes on why these components work so well together:
- Boneless, Skinless Chicken Breast (1 pound): This is our lean protein base. Cutting it into bite-sized pieces ensures it cooks quickly and evenly alongside the vegetables. Chicken thighs would also work, though they may need a minute or two longer to cook.
- Vegetable Medley: We’re using a fantastic mix that provides both sweetness and texture.
- Medium Zucchini, diced (1): Zucchini is mild and absorbs the flavors beautifully. Dicing it helps it cook through quickly.
- Red Bell Pepper, diced (1): Adds sweetness, vibrant color, and a bit of crunch even after cooking.
- Small Red Onion, cut into wedges or large chunks (1): Red onion caramelizes slightly when cooked, adding a lovely savory-sweet depth. Cutting it into larger pieces prevents it from disappearing into the mix.
- Small Sweet Potato or Butternut Squash, peeled and diced (1): This is key for a touch of sweetness and a heartier texture. Sweet potatoes and butternut squash are also packed with nutrients. Make sure the dice size is similar to the chicken for even cooking.
- Olive Oil (2 tablespoons): Our cooking fat and the carrier for our spices, helping them adhere to the chicken and veggies and promoting charring.
- Flavor Boosters:
- Smoked Paprika (1 teaspoon): Adds a warm, smoky depth that complements the grilling process perfectly.
- Garlic Powder (1/2 teaspoon): Provides that essential savory baseline flavor.
- Black Pepper (1/4 teaspoon): A touch of heat and pungency.
- Salt (1/2 teaspoon, plus more to taste): Essential for enhancing all the other flavors. Start with the specified amount and adjust at the end if needed.
- Large Flour Tortillas (4): These are our vessels! Choose a size that’s large enough to comfortably hold a quarter of the filling without being too difficult to roll.
- Fresh Parsley, chopped (Optional, for garnish): A sprinkle of fresh herbs at the end adds brightness and a pop of color.
Crafting Your Grilled Chicken & Veggie Wraps: Step-by-Step Mastery
Ready to build the perfect, non-soggy wrap? This process is straightforward, but paying attention to one crucial detail will make all the difference. Let’s get cooking!
- Prep Your Stars: Begin by getting all your main components ready. Take your boneless, skinless chicken breast and cut it into uniform, bite-sized pieces. The goal here is consistency so everything cooks at roughly the same pace. Now, turn your attention to the vegetables – the zucchini, red bell pepper, red onion, and sweet potato or butternut squash. Dice the zucchini, bell pepper, and sweet potato/squash into pieces similar in size to the chicken. Cut the red onion into slightly larger wedges or chunks; they soften nicely and add great flavor. This initial prep work makes the rest of the process flow smoothly.
- Season Everything Beautifully: Grab a large mixing bowl – one that’s big enough to comfortably hold all your chicken and prepped vegetables. Add the chicken, zucchini, red bell pepper, red onion, and sweet potato/squash to the bowl. Drizzle everything generously with the olive oil. Now, sprinkle over the smoked paprika, garlic powder, black pepper, and initial measure of salt. Get your hands in there (or use a large spoon or tongs!) and toss everything together until every piece of chicken and every veggie is coated evenly in that gorgeous spice and oil mixture. This ensures maximum flavor in every bite.
- Cook the Filling: Heat up your large grill pan or a sturdy skillet over medium-high heat. You want it hot enough to get some nice color on your ingredients. Add the seasoned chicken and vegetables to the pan in a single layer. It’s really important not to overcrowd the pan here; if you have too much in at once, the ingredients will steam instead of sear, and you won’t get those delicious slightly charred edges or ensure even cooking. If necessary, cook the filling in two batches. Let it cook for about 15 to 20 minutes, stirring only occasionally. You’ll know it’s ready when the chicken is completely cooked through (no pink inside!) and the vegetables are tender but still have a little bite, with some lovely browned or charred spots appearing.
- The Secret Weapon: Cool the Filling! This is it – the absolute key step to saying goodbye to soggy wraps forever. Once your chicken and veggie filling is perfectly cooked, immediately remove it from the hot pan. Don’t leave it sitting there! Spread the cooked filling out in a single layer on a large plate or a clean baking sheet. Why do we do this? Steam! Hot food releases steam, and if you immediately put hot, steamy filling into a tortilla, that moisture has nowhere to go but into the tortilla, making it soggy. By spreading it out, you allow that steam and any excess liquid from the cooking process to evaporate. Let the filling cool for at least 5 to 10 minutes, or until it’s just warm to the touch, not piping hot. If there’s any liquid left in the pan after cooking, leave it behind when you transfer the filling. This cooling step is non-negotiable for a sturdy wrap!
- Assemble Your Wraps: Grab one of your large flour tortillas and lay it flat on a clean surface. Take about a quarter of the slightly cooled filling and spoon it onto the center of the tortilla. Be mindful not to overfill! Too much filling makes rolling difficult and increases the chances of breakage or uneven heating later. A good rule of thumb is to leave a couple of inches of space around the edges.
- Fold and Roll: This part requires a little technique to create a nice, tight package. First, fold in the sides of the tortilla over the filling. Then, take the bottom edge of the tortilla and fold it up tightly over the filling, securing the folded sides inside. Now, starting from the bottom folded edge, roll the wrap up snugly into a compact cylinder. Gentle but firm pressure is key to keeping everything contained. Repeat this process with the remaining tortillas and filling.
- Grill the Wraps: Return your grill pan or skillet to medium heat. There’s usually no need for more oil at this stage unless your pan is completely dry. Carefully place the rolled wraps into the hot pan, starting with the seam-side down. Cooking the seam side first helps to seal the wrap and prevent it from unfolding. Grill for about 2 to 3 minutes on each side, or until the tortilla is golden brown, slightly crispy, and has those appealing grill marks. Use tongs to carefully turn the wraps.
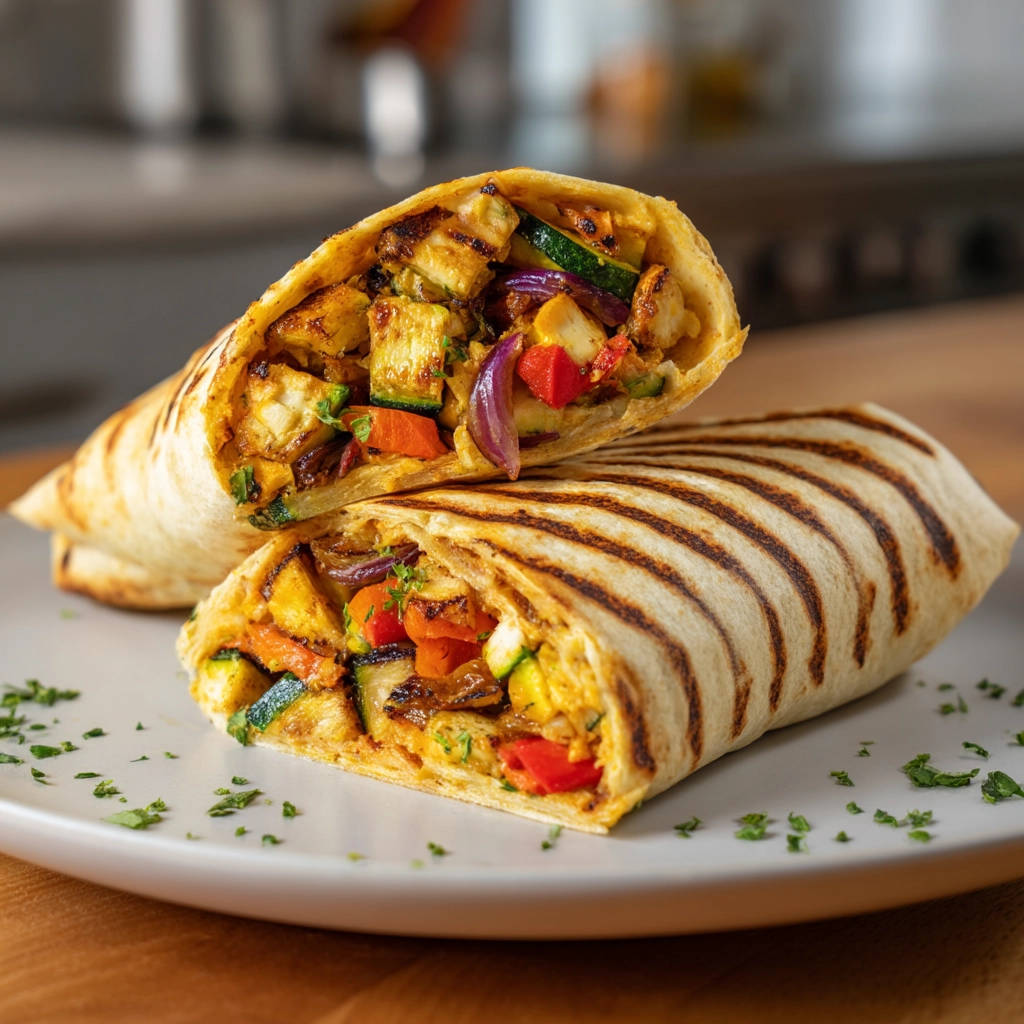
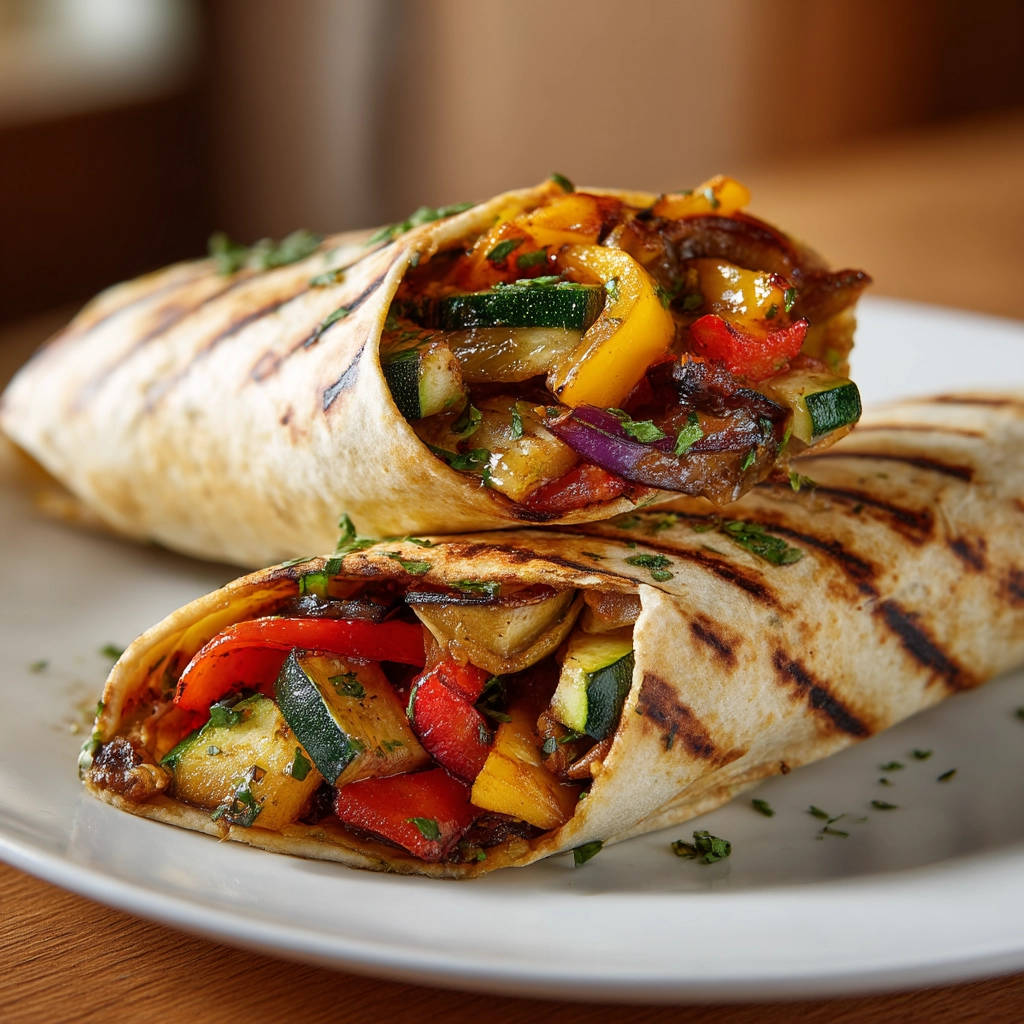
- Serve Immediately: Once your wraps are beautifully grilled and sealed, they’re ready! Use a sharp knife to carefully cut each wrap in half, making for easier handling and showing off the colorful filling inside. Arrange them on a plate and, if you like, sprinkle with some fresh chopped parsley for a burst of color and freshness. Serve them while they’re warm and the tortilla is perfectly toasted!
Tips for Perfect Grilled Chicken & Veggie Wraps Every Time
Making great wraps is simple, but a few extra tips can elevate your results and make the process even smoother.
- Chop Uniformly: As mentioned in the steps, keeping your chicken and vegetable pieces roughly the same size ensures everything cooks through evenly. This is particularly important for the denser sweet potato or squash.
- Don’t Fear the Char: Those slightly charred edges on the chicken and veggies from the initial cooking step add fantastic flavor and texture. Don’t be afraid to let them get a little color!
- Cooling is Crucial: I can’t stress this enough! Giving the filling that 5-10 minutes to cool and release steam is the single most important step for preventing soggy wraps. Be patient here!
- Warm Tortillas: If your tortillas seem a bit stiff or prone to cracking, you can quickly warm them before filling. A few seconds in a microwave, on a dry skillet, or even directly over a low gas flame for a moment or two makes them much more pliable and easier to roll.
- Experiment with Veggies: Feel free to swap out the vegetables based on what’s in season or what you have. Broccoli florets, mushrooms, green beans, or asparagus could all work well. Just ensure they are cut to a size that will cook in the same timeframe as the chicken. For inspiration on roasting other vegetables, you might enjoy our guide on how to make perfect roasted veggies.
- Add a Sauce: While delicious on their own, these wraps are also fantastic with a little drizzle of sauce inside before rolling. A simple yogurt-based sauce, a dollop of homemade guacamole, or even a swirl of hummus would be excellent additions.
What to Serve With Your Grilled Chicken Wraps
These grilled chicken and veggie wraps are a complete meal on their own, but pairing them with a simple side can make it even more satisfying. A fresh, crisp salad is always a winner; maybe something light like our easy kale salad or a creamy broccoli salad would be perfect.
For something a little heartier, a side of roasted potatoes or even crispy sweet potato fries would complement the wraps beautifully. Quick and easy sides like sauteed peas or simple pan-fried potatoes are also great options. Think about contrasts in texture and temperature to make the meal pop!
Your Grilled Wrap Questions Answered (FAQ)
Got questions about making these fantastic wraps? Here are some common ones I hear:
Can I make the filling ahead of time?
Absolutely! You can cook the chicken and veggie filling a day in advance. Make sure to follow the cooling step (Step 4) completely before storing it. Store it in an airtight container in the refrigerator. When you’re ready to make the wraps, gently warm the filling in a skillet, then assemble and grill the wraps as directed. Just be sure it’s warm, not hot, before filling the tortillas to avoid reintroducing excessive steam.
What other proteins can I use?
If chicken isn’t your preference, you could easily substitute it with thinly sliced beef (like for grilled beef skewers) or even firm tofu or chickpeas for a vegetarian option. Adjust cooking times as needed for the alternative protein.
Can I cook these on an outdoor grill?
Yes! This recipe works wonderfully on an outdoor grill. Cook the chicken and veggies in a grill basket or on a grill pan over medium-high heat until cooked through and slightly charred. For the final wrap grilling step, place the rolled wraps directly on the grill grates over medium heat, rotating every few minutes until golden and marked. Just be sure your grill grates are clean and lightly oiled to prevent sticking.
What kind of tortillas are best?
Large flour tortillas are recommended for their flexibility and ability to hold the filling without tearing. Whole wheat tortillas are a great healthy alternative. Corn tortillas tend to be less pliable and can break when rolled, so they are not ideal for this method.
My wraps aren’t getting nice grill marks. What’s wrong?
Ensure your grill pan or skillet is hot enough when you place the wraps in it for the final grilling step. Medium heat is usually sufficient, but preheating the pan for a few minutes is key. Don’t overcrowd the pan, as this can lower the temperature. If you’re using an outdoor grill, make sure it’s properly preheated.
Enjoy Your Homemade Grilled Chicken & Veggie Wraps!
There you have it! A simple, delicious, and guaranteed non-soggy way to enjoy grilled chicken and veggie wraps at home. This recipe is perfect for a busy weeknight, a casual lunch, or even prepped ahead for grab-and-go meals. The combination of tender chicken, sweet and savory vegetables, and that satisfyingly grilled tortilla is simply irresistible.
Give this recipe a try and see how that simple cooling step changes your wrap game forever! I promise, you won’t go back to soggy wraps. Let me know what you think in the comments below, or better yet, share a picture of your beautiful, sturdy wraps! Happy cooking!
Grilled Chicken & Veggie Wraps

Details
- Prep time: 20 minutes
- Cook time: 25 minutes
- Total time: 45 minutes
- Servings: 4
Ingredients
- 1 pound boneless, skinless chicken breast, cut into bite-sized pieces
- 1 medium zucchini, diced
- 1 red bell pepper, diced
- 1 small red onion, cut into wedges or large chunks
- 1 small sweet potato or butternut squash, peeled and diced
- 2 tablespoons olive oil
- 1 teaspoon smoked paprika
- 1/2 teaspoon garlic powder
- 1/4 teaspoon black pepper
- 1/2 teaspoon salt, plus more to taste
- 4 large flour tortillas
- Optional: Fresh parsley, chopped, for garnish
Directions
- Prepare the vegetables and chicken. Cut the chicken and all vegetables into roughly equal, bite-sized pieces so they cook evenly.
- In a large bowl, toss the chicken, zucchini, red bell pepper, red onion, and sweet potato/squash with the olive oil, smoked paprika, garlic powder, salt, and pepper. Make sure everything is coated well.
- Heat a large grill pan or skillet over medium-high heat. Add the seasoned chicken and vegetables in a single layer, cooking in batches if necessary to avoid crowding the pan. Cook for 15 to 20 minutes, stirring occasionally, until the chicken is cooked through and the vegetables are tender and slightly charred in spots.
- This is the key step to prevent soggy wraps: Once the filling is cooked, remove it from the pan and spread it out on a plate or clean baking sheet in a single layer. This allows steam and excess moisture to evaporate. Let it cool for at least 5 to 10 minutes until it’s just warm, not piping hot. If there’s any excess liquid in the pan, leave it behind.
- Lay a tortilla flat. Spoon about one quarter of the slightly cooled filling onto the center of the tortilla. Be careful not to overfill.
- Fold in the sides of the tortilla, then fold up the bottom edge tightly over the filling. Roll the wrap up snugly from the bottom to create a compact cylinder. Repeat with remaining tortillas and filling.
- Heat the grill pan or skillet again over medium heat. Place the wraps seam-side down first to help seal them. Grill for 2 to 3 minutes per side, or until the tortilla is golden brown and has visible grill marks.
- Cut each wrap in half and serve immediately, garnished with fresh parsley if desired.