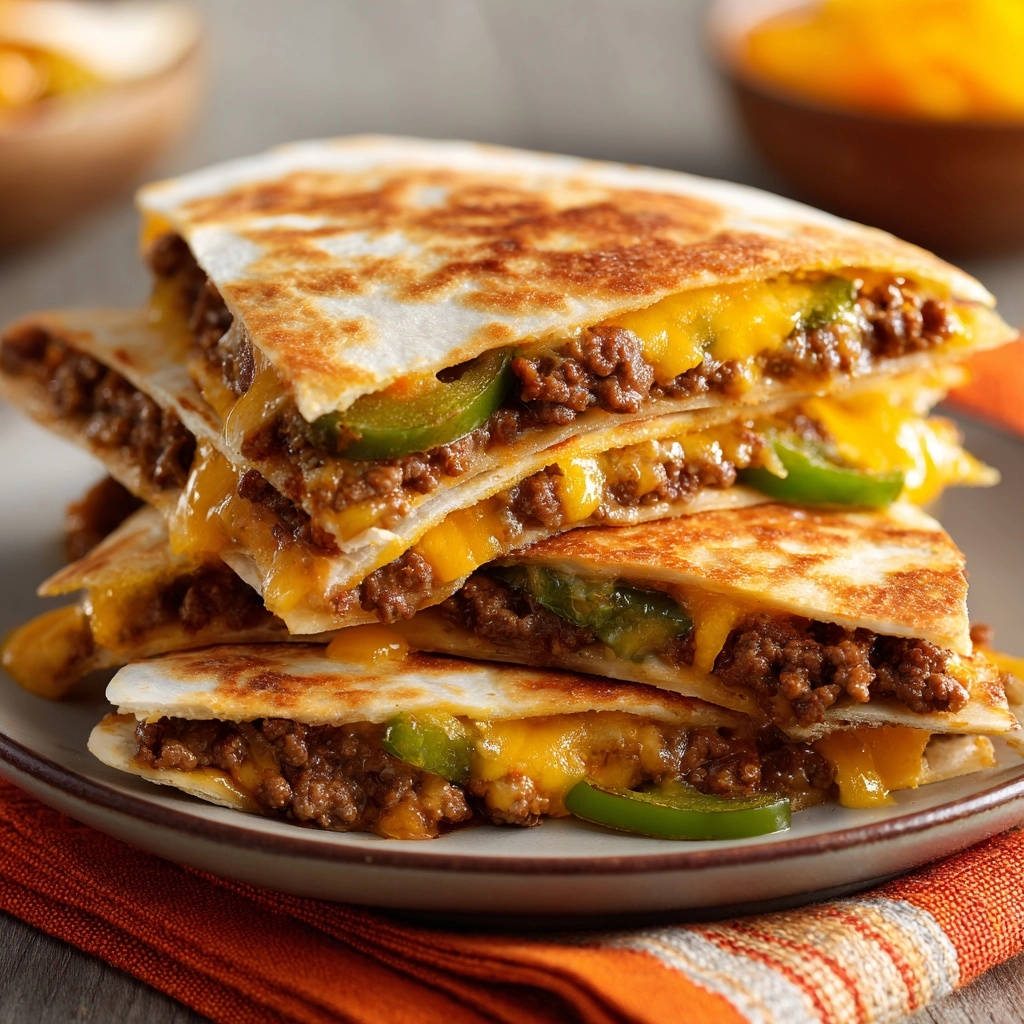
Ever bitten into a quesadilla expecting that perfect golden crunch, only to find it disappointing and soggy? I’ve been there, and it’s a total bummer! But with this recipe for Ground Beef & Jalapeño Quesadillas, those days are officially over.
I’m going to share the simple, game-changing secret that guarantees a perfectly crispy exterior and a juicy, flavorful interior every single time. Get ready to transform your quesadilla night into a truly satisfying experience!
Why This Ground Beef & Jalapeño Quesadillas Recipe is a Game-Changer
This isn’t just another quesadilla recipe; it’s a guide to consistent, crave-worthy results. We’re tackling common pitfalls head-on to deliver maximum flavor and an irresistible texture.
The Crispy Secret Unveiled: Say Goodbye to Soggy Quesadillas
The core of this recipe lies in one critical technique: properly heating a dry skillet before adding any oil or ingredients. This initial dry heat creates a perfect non-stick surface and immediately starts to toast the tortilla, preventing any moisture absorption from the filling.
Quick & Easy Weeknight Win: Ready in Just 25 Minutes
With a mere 10 minutes of prep and 15 minutes of cook time, these Ground Beef & Jalapeño Quesadillas are ideal for busy weeknights. You can whip up a delicious, satisfying meal without spending hours in the kitchen.
A Flavor-Packed Family Favorite with a Kick
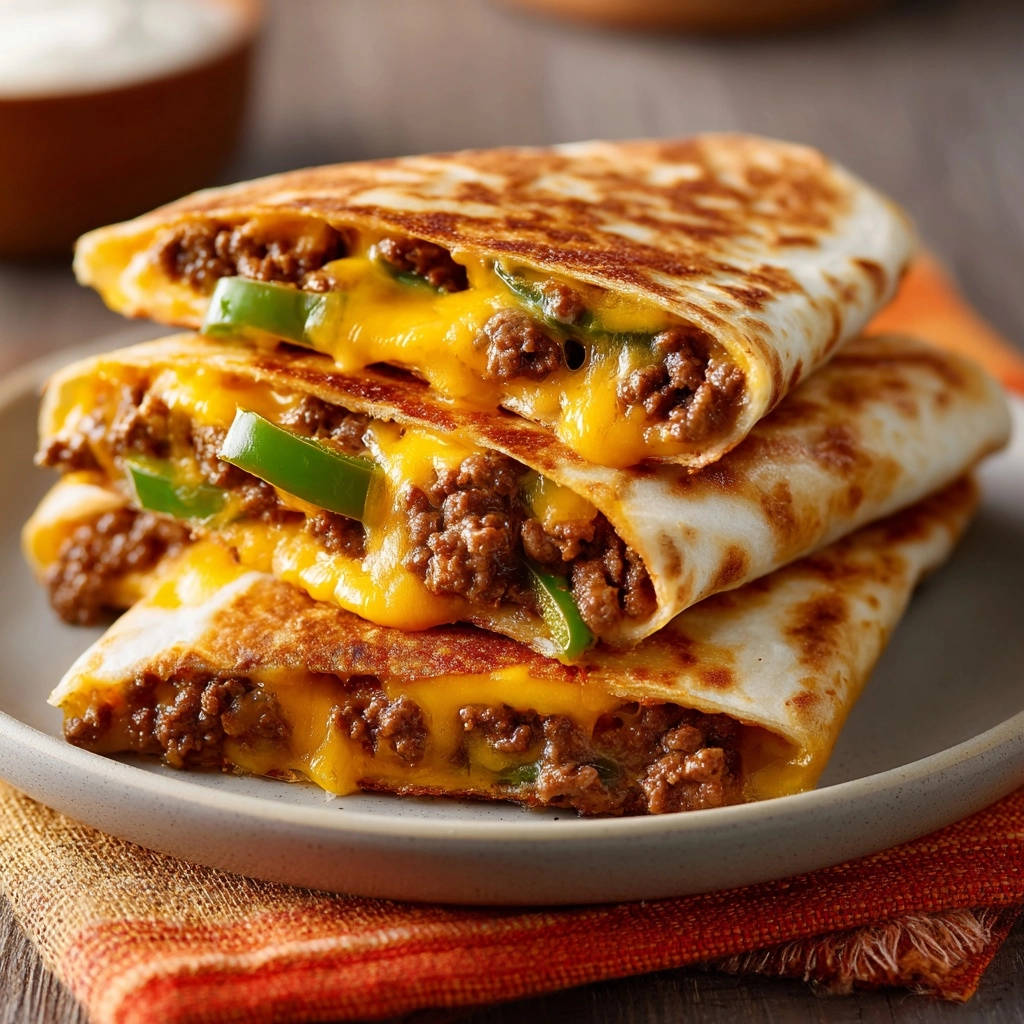
The combination of savory seasoned ground beef, gooey melted cheese, and the bright, zesty kick of pickled jalapeños creates a harmonious flavor profile. It’s bold enough to excite your taste buds, yet balanced enough to please everyone at the table.
Essential Ingredients for Your Perfect Ground Beef & Jalapeño Quesadillas
Quality ingredients are the foundation of any great dish. Here’s why each component in these Ground Beef & Jalapeño Quesadillas plays a crucial role.
The Savory Ground Beef Base
Lean ground beef is the heart of our quesadilla filling, providing a hearty and satisfying texture. Opting for lean beef minimizes excess grease, ensuring your quesadillas remain crisp and flavorful.
Spicy & Savory Enhancers: Taco Seasoning & Pickled Jalapeños
Taco seasoning blend is essential for infusing the beef with a rich, aromatic flavor. It brings warmth and complexity that complements the other ingredients beautifully. For an extra layer of authentic taste, you can even explore making your own homemade chili powder to elevate your seasoning blend.
Pickled jalapeño slices offer a fantastic balance of heat and tangy acidity. Draining and patting them dry is key to preventing extra moisture that could lead to a soggy quesadilla.
The Golden Foundation: Tortillas, Cheese & Oil
Small (6-inch) flour tortillas are perfectly sized for single-serving quesadillas and achieve optimal crispiness. Their thin structure allows for quick cooking and a delightful crunch.
Shredded cheddar cheese is chosen for its superb melting properties, creating a gooey, irresistible interior. Crucially, it forms a protective barrier against the tortilla, contributing to that desired crispness.
A neutral cooking oil like canola or vegetable oil is vital for achieving a golden-brown, crispy exterior. Its high smoke point allows for even cooking without burning.
Equipment You’ll Need for Crispy Quesadilla Success
Having the right tools makes all the difference when crafting these delicious Ground Beef & Jalapeño Quesadillas.
Pans & Utensils for Seamless Cooking
A large non-stick skillet is your most important tool, ensuring even heat distribution and easy flipping for perfectly crisp quesadillas. Its non-stick surface is crucial for preventing sticking without excessive oil.
You’ll also need a sturdy spoon for browning the ground beef and a reliable cutting board for slicing your finished quesadillas into neat wedges.
Step-by-Step: Crafting Your Crispy Ground Beef & Jalapeño Quesadillas
Follow these detailed steps to ensure your quesadillas are crispy, flavorful, and absolutely perfect.
Preparing the Flavorful Beef Filling
- Step 1: Brown the Beef.
In a large skillet, brown the ground beef over medium-high heat, breaking it apart with a spoon as it cooks. Once fully browned, be sure to drain any excess fat. This step is crucial for preventing a greasy filling that could make your quesadillas soggy.
- Step 2: Season and Simmer.
Stir in the taco seasoning and water with the browned beef. Bring the mixture to a gentle simmer and continue cooking for 2 to 3 minutes, or until nearly all the liquid has evaporated. This ensures the meat is thoroughly seasoned and not watery, which is key for a crispy quesadilla.
The Golden Rule: Heating Your Skillet (The “No Soggy” Secret!)
- Step 3: Preheat a Dry Skillet.
This is your golden ticket to crunch! Get a clean, dry large non-stick skillet screaming hot over medium heat for about 2 to 3 minutes until it’s properly searing. This critical initial dry heat is the secret to preventing sogginess and starting the crisping process immediately upon contact.
Assembling Your Quesadilla Masterpiece
- Step 4: Oil and Place Tortilla.
Lightly brush just one side of a tortilla with oil. Immediately place the oiled side down into the already hot, dry skillet. This minimal oiling on one side, combined with the hot pan, ensures that immediate crisping.
As soon as it’s in the pan, sprinkle about 1/4 cup of shredded cheese evenly over half of the tortilla, making sure to spread it close to the edge. This cheese layer is paramount; it acts as a barrier and forms a crispy, flavorful foundation.
- Step 5: Add Filling.
Spoon about 2 to 3 tablespoons of your seasoned ground beef filling onto the cheesed half of the tortilla. Distribute a few drained jalapeño slices over the meat for that perfect kick. Finish with another light sprinkle of cheese over the filling to help bind everything together.
- Step 6: Fold into a Half-Moon.
Carefully fold the empty half of the tortilla over the filling, creating a neat half-moon shape. Press down gently to help the cheese and filling adhere.
Achieving Perfect Golden Crispy Sides
- Step 7: Cook First Side.
Cook the quesadilla for 2 to 3 minutes without disturbing it. Watch for the bottom to turn a beautiful golden brown and become visibly crispy. At this point, the cheese should be melting, acting like a natural glue to hold the quesadilla together.
- Step 8: Flip and Finish.
Using a thin spatula, carefully flip the quesadilla. Cook the second side for another 2 to 3 minutes, or until it’s also golden brown and crispy, and all the cheese inside is gloriously gooey and melted.
- Step 9: Repeat and Rest.
Remove the perfectly cooked quesadilla from the skillet and place it on a cutting board. Repeat the process with the remaining tortillas and filling, adding just a tiny bit more oil to the pan if needed for each one. Allowing the cooked quesadillas to rest for a minute is crucial; it lets the cheese set slightly and the heat distribute, preventing a messy interior when cut.
- Step 10: Cut and Serve.
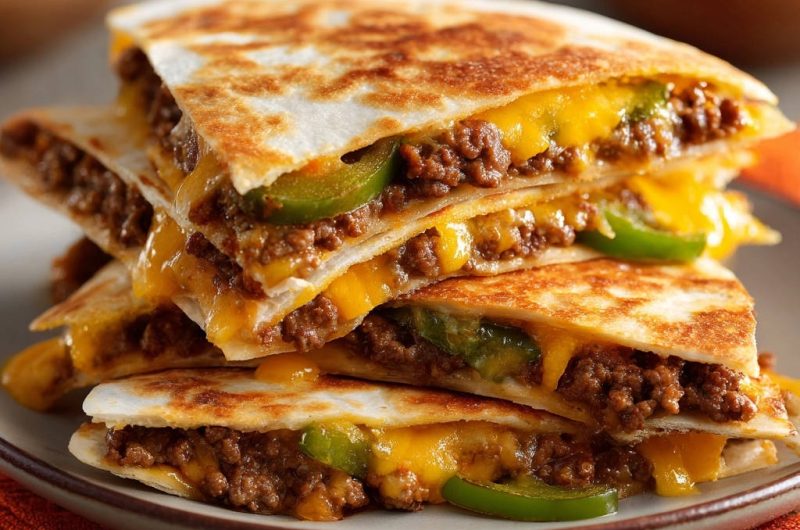
After resting, cut each quesadilla into 2 or 3 wedges using a sharp knife or pizza cutter. Serve immediately to savor that incredible crispy crunch and warm, flavorful filling!
Chef’s Tips & Tricks for Next-Level Ground Beef & Jalapeño Quesadillas
Elevate your quesadilla game with these expert insights.
Mastering the Heat: Oil & Temperature Control
Don’t Drench, Just Brush: Too much oil in the pan won’t make your quesadilla crispier; it will make it greasy. A very light brush on one side of the tortilla is all you need to achieve that perfect golden crust.
Maintain Medium Heat: Resist the urge to crank up the heat. High heat will burn the tortilla before the cheese melts and the filling warms through. Too low, and you risk a soggy, pale quesadilla. Consistent medium heat is the sweet spot for even cooking and optimal crisping.
Filling Proportions for Even Cooking
Don’t Overstuff: An overloaded quesadilla is a leaky, difficult-to-cook quesadilla. Overstuffing prevents proper folding, makes even cooking challenging, and often results in filling spilling out into the pan.
Spread to the Edges: When sprinkling cheese on the tortilla, make sure to spread it close to the edges. This creates a stronger seal once melted, holding your quesadilla together and ensuring a crisp crust all around.
Resting Your Quesadillas: Don’t Skip This Step!
Allow a Moment to Settle: After cooking, let your quesadilla rest for a minute on the cutting board before slicing. This brief pause allows the molten cheese to firm up slightly and the internal heat to distribute, preventing a messy, falling-apart interior when you cut into it.
Troubleshooting Common Quesadilla Woes
Even seasoned cooks encounter issues. Here’s how to fix common quesadilla problems.
Why Is My Quesadilla Still Soggy?
The most common culprit is an insufficiently preheated skillet. Ensure your pan is hot and dry before adding the oiled tortilla. Too much oil can also cause sogginess; a light brush is enough. Avoid overcrowding the pan; cook one quesadilla at a time to maintain consistent heat.
My Cheese Isn’t Melting Properly or It’s Leaking Out
If your cheese isn’t melting, your skillet might not be hot enough, or you might be using a cheese that doesn’t melt well. Stick to good melting cheeses like cheddar. If it’s leaking, you might be overfilling the quesadilla, or not spreading the cheese close enough to the edges to create a proper seal.
The Filling is Falling Out When I Flip or Cut!
This usually happens due to overstuffing or improper cheese distribution. Ensure you use the recommended amount of filling and that the cheese is spread to the very edge of the half-tortilla. The melted cheese acts as a crucial binder, holding everything securely in place. Also, remember to let your quesadilla rest for a minute before cutting.
Serving Suggestions & Perfect Pairings for Your Quesadillas
Enhance your Ground Beef & Jalapeño Quesadillas experience with these delicious accompaniments.
Classic & Creative Dipping Options
Traditional pairings like cool sour cream, creamy guacamole, and fresh salsa are always a hit. For something a little different, try a smoky chipotle crema made with a touch of adobo sauce, or a vibrant pico de gallo for an extra burst of freshness.
What to Serve Alongside Your Ground Beef & Jalapeño Quesadillas
Complement the richness of the quesadillas with light yet satisfying sides. A simple crisp green salad with a lime vinaigrette, fluffy Mexican rice, or seasoned black beans all make excellent companions. For another hearty beef dish, consider making a cheesy beef pasta bake on another night.
Storage & Make-Ahead Tips for Maximum Freshness
Plan ahead and enjoy these delicious quesadillas later with these helpful tips.
Reheating for Continued Crispiness
To reheat leftover quesadillas and retain their signature crispiness, avoid the microwave. The best methods are reheating them in a dry skillet over medium heat, in an air fryer at 350°F (175°C) for a few minutes, or in a toaster oven. These methods will revive that delightful crunch.
Can I Prep Components in Advance?
Absolutely! You can prepare the seasoned ground beef filling up to 2-3 days in advance and store it in an airtight container in the refrigerator. This significantly cuts down on active cooking time on your quesadilla night, making it even faster.
Your Ground Beef & Jalapeño Quesadillas FAQs Answered
Get answers to common questions about making the best quesadillas.
Can I Use Different Cheeses in My Quesadillas?
Yes, absolutely! While shredded cheddar is excellent for its melty properties and classic flavor, you can certainly experiment. Monterey Jack, Pepper Jack (for extra kick), or a Mexican blend would all work well. Just ensure the cheese is finely shredded for optimal melting.
What If I Don’t Like Spicy Food?
If heat isn’t your preference, you can easily adjust this recipe. Simply reduce the amount of pickled jalapeños, or omit them entirely. You can also rinse the pickled jalapeños before adding them to lessen their intensity. Alternatively, swap them for mild green chilies for a hint of flavor without the spice.
Can I Make These Ground Beef & Jalapeño Quesadillas in an Air Fryer?
Yes, you can! To adapt this recipe for the air fryer, follow all filling and assembly steps. Place one or two quesadillas in a single layer in the air fryer basket (don’t overlap). Air fry at 375°F (190°C) for 6-8 minutes, flipping halfway through, until golden brown and crispy. Cooking times may vary by air fryer model.
Can I Freeze Cooked Quesadillas?
Yes, cooked quesadillas can be frozen! Allow them to cool completely, then wrap each individually in plastic wrap, followed by aluminum foil. Store in a freezer-safe bag for up to 1-2 months. To reheat from frozen, unwrap and bake in a preheated oven at 375°F (190°C) for 15-20 minutes, or air fry, until heated through and crispy.
Ready to Revolutionize Your Quesadilla Night?
Now that you’re armed with the ultimate crispy quesadilla secret and all the expert tips, it’s time to transform your weeknight meals! Say goodbye to soggy disappointment and hello to perfectly golden, flavor-packed Ground Beef & Jalapeño Quesadillas.
Give this recipe a try and experience the satisfying crunch and juicy filling for yourself. I’m confident this will become a new favorite in your kitchen!
Ground Beef & Jalapeño Quesadillas
Course: Main CourseCuisine: Mexican cuisineDifficulty: easy4
servings10
minutes15
minutes25
minutesMexican cuisine
Ingredients
1 pound lean ground beef
1 tablespoon taco seasoning blend
1/4 cup water
8 small (6-inch) flour tortillas
2 cups shredded cheddar cheese
1/4 cup pickled jalapeño slices, drained and patted dry
2 tablespoons neutral cooking oil (like canola or vegetable)
Directions
- In a large skillet over medium-high heat, brown the ground beef, breaking it apart with a spoon as it cooks. Drain any excess fat.
- Stir in the taco seasoning and water. Bring to a simmer and cook for 2 to 3 minutes, or until the liquid has mostly evaporated and the meat is well seasoned. Remove from heat and set aside.
- This is the key to no more soggy quesadillas: Heat a clean, dry large non-stick skillet over medium heat for about 2 to 3 minutes until it’s properly hot. You want that heat even and ready.
- Lightly brush one side of a tortilla with oil. Place the oiled side down in the hot skillet. Immediately sprinkle about 1/4 cup of cheese over half of the tortilla, making sure to spread it close to the edge. This cheese layer helps create a barrier and crispy foundation.
- Spoon about 2 to 3 tablespoons of the seasoned ground beef onto the cheesed half of the tortilla. Distribute a few jalapeño slices over the meat. Sprinkle another tablespoon of cheese over the filling.
- Fold the other half of the tortilla over the filling, creating a half-moon shape.
- Cook for 2 to 3 minutes, undisturbed, until the bottom is golden brown and crispy. The cheese should start to melt and act like glue.
- Carefully flip the quesadilla and cook for another 2 to 3 minutes, or until the second side is also golden brown and crispy, and all the cheese is gooey and melted.
- Remove the quesadilla from the skillet and place it on a cutting board. Repeat with the remaining tortillas and filling, adding a tiny bit more oil to the pan if needed for each one.
- Let the cooked quesadillas rest for a minute, then cut each into 2 or 3 wedges. Serve immediately and enjoy that perfect crunch!
Notes
- The key to crispy quesadillas is preheating a dry skillet and using cheese as a barrier.