Is there anything more frustrating than anticipating a warm, comforting bowl of chili, only to bite into dry, rubbery chicken? It’s a texture fail that can really ruin a meal! I know the feeling. For years, I struggled with getting that perfectly tender, shreddable chicken in my white chili recipes. But after lots of testing and tweaking, I finally landed on a simple technique that ensures your chicken is incredibly moist and delicious every single time. This isn’t just any white chicken chili; it’s the one that guarantees tender chicken, making every spoonful a delight.
Why You’ll Love This Hearty White Chicken Chili
Beyond the star attraction of guaranteed tender chicken, this hearty white chicken chili offers so much to love. It’s a flavor-packed bowl of goodness that’s perfect for cozy nights, busy weeknights, or feeding a crowd. Here are just a few reasons why this recipe is about to become a family favorite:
- No More Dry Chicken: Seriously, the poaching method changes everything. Your chicken will be moist and easy to shred, melting into the chili beautifully.
- Rich, Comforting Flavor: It’s got that classic chili warmth from cumin and oregano, a gentle hum of spice, and the creamy texture from the beans.
- Simple Ingredients: You won’t need obscure items. Everything here is readily available at your local grocery store.
- Quick & Easy: While there are a few steps, the process is straightforward and relatively fast, making it ideal for dinner any night of the week.
- Versatile: It’s a fantastic base for all your favorite chili toppings!
Gathering Your Ingredients for Hearty White Chicken Chili
Creating a truly memorable pot of chili starts with gathering quality ingredients. This recipe relies on a simple lineup that delivers big on flavor and texture. Think of these components working together – the protein providing substance, the aromatics building the base, the spices bringing the warmth, and the beans adding creaminess and heartiness.
Here’s what you’ll need to bring this comforting bowl to life. Pay attention to the notes on why certain ingredients matter!
- The Protein Base: You’ll need two boneless, skinless chicken breasts or thighs. Using thighs can lend a slightly richer flavor and are naturally more forgiving against drying out, but breasts work perfectly with our tenderizing technique. Choose whichever you prefer!
- Aromatic Foundation: We start by building flavor with a tablespoon of olive oil, one large onion, finely chopped, and three cloves of garlic, minced. These three are the unsung heroes, creating the essential base aroma and taste for the chili.
- Warmth & Spice: The heart of the chili’s flavor comes from the spices. You’ll need one teaspoon of ground cumin for its earthy depth, one teaspoon of dried oregano for that classic savory note, and half a teaspoon of chili powder. For those who like a little extra heat, a quarter teaspoon of cayenne pepper is optional but highly recommended to give it a gentle kick. Want to adjust the spice? Feel free to add a pinch more cayenne or even a dash of your favorite hot sauce later.
- The Liquid & Bulk: Four cups of good quality chicken broth are essential for both poaching the chicken and creating the chili’s base. Don’t skimp here – better broth means better flavor. You’ll also need two cans (15 ounces each) of white beans. Cannellini or Great Northern beans are excellent choices, offering a creamy texture when simmered. Make sure to drain and rinse them well before adding them to the pot. One can (4 ounces) of chopped green chiles (the mild canned kind) are optional but add a wonderful layer of mild pepper flavor and authenticity to the white chili profile.
- Seasoning: Simple salt and black pepper to taste are crucial for bringing all the flavors together. Don’t be shy about tasting and adjusting!
- Freshness & Garnish: A quarter cup of fresh cilantro or parsley, chopped, adds brightness and a pop of color. We’ll stir some in at the end and save the rest for garnishing each bowl.
Crafting Your Chili: Step-by-Step
Ready to make magic happen? Follow these steps carefully, paying special attention to the chicken poaching technique, and you’ll be rewarded with the most tender Hearty White Chicken Chili you’ve ever made.
- The Tender Chicken Secret: Start by placing your boneless, skinless chicken breasts or thighs into a large pot or Dutch oven. Pour in the chicken broth, ensuring the chicken pieces are mostly submerged. Now, bring the broth to a gentle simmer over medium heat. It’s crucial to maintain a gentle, not aggressive, simmer. This slow, moist cooking environment is the secret to preventing the chicken from becoming dry and tough. Let it cook for about 15 to 20 minutes, or until the chicken is cooked through and feels tender when you gently poke it with a fork. This method infuses the chicken with flavor while keeping it incredibly juicy.
- Rest and Reserve: Once the chicken is perfectly cooked, carefully remove it from the pot and set it aside on a cutting board. Let it cool slightly.
Do NOT discard that beautiful broth in the pot! This is now flavorful liquid gold, infused with chicken essence. Keep it right there in the pot; we’ll be using it shortly.
- Build the Base: While the chicken cools, return the same pot with the reserved broth to medium heat. Add the tablespoon of olive oil. Once shimmering, add the chopped large onion. Cook the onion, stirring occasionally, until it softens and becomes translucent, which should take about 5 to 7 minutes. This step sweetens the onion and builds the first layer of flavor for the chili base.
- Infuse with Spices & Aromatics: Now, add the minced garlic, ground cumin, dried oregano, chili powder, and the optional cayenne pepper to the pot with the softened onions. Stir everything together and cook for just 1 to 2 minutes. Cooking the dry spices briefly in the hot oil before adding liquid helps to bloom their flavors, making them more vibrant and aromatic. You’ll notice a wonderful fragrance filling your kitchen!
- Add the Stars: Beans & Broth: Next, add the drained and rinsed white beans (cannellini or great northern) to the pot. If you’re using them, add the chopped green chiles now too. Pour the reserved chicken broth (which should still be warm) back into the pot with the bean and onion mixture. Stir everything to combine. Bring the mixture back to a gentle simmer.
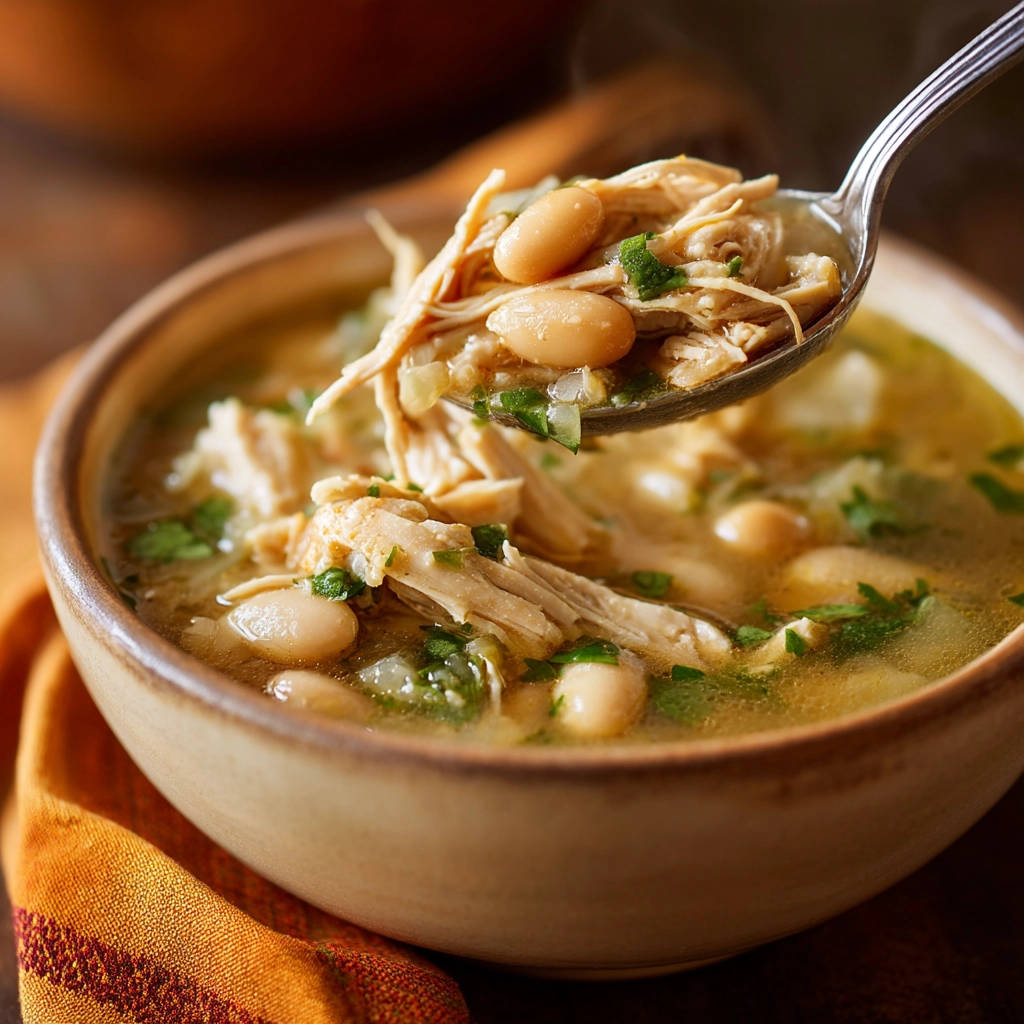
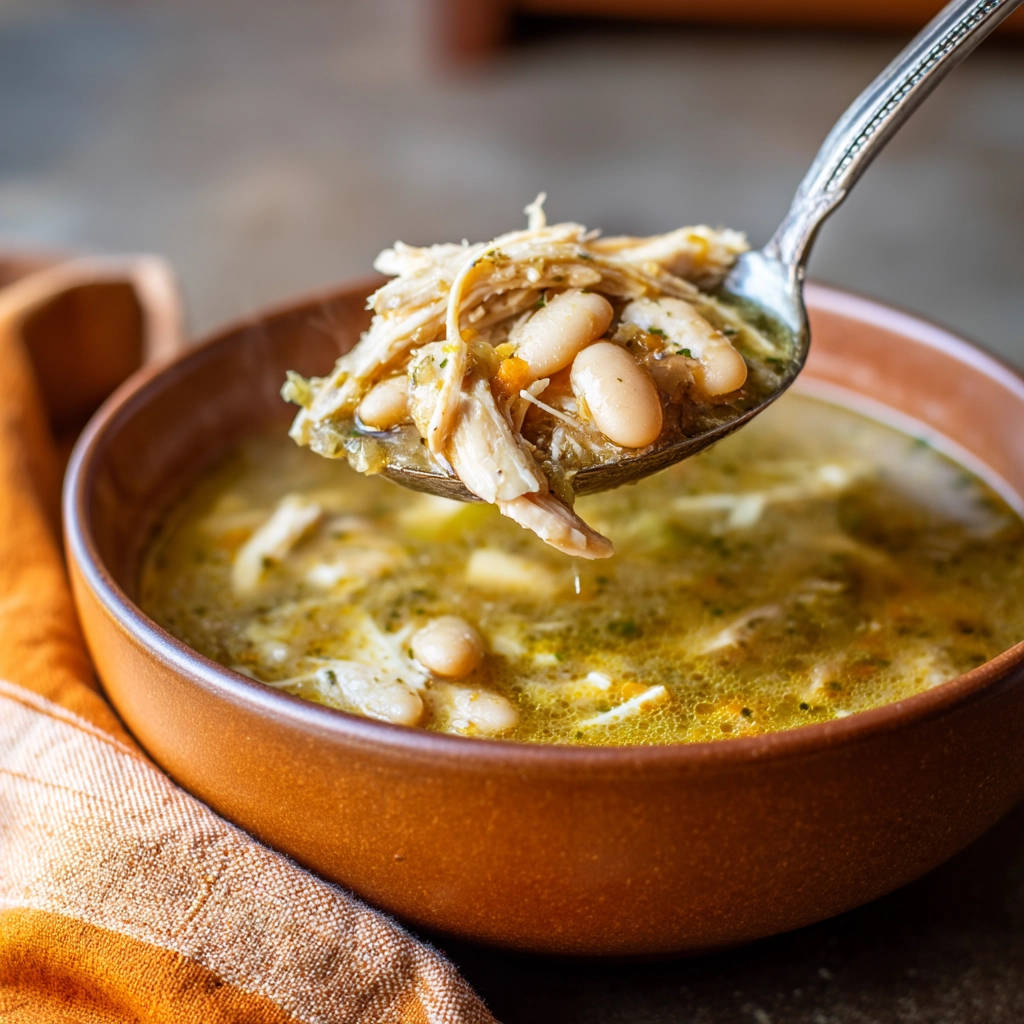
- Shred the Chicken: While the chili base is simmering and the flavors are starting to meld, grab the cooked chicken that’s been cooling slightly on the cutting board. Using two forks, start shredding the chicken into bite-sized pieces. Because it was cooked so gently in the broth, you should find it shreds easily and looks incredibly moist and tender.
- Combine & Simmer for Flavor: Let the chili base simmer gently for about 10 to 15 minutes. This simmering time is important as it allows all the flavors from the onions, garlic, spices, and beans to meld together beautifully. Once the base has developed its flavor, stir the shredded chicken back into the pot. This is another critical step for tender chicken – we’re just adding it back in to warm it through, not to cook it further. Overcooking the chicken after it’s shredded is a sure path back to dryness!
- Season & Finish: Now it’s time to season! Taste the chili and add salt and black pepper generously until the flavors pop. Stir in half of the fresh chopped cilantro or parsley. This adds a burst of fresh, herbaceous flavor right before serving.
- Serve Hot: Ladle the hearty white chicken chili into warm bowls. Garnish each serving with the remaining fresh chopped cilantro or parsley. Add your favorite toppings (see suggestions below!) and enjoy your perfectly cooked, tender chicken chili!
Tips for Perfect Hearty White Chicken Chili Every Time
Here are a few extra tips and tricks to ensure your chili turns out amazing and the chicken stays consistently tender:
- Don’t Boil the Chicken: The key word is “simmer.” Boiling can agitate the chicken too much and lead to tougher results. A gentle simmer is all you need.
- Choose Your Beans Wisely: While cannellini and Great Northern beans are recommended, other white beans like navy beans can also work. Just ensure they are well-drained and rinsed if using canned.
- Spice Level Adjustment: The recipe provides a moderate spice level. For more heat, increase the cayenne pepper or add a pinch of red pepper flakes with the other spices. For less heat, simply omit the cayenne and green chiles.
- Make it Creamier: While this recipe is naturally creamy from the beans, you could stir in a splash of heavy cream, half-and-half, or even a little cream cheese at the very end for an extra rich and creamy texture.
- Add Veggies: Feel free to add other vegetables like diced bell peppers (add them with the onion), corn (add with the beans), or even some chopped zucchini towards the end of the simmer time.
- Using a Different Pot: While a Dutch oven is ideal for its even heating, any large, heavy-bottomed pot will work perfectly for this recipe.
What to Serve With Hearty White Chicken Chili
A delicious bowl of Hearty White Chicken Chili is fantastic on its own, but it’s even better with the right accompaniments! Consider these options:
- Warm, crusty bread or homemade garlic naan bread for dipping.
- Cornbread muffins or slices.
- A simple side salad, like our easy kale salad.
- Rice, for serving the chili over. Our easy Mexican rice would be a great pairing.
Don’t forget the toppings! Shredded cheese (Monterey Jack, cheddar, or a Mexican blend), a dollop of sour cream or Greek yogurt, sliced avocado or guacamole, chopped fresh cilantro, crispy tortilla strips, or a squeeze of lime juice all take this chili to the next level.
Your Hearty White Chicken Chili Questions Answered (FAQ)
Got questions about making the best white chicken chili? Here are some common ones!
Can I use frozen chicken breasts?
Yes, you can. However, it’s best to thaw them completely before adding them to the broth for poaching. Cooking frozen chicken in the broth will take significantly longer and might not yield the same perfectly tender results as starting with thawed chicken.
How can I make the chili thicker?
This chili thickens naturally from the beans as it simmers. If you prefer a thicker consistency, you can mash some of the white beans against the side of the pot with a spoon or potato masher while it’s simmering. Alternatively, you can remove about 1 cup of the chili, blend it until smooth, and stir it back into the pot. For a quicker fix, you can mix a tablespoon or two of cornstarch with an equal amount of cold water to create a slurry, then stir this into the simmering chili and cook for a few minutes until thickened.
Can I make this in a slow cooker instead?
Yes, you can adapt this recipe for a slow cooker, but you’ll need to adjust the technique slightly to keep the chicken tender. You can still poach the chicken briefly in broth on the stovetop as directed, then add it and the reserved broth to the slow cooker along with the sautéed onions, garlic, spices, beans, and chiles. Cook on low for 3-4 hours or high for 1.5-2 hours, then shred the chicken and return it to the pot to heat through. Or, cook the chili base (everything except the chicken) in the slow cooker, and cook the chicken separately using the stovetop poaching method before shredding and adding it at the end.
How long does leftover chili last?
Stored in an airtight container in the refrigerator, leftover Hearty White Chicken Chili will stay fresh for 3-4 days. Reheat gently on the stovetop or in the microwave.
Can I freeze this chili?
Absolutely! White chicken chili freezes beautifully. Allow the chili to cool completely, then transfer it to freezer-safe containers or bags, leaving a little headspace. It can be frozen for up to 3 months. Thaw overnight in the refrigerator and reheat gently.
Enjoy Your Homemade Hearty White Chicken Chili!
There you have it – a recipe for Hearty White Chicken Chili where dry chicken is a thing of the past! This comforting, flavorful dish is simple to make and guaranteed to satisfy. Whether you’re curled up on the couch on a chilly evening or serving it to friends and family, this chili is sure to be a hit.
Give it a try and let me know what you think! Did the tender chicken technique work wonders for you? What are your favorite toppings? Share your thoughts in the comments below, and don’t forget to share this recipe with anyone who needs a little extra comfort (and tender chicken!) in their life.
Hearty White Chicken Chili

Ingredients
- 2 boneless, skinless chicken breasts or thighs
- 1 tablespoon olive oil
- 1 large onion, chopped
- 3 cloves garlic, minced
- 1 teaspoon ground cumin
- 1 teaspoon dried oregano
- 1/2 teaspoon chili powder
- 1/4 teaspoon cayenne pepper (optional)
- 4 cups chicken broth
- 2 cans (15 ounces each) white beans (such as cannellini or great northern), drained and rinsed
- 1 can (4 ounces) chopped green chiles (optional)
- Salt and black pepper to taste
- 1/4 cup fresh cilantro or parsley, chopped (for garnish, and some stirred in)
Directions
- Add chicken breasts or thighs to a large pot or Dutch oven. Pour in the chicken broth, ensuring the chicken is mostly submerged. Bring to a gentle simmer over medium heat. Cook for 15-20 minutes, or until the chicken is cooked through and easily pierced with a fork. The key is to cook the chicken in the broth slowly.
- Remove the chicken from the pot and set aside on a cutting board to cool slightly. Reserve the cooking broth in the pot.
- While the chicken cools, heat the olive oil in the same pot over medium heat. Add the chopped onion and cook until softened, about 5-7 minutes.
- Add the minced garlic, cumin, oregano, chili powder, and cayenne (if using) to the pot. Stir and cook for 1-2 minutes until fragrant.
- Add the drained and rinsed white beans and chopped green chiles (if using) to the pot. Pour the reserved chicken broth back into the pot with the beans and onion mixture. Bring to a simmer.
- While the soup simmers, shred the cooked chicken using two forks. Because it was cooked gently in the broth, it should shred easily and remain moist.
- Once the soup base has simmered for about 10-15 minutes to allow the flavors to meld, stir the shredded chicken back into the pot. This is the crucial step to keep it tender; add it back at the end just to heat through, not to cook further.
- Season the chili generously with salt and black pepper to taste. Stir in half of the fresh chopped cilantro or parsley.
- Ladle the chili into bowls. Garnish with remaining fresh cilantro or parsley before serving.