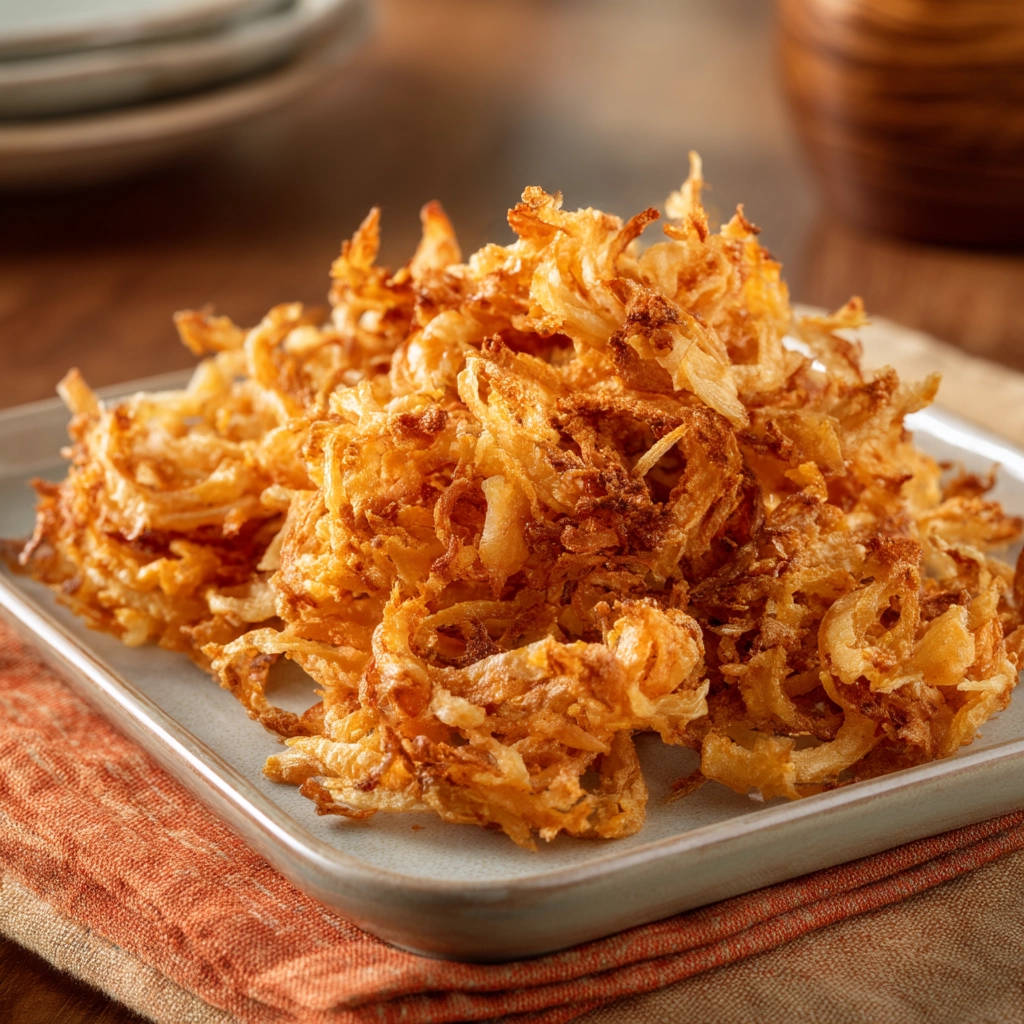
Ah, homemade fried onion strings. Just thinking about that golden, crunchy goodness makes my mouth water! They’re the perfect topping for everything from burgers and salads to green bean casserole and steak. But let’s be honest, achieving that perfect, shatteringly crispy texture at home can feel like a culinary Everest. We’ve all been there, ending up with a sad pile of greasy, soggy, or burnt onion bits instead of those beautiful, delicate strands.
For the longest time, I thought store-bought was my only option for truly crispy fried onions. But I was determined! After some trial and error, I cracked the code on making perfectly crispy homemade fried onion strings right in my own kitchen. It’s simpler than you think, and once you nail the technique, you’ll never look back. Ready to say goodbye to soggy disappointments? Let’s dive in!
Why You’ll Fall in Love with This Crispy Fried Onion Recipe
This isn’t just another recipe for fried onions; it’s the recipe that guarantees success. Here’s why this method will become your go-to:
- Unbeatable Texture: We’re talking serious, glorious crunch here. No soggy centers or greasy exteriors.
- Simple Technique: The key is just a couple of easy-to-follow steps that make all the difference.
- Fresh Flavor: Homemade always tastes better, and these fried onion strings are no exception. You get the sweet onion flavor perfectly balanced by the crispy coating.
- Incredible Versatility: Use them as a garnish, a topping, or even eat them straight from the plate! (No judgment here.)
- Better Than Store-Bought: Forget the can! These taste infinitely fresher and crispier.
Gathering Your Ingredients for Crispy Onion Strings
One of the best parts about this recipe is how few ingredients you need. You likely have most of these pantry staples on hand already. It’s about transforming humble onions into something truly special with just a little flour, salt, and pepper.
Here’s what you’ll need:
- Large Yellow Onions: Yellow onions are a fantastic choice here. They have a good balance of sweetness and savory flavor that holds up well to frying. While you can use other types like white or sweet onions, yellow onions are my preference for classic fried onion strings. Aim for large ones to get longer, more substantial strands.
- All-Purpose Flour: This forms the base of our crispy coating. Standard all-purpose works perfectly. It’s what gives the onions that familiar, light crunch.
- Salt & Black Pepper: Simple seasonings are all you need! They enhance the natural flavor of the onion and the savory coating. You’ll add some to the flour mixture and finish with a sprinkle right after frying.
- Vegetable Oil for Frying: You’ll need a neutral oil with a high smoke point. Vegetable oil is readily available and works beautifully. Canola or peanut oil are also great options if you have them. The key is having enough oil to submerge the onions for even cooking.
Crafting Your Crispy Fried Onion Strings: Step-by-Step
Making crispy fried onion strings involves a few key techniques that ensure that sought-after crunch. Don’t skip any of these steps – they all play a vital role!
-
Slice Those Onions Thinly: Start by peeling your onions. The goal is thin, consistent slices, about 1/8th of an inch thick or even thinner if you can manage it. You can slice them into full rings or cut the onion in half first and slice into half-rings. Consistency is crucial so that every piece fries at the same rate. A sharp knife is key here, or for ultimate uniformity, consider using a mandoline slicer (with caution and a guard!).
-
Give Them a Cold Bath: Separate the sliced onion pieces into individual rings or strands. Place them in a large bowl and cover them generously with cold water. Let them soak for about 15 minutes. This step is one of the “tricks”! Soaking helps to wash away some of the starches and sugars from the onion. Fewer starches and sugars mean less chance of the onions sticking together and less risk of them burning before they get crispy.
-
Whip Up the Coating: While your onions are taking their bath, get your simple coating ready. In a medium bowl, whisk together the all-purpose flour, salt, and black pepper. Just a quick mix to distribute the seasoning evenly through the flour.
-
Drain and DRY, DRY, DRY: This is perhaps the MOST critical step for achieving crispiness and preventing oily splatters. After the 15-minute soak, drain the onions thoroughly in a colander. Then, spread them out on a layer of paper towels or clean kitchen towels. Pat them down really, really well until they are as dry as possible. Any excess moisture will steam the onions instead of frying them, resulting in a soggy coating.
-
Coat the Onion Pieces: Add the well-dried onion pieces to the bowl with your seasoned flour mixture. Gently toss them around, using your hands or tongs, until every single piece is coated completely. Pick up handfuls and shake off any significant excess flour – you want a light, even coating, not thick clumps.
-
Heat the Oil: Grab a large, heavy-bottomed pot or a deep skillet. Cast iron or a Dutch oven works wonderfully as it retains heat well. Pour in about 1-2 inches of vegetable oil. Heat the oil over medium-high heat until it reaches 350°F (175°C). Using a kitchen thermometer clipped to the side of the pot is the most accurate way to monitor the temperature, which is vital for successful frying. If you don’t have a thermometer, a simple test is to drop a tiny pinch of the seasoned flour into the hot oil; it should immediately sizzle and bubble vigorously.
-
The Golden Rule: Fry in Small Batches! This is the other major “trick” to consistently crispy results. Do NOT overcrowd the pot. Adding too many onions at once will drastically lower the oil temperature. When the oil cools down, the onions cook slower and absorb more oil, becoming greasy and soggy instead of crisp. Add just a handful of coated onions at a time, spreading them out in a single layer so they aren’t touching too much and can crisp up properly.
-
Fry to Golden Perfection: Let the onions fry for about 2 to 4 minutes per batch. Stir them occasionally with a slotted spoon or a spider (a mesh-like spoon) to ensure even browning. Watch them closely during this stage; they can go from perfectly golden to burnt very quickly once they start changing color. They should look deeply golden brown and feel light and crispy when you lift them.
-
Drain Off Excess Oil: Use your slotted spoon or spider to lift the fried onions out of the hot oil. Pause briefly over the pot to let any major excess oil drip back in. Immediately transfer the crispy fried onion strings to a plate lined with paper towels. This allows any remaining surface oil to drain off, keeping them crisp.
-
Repeat and Season: Continue frying the remaining batches of onions, remembering to allow the oil temperature to come back up to 350°F (175°C) between batches if needed. As soon as each batch comes out of the oil, while they are still hot, season them lightly with a little more salt if you like. The salt adheres best when they are hot and slightly oily. Serve them warm for the best texture!
Tips for Perfect Crispy Fried Onion Strings Every Time
Getting those homemade fried onion strings just right is easier with a few expert tips:
- Consistency is Key: As mentioned in the steps, thin, uniform slices are crucial. A mandoline makes this much easier, but a steady hand and a sharp knife work too. Uneven slices will result in some pieces burning while others are still getting crispy.
- Don’t Rush the Soak and Dry: While soaking helps remove starch, the drying step is non-negotiable for crispiness. Take the extra time to pat them until they feel quite dry.
- Oil Temperature is Your Friend: Maintaining the oil temperature around 350°F (175°C) is vital. Too cool, and they’re greasy; too hot, and they burn before crisping. Use a thermometer for accuracy.
- Patience with Batches: Resist the urge to dump all the onions in at once. Frying in small batches takes a little longer but makes all the difference in texture.
- Season While Hot: Salt sticks best to the fried onions immediately after they come out of the oil. Don’t wait until they’ve cooled.
What to Serve With Crispy Onion Strings
These crispy fried onion strings are incredibly versatile! They add a delightful crunch and savory flavor to so many dishes. Pile them high on classic comfort food favorites. They are a must-have topping for burgers, hot dogs, or sandwiches. I love them sprinkled over creamy soups or hearty chilis, like our Hearty Beef Chili.
They are also fantastic as a crunchy garnish for main courses. Imagine them topping a perfectly cooked steak or adding texture to roasted chicken. They elevate simple side dishes too, like mashed potatoes or green bean casserole (their most famous pairing!). Try adding them to our Creamy Scalloped Potatoes for an extra layer of flavor and crunch.
Don’t underestimate their power on salads either! A sprinkle of these crispy onions can transform a simple green salad into something special, adding a savory counterpoint to fresh greens and vinaigrette. If you’re looking for other delicious side dishes that would pair well, you might enjoy our Crispy Roasted Brussels Sprouts.
Your Crispy Onion String Questions Answered (FAQ)
Why do I need to soak the onions in cold water?
Soaking the sliced onions in cold water for a short time helps to draw out some of their excess starch and natural sugars. Less starch means they are less likely to clump together in the fryer, and less sugar means they are less likely to burn too quickly before they become fully crispy.
How do I know the oil is hot enough if I don’t have a thermometer?
While a thermometer is highly recommended for accuracy when frying, you can test the oil temperature by dropping a tiny pinch of the seasoned flour mixture into the pot. If the oil is hot enough (around 350°F), the flour will immediately bubble vigorously and float to the surface. If it just sinks or bubbles weakly, the oil isn’t hot enough. If it smokes excessively and the flour burns instantly, it’s too hot – turn off the heat and let it cool slightly.
My fried onions turned out soggy or greasy. What went wrong?
The most common culprits for soggy or greasy fried onions are overcrowding the pot during frying and not drying the onions thoroughly after soaking. Overcrowding lowers the oil temperature, causing the onions to absorb oil instead of crisping. Insufficient drying means the excess water steams the onions instead of allowing the coating to crisp up. Ensure the oil is at the correct temperature, fry in small batches, and make sure those onions are really dry!
Can I use a different type of onion besides yellow?
Yes, you can. Sweet onions (like Vidalia or Walla Walla) work well and will give you a slightly sweeter fried onion. White onions have a sharper flavor that mellows when fried but can sometimes be less consistently crispy than yellow. Red onions aren’t typically used for classic fried strings but could offer a different flavor profile.
How should I store leftover crispy fried onions, and can I reheat them?
Store leftover crispy fried onions in an airtight container at room temperature. They will lose some crispiness over time. To re-crisp them, spread them in a single layer on a baking sheet and heat them in a preheated oven at around 350°F (175°C) for a few minutes until they are crispy again. You can also use an air fryer for a similar effect.
Can I make these gluten-free?
Yes, you can! Simply substitute the all-purpose flour with a good quality gluten-free all-purpose flour blend. Follow the rest of the steps as written.
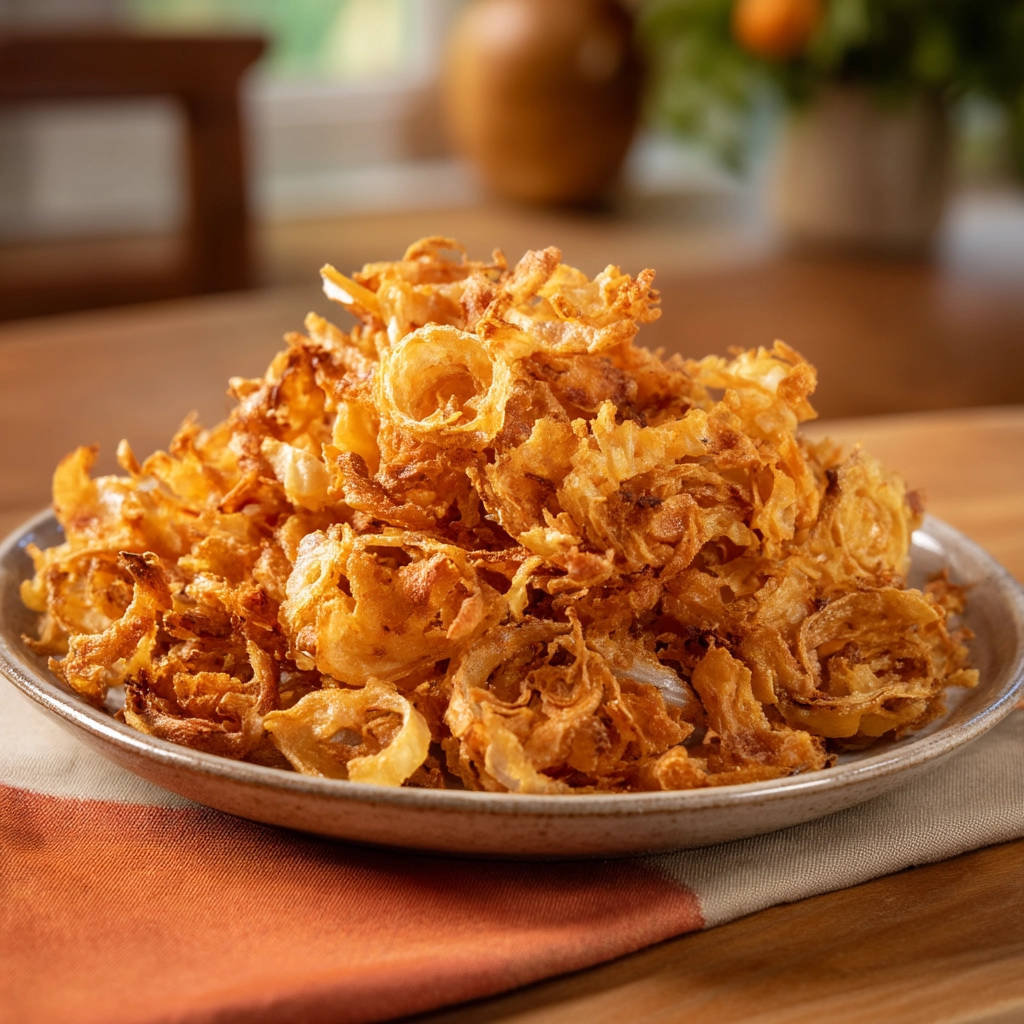
Enjoy Your Homemade Crispy Fried Onion Strings!
See? Making those perfectly crispy fried onion strings at home wasn’t so intimidating after all! With just a few simple ingredients and paying attention to those key techniques – the soak, the thorough dry, and the small-batch frying – you can achieve that coveted golden crunch every single time. They’re so much better than anything you’ll find in a can, bursting with fresh onion flavor and irresistible texture.
Get ready to elevate your favorite dishes! Whether you’re topping a holiday casserole, garnishing a steak, or adding them to your burger, these homemade crispy fried onion strings are guaranteed to impress. Give this recipe a try, and let me know how it goes in the comments below! Happy frying!
Homemade Fried Onion Strings

Ingredients
- 2 large yellow onions
- 1 cup all-purpose flour
- 1 teaspoon salt
- 1/2 teaspoon black pepper
- Vegetable oil for frying
Directions
- Peel the onions and slice them very thinly into rings or half-rings. Aim for consistent thickness so they fry evenly.
- Separate the onion slices into individual rings or pieces. Place them in a large bowl of cold water and let them soak for about 15 minutes. This helps remove some starch and sugar, which promotes crispiness and prevents burning.
- While the onions soak, prepare the coating. In a medium bowl, whisk together the flour, salt, and pepper.
- Drain the soaked onions very well. Pat them thoroughly dry with paper towels. This step is crucial for getting a crispy coating and preventing splattering.
- Add the dried onion pieces to the bowl with the flour mixture. Toss them gently to coat every piece completely, shaking off any excess flour.
- Fill a large heavy-bottomed pot or deep skillet with about 1-2 inches of vegetable oil. Heat the oil over medium-high heat until it reaches 350°F (175°C). An easy way to check without a thermometer is to drop a tiny pinch of flour in; it should sizzle immediately.
- This is the key to crispiness: Fry the onions in small batches. Do not overcrowd the pot, or the oil temperature will drop, and the onions will become soggy instead of crisp. Add a handful of coated onions to the hot oil, spreading them out so they don’t clump.
- Fry for 2 to 4 minutes, stirring occasionally with a slotted spoon or spider, until they are golden brown and crispy. Watch them closely as they can burn quickly once they start browning.
- Use the slotted spoon to remove the fried onions from the oil, letting excess oil drain back into the pot. Transfer the crispy onions to a plate lined with paper towels to drain further.
- Repeat with the remaining onion batches, letting the oil come back up to temperature between batches if needed. Season the hot fried onions lightly with a little more salt if desired before serving.