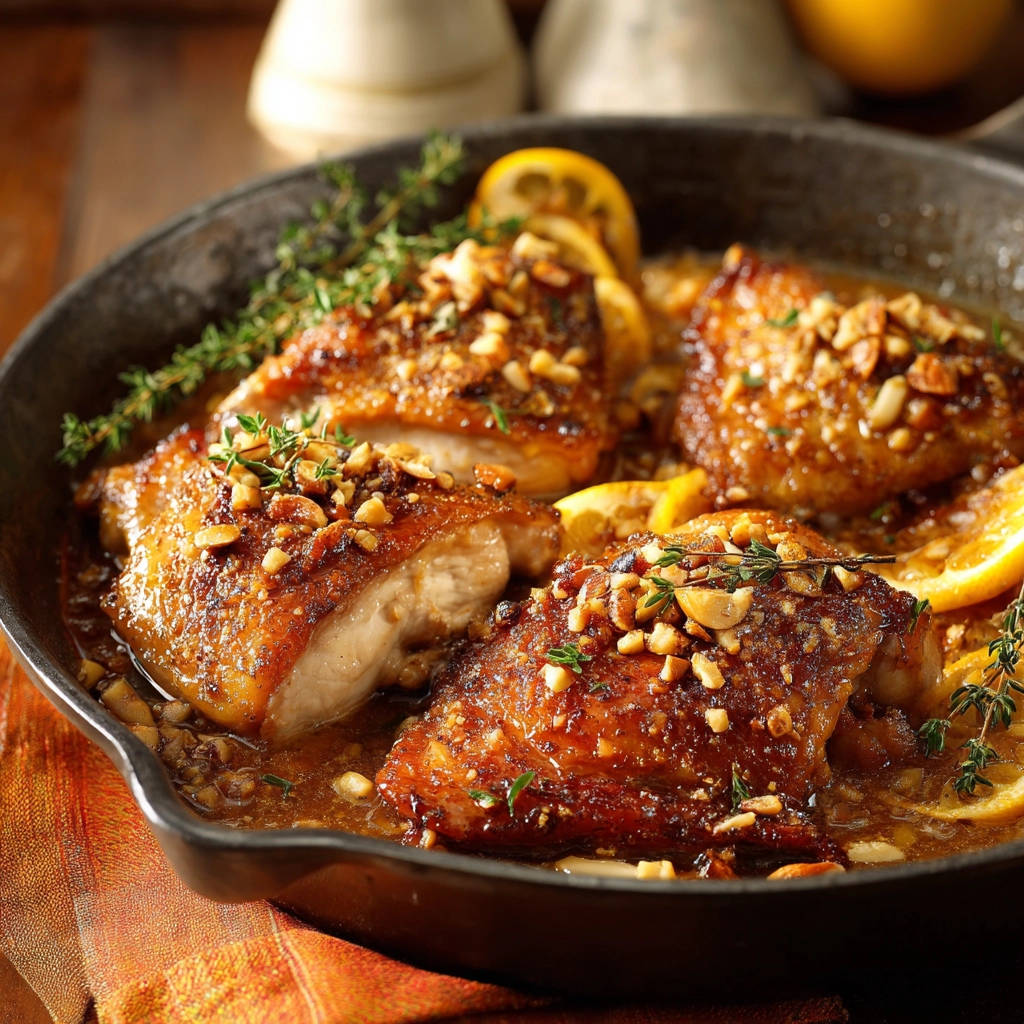
We’ve all been there, haven’t we? You slice into what should be a glorious chicken dinner, only to be met with disappointment. Dry, tough chicken is the enemy of a good meal! It certainly used to be a common occurrence in my own kitchen more often than I’d like to admit. But over the years, I’ve discovered a simple, foolproof method for making Skillet Lemon Herb Chicken with Nuts that is guaranteed to be incredibly juicy and packed with flavor every single time.
This isn’t a complicated recipe. In fact, it relies on one key technique that locks in moisture and creates a beautiful, aromatic sauce right in the pan. Forget dry chicken forever! This lemon herb chicken skillet is about to become your new weeknight favorite, delivering tender meat, crispy skin, and a bright, savory finish with the delightful crunch of nuts.
Why This Skillet Lemon Herb Chicken is a Keeper
What makes this specific skillet chicken recipe stand out from the rest? It’s a combination of strategic cooking techniques and simple, fresh ingredients that work magic together.
- Guaranteed Juiciness: The secret method involves searing the chicken to lock in flavor, then finishing it covered in a simmering sauce. This gentle, moist heat infusion is the key to tender perfection.
- Flavor Bomb: Fresh lemon, fragrant thyme, and savory garlic infuse the chicken and sauce with layers of bright, herbaceous flavor that are simply irresistible.
- One-Pan Wonder: Everything cooks right in your skillet, meaning minimal cleanup. Less time scrubbing, more time enjoying!
- Quick & Easy: From start to finish, this meal is ready in about 40 minutes, making it perfect for busy weeknights.
- Fantastic Texture: The initial sear gives you delicious crispy skin (if using skin-on thighs), and the sprinkle of nuts at the end adds a wonderful contrasting crunch to the tender chicken and rich sauce.
What You’ll Need: The Ingredients Behind the Magic
Getting these few simple ingredients together is the first step to unlocking seriously juicy chicken. The beauty of this recipe lies in how these basic pantry staples and fresh elements transform into something truly special.
- Bone-In, Skin-On Chicken Thighs (4 count): Chicken thighs are inherently more forgiving than chicken breasts thanks to their higher fat content, which helps them stay moist. Keeping the bone in and skin on adds even more flavor and helps protect the meat as it cooks. The skin crisps up beautifully in the initial sear.
- Olive Oil (2 tablespoons): Our fat for searing. Olive oil is a healthy choice and handles the medium-high heat needed to get that golden-brown skin.
- Salt (1 teaspoon) and Black Pepper (1/2 teaspoon): The essential seasonings. Don’t be shy when seasoning the chicken; it helps build flavor from the outside in.
- Minced Garlic (4 cloves): Garlic adds a foundational aromatic depth to the sauce. Freshly minced is best for the most potent flavor.
- Chicken Broth (1 1/2 cups): This forms the base of our luscious pan sauce. Using chicken broth instead of just water adds an extra layer of savory flavor.
- Lemon (1 count): We’ll use both the juice for brightness in the sauce and slices to simmer alongside the chicken, infusing it with vibrant citrus notes.
- Fresh Thyme (4 sprigs): Thyme is the perfect earthy, aromatic herb to complement the lemon and chicken. Using whole sprigs makes it easy to remove them later, leaving just their essence behind.
- Chopped Nuts (1/4 cup): This is where the “nuts” come in! Almonds or walnuts work wonderfully, providing a delightful textural contrast and nutty flavor that elevates the dish. Toasting them briefly beforehand can enhance their flavor even more.
Beyond these core ingredients, you might want some fresh thyme leaves for garnish at the very end, just to make that beautiful skillet meal presentation-ready!
Cooking Up Perfection: Your Skillet Lemon Herb Chicken Journey
Ready to say goodbye to dry chicken? Follow these steps, paying attention to the little details, and you’ll be rewarded with the most flavorful, juicy lemon herb chicken with nuts you’ve ever made!
-
Prep for the Sear: First things first, get those chicken thighs ready. Pat them down really well with paper towels. This is a crucial step, especially if you want crispy skin. Moisture on the skin prevents it from browning properly. Once they’re good and dry, season them generously on all sides with your salt and black pepper. Don’t forget the underside!
-
Heat the Skillet: Grab a large, oven-safe skillet (cast iron or a good quality stainless steel works great here) and add the olive oil. Place it over medium-high heat. You want the oil to get shimmering hot, but not smoking, before adding the chicken. This high heat is essential for developing that initial golden crust.
-
The First Sear: Carefully place the seasoned chicken thighs into the hot skillet. If they have skin, place them skin-side down. Listen for that beautiful sizzle! Let them sear undisturbed for 6 to 8 minutes. This allows the skin to render fat and get deeply golden brown. You’ll know they’re ready to flip when they release easily from the pan. If they’re sticking, give them another minute or two.
-
Sear the Other Side: Flip the chicken thighs over and sear the other side for just 2 to 3 minutes. This step is less about browning and more about getting some color and starting the cooking process on the underside. Once seared on both sides, remove the chicken from the skillet and set it aside on a plate for a moment. Don’t worry, it’s not fully cooked yet!
-
Build the Flavor Base: Reduce the heat under your skillet to medium. Add the minced garlic to the pan, stirring constantly. Cook for about 1 minute, just until you can smell that wonderful garlic aroma. Be careful not to let it burn, as burned garlic can taste bitter.
-
Deglaze and Add Aromatics: Pour in the chicken broth and the lemon juice. Use a wooden spoon or spatula to scrape up any browned bits stuck to the bottom of the pan – that’s pure flavor! Add the sprigs of fresh thyme to the liquid. Bring this mixture to a gentle simmer.
-
Return the Chicken & Lemon: Nest the seared chicken thighs back into the simmering sauce in the skillet. Arrange the lemon slices around the chicken. The chicken should be partially submerged in the liquid.
-
The Juicy Secret: Covered Simmering: This is the critical step for ensuring juiciness. Cover the skillet tightly with a lid (or foil if your skillet doesn’t have a lid). Reduce the heat to low so the liquid is just gently simmering, not boiling vigorously. Let it cook covered for 20 to 25 minutes. Simmering the chicken low and slow in this flavorful, moist environment is what guarantees tender, juicy results. To be sure it’s done, use a meat thermometer inserted into the thickest part of a thigh (avoiding the bone); it should read 165°F (74°C).
-
Thicken the Sauce (Optional): Uncover the skillet. The sauce might be thinner than you’d like. If so, increase the heat slightly and let the sauce simmer uncovered for a few minutes, stirring occasionally. This will help reduce and thicken it to your desired consistency. If you prefer a thicker sauce, you could also make a quick slurry of cornstarch and water and stir it in at this stage.
-
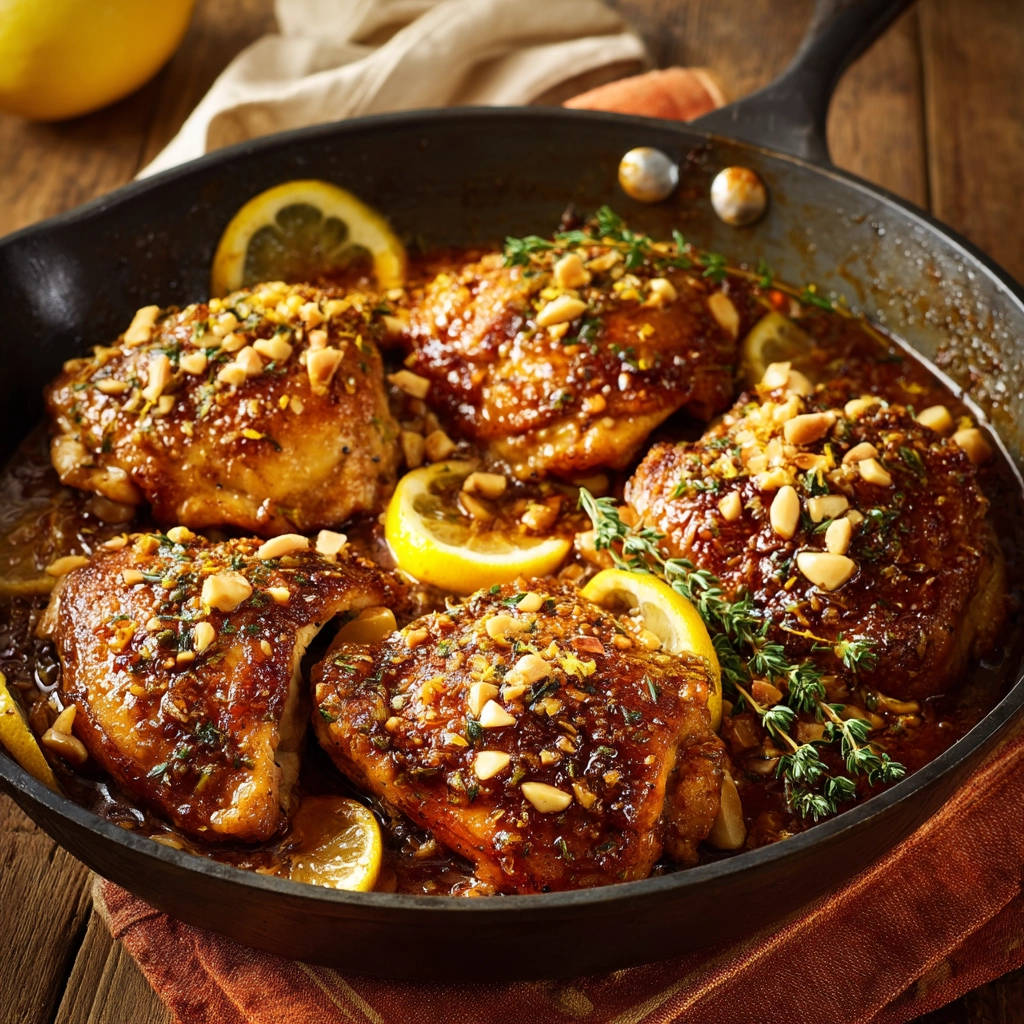
Finish and Serve: Sprinkle the chopped nuts generously over the chicken and the sauce. Garnish with a few fresh thyme leaves if you like. Serve the skillet lemon herb chicken directly from the pan, spooning that incredible sauce over each piece. Enjoy your guaranteed-juicy dinner!
Pro Tips for Your Best Skillet Chicken
Achieving perfectly juicy chicken isn’t hard when you know a few tricks. Here are some pro tips to make this skillet lemon herb chicken recipe shine every time:
- Master the Dry Pat: We mentioned it in the steps, but it bears repeating! Seriously dry chicken skin is the foundation of a good sear. Don’t rush this step.
- Use the Right Skillet: An oven-safe skillet is essential since we’ll be covering it and simmering. Cast iron is fantastic for even heat distribution and searing, but any heavy-bottomed skillet with a tight-fitting lid will work. Make sure it’s large enough to fit the chicken thighs in a single layer without overcrowding.
- Trust Your Thermometer: The cooking time provided is an estimate. Chicken thigh size varies, and stove heats differ. The most reliable way to know your chicken is perfectly cooked and safe to eat is by using an instant-read meat thermometer. Aim for 165°F (74°C) in the thickest part, away from the bone. Cooking beyond this can lead to dryness.
- Let it Rest: While this isn’t explicitly in the steps for simplicity (since it’s served from the pan), letting the chicken rest for just 5-10 minutes off the heat (even in the covered skillet) allows the juices to redistribute throughout the meat, making it even more tender.
- Adjust the Sauce: If your sauce is still too thin after simmering uncovered for a few minutes, don’t hesitate to make a quick slurry. Mix a teaspoon of cornstarch with a tablespoon of cold water, whisk it into the simmering sauce, and let it bubble for a minute or two until thickened. If it’s too thick, just add a splash more chicken broth.
What to Serve With Your Skillet Lemon Herb Chicken
This flavorful lemon herb chicken skillet is fantastic on its own, but it pairs beautifully with a variety of sides to create a complete meal. Imagine the bright sauce spooned over fluffy rice or creamy mashed potatoes! For a lighter option, try serving it alongside simple steamed green beans or a fresh salad. If you’re looking for delicious ways to round out your meal, consider our easy crispy roasted potatoes or even our juicy chicken and rice bowl for inspiration on starch pairings, though you’d just use the rice component here.
Your Skillet Lemon Herb Chicken Questions Answered (FAQ)
Got a few questions buzzing in your head? Let’s tackle some common ones about making this skillet lemon chicken with nuts.
Can I use boneless, skinless chicken thighs or breasts?
Yes, you can! However, boneless cuts cook much faster, and skinless pieces won’t get the initial sear for crispy skin. If using boneless, skinless thighs, reduce the searing time slightly and check for doneness (165°F/74°C) closer to the 15-20 minute mark during the covered simmer. For breasts, searing time is similar, but the covered simmer will be shorter, perhaps 10-15 minutes, as breasts are leaner and dry out more easily. Always use a thermometer!
What other types of nuts can I use?
Pecans, pistachios, or even toasted pine nuts would be delicious additions, each adding their own unique flavor and crunch. Choose what you love or have on hand!
Can I make this recipe ahead of time?
This dish is truly best served fresh, especially for crispy skin and the bright flavor. However, you can cook the chicken and sauce ahead of time. Store them separately in airtight containers in the refrigerator for up to 3-4 days. Reheat gently in a skillet on the stovetop over low heat, adding a splash more broth if needed. Add the nuts just before serving for maximum crunch.
My sauce didn’t thicken enough. What went wrong?
Several things could cause a thin sauce: your simmer wasn’t vigorous enough during the uncovered reduction phase, or maybe you had a lot more liquid initially. Don’t worry, this is easy to fix! As mentioned in the tips, you can simply continue simmering uncovered to reduce it further, or make a quick cornstarch slurry (1 tsp cornstarch + 1 tbsp cold water) and whisk it into the simmering sauce until it thickens.
Can I use dried herbs instead of fresh thyme?
Fresh herbs always provide the best flavor, but you can substitute dried. Use about 1/3 the amount of dried herbs compared to fresh. So, for 4 sprigs of fresh thyme, you’d use about 1 teaspoon of dried thyme. Add the dried thyme along with the garlic.
Ready to Enjoy Your Homemade Skillet Lemon Herb Chicken!
There you have it – the secret to incredibly moist, flavorful, and easy Skillet Lemon Herb Chicken with Nuts. This recipe proves that weeknight dinners can be both simple and absolutely delicious. The bright lemon, fragrant herbs, savory sauce, and nutty crunch come together for a meal that feels special but takes minimal effort.
Give this skillet lemon herb chicken a try tonight and experience the joy of perfectly cooked chicken. We’d love to hear how it turned out! Leave a comment below and let us know what you thought or if you made any fun variations. Happy cooking!
Skillet Lemon Herb Chicken with Nuts

Ingredients
- 4 bone-in, skin-on chicken thighs
- 2 tablespoons olive oil
- 1 teaspoon salt
- 1/2 teaspoon black pepper
- 4 cloves garlic, minced
- 1 1/2 cups chicken broth
- 1 lemon, juiced and sliced
- 4 sprigs fresh thyme
- 1/4 cup chopped nuts (such as almonds or walnuts)
Directions
- Pat the chicken thighs thoroughly dry with paper towels. Season generously on all sides with salt and pepper. Getting the skin really dry is key for the initial sear.
- Heat the olive oil in a large oven-safe skillet over medium-high heat until shimmering.
- Carefully place the chicken thighs in the hot skillet, skin-side down if applicable. Sear for 6-8 minutes until the skin is golden brown and releases easily from the pan.
- Flip the chicken and sear the other side for 2-3 minutes. Remove chicken from the skillet and set aside.
- Reduce heat to medium. Add the minced garlic to the skillet and cook for 1 minute until fragrant, stirring constantly.
- Pour in the chicken broth and lemon juice. Scrape up any browned bits from the bottom of the pan. Add the thyme sprigs. Bring the liquid to a simmer.
- Return the seared chicken thighs to the skillet, nesting them in the sauce. Add the lemon slices around the chicken.
- Cover the skillet tightly and reduce the heat to low. Simmer gently for 20-25 minutes, or until the internal temperature of the thickest part of the chicken reaches 165°F (74°C) on a meat thermometer. Cooking covered at a gentle simmer in the sauce is the trick to keeping the chicken incredibly moist.
- Uncover the skillet. If the sauce is too thin, increase the heat slightly and simmer uncovered for a few minutes until it thickens to your desired consistency.
- Sprinkle the chopped nuts over the chicken and garnish with fresh thyme leaves before serving directly from the skillet.