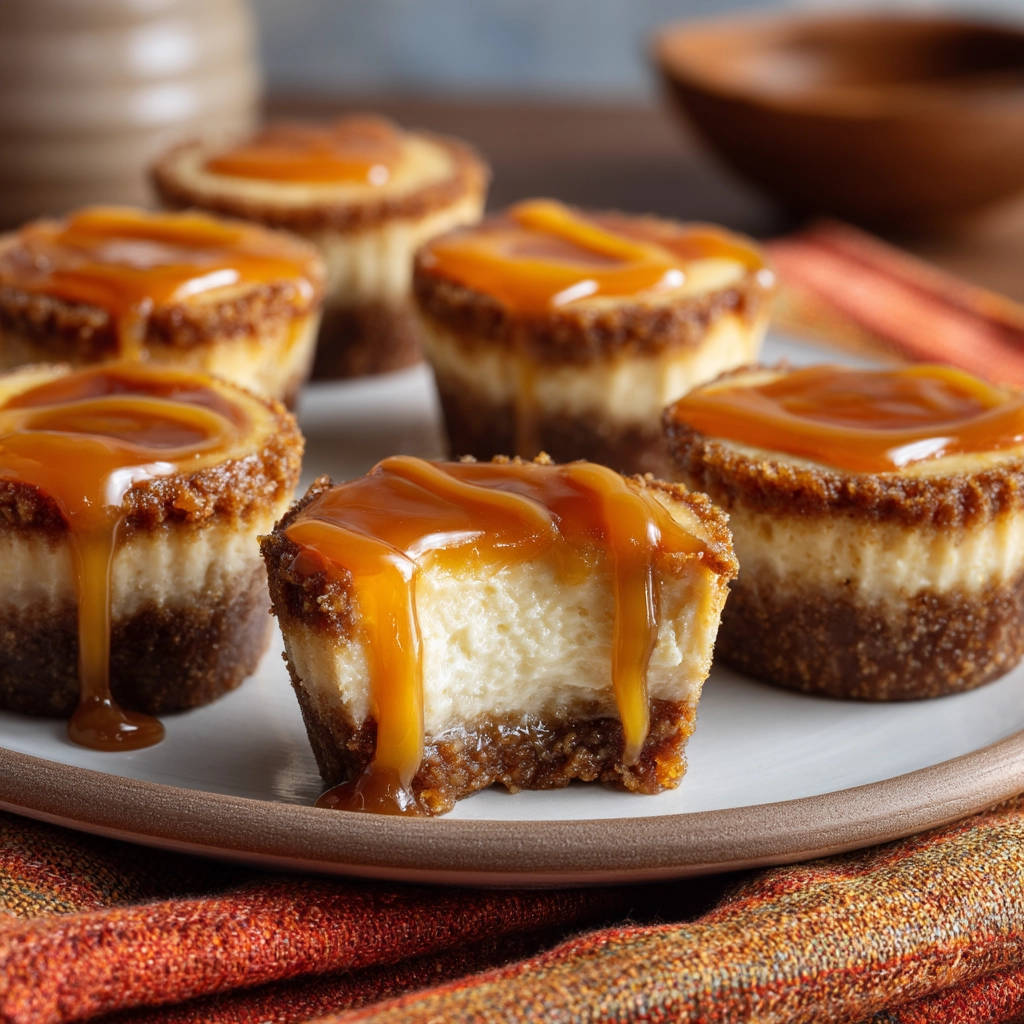
Ever reach for a mini cheesecake, anticipating that delightful crunch of the crust against the creamy filling, only to be met with a disappointing, soggy bottom? It’s a common kitchen heartbreak! For years, I struggled with mini cheesecakes where the graham cracker base seemed to just melt into the filling, losing all its lovely texture.
But after much trial and error, I discovered a simple, game-changing technique that guarantees a firm, crispy crust every single time you make these mini caramel cheesecakes. No more mushy mishaps! These little bites are now my go-to for parties, potlucks, or just when a craving for something sweet, creamy, and perfectly textured hits.
Beyond the perfect crust, you get that luscious, smooth cheesecake filling and a decadent drizzle of caramel. They’re everything you love about a full-sized cheesecake, scaled down into adorable, individual servings. Let’s dive into how you can make these miniature marvels in your own kitchen!
Why You’ll Absolutely Adore These Mini Caramel Cheesecakes
These aren’t just any mini cheesecakes. They’re designed for success and maximum enjoyment!
- Guaranteed Crispy Crust: Thanks to one easy step, say goodbye to soggy graham cracker bases forever.
- Perfectly Portable: Individual servings mean they’re ideal for sharing, parties, lunchboxes, or enjoying one (or two!) without needing a plate and fork.
- Irresistibly Delicious: The classic combination of creamy cheesecake, crunchy graham cracker, and sweet caramel is a timeless favorite.
- Easier Than Full-Sized: Mini cheesecakes bake faster and are often less prone to the cracking issues sometimes associated with larger cheesecakes.
- Simple Ingredients: You likely have most of these staples in your pantry and fridge already.
Gathering Your Ingredients for Delicious Mini Caramel Cheesecakes
Creating these delightful bites starts with rounding up the right components. Each ingredient plays a crucial role, from providing the foundational crunch of the crust to creating that signature smooth, rich cheesecake texture. Let’s look at what you’ll need, and why these ingredients work together so beautifully.
The crust is a simple yet essential blend. We start with graham cracker crumbs, the classic choice for cheesecake bases. Their slightly sweet, wheaty flavor is the perfect counterpoint to the rich filling. Granulated sugar adds just a touch more sweetness and helps with crisping, while melted unsalted butter binds everything together, creating that pressable, sturdy base that will transform into a crispy delight.

For the creamy heart of these mini treats, softened cream cheese is non-negotiable. Using block cream cheese at room temperature is key to achieving a smooth, lump-free filling. Granulated sugar provides sweetness, balancing the tang of the cream cheese. Large eggs add structure and richness, helping the cheesecake set properly. A touch of vanilla extract brings warmth and enhances all the other flavors. Finally, sour cream or heavy cream is added for extra richness and that signature creamy texture that melts in your mouth.
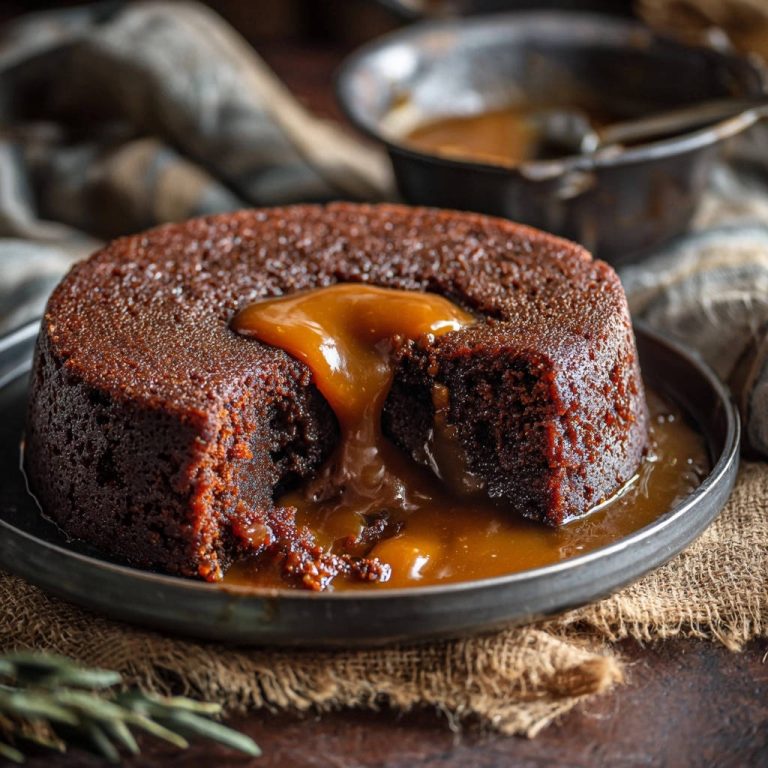
And of course, the crown jewel is the caramel sauce! While store-bought works perfectly for convenience, you can absolutely use your favorite homemade caramel sauce if you’re feeling ambitious.
Here is the list of ingredients you’ll need:
- 1 and 1/2 cups graham cracker crumbs (this is usually about 10 full graham cracker sheets processed into fine crumbs)
- 1/4 cup granulated sugar (for the crust)
- 1/2 cup melted unsalted butter
- 2 packages (8 ounces each) cream cheese, softened to room temperature
- 3/4 cup granulated sugar (for the filling)
- 2 large eggs, also at room temperature
- 1 teaspoon vanilla extract
- 1/4 cup sour cream or heavy cream
- Caramel sauce, for topping (as much as your heart desires!)
Crafting Your Mini Caramel Cheesecakes: Step-by-Step
Now that you have all your ingredients ready, let’s walk through the process. Remember, the magic happens with that one little extra step for the crust! Follow these steps carefully, and you’ll be rewarded with perfect mini cheesecakes.
-
Prep Your Workspace: Begin by preheating your oven. Set it to 350°F (175°C). While it heats, get your muffin tin ready. Lining a standard 12-cup muffin tin with paper liners is crucial here; it makes removing the finished cheesecakes clean and easy. Make sure the liners fit snugly.
-
Mix the Crust Ingredients: In a medium-sized bowl, combine your graham cracker crumbs, the 1/4 cup of sugar specified for the crust, and the melted unsalted butter. Stir everything together thoroughly. You want all the crumbs to be coated and moistened by the butter; this is what allows them to hold their shape when pressed.
-
Form the Crust Bases: Spoon approximately 2 tablespoons of this buttery crumb mixture into the bottom of each paper-lined muffin cup. Use a small glass or the back of a spoon to firmly press the crumbs down into an even, compact layer. Pressing firmly is important for a solid base, but don’t worry about making it absolutely perfect; the next step will help!
-
The Secret to No More Soggy Crust!: This is the crucial step that elevates these from good to magnificent. Place the muffin tin with the pressed crusts into your preheated oven. Bake the crusts alone for 8 to 10 minutes. You’re looking for them to become slightly golden around the edges and feel set when you gently touch them. This brief bake time toasts the crumbs and butter, creating a barrier that prevents the moisture from the filling from seeping in and making the crust soggy. Once baked, remove the tin from the oven and let the crusts cool slightly while you prepare the filling. This cooling prevents the hot crust from affecting the cheesecake batter consistency.
-
Prepare the Silky Filling – Part 1: In a large mixing bowl, add your softened cream cheese and the 3/4 cup of sugar for the filling. Use an electric mixer (either a hand mixer or a stand mixer with the paddle attachment) to beat them together. Beat until the mixture is completely smooth and creamy, with no lumps of cream cheese remaining. This step is where you build the creamy foundation.
-
Prepare the Silky Filling – Part 2 (Add Eggs): Add the large eggs to the cream cheese mixture, but do so one at a time. After adding each egg, mix on low speed just until it is combined into the batter. It’s very important not to overmix at this stage once the eggs are added. Overmixing can incorporate too much air, which can cause cheesecakes to puff up excessively while baking and then crack or sink as they cool.
-
Prepare the Silky Filling – Part 3 (Finishing Touch): Stir in the vanilla extract and your choice of sour cream or heavy cream. Mix on low speed or gently fold until the batter is smooth and homogenous. The sour cream or heavy cream adds extra richness and a smooth texture. Give the bowl a scrape down with a spatula to ensure everything is incorporated.
-
Fill the Cups: Carefully pour or spoon the smooth cheesecake batter evenly over the pre-baked and slightly cooled crusts in the muffin tin. Fill each paper liner about two-thirds full. Avoid overfilling, as the cheesecakes will rise slightly as they bake.
-
Bake the Cheesecakes: Place the filled muffin tin back into the 350°F (175°C) oven. Bake for 18 to 22 minutes. The cheesecakes are ready when the edges look set, but the centers still appear slightly soft and have a gentle wobble when you lightly jiggle the pan. They will continue to set as they cool.
-
Gentle Cooling (No Cracks!): To prevent sudden temperature changes that can lead to sinking or cracking, turn off the oven once the baking time is complete. Prop the oven door open slightly (you can use a wooden spoon handle) and let the cheesecakes sit inside the cooling oven for about 15 minutes. This allows them to cool down gradually.
-
Cool Completely: After the gentle cool-down in the oven, remove the muffin tin. Place the tin on a wire rack and let the mini cheesecakes cool completely to room temperature. This usually takes another hour or so. Don’t rush this step!
-
The All-Important Chill: Once the cheesecakes are at room temperature, transfer the muffin tin to the refrigerator. Chill them for at least 2 hours, but preferably longer, until they are fully chilled and firm. Chilling is essential for the cheesecake to set properly and develop the correct dense, creamy texture.
-
Serve and Enjoy: When you’re ready to serve, carefully lift each mini cheesecake out of the muffin tin using the paper liners. Drizzle generously with caramel sauce just before presenting them. The combination of the chilled cheesecake, crispy crust, and warm or room-temperature caramel is pure bliss!
Tips for Perfect Mini Caramel Cheesecakes Every Time
Achieving cheesecake perfection is within reach! Here are a few extra pointers to help ensure your mini caramel cheesecakes turn out beautifully:
- Use Room Temperature Ingredients: This applies particularly to the cream cheese and eggs. Cold cream cheese is difficult to beat smooth, leading to lumps. Cold eggs don’t incorporate as well, which can affect the texture and structure of the filling. Plan ahead and take them out of the fridge about an hour before you start.
- Don’t Overmix: Once you add the eggs to the cream cheese mixture, mix on low speed and only until just combined. Overmixing incorporates too much air, which can lead to sinking and cracking as the cheesecakes cool.
- The Pre-Bake is Key: Seriously, don’t skip step 4! That initial bake time for the crust is the secret weapon against sogginess. It toasts the crumbs and creates a protective barrier. This is a technique that can even help with other baked goods requiring a crisp base, like certain tarts or bars. If you struggle with crusts, check out our guide to perfecting fruit tart crusts!
- Cooling Matters: Allowing the cheesecakes to cool gradually first in the oven and then completely on a wire rack helps prevent cracks caused by sudden temperature changes. Chilling solidifies the structure and texture.
- Quality Caramel: While the cheesecake is the star, a good caramel sauce makes all the difference. Use a quality store-bought sauce or make your own if you have a favorite recipe.
- Storage: Store uneaten mini cheesecakes in an airtight container in the refrigerator for up to 3-4 days. For longer storage, they can be frozen (without the caramel topping) for up to 1-2 months. Thaw in the refrigerator before topping and serving.
What to Serve With Your Mini Caramel Cheesecakes
These mini delights are wonderful on their own, but pairing them can elevate the experience. Serve them with a dollop of whipped cream or a sprinkle of sea salt over the caramel for an extra touch of gourmet flair. They are the perfect sweet ending to almost any meal. For a dessert spread, consider offering them alongside other favorites like Classic Chocolate Cream Pie or maybe something fruity like Strawberry Caramel Cheesecake.
Your Mini Caramel Cheesecakes Questions Answered (FAQ)
Here are some common questions people ask when making mini cheesecakes:
What if I don’t have paper liners for the muffin tin?
While paper liners are highly recommended for easy removal, you can make mini cheesecakes without them. You will need to grease each muffin cup very well with butter or non-stick cooking spray before adding the crust mixture. Removal will require careful loosening around the edges with a knife.
Why is chilling for at least 2 hours so important?
Chilling isn’t just about serving them cold. It’s a crucial step for the cheesecake filling to fully set and firm up. This develops the dense, smooth texture that cheesecake is known for. Trying to remove or eat them before they are completely chilled will result in a soft, messy cheesecake.
Can I use different types of crumbs for the crust?
Absolutely! While graham cracker is classic, you can experiment. Try using crushed vanilla wafers, chocolate cookies, or even shortbread cookies. The amount of butter needed might vary slightly depending on how dry the crumbs are, but the process is the same. Just pulse your chosen cookies in a food processor until fine crumbs form.
My cheesecake tops cracked slightly. What went wrong?
Cracking can happen for a few reasons, often related to temperature shock or overmixing. Ensure your cream cheese and eggs are at room temperature. Mix the batter on low speed and only until just combined, especially after adding the eggs. The gradual cooling step in the turned-off oven (Step 10) is also designed specifically to prevent cracking by allowing the cheesecake to cool down slowly. Even if they crack slightly, a generous drizzle of caramel sauce hides any imperfections!
Can I make the caramel sauce ahead of time?
Yes! Caramel sauce can be made days in advance and stored in the refrigerator. Gently warm it slightly before drizzling over the chilled cheesecakes for the best consistency.
How do these compare to a classic baked cheesecake?
These mini versions offer the same beloved flavor profile and creamy texture as a classic baked cheesecake, but in a convenient individual size. They also typically bake much faster and are less finicky regarding water baths or dramatic temperature changes compared to their large counterparts. If you love this, you might also enjoy tackling a full-sized classic baked cheesecake!
Enjoy Your Homemade Mini Caramel Cheesecakes!
There you have it! The secret to mini caramel cheesecakes with a perfectly firm, crunchy crust, paired with a smooth, creamy filling and decadent caramel topping. These little desserts are guaranteed crowd-pleasers and are surprisingly simple to make once you know the key techniques. Give them a try for your next gathering or simply to satisfy your sweet tooth.
Did you try this recipe? Let me know how they turned out in the comments below! Your feedback makes my day. Happy baking!
Mini Caramel Cheesecakes

Ingredients
- 1 and 1/2 cups graham cracker crumbs (about 10 full sheets)
- 1/4 cup granulated sugar
- 1/2 cup melted unsalted butter
- 2 packages (8 ounces each) cream cheese, softened
- 3/4 cup granulated sugar
- 2 large eggs
- 1 teaspoon vanilla extract
- 1/4 cup sour cream or heavy cream
- Caramel sauce, for topping
Directions
- Preheat oven to 350 degrees F (175 degrees C). Line a 12-cup muffin tin with paper liners.
- In a medium bowl, combine graham cracker crumbs, 1/4 cup sugar, and melted butter. Stir until well combined and the crumbs are moistened.
- Spoon about 2 tablespoons of the crumb mixture into the bottom of each prepared muffin cup. Use the back of a spoon or a small glass to firmly press the crumbs into an even layer.
- This is the key step for a firm crust! Bake the crusts in the preheated oven for 8 to 10 minutes, or until they are slightly golden and feel set. This helps prevent the crust from getting soggy later. Remove from oven and let cool slightly while you prepare the filling.
- In a large bowl, beat the softened cream cheese and 3/4 cup sugar together using an electric mixer until smooth and creamy.
- Beat in the eggs one at a time, mixing just until combined after each addition. Do not overmix.
- Stir in the vanilla extract and sour cream (or heavy cream) until the batter is smooth.
- Pour or spoon the cheesecake batter evenly over the pre-baked crusts in the muffin tin, filling each cup about two-thirds full.
- Bake for 18 to 22 minutes, or until the centers are mostly set but still look slightly soft and jiggly.
- Turn off the oven and prop the oven door open slightly. Let the cheesecakes sit in the cooling oven for 15 minutes. This gradual cooling helps prevent sinking.
- Remove the muffin tin from the oven and let the cheesecakes cool completely in the tin on a wire rack.
- Once completely cool, refrigerate the cheesecakes for at least 2 hours, or until fully chilled and firm.
- Carefully remove the mini cheesecakes from the muffin tin. Drizzle generously with caramel sauce just before serving.