
Oh, cheesecake. Just saying the word conjures up images of creamy, dreamy indulgence. But let’s be honest, attempting a classic cheesecake can sometimes feel like tackling Mount Everest in your kitchen! Getting that perfect, crack-free surface and a velvety smooth texture that actually sets up without being rubbery? It stumped me for years. I had my share of sunken centers and sad, soft textures.
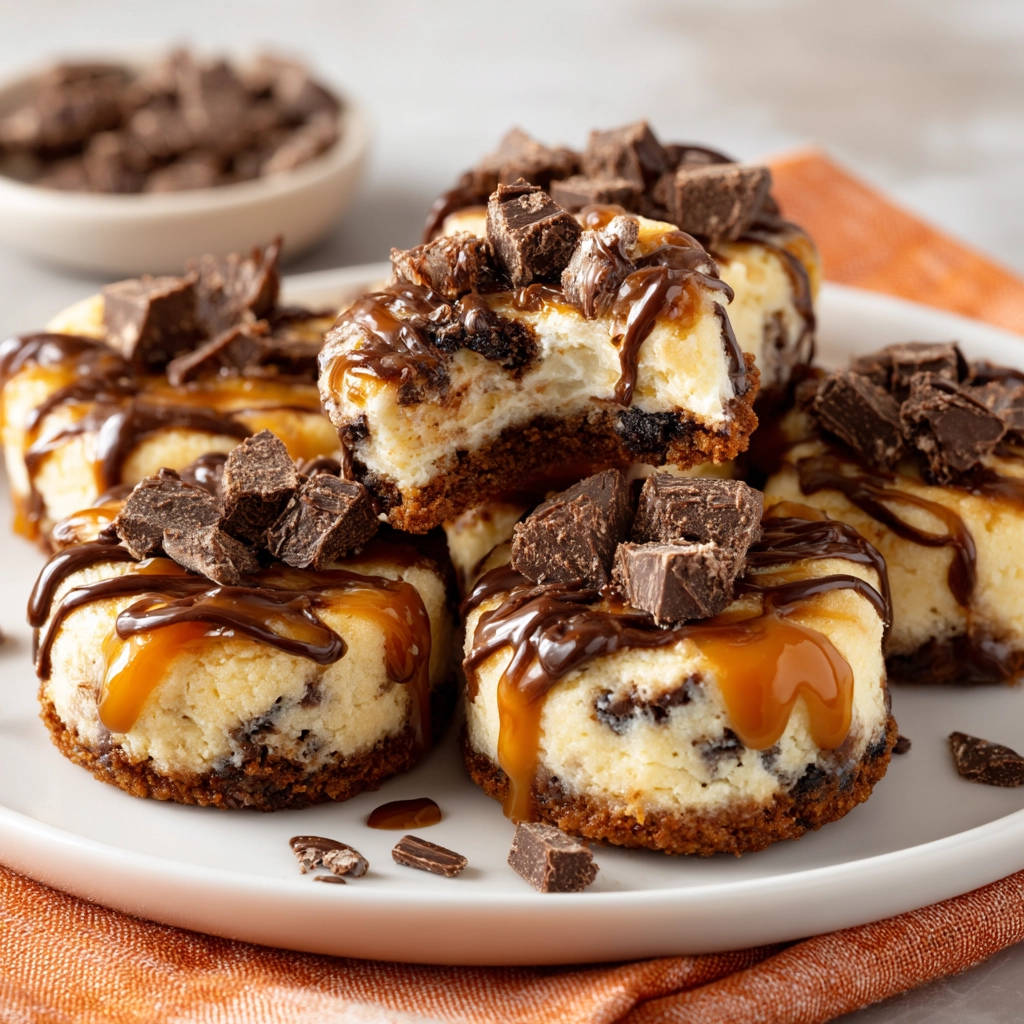
That is, until I unlocked a simple, game-changing secret for guaranteed success, especially when making delightful individual portions. Forget the stress! These heavenly Mini Chocolate Caramel Cheesecakes are not only stunningly delicious with their rich chocolate base and luscious caramel topping, but they are also designed for foolproof perfection every single time. They’re the ideal bite-sized treat for parties, gifts, or just indulging in a little personal decadence.
Ready to ditch the cheesecake anxiety and dive headfirst into chocolate-caramel bliss?
For a truly firm result, explore chocolate caramel cheesecake bars with a crisp crust.
Why You’ll Love These Mini Chocolate Caramel Cheesecakes
Beyond being incredibly tasty, there are so many reasons why these individual chocolate caramel cheesecakes will become your go-to dessert:
If you’re inspired by the chocolate and caramel pairing, try the rich flavors of caramel pecan cheesecake next.
- Guaranteed Success: The simple water bath method ensures even cooking and that coveted creamy, set texture without cracks. It truly takes the guesswork out of cheesecake.
- Perfect Portion Size: No need to slice a whole cake! Each mini cheesecake is a delightful individual serving, making them ideal for entertaining or portion control (if you can resist!).
- Rich Flavor Combination: Chocolate and caramel are a match made in dessert heaven. The deep chocolate cookie crust and filling perfectly complement the sweet, gooey caramel topping.
- Easier Than a Full Cheesecake: While requiring patience for chilling, the baking process in muffin tins feels less daunting than managing a large springform pan.
- Impressive Presentation: Drizzled with sauces and sprinkled with chocolate chunks, these mini treats look like they came straight from a fancy bakery.
Gathering Your Ingredients for Mini Chocolate Caramel Cheesecakes
The beauty of this recipe lies in its straightforward ingredients that come together to create something truly special. You won’t need anything exotic, just common pantry staples and a few dessert essentials.
For the sturdy, flavorful crust, we’re starting with chocolate cookie crumbs. The kind made from chocolate sandwich cookies works best, as their cream filling helps bind the crust beautifully when mixed with melted butter. About 20 cookies will give you the needed crumbs – you can crush them in a food processor for fine, even crumbs, or place them in a bag and smash with a rolling pin for a more rustic texture. The melted butter acts as the glue, holding it all together once chilled.
The heart of any cheesecake is, of course, the cream cheese filling. You’ll need a generous 16 ounces of cream cheese. It’s absolutely crucial that your cream cheese is properly softened to room temperature. Cold cream cheese will result in a lumpy batter, no matter how much you beat it. A bit of granulated sugar provides the essential sweetness that balances the tang of the cream cheese.
To give the cheesecake structure and that signature creamy texture, we incorporate two large eggs. Adding them one at a time is key – more on that in the instructions! A touch of vanilla extract enhances all the flavors, adding a warm, aromatic note to the filling. For extra pockets of chocolatey goodness within the creamy filling, you’ll gently fold in about half a cup of chopped chocolate cookies. These little bits soften slightly but still provide delightful bursts of texture and flavor.
Finally, the glorious finishing touches! Have your favorite chocolate sauce and caramel sauce ready for drizzling. You can use store-bought for convenience or make your own if you’re feeling ambitious. A shower of chopped chocolate chunks over the top adds another layer of chocolate intensity and a lovely textural contrast to the smooth filling and gooey sauces.
Here’s a quick look at everything you’ll need:
- 1 and 1/2 cups chocolate cookie crumbs (from about 20 chocolate sandwich cookies)
- 1/4 cup melted butter
- 16 ounces cream cheese, softened
- 1/2 cup granulated sugar
- 2 large eggs
- 1 teaspoon vanilla extract
- 1/2 cup chopped chocolate cookies (from about 6 chocolate sandwich cookies)
- Chocolate sauce for drizzling
- Caramel sauce for drizzling
- Chopped chocolate chunks for topping
Crafting Your Mini Chocolate Caramel Cheesecakes: Step-by-Step
Ready to create these bite-sized beauties? Follow these steps carefully, paying special attention to the temperature and mixing instructions. That little bit of extra care makes all the difference!
Prep the Oven and Pan: Start by getting your oven ready. Preheat it to 325 degrees F (160 degrees C). This lower temperature is ideal for baking cheesecakes gently, preventing them from cooking too quickly and cracking. Line a standard 12-cup muffin tin with paper liners. These liners make removing the finished mini cheesecakes a breeze and help them keep their perfect shape.
Create the Cookie Crust: In a small bowl, combine your chocolate cookie crumbs and the melted butter. Stir until the crumbs are evenly moistened and look like wet sand. This is your base! Spoon about 1 to 2 tablespoons of this mixture into the bottom of each lined muffin cup. Use the bottom of a small glass or a measuring cup to firmly press the crumbs down. Compacting the crust ensures it holds together and doesn’t crumble when you take your first bite.
Beat the Cream Cheese Base: Grab a large bowl and your electric mixer. Add the softened cream cheese and granulated sugar. Beat these together on medium speed until the mixture is wonderfully smooth and creamy. This step is essential for getting a lump-free batter. Stop and scrape down the sides and bottom of the bowl with a rubber spatula occasionally to make sure everything is evenly incorporated.
Incorporate Eggs and Flavor Gently: Now, add the eggs, but here’s a crucial tip: add them one at a time. After adding the first egg, beat on low speed just until it’s combined. Then add the second egg and repeat. The key here is to avoid overmixing once the eggs are in. Too much air beaten into the batter after the eggs can cause the cheesecake to rise too much and then fall, leading to cracks. Stir in the vanilla extract. Finally, gently fold in the chopped chocolate cookies using your spatula. You want to distribute the cookie chunks without breaking them up too much or deflating the batter.
Fill the Muffin Cups: Carefully spoon or pour the cheesecake batter evenly over the prepared cookie crusts in each muffin cup. Fill each cup about three-quarters of the way full. This leaves a little room for the cheesecake to rise slightly as it bakes.
Employ the Water Bath (The Secret!): This is the step that guarantees success! Find a larger baking pan, such as a roasting pan or a 9×13 inch pan, that your muffin tin can fit inside comfortably. Place the filled muffin tin inside this larger pan. Carefully pour hot (not boiling, but hot tap water or recently boiled then slightly cooled) water into the larger pan around the muffin tin. The water level should come about halfway up the sides of the muffin tin. This water bath creates a humid environment and provides gentle, even heat, which is the magic behind a perfectly set, crack-free, and creamy cheesecake.
Bake to Perfection: Carefully transfer the nested pans (the large pan with the water bath and the muffin tin inside) into your preheated oven. Bake for 25 to 30 minutes. You’ll know they’re done when the edges look set and slightly firm, but the centers still look a little soft and might jiggle just slightly if you gently nudge the pan. Don’t wait until the centers are completely firm in the oven, as they will continue to set as they cool.
Cool Slowly in the Oven: Once the baking time is up, turn off the oven. This next cooling step is just as important as the water bath for preventing cracks! Prop the oven door open slightly – you can use a wooden spoon handle to keep it ajar. Leave the cheesecakes in the water bath inside the cooling oven for about 30 minutes. This gradual temperature decrease prevents a sudden shock that can cause cracks on the surface.
Finish Cooling at Room Temperature: After their oven cool-down, carefully remove the muffin tin from the water bath. The water might still be warm, so be cautious! Place the muffin tin on a wire rack to allow air circulation around the sides and bottom. Let the mini cheesecakes cool completely at room temperature. They will continue to set further during this stage.
Chill Thoroughly: Once the cheesecakes are completely cool to the touch, transfer the entire muffin tin to the refrigerator. Chill them for at least 2 hours, but ideally longer, until they are fully set through. This chilling time is non-negotiable for the right cheesecake texture!
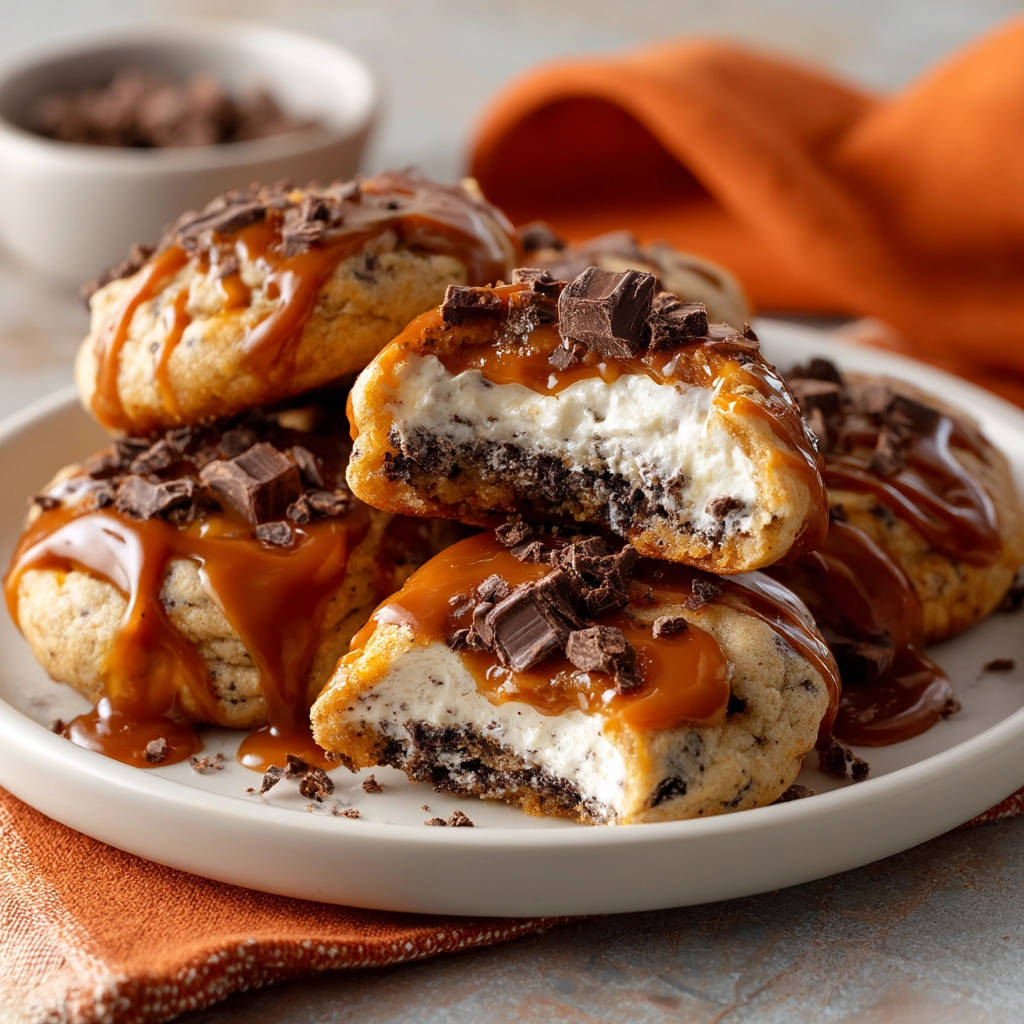
Serve with Flourish: When you’re ready to enjoy, carefully remove the mini cheesecakes from the muffin tin by lifting the paper liners. Place them on a serving plate. Now for the fun part! Drizzle generously with chocolate sauce and caramel sauce. Top them off with plenty of chopped chocolate chunks for that extra bit of decadence. Get ready for oohs and aahs!
Tips for Perfect Mini Chocolate Caramel Cheesecakes Every Time
Making cheesecake, even mini ones, can feel precise, but these simple tips will help you achieve that bakery-quality result at home:
More Sweet & Savory Ideas
After enjoying these mini chocolate caramel cheesecakes, consider these complementary recipes.
- For a contrasting starter, try this Whipped Feta Roasted Tomato Dip, which offers a bright, savory counterpoint to the sweetness.
- If you’re leaning towards more baked goodness, the Cheesy Sausage Biscuit Bake provides a satisfying, savory option that balances the richness of the cheesecakes.
- Room Temperature is Your Friend: Ensure your cream cheese and eggs are truly at room temperature. Cold ingredients don’t emulsify properly, leading to a lumpy batter which can affect texture and baking. Take them out of the fridge at least an hour before you plan to start mixing.
- Don’t Overmix the Batter: Especially after adding the eggs! Beating too much air into the batter at this stage is a common culprit for cracking. Mix just until combined on low speed.
- Crush Cookies Evenly: A food processor makes quick work of creating uniform crumbs for the crust, ensuring a consistent texture.
- Seal the Water Bath (Optional but helpful): Some bakers wrap the bottom of their springform pans in foil before the water bath to prevent leaks. While muffin tins are less prone to this, ensuring your outer pan is large enough and the water level is appropriate (halfway up the muffin tin) is key.
- Know Your Oven: Ovens can vary. If your cheesecakes seem to be browning too quickly on top, you can lightly tent the muffin tin with foil during the last part of baking.
- Storage: Store leftover mini cheesecakes in an airtight container in the refrigerator for up to 3-4 days. They are best enjoyed chilled.
What to Serve With Mini Chocolate Caramel Cheesecakes
These rich little delights are truly a dessert all on their own, perfect with a simple glass of milk or a cup of coffee. They make a fantastic ending to a meal. If you’re hosting a dessert spread, they pair wonderfully with other treats that offer a contrast in flavor or texture. Consider serving them alongside something fruity, like a fresh berry salad or a classic peach crumble tart, or maybe a lighter option like a dreamy chocolate mousse to offer variety in chocolate textures.
Your Mini Chocolate Caramel Cheesecake Questions Answered (FAQ)
What kind of chocolate cookies should I use for the crust?
Chocolate sandwich cookies (like Oreos) are ideal because the cream filling helps create a well-bound crust when mixed with butter. You can use generic versions or other similar chocolate cookies, but ensure they have a bit of fat content to help the crust set.
Can I skip the water bath?
While technically possible, the water bath is the “secret” ingredient to these being “Guaranteed Set!” It provides consistent, gentle heat and steam, which is crucial for baking cheesecake without cracks and ensuring that smooth, creamy texture. Skipping it increases the risk of an unevenly baked cheesecake, potential cracks, or a less creamy result. I highly recommend using it!
My cheesecakes cracked! What went wrong?
Cracking usually happens due to sudden temperature changes or overmixing. Make sure your ingredients were at room temperature, avoid overbeating the batter (especially after adding eggs), and follow the slow cooling steps – first in the turned-off oven in the water bath, then at room temperature before chilling.
How do I store these mini cheesecakes?
Store them in an airtight container in the refrigerator. They will keep well for 3 to 4 days. For best texture, add the caramel and chocolate drizzles and chopped chunks just before serving.
Can I freeze mini cheesecakes?
Yes! Mini cheesecakes freeze quite well. Let them cool completely, then freeze them solid uncovered on a baking sheet. Once frozen, wrap each one individually in plastic wrap, then place them in an airtight freezer-safe container or bag. Freeze for up to 1-2 months. Thaw them overnight in the refrigerator before adding toppings and serving.
Enjoy Your Homemade Mini Chocolate Caramel Cheesecakes!
See? Making beautiful, perfectly set cheesecake doesn’t have to be scary! With the magic of the water bath and a little patience, you can create these utterly decadent Mini Chocolate Caramel Cheesecakes right in your own kitchen. They’re rich, creamy, chocolatey, caramel-y, and guaranteed to disappear fast.
Give this recipe a try and let me know how they turn out! Share your photos and tell me your favorite part in the comments below. Happy baking!
Mini Chocolate Caramel Cheesecakes
Course: DessertCuisine: AmericanDifficulty: medium550
kcalUnlock the secret to perfect Mini Chocolate Caramel Cheesecakes that always set! Get our guaranteed recipe for creamy, decadent individual treats.
Ingredients
1 and 12 cups chocolate cookie crumbs (from about 20 chocolate sandwich cookies)
14 cup melted butter
16 ounces cream cheese softened
12 cup granulated sugar
2 large eggs
1 teaspoon vanilla extract
12 cup chopped chocolate cookies (from about 6 chocolate sandwich cookies)
Chocolate sauce for drizzling
Caramel sauce for drizzling
Chopped chocolate chunks for topping
Directions
- Preheat oven to 325 degrees F (160 degrees C). Line a 12-cup muffin tin with paper liners.
- In a small bowl, combine cookie crumbs and melted butter. Press about 1 to 2 tablespoons of the mixture firmly into the bottom of each lined muffin cup to form the crust.
- In a large bowl, beat softened cream cheese and granulated sugar with an electric mixer on medium speed until smooth and creamy. Scrape down the sides of the bowl.
- Add eggs one at a time, beating on low speed just until combined after each addition. Do not overmix. Stir in the vanilla extract. Gently fold in the chopped chocolate cookies.
- Pour the cheesecake batter evenly over the crusts in the muffin cups, filling each about three-quarters full.
- This is the key step for a guaranteed set: Place the filled muffin tin inside a larger baking pan (like a roasting pan or a 9×13 inch pan). Carefully pour hot water into the larger pan around the muffin tin, until the water comes about halfway up the sides of the muffin tin. This water bath provides even heat and steam, preventing cracks and ensuring a creamy, perfectly set cheesecake.
- Carefully place the nested pans into the preheated oven. Bake for 25 to 30 minutes, or until the centers are mostly set but still look slightly soft. The edges should look firm.
- Turn off the oven and prop the door open slightly (you can use a wooden spoon). Let the cheesecakes cool in the water bath inside the oven for about 30 minutes. This slow cooling also helps prevent cracking and ensures a smooth texture.
- Carefully remove the muffin tin from the water bath and place it on a wire rack. Let the cheesecakes cool completely at room temperature.
- Once cool, transfer the muffin tin to the refrigerator and chill the cheesecakes for at least 2 hours, or until fully set.
- To serve, remove the cheesecakes from the muffin tin. Drizzle with chocolate sauce and caramel sauce, then top generously with chopped chocolate chunks.


