There’s nothing quite like the charm of mini bundt cakes. Their perfect little rings, ready to be drizzled and devoured, make them ideal for parties, gifts, or just a special treat for yourself. But let’s be honest, pulling those beauties out of the pan can be a moment of truth. Will they pop out cleanly, displaying their intricate design, or will they crumble, leaving half their deliciousness stuck to the metal? If you’ve ever faced the heartbreak of a stuck mini orange bundt cake, you know the frustration!
I’ve been there more times than I’d like to admit. Beautiful batters, promising scents filling the kitchen, only to end in a sticky, broken mess. But after much trial and error, I finally cracked the code. There’s a simple, foolproof method for preparing your mini bundt pan that guarantees a clean release every single time. This recipe for Mini Orange Bundt Cakes not only delivers a moist, flavorful cake bursting with citrus brightness but also shares the pan-prepping secret that will change your mini baking game forever. Get ready for picture-perfect results!
Why These Mini Orange Bundt Cakes Are a Keeper
Beyond the satisfaction of a perfectly released cake, these mini orange bundt cakes offer a lot to love:
- Foolproof Non-Stick: Seriously, the greasing and flouring technique detailed below is a game-changer for mini bundt pans. No more lost cake pieces!
- Bright Citrus Flavor: Fresh orange juice and zest infuse these cakes with a vibrant, zesty taste that’s incredibly refreshing.
- Perfectly Portioned: Mini cakes are ideal for individual servings, making them great for entertaining or portion control (if you can resist having just one!).
- Tender, Moist Crumb: The addition of sour cream or yogurt ensures these cakes are wonderfully soft and moist.
- Quick to Make: With a total time of just 45 minutes, you can have these delightful treats ready relatively quickly.
Gathering Your Ingredients for These Bright Bites
Creating these delightful mini orange bundt cakes starts with assembling a few simple ingredients. Each component plays a crucial role in building that perfect texture and vibrant flavor. Let’s break down what you’ll need for the cakes, the glaze, and the delightful topping.
For the cake batter, we rely on baking staples with a few key additions for moisture and citrus punch. All-purpose flour provides the structure, while a combination of baking powder and baking soda gives the cakes lift and contributes to a tender crumb. A touch of salt balances the sweetness.
For richness and sweetness, you’ll cream together softened unsalted butter and granulated sugar until light and fluffy. Large eggs add structure and bind everything together, and vanilla extract provides that classic, comforting flavor base.
Now for the secret to incredible moisture and a slight tang that complements the orange beautifully: sour cream or plain yogurt. And of course, the star flavor comes from fresh orange juice and the fragrant zest of one orange. Using fresh zest is key here, as it contains the potent oils that give you that true, bright citrus aroma and taste.
Here is the complete list of ingredients for your convenience:
- For the cakes:
- 1 and 1/2 cups all purpose flour
- 1 teaspoon baking powder
- 1/4 teaspoon baking soda
- 1/4 teaspoon salt
- 1/2 cup unsalted butter softened
- 1 cup granulated sugar
- 2 large eggs
- 1 teaspoon vanilla extract
- 1/2 cup sour cream or plain yogurt
- 1/4 cup fresh orange juice
- Zest of 1 orange
- For the glaze:
- 1 cup powdered sugar
- 2 to 3 tablespoons milk or orange juice
- For the topping:
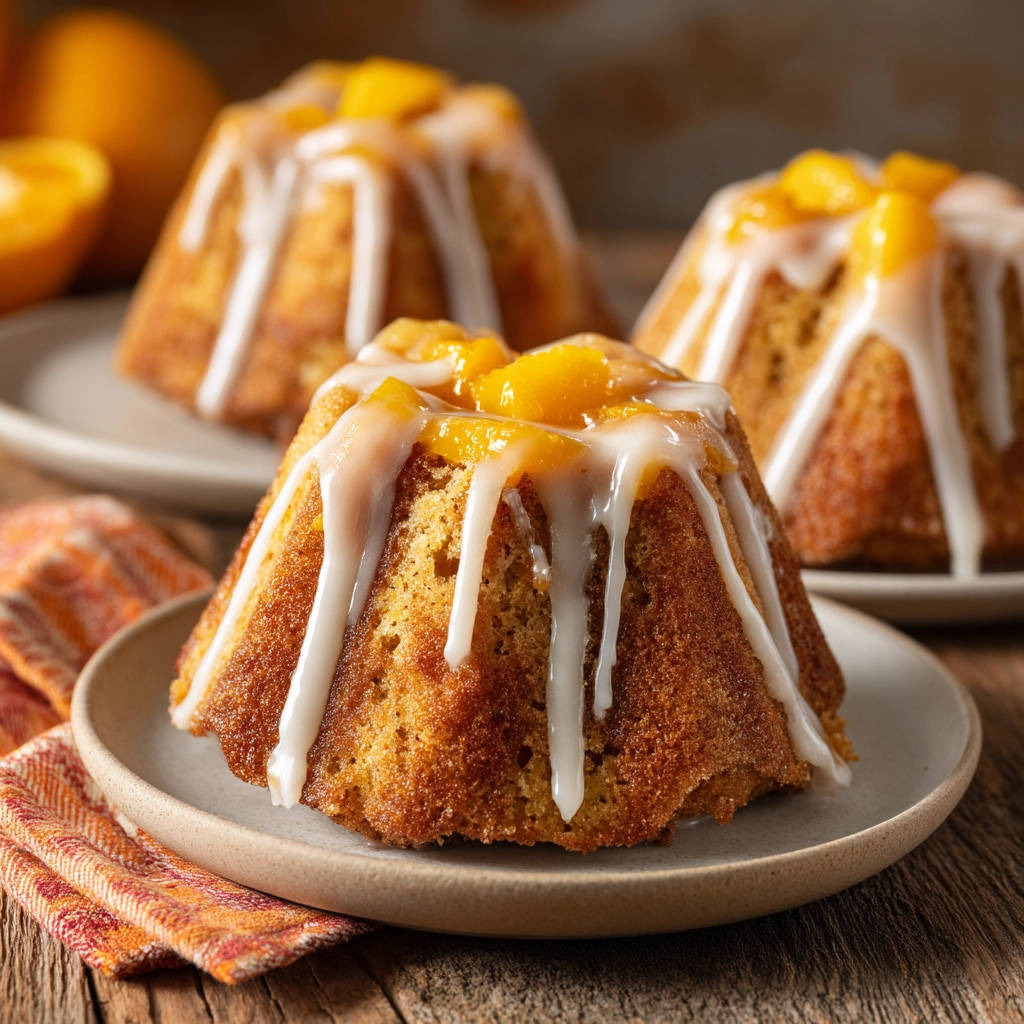
- 1/2 cup finely diced peeled peaches or mandarin oranges
The simple glaze requires just powdered sugar and a liquid – you can use milk for a classic vanilla glaze or more orange juice to intensify the citrus flavor. Finally, a fresh fruit topping adds a lovely burst of flavor and color. Diced peeled peaches or mandarin oranges are suggested, both pairing wonderfully with the orange cake base.
Crafting Your Mini Orange Bundt Cakes: Step-by-Step Guide
Now for the fun part – bringing these ingredients together to create beautiful, non-stick mini orange bundt cakes! Follow these steps carefully, paying special attention to the pan preparation, and you’ll be rewarded with perfect results.
- Prepare for Baking Success: Preheat your oven to 350 degrees F (175 degrees C). Getting your oven to the correct temperature is crucial for even baking. But before you even think about the batter, the most critical step for preventing sticking begins with your pan. You’ll need a good quality nonstick mini bundt pan.
- The Foolproof Pan Prep: This is the secret! Take about 1 tablespoon of softened butter. Using a pastry brush or even your clean fingers, apply a generous, even layer of butter over every single surface of the mini bundt cavities. Don’t be shy! Make absolutely sure you get into all the nooks, crannies, and intricate designs of the mold. Next, sprinkle about 2 tablespoons of all-purpose flour into the buttered cavities. Hold the pan over your sink or a trash can and shake it, tapping gently, to coat the butter thoroughly with the flour. The flour should cling to the butter, creating a visible white layer. Shake out any excess flour – you want a thin, even coating, not clumps. This butter and flour combination creates a barrier that guarantees the cakes will release effortlessly.
- Combine Dry Ingredients: In a medium bowl, whisk together your dry ingredients: the all-purpose flour, baking powder, baking soda, and salt. Whisking them together ensures the leaveners and salt are evenly distributed throughout the mixture, which is important for consistent rise and flavor.
- Cream Butter and Sugar: In a large bowl, using an electric mixer (handheld or stand mixer), cream together the softened butter and granulated sugar until the mixture is light in color and fluffy in texture. This step incorporates air into the batter, which helps the cakes rise and contributes to a tender crumb.
- Add Eggs and Vanilla: Beat in the eggs one at a time, mixing well after each addition until the egg is fully incorporated. Adding eggs one at a time helps the batter emulsify properly, preventing it from separating. Stir in the vanilla extract.
- Whisk Wet Ingredients: In a small separate bowl, whisk together the sour cream or yogurt, fresh orange juice, and orange zest until well combined.
- Combine Wet and Dry: Now, add the dry ingredients to the butter mixture alternately with the wet ingredients (the sour cream/orange juice mixture). Start and end with the dry ingredients. Add about a third of the dry ingredients, mix just until streaks disappear, then add half of the wet ingredients, mix, then another third of the dry, the remaining wet, and finally the last third of the dry. Mix only until everything is just combined and no dry pockets remain. Be careful not to overmix! Overmixing develops the gluten in the flour, which can lead to tough, dense cakes.
- Fill the Molds: Divide the batter evenly among the prepared mini bundt cavities. Fill each cavity approximately two-thirds full. This allows room for the cakes to rise during baking without overflowing the molds.
- Bake: Bake in the preheated oven for 20 to 25 minutes. The baking time can vary slightly depending on your oven and the specific pan. You’ll know the cakes are done when a wooden skewer or toothpick inserted into the center of a cake comes out clean, with no wet batter attached (a few moist crumbs are okay).
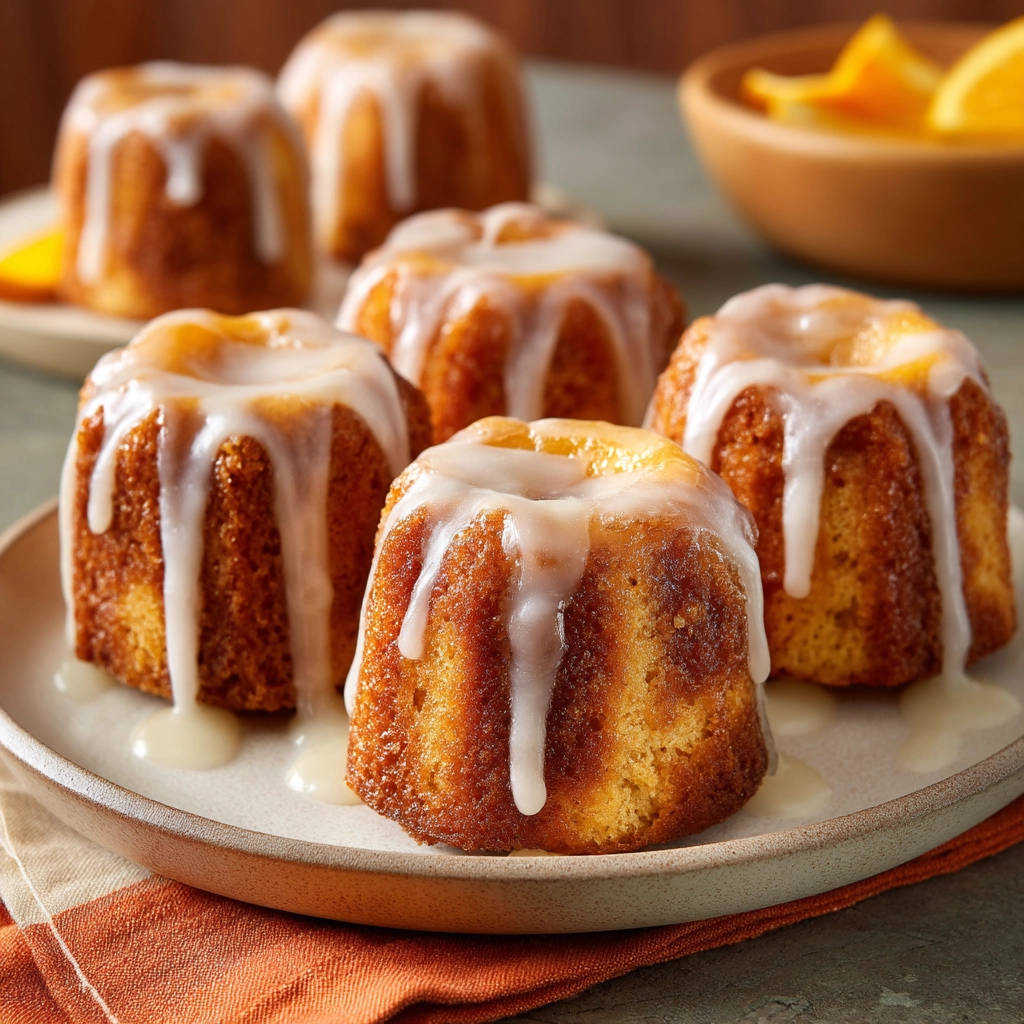
- Cooling is Key: Once baked, remove the pan from the oven and let the cakes cool in the pan for 10 minutes. This cooling time in the pan is important; it allows the cakes to set slightly and firm up before you attempt to remove them. After 10 minutes, carefully invert the pan onto a wire rack. The cakes should release easily thanks to your careful greasing and flouring! If one is a little stubborn, a gentle tap on the top of the pan might help. Let the cakes cool completely on the wire rack before proceeding with the glaze.
- Prepare the Glaze: While the cakes cool, make the glaze. In a small bowl, whisk together the powdered sugar and 2 tablespoons of your chosen liquid (milk or orange juice) until smooth. If the glaze is too thick to drizzle easily, add more liquid a teaspoon at a time, whisking after each addition, until you reach your desired drizzling consistency. It should be pourable but not watery.
- Glaze and Top: Once the mini bundt cakes are completely cool to the touch, drizzle the glaze over the tops, allowing it to run down the sides and collect in the center ring. This creates that classic bundt cake look. Before the glaze has a chance to set and harden completely, top each cake with a spoonful of the finely diced peeled peaches or mandarin oranges. The fruit adds a beautiful finishing touch and extra burst of freshness.
Tips for Baking Perfectly Moist Mini Orange Bundt Cakes
Achieving consistently delicious results with mini bundt cakes is easy once you know a few tricks. Here are some pro tips to ensure your mini orange bundt cakes turn out perfectly every time:
- Room Temperature Ingredients: Ensure your butter, eggs, and sour cream (or yogurt) are at room temperature before you start mixing. Room temperature ingredients emulsify better, leading to a smoother batter and a finer, more tender crumb in your baked goods. Remember, softened butter should yield slightly to the touch but not be greasy or melted.
- Measure Flour Correctly: To avoid dense cakes, measure your flour accurately. Spoon the flour into your measuring cup and level it off with a straight edge (like the back of a knife). Don’t scoop directly from the bag, as this packs the flour down and you’ll end up with too much.
- Don’t Skip the Zest: Orange zest holds the majority of the orange flavor. Make sure to zest only the brightly colored part of the peel, avoiding the bitter white pith underneath.
- Use a Good Pan: While the butter and flour technique is crucial, starting with a good quality nonstick mini bundt pan designed for easy release certainly helps! Over time, even nonstick coatings can wear, so proper care is important.
- Cooling is Non-Negotiable: Allowing the cakes to cool in the pan for the specified 10 minutes before inverting gives their delicate structure time to set. Trying to remove them too early is a common cause of breakage.
- Cool Completely Before Glazing: Glazing warm cakes will cause the glaze to melt and slide off. Wait until the cakes are entirely cool on the wire rack for the glaze to set up properly and look beautiful.
- Experiment with Toppings: While peaches and mandarin oranges are lovely, feel free to experiment with other fruit like fresh berries, diced mango, or even toasted coconut flakes for a different twist.
What to Serve With Your Mini Orange Bundt Cakes
These mini orange bundt cakes are truly delightful on their own, a perfect little treat. However, they also pair wonderfully with a few simple additions. A cup of tea or coffee makes them an ideal afternoon snack. For a slightly more elaborate dessert, you could serve them alongside a scoop of vanilla ice cream or a dollop of whipped cream. The bright citrus flavor also makes them a refreshing end to a meal.
If you’re serving these for a special occasion or brunch, consider pairing them with other sweet treats from the site, like our Mini Cheesecakes or perhaps some Bakery Style Blueberry Muffins for a variety of mini baked goods.
Your Mini Orange Bundt Cake Questions Answered (FAQ)
Got questions about making these mini orange bundt cakes? Here are some answers to common queries that might pop up:
Why is the butter and flour method so important for mini bundt pans?
Mini bundt pans have lots of intricate details and tight corners. While nonstick coatings help, these small spaces are prone to trapping cake batter as it expands and bakes. A thick, even layer of softened butter followed by a thorough coating of flour creates a solid barrier in every tiny crevice. The flour adheres to the butter and provides a dry surface that the cake batter won’t stick to as it pulls away from the edges while cooling. It’s simply the most reliable method I’ve found for achieving a clean release from these detailed molds.
Can I use bottled orange juice instead of fresh?
You can use bottled orange juice in a pinch, but fresh orange juice will give you a much brighter, more vibrant citrus flavor. Bottled juices can sometimes have a slightly muted or even processed taste compared to fresh. If you do use bottled, make sure it’s 100% orange juice with no added sugar or pulp, if possible.
What if I don’t have sour cream or yogurt?
Sour cream and plain yogurt are excellent for adding moisture, richness, and a tender texture due to their fat content and acidity. While you might find some recipes suggest buttermilk as a substitute, the consistency difference here might affect the batter. It’s best to stick to either sour cream or plain, full-fat yogurt for the best results in this specific recipe.
Can I bake this batter as a regular-sized bundt cake or muffins?
Yes, you could likely adapt this batter for a standard bundt cake or muffins, but you would need to adjust the baking time and potentially the ingredient quantities. A standard bundt cake would require a longer baking time (likely 45-60 minutes or more), and muffins would bake much faster (closer to 18-22 minutes). Always test for doneness with a skewer. You might also need to scale the recipe up for a full-size bundt cake.
How should I store these mini bundt cakes?
Once the glaze is set, store the mini orange bundt cakes in an airtight container at room temperature for up to 2-3 days. If your home is very warm or humid, or if you’ve used fresh fruit that might spoil quickly, you can refrigerate them, but this can sometimes slightly dry out cakes. Let them come back to room temperature before serving for the best texture.
Can I freeze these cakes?
Yes, you can freeze the baked and cooled mini bundt cakes before glazing and adding the topping. Wrap each cooled cake tightly in plastic wrap, then place them in a freezer-safe bag or container. They can be frozen for up to 2-3 months. Thaw them overnight in the refrigerator, then bring to room temperature before glazing and adding the topping.
Is the glaze necessary?
The glaze adds sweetness and visual appeal, but if you prefer a less sweet cake, you can definitely omit it. The cakes are moist and flavorful enough to enjoy on their own.
Enjoy Your Homemade Mini Orange Bundt Cakes!
There you have it – a recipe for mini orange bundt cakes that are not only delicious but also guaranteed to release cleanly from the pan, thanks to that simple but essential prepping step. The bright citrus flavor is perfect for lifting your spirits any time of year. Whether you’re baking for a special occasion or just because, these mini cakes are sure to bring a smile to your face (and your taste buds!).
Give this recipe a try and say goodbye to stuck cakes forever! Let me know in the comments below how they turned out for you. Happy baking!
Mini Orange Bundt Cakes

Ingredients
- For the cakes:
- 1 and 1/2 cups all purpose flour
- 1 teaspoon baking powder
- 1/4 teaspoon baking soda
- 1/4 teaspoon salt
- 1/2 cup unsalted butter softened
- 1 cup granulated sugar
- 2 large eggs
- 1 teaspoon vanilla extract
- 1/2 cup sour cream or plain yogurt
- 1/4 cup fresh orange juice
- Zest of 1 orange
- For the glaze:
- 1 cup powdered sugar
- 2 to 3 tablespoons milk or orange juice
- For the topping:
- 1/2 cup finely diced peeled peaches or mandarin oranges
Directions
- Preheat your oven to 350 degrees F (175 degrees C). The key to preventing sticking starts before you even grease the pan. Use a good quality nonstick mini bundt pan. Take about 1 tablespoon of softened butter and, using a pastry brush or your fingers, spread a generous, even layer over every single surface of the mini bundt cavities. Make sure you get into all the crevices.
- Next, sprinkle about 2 tablespoons of all purpose flour into the buttered cavities. Shake the pan over your sink or trash can, tapping it gently, to coat the butter thoroughly with flour and shake out any excess. This butter and flour coating is your foolproof barrier against sticking.
- In a medium bowl, whisk together the flour, baking powder, baking soda, and salt.
- In a large bowl, cream together the softened butter and granulated sugar until light and fluffy.
- Beat in the eggs one at a time, then stir in the vanilla extract.
- In a small bowl, whisk together the sour cream or yogurt, orange juice, and orange zest.
- Add the dry ingredients to the butter mixture alternately with the wet ingredients, beginning and ending with the dry ingredients. Mix until just combined, being careful not to overmix.
- Divide the batter evenly among the prepared mini bundt cavities, filling each about two thirds full.
- Bake for 20 to 25 minutes, or until a wooden skewer inserted into the center of a cake comes out clean.
- Let the cakes cool in the pan for 10 minutes. This cooling time is important. Then, carefully invert the pan onto a wire rack. The cakes should release easily thanks to your careful greasing and flouring. Let the cakes cool completely on the wire rack.
- While the cakes cool, prepare the glaze. Whisk together the powdered sugar and milk or orange juice until smooth. Add more liquid a teaspoon at a time if needed to reach your desired drizzling consistency.
- Once the cakes are completely cool, drizzle the glaze over the tops, allowing it to run down the sides.
- Top each cake with a spoonful of the diced peaches or mandarin oranges before the glaze sets.