Have you ever spent time carefully crafting adorable mini treats, only to face the heartbreak of them sticking, crumbling, or leaving half their goodness behind when you try to remove them from the pan? It’s incredibly frustrating, right? I’ve been there more times than I’d like to admit! But after much trial and error, I finally discovered the simple, game-changing secret to making these delightful mini peanut butter bites slide out of the tin perfectly clean, every single time. You won’t believe how effortless it is to achieve that pristine finish with this recipe!
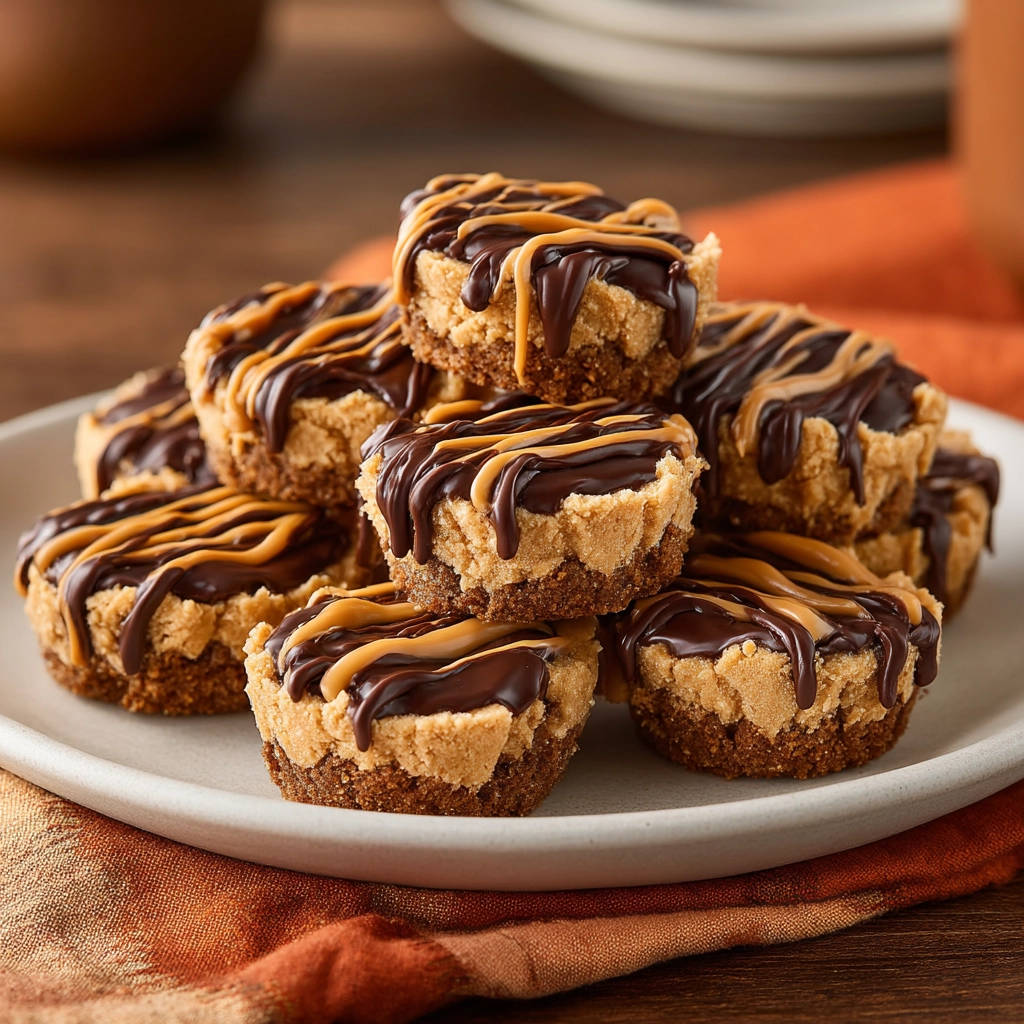
These no-bake peanut butter bites are little squares (or rather, circles!) of heaven, featuring a classic graham cracker base, a creamy, sweet peanut butter filling, and a smooth chocolate topping. They’re quick to prepare, require zero oven time, and are guaranteed to be a hit with kids and adults alike. Plus, with my foolproof method, you can forget about frustrating messes and enjoy your beautifully formed treats!
Why You’ll Love These Mini Peanut Butter Bites
Beyond their irresistible flavor combination (hello, peanut butter and chocolate!), these little bites offer a host of reasons to become your new go-to no-bake treat:
- Effortlessly Easy: No baking required, just simple mixing and chilling. Perfect for hot days or when you want dessert without turning on the oven.
- Quick Prep Time: You can have these assembled in about 20 minutes, leaving you plenty of time to chill them before indulging.
- Guaranteed Clean Release: The simple trick shared in the steps ensures each bite lifts out of the tin without sticking or breaking.
- Crowd-Pleasing: Who can resist the classic pairing of peanut butter and chocolate in a perfectly portioned bite?
- Scalable: Easily double or triple the recipe for larger gatherings.
- Adorable Presentation: Their mini size makes them perfect for dessert platters, parties, or just a cute snack.
Gathering Your Ingredients for Perfect Mini Peanut Butter Bites
These delightful no-bake treats rely on a handful of simple pantry staples to create their layered texture and classic flavor. Each component plays a vital role, from the sturdy base to the sweet, creamy filling and the smooth, decadent topping.
Here’s what you’ll need to gather from your kitchen:
- Graham Cracker Crumbs: You’ll need 1 and 1/2 cups. You can buy pre-made crumbs for convenience or make your own by pulsing whole graham crackers in a food processor or crushing them in a bag with a rolling pin until they resemble fine sand. They provide the perfect crunchy base.
- Melted Unsalted Butter: Just 1/4 cup is needed. Melting the butter helps bind the graham cracker crumbs together, creating a firm, pressable base that holds its shape once chilled. Unsalted butter gives you control over the overall sweetness.
- Creamy Peanut Butter: You’ll use a generous 1 and 1/2 cups for the rich, creamy filling, plus an additional 1/4 cup if you plan on adding an extra drizzle on top. For best results and consistent texture in the filling, a conventional, no-stir creamy peanut butter works wonderfully.
- Powdered Sugar: Only 1/2 cup is required. This fine sugar blends seamlessly with the peanut butter, creating a smooth, sweet, and firm filling without any graininess.
- Semi-Sweet Chocolate Chips: One cup is needed for the luscious chocolate topping. Semi-sweet offers a nice balance that complements the peanut butter without being overly bitter or sweet.
- Coconut Oil or Shortening: A single tablespoon helps the chocolate melt smoothly and set with a nice snap. It makes the chocolate coating easier to drizzle and gives it a slightly softer texture when bitten into compared to just melted chocolate chips.
- Extra Creamy Peanut Butter for Drizzling (Optional): About 1/4 cup, melted, adds an extra layer of peanut butter flavor and makes for a beautiful visual garnish.
Having all your ingredients measured out and ready to go (mise en place!) will make the assembly process incredibly fast and smooth.

Crafting Your Bites: Step-by-Step to That Clean Release
The magic of these mini peanut butter bites isn’t just in their taste, but in how effortlessly they come out of the tin. Follow these steps carefully, paying special attention to the chilling times and the initial lining, and you’ll be rewarded with perfect, clean-release treats every time!
-
Prepare Your Tin: The Key to Clean Release! The absolute secret weapon for getting these bites out cleanly is simple: liners. Line a mini muffin tin with mini paper or foil liners. Don’t skip this step! It creates a barrier that prevents the base or filling from sticking to the pan itself, guaranteeing they lift right out later.
-
Mix the Crust Ingredients: Grab a medium-sized bowl. Add the graham cracker crumbs and the melted unsalted butter. Stir them together thoroughly. Keep mixing until all the crumbs are moistened by the butter and the mixture looks and feels like wet sand. This ensures the base will hold together.
-
Form the Bases: Now, divide the crumb and butter mixture evenly among the lined mini muffin cups. This recipe makes about 24 bites, so aim for a small amount in the bottom of each liner. Once divided, use a small spoon, the back of a measuring spoon, or even your clean fingers to press the crumbs down firmly into the bottom of each liner. Pressing firmly is crucial! It compacts the mixture and forms a solid foundation that won’t crumble when you handle the finished bite.
-
Prepare the Peanut Butter Filling: In a separate bowl, combine the generous 1 and 1/2 cups of creamy peanut butter with the 1/2 cup of powdered sugar. Stir or mix this together until the two ingredients are completely combined and the mixture is smooth and consistent. A rubber spatula works well here to scrape the sides and ensure everything is incorporated.
-
Add the Filling: Spoon the creamy peanut butter mixture over the pressed graham cracker bases in each lined cup. Fill each cup almost all the way to the top, leaving just a tiny bit of space for the chocolate topping. Once the filling is in, gently press down on the tops with a spoon or your finger just enough to make the surface relatively smooth. This helps create a nice, flat layer for the chocolate.
-
Chill the Bites (First Chill): This is another non-negotiable step for proper structure. Place the entire mini muffin tin into the refrigerator. Let it chill for at least 30 minutes. This initial chilling time is essential for both the graham cracker base and the peanut butter filling to firm up and set properly. Without this step, they would be too soft and messy when you add the chocolate.
-
Melt the Chocolate Topping: While your bites are getting cold and firm in the fridge, prepare the chocolate layer. Get a microwave-safe bowl and add the semi-sweet chocolate chips and the coconut oil or shortening. Microwave the mixture in short intervals – think 30 seconds at a time. After each 30-second burst, take the bowl out and stir the chocolate thoroughly. Continue microwaving and stirring until the chocolate is completely smooth and melted with no lumps. Be very careful not to overheat the chocolate, as it can seize or burn.
-
Add the Chocolate Topping: Take the chilled muffin tin out of the refrigerator. Using a spoon or a piping bag with a small tip (or even just snipping the corner off a plastic baggie), drizzle or spoon the smooth melted chocolate over the top of each firm peanut butter bite, covering the peanut butter layer completely.
-
Add Optional Peanut Butter Drizzle: If you’re adding the extra peanut butter drizzle for decoration, now’s the time. In a small microwave-safe bowl, melt the additional 1/4 cup of creamy peanut butter until it’s slightly runny. This usually takes about 30 seconds in the microwave. Use a spoon to artistically drizzle this melted peanut butter in lines or swirls over the set or still-wet chocolate layer. This adds visual appeal and another layer of classic flavor.
-
Chill Again (Final Set): Return the muffin tin with the topped bites back to the refrigerator. This final chilling step is crucial for the chocolate to set completely and for the entire bite to firm up adequately. Leave them in for at least 1 hour, or until the chocolate is solid and firm to the touch. This ensures the bites are structurally sound and ready for their clean release.
-
The Guaranteed Clean Release! Once the bites are fully chilled and the chocolate is hard, take the tin out. Now for the satisfying part! Simply lift each bite out of its liner. Because you lined the tin initially and allowed sufficient chilling time, they should slide out effortlessly and cleanly, leaving no mess behind. Store these completed mini peanut butter treats in an airtight container in the refrigerator to keep them fresh and firm.
Following these steps, especially the lining and chilling, will guarantee you perfect, easy-to-remove mini peanut butter bites every single time. It’s truly a game-changer for anyone who loves making small, portioned treats!
Tips for Perfect Mini Peanut Butter Bites Every Time
Making these delightful little treats is straightforward, but a few simple tips can elevate your results and ensure they turn out perfectly every single time:
- Choosing Your Peanut Butter: While natural peanut butter is delicious, the oil separation can sometimes make the filling less stable in a no-bake recipe like this. For the creamiest, most consistent filling that sets well, a conventional, hydrogenated creamy peanut butter is often the most reliable choice.
- Don’t Skimp on Chilling: I know it’s tempting to rush, but the chilling steps are non-negotiable for that clean release and the proper structure of the bites. Allow the full recommended time for both the base/filling and the final chocolate setting.
- Melting Chocolate Safely: Microwaving chocolate requires patience. Use 30-second intervals and stir diligently between each one. Chocolate holds its shape even when melted, so stirring is key to seeing its true consistency. Overheating will cause it to seize into a unusable, lumpy mess.
- Coconut Oil vs. Shortening: Both work to help the chocolate melt smoothly and set with a slight softness. Coconut oil is a popular choice, but shortening is also effective and neutral in flavor. Choose whichever you have on hand.
- Packing the Base: Really take a moment to press that graham cracker base down firmly. A well-compacted base is less likely to crumble when you remove the bite from the liner.
Serving & Storing Your Mini Peanut Butter Bites
These mini peanut butter bites are perfect served straight from the refrigerator. Arrange them on a small platter for parties – they’re just the right size for grabbing! Their portability also makes them great for lunchboxes or picnics (as long as they stay cool).
Store any leftover bites in an airtight container in the refrigerator. They will keep well for up to a week. For longer storage, you can freeze them in a single layer on a baking sheet until firm, then transfer them to a freezer-safe container or bag. Thaw them in the refrigerator before enjoying.
If you’re looking for other easy no-bake desserts, you might enjoy our Easy No-Bake Chocolate Cream Loaf or perhaps some festive Classic Chewy Treats!
Your Mini Peanut Butter Bites Questions Answered (FAQ)
Got questions about making these simple yet satisfying mini peanut butter treats? Here are some answers to common queries:
Can I use crunchy peanut butter instead of creamy?
While you can technically use crunchy peanut butter, the texture of the filling will be quite different. It won’t be as smooth and may not hold together quite as firmly. For the intended creamy filling, I recommend sticking to creamy peanut butter.
Can I use a different type of chocolate?
Absolutely! Semi-sweet chocolate chips provide a classic flavor, but you could easily use milk chocolate chips for a sweeter bite or dark chocolate chips for a richer, less sweet topping. The melting method with coconut oil or shortening remains the same.
Do I have to use liners? Can I just grease the pan?
While greasing might help to some extent, using liners is the real key to the guaranteed clean release this recipe promises. Without liners, the graham cracker base and peanut butter filling are much more likely to stick to the metal tin, leading to frustrating crumbling when you try to remove them. Trust me on this one – use the liners!
How many mini bites does this recipe make?
This recipe is designed to make approximately 24 mini peanut butter bites, using a standard 24-cup mini muffin tin.
How long do these last in the refrigerator?
When stored in an airtight container in the refrigerator, these bites will stay fresh and firm for up to a week.
Can I freeze these mini peanut butter bites?
Yes, they freeze beautifully! Place the set bites in a single layer on a small baking sheet or plate and freeze until solid. Then transfer them to a freezer-safe zip-top bag or container. They should last in the freezer for 1-2 months. Thaw them in the refrigerator for a few hours before serving.
Enjoy Your Homemade Mini Peanut Butter Bites!
There you have it – a simple, no-bake recipe for incredibly delicious mini peanut butter bites that are guaranteed to come out of the tin perfectly every time. No more crumbling, no more sticking, just pure, unadulterated peanut butter and chocolate bliss in a perfect little package. They are ideal for satisfying a sweet craving, sharing with friends, or adding to a party spread.
Give this recipe a try and experience the magic of the guaranteed clean release for yourself! I’d love to hear how yours turn out. Leave a comment below and let me know what you think, or share a picture of your beautiful bites! Happy treat making!
Mini Peanut Butter Bites

Details
- Prep time: 20 minutes
- Cook time: 0 minutes (chilling time additional)
- Servings: 24 mini bites
Ingredients
- 1 and 1/2 cups graham cracker crumbs
- 1/4 cup melted unsalted butter
- 1 and 1/2 cups creamy peanut butter
- 1/2 cup powdered sugar
- 1 cup semi sweet chocolate chips
- 1 tablespoon coconut oil or shortening
- 1/4 cup creamy peanut butter for drizzling (optional)
Directions
- Line a mini muffin tin with mini paper or foil liners. This is the key step for the guaranteed clean release later.
- In a medium bowl, combine the graham cracker crumbs and melted butter. Stir until well combined and it resembles wet sand.
- Divide the crumb mixture evenly among the lined muffin cups. Use a small spoon or your fingers to press the crumbs firmly down to form the base of each bite. Pressing firmly helps the base hold together.
- In another bowl, mix together the 1 and 1/2 cups creamy peanut butter and the powdered sugar until smooth and well combined.
- Spoon the peanut butter mixture over the crumb bases, filling each cup almost to the top. Gently press down slightly to make the tops somewhat smooth.
- Place the muffin tin in the refrigerator for at least 30 minutes to allow the bases and peanut butter filling to firm up. Chilling is essential for the bites to set properly and release cleanly.
- While the bites are chilling, melt the chocolate chips. In a microwave safe bowl, combine the chocolate chips and coconut oil or shortening. Microwave in 30 second intervals, stirring after each, until completely smooth and melted. Be careful not to overheat the chocolate.
- Remove the muffin tin from the refrigerator. Drizzle the melted chocolate over the top of each peanut butter bite.
- If using, melt the additional 1/4 cup creamy peanut butter in a small microwave safe bowl until slightly runny (about 30 seconds). Use a spoon to drizzle this melted peanut butter over the chocolate layer for decoration.
- Return the muffin tin to the refrigerator for at least 1 hour, or until the chocolate is completely set. The final chilling step is crucial for the bites to be firm enough to lift cleanly out of the liners.
- Once set, simply lift the bites out of the liners. They should slide out easily thanks to the proper lining and chilling technique. Store in an airtight container in the refrigerator.