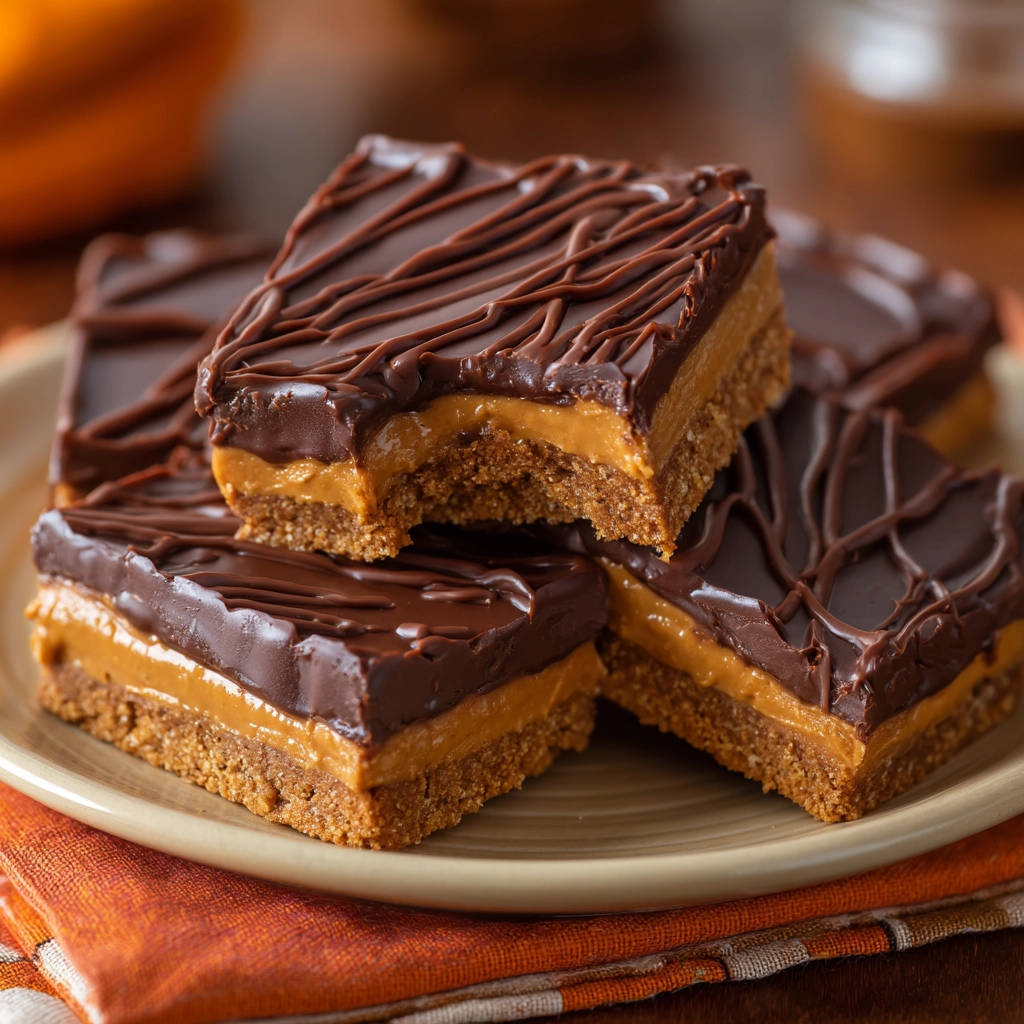
Oh, hello there, fellow dessert lover! Let’s talk about one of life’s simplest, most perfect pairings: peanut butter and chocolate. Seriously, is there anything better? These No-Bake Peanut Butter Chocolate Bars are a classic for a reason – they’re rich, creamy, and satisfy that craving like nothing else. But if you’ve ever made them, you might know the struggle: cutting those beautiful bars into neat, clean squares often turns into a crumbly, chocolate-cracked mess.
For years, I battled this messy reality. My gorgeous bars would look amazing in the pan, but the second I brought the knife down, it was disaster. Layers smearing, chocolate shattering… frustrating! It took me some trial and error, but I finally discovered the simple trick that guarantees picture-perfect, easy clean slices every single time. And trust me, once you know this secret, you’ll be whipping up these chocolate peanut butter treats constantly, just to show off those flawless edges!
Why You’ll Absolutely Adore These Bars
Beyond just being a delicious treat, there are so many reasons these No-Bake Peanut Butter Chocolate Bars deserve a permanent spot in your recipe rotation:
- No Baking Required: Perfect for hot days or when you just don’t want to turn on the oven. Minimal fuss, maximum reward!
- Classic Flavor Combo: Peanut butter and chocolate is a pairing that never goes out of style. It’s nostalgic, comforting, and universally loved.
- Easy to Make: The steps are straightforward, making this a great recipe for beginners or getting the kids involved.
- Make-Ahead Friendly: These bars need chilling time, making them ideal for prepping ahead of parties, potlucks, or just having dessert ready for the week.
- Portable Treat: Once cut, they’re easy to pack for lunches, picnics, or sharing with friends.
- THAT Secret Cutting Trick: Say goodbye to messy bars forever! This method is a game-changer.
If you love easy no-bake desserts, you might also enjoy our Easy No-Bake Chocolate Cream Loaf – another simple stunner!
Gathering Your Ingredients for These No-Bake Delights
One of the beautiful things about these peanut butter chocolate squares is that the ingredients are simple, everyday pantry staples. But understanding the role each one plays is key to achieving that perfect texture and flavor balance.
Here’s what you’ll need, with a little insight into each component:
- Graham Cracker Crumbs: About 1 and 1/2 cups, which is roughly 10-12 full graham cracker sheets processed into fine crumbs. These form the foundational crust. You can buy pre-crushed crumbs or crush your own in a food processor or by placing them in a bag and crushing with a rolling pin. For the best results, make sure they are finely ground so the base holds together well.
- Unsalted Butter (Melted): This 1/2 cup of melted butter acts as the binder for the graham cracker crumbs, giving the base structure and richness. Using unsalted butter allows you to control the overall saltiness of the bars.
- Granulated Sugar (Optional, for Base): A mere 1/4 cup. Adding a little sugar to the base enhances its sweetness and helps it crisp slightly when chilled. It’s optional, so if you prefer a less sweet base, feel free to omit it.
- Creamy Peanut Butter (for Filling): You’ll need 1 full cup for the luscious peanut butter filling. Creamy peanut butter works best here for a smooth, consistent layer. Natural peanut butter can work, but make sure it’s well-stirred to avoid separation and potential oiliness in the filling texture. A standard, no-stir creamy peanut butter is often the easiest and most reliable choice for this recipe.
- Unsalted Butter (Softened, for Filling): Another 1/2 cup, but this time, it needs to be softened. This softened butter is creamed with the peanut butter and powdered sugar to create that wonderfully smooth, rich filling. Softened means it should be pliable enough to easily mix, but not melted.
- Powdered Sugar: A generous 2 cups of powdered sugar provides the bulk and sweetness for the filling, giving it that smooth, almost fudge-like texture that melts in your mouth.
- Vanilla Extract (Optional): Just 1 teaspoon. A touch of vanilla enhances the flavors of both the peanut butter and chocolate, adding a subtle depth to the filling.
- Milk or Semi-Sweet Chocolate Chips: 10 ounces of your favorite chocolate chips create the top layer. Milk chocolate offers a sweeter, classic candy bar taste, while semi-sweet provides a slightly richer, less sugary profile. Choose what you love!
- Vegetable Oil or Shortening: 1 tablespoon is mixed with the chocolate. This is a key ingredient for the chocolate topping! It helps the chocolate melt smoother, gives it a beautiful glossy finish, and crucially, prevents it from becoming too hard and brittle when chilled, which is part of the secret to getting those clean cuts.
- Creamy Peanut Butter (for Swirling): Just 2 tablespoons are needed for the decorative (and delicious!) swirl on top. Microwaving this small amount briefly makes it easy to drizzle and swirl into the melted chocolate.
Crafting Your No-Bake Peanut Butter Chocolate Bars: Step-by-Step to Success
Ready to create some magic? This process is simple, but following these steps carefully will ensure you get perfect layers and, of course, those easy clean slices!
-
Prepare Your Pan with Precision: The very first step sets you up for success! Take an 8×8 inch square baking pan and line it with parchment paper. The crucial part here is to leave a generous overhang of parchment on all four sides. Think of it like little handles! This overhang will allow you to easily lift the entire chilled block of bars out of the pan later, making the cutting process much simpler and less messy.
-
Build the Foundation: The Graham Cracker Base: In a medium-sized mixing bowl, combine your finely ground graham cracker crumbs and the 1/2 cup of melted unsalted butter. If you’re using it, stir in the optional 1/4 cup of granulated sugar now too. Mix everything together until the graham cracker crumbs are uniformly moistened by the butter. The mixture should resemble wet sand – you should be able to clump it together slightly in your hand.
-
Press it Down Firmly: Pour the moist crumb mixture into the prepared 8×8 pan. Now, for a step that truly helps with clean cutting later: press the mixture down FIRMLY and evenly across the bottom of the pan. Don’t be shy! Use the flat bottom of a drinking glass, a small measuring cup, or even your clean hand covered with plastic wrap. A compact, solid base is less likely to crumble when you slice, providing a sturdy foundation for the other layers.
-
Whip Up the Creamy Peanut Butter Filling: Grab a separate medium bowl. Beat together the 1 cup of creamy peanut butter and the 1/2 cup of softened unsalted butter. You want to beat this until the mixture is smooth and wonderfully creamy. Now, gradually add the 2 cups of powdered sugar. Add it about a cup at a time, mixing well after each addition until it’s fully incorporated and the filling is completely smooth and lump-free. If you’re using it, stir in the 1 teaspoon of optional vanilla extract for that extra layer of flavor. The consistency should be thick but spreadable.
-
Layer on the Peanut Butter: Carefully dollop spoonfuls of the creamy peanut butter filling over the firmly pressed graham cracker base in the pan. Use an offset spatula or the back of a spoon to gently spread the filling evenly from edge to edge. Try to create a smooth, uniform layer, distributing the peanut butter mixture without disturbing the base too much. An even layer ensures each bar has the perfect ratio of base to filling.
-
Melt the Chocolate Topping: Get a microwave-safe bowl ready and combine the 10 ounces of chocolate chips and the 1 tablespoon of vegetable oil or shortening. Melting chocolate requires patience and gentle heat. Microwave the mixture on 50 percent power, using short 30-second bursts. After each interval, stop and stir thoroughly, even if the chocolate doesn’t look melted yet – the residual heat will continue the process. Keep microwaving and stirring until the chocolate is completely melted and looks smooth and glossy. Be very careful not to overheat the chocolate, as it can seize and become unusable. The added oil or shortening helps achieve that beautiful shine and makes the chocolate layer easier to cut later.
-
Pour the Chocolate Layer: Once your chocolate topping is perfectly melted and smooth, pour it carefully and evenly over the peanut butter layer in the pan. Use a spatula or the back of a spoon to spread it right up to the edges, creating a smooth, even coat. This will be your beautiful, glossy top layer!
-
Add the Peanut Butter Swirl (Optional, but Pretty!): Take the 2 tablespoons of creamy peanut butter for swirling. Place it in a very small microwave-safe bowl. Microwave it for just 15-20 seconds – you just want it slightly warmed and runny enough to drizzle easily. Use a spoon to drizzle small amounts of this warmed peanut butter haphazardly over the melted chocolate layer. Then, take a toothpick or a thin knife and gently swirl the peanut butter into the chocolate. Don’t over-swirl; a few gentle passes are all you need to create a lovely marbled effect without muddling the colors completely.
-
Chill, Chill, CHILL!: This is arguably the most critical step for achieving easy clean slices! Place the pan of layered bars into the refrigerator. They need to chill for at least 2 hours, or until the entire block is completely firm and set. Rushing this step will lead to a messy, smeared cutting experience. Patience is key here!
-
Master the Art of the Clean Cut (The Secret!): Once the bars are thoroughly chilled and firm, it’s time for the magic trick! Use the parchment paper overhang as handles to carefully lift the entire chilled block out of the pan and place it onto a sturdy cutting board. Now, fill a tall glass or container with very hot water. Grab a sharp knife – a chef’s knife or a large slicing knife works well. Dip the knife blade completely into the hot water. Let it sit for a few seconds to heat up. Carefully wipe the knife blade COMPLETELY dry with a clean towel (water and melted chocolate don’t mix!). Make a single, clean cut through the bars. Repeat this process for EVERY single cut: dip the knife in hot water, wipe it dry, make a cut. This warms the chocolate just enough to slice through cleanly without cracking or dragging the layers. Continue dipping and drying the knife between each cut until you’ve sliced the entire block into your desired bar size (often 16 squares for an 8×8 pan). Store the cut bars in a single layer or with parchment paper between layers in an airtight container in the refrigerator to keep them firm and fresh.
Tips for Perfect Peanut Butter Chocolate Bars Every Time
Want to ensure your No-Bake Peanut Butter Chocolate Bars turn out perfectly? Here are a few extra tips and tricks I’ve learned along the way:
- Use Room Temperature Butter (for Filling): For the peanut butter filling, make sure the 1/2 cup of butter is truly softened, not melted. This allows it to cream properly with the peanut butter and powdered sugar, resulting in the smoothest filling.
- Don’t Skip the Chilling: I know I mentioned it in the steps, but it bears repeating! Sufficient chilling time is absolutely essential for the layers to set and for clean slicing. Minimum two hours, but longer is fine.
- The Hot Knife is Your Friend: Seriously, this is the game-changer. Dipping the knife in hot water and drying it between each cut melts the chocolate surface just enough to glide through smoothly.
- Parchment Paper Overhang: That little bit of extra parchment makes lifting the set bars out of the pan incredibly easy, preventing breakage before you even start cutting.
- Press the Base Firmly: A well-compressed graham cracker base provides a stable foundation and is less likely to crumble when you cut the bars. Use the bottom of a glass or a measuring cup for even pressure.
- Don’t Overheat the Chocolate: Melting chocolate at 50% power in short bursts is key to preventing it from burning or seizing. Stirring between intervals helps it melt using residual heat.
- Storage: Keep these no-bake peanut butter chocolate bars stored in an airtight container in the refrigerator. They’ll stay fresh and firm for up to a week (if they last that long!).
- Flavor Boost: A tiny pinch of salt added to the peanut butter filling can actually enhance the chocolate and peanut butter flavors beautifully, cutting through the sweetness just a touch.
Recipe Variations
While the classic is divine, you can play around with these bars!
- Different Cookies: Instead of graham crackers, try using crushed chocolate cookies or shortbread cookies for the base.
- Chocolate Type: Swap milk or semi-sweet chocolate for dark chocolate for a more intense chocolate flavor. White chocolate could also be used, though it’s sweeter.
- Add-ins: Stir in some mini chocolate chips, chopped peanuts, or even pretzel pieces into the peanut butter filling for added texture and flavor.
Looking for other easy chocolate treats? Check out our Easy Chocolate Clusters or maybe even some Fudgy Brownies!
Your No-Bake Peanut Butter Chocolate Bar Questions Answered (FAQ)
Can I use natural peanut butter?
Yes, you can, but be aware it might affect the texture slightly. Natural peanut butter tends to separate and can be oilier. Make sure it is extremely well-stirred to combine the oil back into the peanut butter before measuring. The filling might be a little softer than if using a conventional no-stir creamy peanut butter.
How long do these bars last?
When stored in an airtight container in the refrigerator, these No-Bake Peanut Butter Chocolate Bars will last for about 5-7 days. Keep them chilled for the best texture and clean slices.
Can I freeze these bars?
Absolutely! Once cut, you can freeze the bars. Place them in a single layer on a baking sheet to freeze until firm, then transfer them to an airtight, freezer-safe container or bag. Layer them with parchment paper in between to prevent sticking. Thaw them in the refrigerator before serving. They should keep well in the freezer for up to 2-3 months.
Why is my chocolate topping cracking when I cut?
This is the most common issue, and it’s usually because the chocolate layer is too hard and brittle when cold. Ensuring the bars are thoroughly chilled is important, but the key is the hot knife trick mentioned in step 10. The small amount of vegetable oil or shortening added to the chocolate also helps prevent it from becoming rock hard.
Do I have to use unsalted butter?
Unsalted butter is recommended so you can control the salt level. However, if you only have salted butter, you can use it. You might omit the optional sugar in the base or add a tiny pinch less salt if you prefer a saltier peanut butter filling. Just be mindful that the overall saltiness will increase slightly.
What size pan should I use?
This recipe is specifically designed for an 8×8 inch square pan. Using a different size pan will change the thickness of the layers and may require adjusting the ingredients or chilling time. A 9×13 pan would result in much thinner bars.
Enjoy Your Homemade Peanut Butter Chocolate Bars!
There you have it – the ultimate guide to making perfect No-Bake Peanut Butter Chocolate Bars with that secret weapon for beautiful, clean slices. These bars are a crowd-pleaser, whether you’re bringing them to a gathering or just keeping a stash in the fridge for when that sweet craving hits. They truly embody everything we love about homemade treats: simple, delicious, and made with love.
Give this recipe a try and experience the joy of cutting those flawless squares! Let me know in the comments below how yours turned out, or if you have any other favorite no-bake tips to share. Happy dessert making!
No-Bake Peanut Butter Chocolate Bars

Ingredients
- 1 and 1/2 cups graham cracker crumbs (about 10-12 full sheets)
- 1/2 cup unsalted butter, melted
- 1/4 cup granulated sugar (optional, for base)
- 1 cup creamy peanut butter
- 1/2 cup unsalted butter, softened
- 2 cups powdered sugar
- 1 teaspoon vanilla extract (optional)
- 10 ounces milk or semi-sweet chocolate chips
- 1 tablespoon vegetable oil or shortening
- 2 tablespoons creamy peanut butter, for swirling
Directions
- Line an 8×8 inch square baking pan with parchment paper, leaving an overhang on the sides to easily lift the bars out later.
- In a medium bowl, combine the graham cracker crumbs, melted butter, and optional granulated sugar. Stir until the crumbs are evenly moistened and resemble wet sand.
- Pour the crumb mixture into the prepared pan. Use the bottom of a glass or a flat measuring cup to press the mixture down firmly and evenly into the bottom of the pan. This firm base helps with cutting later.
- In a separate bowl, beat together the 1 cup of peanut butter and the softened 1/2 cup butter until smooth and creamy. Gradually add the powdered sugar, mixing until fully combined and smooth. Add the optional vanilla extract if using.
- Spread the peanut butter mixture evenly over the graham cracker base in the pan.
- In a microwave-safe bowl, combine the chocolate chips and vegetable oil or shortening. Microwave on 50 percent power in 30-second intervals, stirring after each, until the chocolate is completely melted and smooth. Be careful not to overheat.
- Pour the melted chocolate evenly over the peanut butter layer.
- Place the 2 tablespoons of peanut butter for swirling in a small microwave-safe bowl and microwave for 15-20 seconds until slightly runny. Drizzle spoonfuls of this peanut butter over the melted chocolate layer. Use a toothpick or a knife to gently swirl the peanut butter into the chocolate for a marbled effect.
- Refrigerate the pan for at least 2 hours, or until the bars are completely firm. This chilling step is crucial for clean cutting.
- To cut the bars cleanly: Lift the chilled block out of the pan using the parchment paper overhang. Place it on a cutting board. Fill a tall glass with hot water. Dip a sharp knife into the hot water, wipe it completely dry, and then make a clean cut through the bars. Repeat this process, dipping and drying the knife before each cut, to ensure smooth, clean slices without cracking the chocolate or smearing the layers. Store the cut bars in an airtight container in the refrigerator.