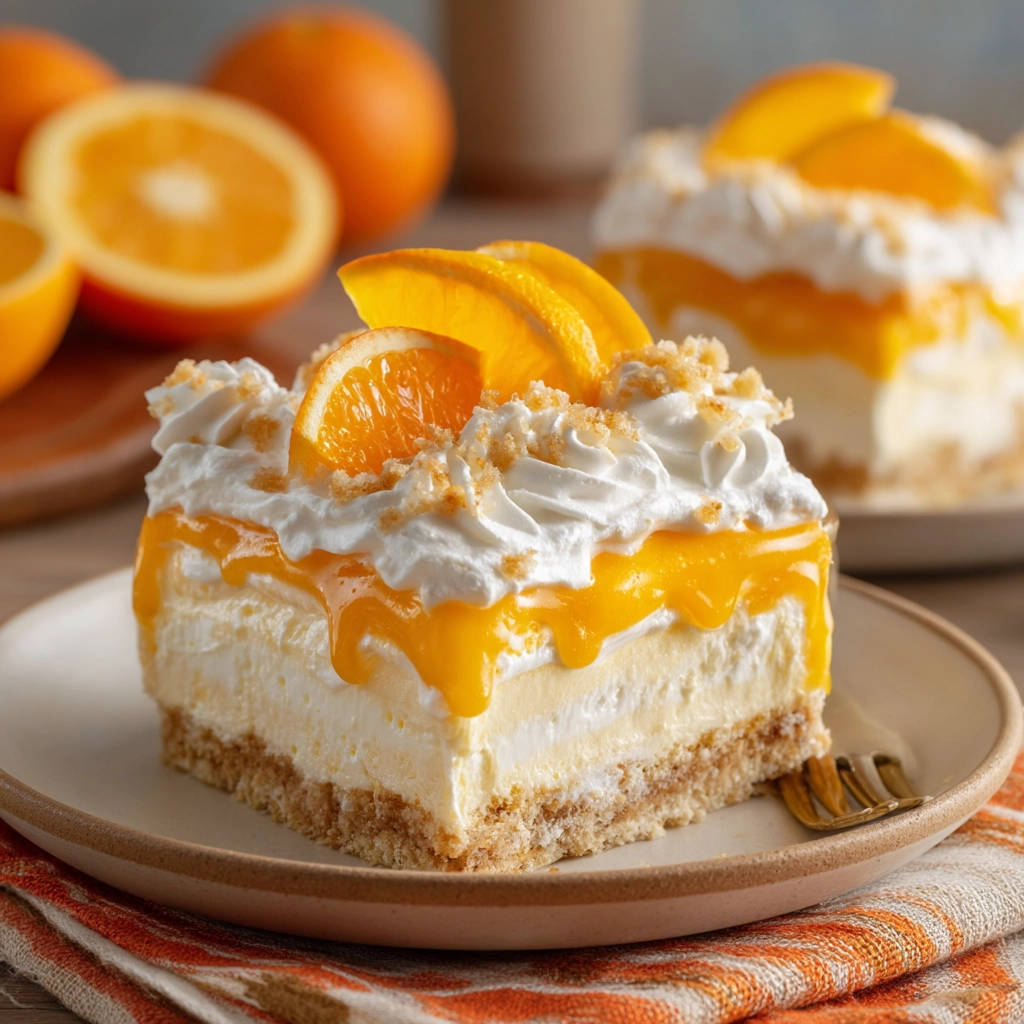
Ah, Orange Dream Bars. Just thinking about them conjures up images of sunny days and refreshing, creamy indulgence. That classic combination of bright citrus and smooth, sweet filling layered over a buttery graham cracker crust is pure bliss! But let’s be honest, sometimes no-bake desserts can be a little… finicky, right? You envision neat, sliceable bars, but end up with a delightful but messy scoop. It’s frustrating when your dream bars turn into a dream puddle!
I’ve been there! After a few experiments and tweaking, I discovered the simple secrets to achieving perfectly set Orange Dream Bars that hold their shape beautifully. No more crumbling disasters or soft-serve struggles. Just clean slices of pure, unadulterated orange and cream delight. Get ready to make these bars with confidence!
Why You’ll Absolutely Adore This Orange Dream Bars Recipe
What makes these Orange Dream Bars stand out from the crowd? It’s more than just their sunny disposition! They offer a delightful escape in every bite, combining textures and flavors that are simply irresistible.
- Perfectly Set Texture: This is the big one! Thanks to specific techniques in preparing both the creamy and orange layers, these bars set up beautifully, making them incredibly easy to cut and serve.
- Vibrant Flavor Combination: The bright, zesty orange layer cuts through the rich, sweet cream cheese filling, creating a balanced taste that’s not too heavy. It’s like a creamsicle in bar form!
- No-Bake Convenience: While there’s a little stove time for the orange layer, the majority of the work happens without turning on the oven, making them ideal for warm weather or when you just don’t feel like baking.
- Simple Ingredients: You won’t find a long list of obscure items here. Most of the ingredients are pantry staples or readily available at any grocery store.
- Crowd-Pleasing Appeal: Seriously, who doesn’t love orange and cream? These bars are a guaranteed hit at picnics, potlucks, or just a quiet afternoon treat at home.
Say goodbye to saggy bars and hello to sliceable sunshine!
The Essential Ingredients for Perfectly Set Orange Dream Bars
Creating these delightful layers requires a few key players, each contributing to the final texture and flavor profile. Think of it like building a delicious masterpiece, layer by layer, using simple, humble ingredients that come together to create something truly special.
We start with the foundation – a classic graham cracker crust. This isn’t just about providing a base; it adds a delightful crunch and nutty flavor that complements the creamy layers above. You’ll need:
- 1 and 1/2 cups graham cracker crumbs: You can buy pre-crushed crumbs or make your own by blitzing graham crackers in a food processor or crushing them in a bag with a rolling pin. About 10-12 full sheets usually yield the right amount.
- 1/4 cup granulated sugar: Just a touch to add a little sweetness to the crust.
- 1/2 cup unsalted butter, melted: This acts as the binding agent, holding the crumbs together so the crust doesn’t fall apart when you slice the bars. Unsalted butter lets you control the overall saltiness.
Next is the heart of the dessert – the creamy filling. This layer is rich, smooth, and provides that dreamy, soft texture that contrasts with the firm orange topping and crunchy crust. The key here is ensuring everything is at the right temperature and mixed just so.
- 2 packages (8 ounce each) cream cheese, softened: Softened cream cheese is non-negotiable! Cold cream cheese will result in a lumpy filling. Let it sit on the counter for an hour or two, or gently soften it in the microwave on a low setting in short bursts.
- 1 cup powdered sugar: Also known as confectioners’ sugar, this provides sweetness and a smooth texture to the filling. Its fine consistency dissolves easily, preventing grittiness.
- 1 teaspoon vanilla extract: A splash of pure vanilla enhances the creamy flavor and adds a layer of warmth.
- 1 container (8 ounce) whipped topping, thawed (like Cool Whip): This is crucial for the filling’s texture and stability. Gently folding in thawed whipped topping adds lightness and helps the cream cheese layer set firmly without being overly dense. Ensure it’s fully thawed but still cold.
Finally, the star of the show – the vibrant orange layer! This provides the signature citrus punch and the essential setting power that defines these bars.
- 1 cup fresh orange juice: Freshly squeezed juice will give you the best, brightest flavor. However, quality store-bought orange juice (not from concentrate is often best) can also work.
- 1/4 cup granulated sugar: To sweeten the tartness of the orange juice.
- 2 tablespoons cornstarch: This is the thickening agent for the orange layer. It reacts with heat to create a gel-like consistency that sets up firmly as it cools.
- 1 tablespoon lemon juice (optional for brightness): A small amount of lemon juice isn’t strictly necessary but adds a lovely tang that enhances the orange flavor, making it pop even more. Don’t skip it if you want that extra zing!
For serving and that extra flourish, you might also want:
- Fresh orange slices for garnish
- Additional graham cracker crumbs for topping
Having all your ingredients measured and ready before you start makes the process smooth and enjoyable.
Crafting Your Orange Dream Bars: Step-by-Step Guide
Making these bars is surprisingly straightforward, especially once you understand the simple techniques that ensure a perfect set. We’ll build them layer by layer, giving each step the care it needs for the best results.
-
Begin with the Beautiful Base: Grab a medium-sized bowl and combine your graham cracker crumbs, the quarter cup of granulated sugar, and the half cup of melted unsalted butter. Stir everything together until the crumbs are evenly moistened, resembling wet sand. Transfer this mixture to a 9×13 inch baking pan. This size pan is ideal for achieving the perfect bar thickness. Use the bottom of a glass or a flat-bottomed measuring cup to press the mixture down very firmly and evenly across the bottom of the pan and slightly up the sides if you like. This firm press is essential for a crust that holds together when sliced. Pop this crust into the refrigerator to chill for at least 15 minutes while you move on to the next step. Chilling helps solidify the butter, making the crust sturdy.
-
Whip Up the Creamy Dream Layer: While the crust chills, prepare the luscious filling. In a large bowl, beat the softened cream cheese and the cup of powdered sugar together with an electric mixer until the mixture is completely smooth and free of any lumps. This might take a couple of minutes, scraping down the sides of the bowl as needed. Beat in the teaspoon of vanilla extract until just combined. Now for the secret to that light, stable texture: gently fold in the thawed whipped topping. Use a spatula or a rubber scraper for this part, incorporating the whipped topping with a light hand until no white streaks remain. The key here is not to overmix; overmixing can deflate the whipped topping, resulting in a denser filling that might not set as well or be as smooth. The goal is a light, fluffy, and cohesive mixture.
-
Layer the Creamy Goodness: Carefully spoon the creamy filling you just made over the chilled graham cracker crust. Use an offset spatula or the back of a spoon to gently spread the filling evenly from edge to edge. Take your time to smooth the top nicely. This layer should be uniform for pretty bars later on. Once smooth, return the pan to the refrigerator. Keeping it cold at this stage is important, especially as you prepare the warmer orange layer, to prevent the cream cheese layer from becoming too soft.
-
Craft the Vibrant Orange Topping: In a small saucepan, whisk together the cup of fresh orange juice, the quarter cup of granulated sugar, and the two tablespoons of cornstarch. Make sure to whisk these together before turning on the heat to prevent cornstarch lumps. If you’re using the optional lemon juice for extra brightness, add it now. Place the saucepan over medium heat and begin stirring constantly. You’ll need to keep stirring to prevent the cornstarch from sticking and burning on the bottom. Watch the mixture closely; it will gradually thicken and become clear and glossy as it heats. This process usually takes only a few minutes once it starts to heat up. As soon as it thickens and is clear, remove the pan from the heat. Let this orange mixture cool slightly in the saucepan for about 5-10 minutes, giving it an occasional stir. This slight cooling is crucial – pouring a hot mixture directly onto the cold creamy layer could cause it to melt or become uneven.
-
Add the Zesty Top Layer: Once the orange mixture has cooled slightly (it should still be pourable but not hot enough to melt the filling), gently spoon or pour it over the creamy layer in the chilled pan. Carefully spread the orange mixture with a spatula to cover the entire surface evenly. You want a nice, smooth top layer of bright orange.
-
The Most Important Step: The Chill! Cover the pan loosely with plastic wrap to prevent the surface from drying out or picking up refrigerator odors. Now, place the covered pan back into the refrigerator for the crucial setting time. This recipe must chill for at least 4 hours, but ideally, chilling it overnight is best. This extended chilling period allows the cornstarch in the orange layer and the components in the cream cheese layer to fully set and firm up. This is the absolute key to getting those clean, beautiful slices without the bars falling apart. Patience truly pays off here!
-
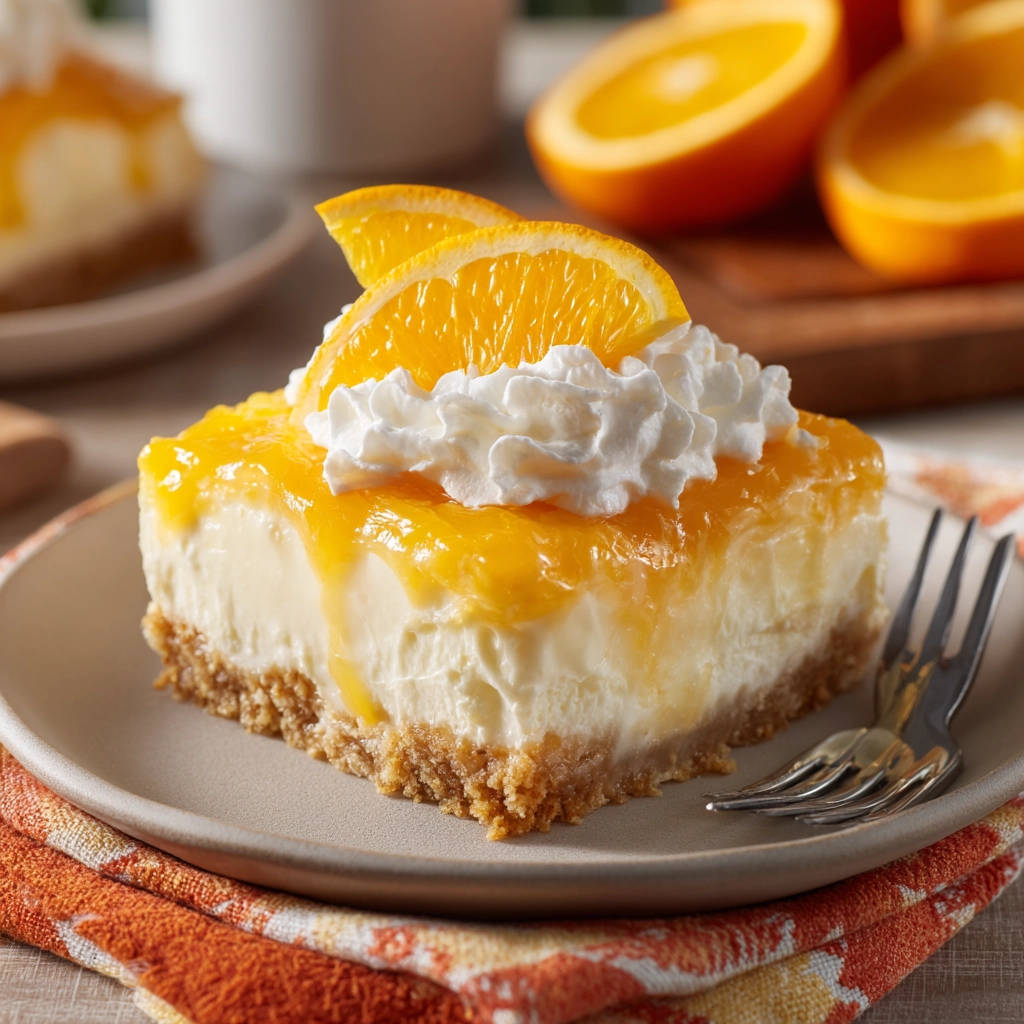
Slice and Serve Your Sunny Squares: Once the bars are completely chilled and firmly set, it’s time for the reward! Use a sharp knife wiped clean between cuts for the neatest squares. Cut the entire pan into your desired serving size, typically 12 squares. For extra flair, you can top each bar just before serving with a dollop of whipped topping, a sprinkle of additional graham cracker crumbs, or a thin slice of fresh orange. Arrange them on a platter and enjoy the refreshing, perfectly set Orange Dream Bars!
Pro Tips for Perfect Orange Dream Bars Every Time
Even though this recipe is straightforward, a few little tricks can elevate your Orange Dream Bars from great to absolutely spectacular and ensure they set up perfectly every single time.
- Temperature Matters (Especially for Cream Cheese!): We mentioned it in the ingredients, but it bears repeating: make sure your cream cheese is genuinely softened. Cold cream cheese leads to lumps, no matter how long you beat it. Similarly, the whipped topping should be thawed but still cold from the fridge when you fold it in.
- Don’t Rush the Chill: Seriously, this is the single most important tip for getting bars that set firmly. While 4 hours is the minimum, planning to chill them overnight (6-8 hours or more) guarantees the best possible texture for slicing. Think of it as mandatory flavor development time!
- Cool the Orange Layer Sufficiently: Pouring hot orange mixture onto a cold cream layer is a recipe for disaster. It can melt the cream cheese, creating a messy interface between the layers or preventing the top from setting properly. Let it cool on the counter for 5-10 minutes, stirring occasionally, until it’s warm but not hot to the touch.
- Gentle Folding is Key: When incorporating the whipped topping into the cream cheese mixture, use a light hand and a spatula. Overmixing can deflate the whipped topping, making the filling less airy and potentially affecting its ability to set firmly. Fold just until no streaks remain.
- For Easy Slicing: Dip a sharp knife in hot water and wipe it clean between each cut. This helps the knife glide through the layers without dragging or sticking, giving you those beautiful, clean edges.
- Add Some Zest: Want even more orange flavor? Consider adding 1-2 teaspoons of fresh orange zest to the orange juice mixture before heating. This provides an intense citrus aroma and flavor boost. You could also stir a little zest into the creamy filling!
Recipe Variations and Swaps
While the classic Orange Dream Bar is fantastic, you can play around with variations:
- Different Juices: Experiment with other citrus juices! Lemon bars are a classic for a reason, but you could try lime for a Key Lime-like bar, or even a mix of citrus juices. Just ensure the total liquid amount for the top layer remains the same.
- Add Texture: Sprinkle some toasted coconut on top along with the graham cracker crumbs for added texture and flavor. Or perhaps a layer of chopped white chocolate?
- Spice it Up (Gently): A tiny pinch of ground ginger or cardamom whisked into the orange layer can add a subtle, unexpected warmth that pairs beautifully with citrus.
Serving Suggestions
These bars are perfect on their own, but serving them with a few extra touches makes them even more special. A dollop of fresh whipped cream, a scattering of additional graham cracker crumbs, or a simple twist of orange peel on top of each bar adds a touch of elegance. They are a light and refreshing end to almost any meal, pairing well after savory dishes like Crispy Chicken Katsu or a lighter pasta like Angel Hair Pasta with Burst Cherry Tomato Sauce.
Your Orange Dream Bars Questions Answered (FAQ)
Got questions about making these delightful bars? Here are some common ones and their answers to help you succeed!
Can I use reduced-fat cream cheese or whipped topping?
While technically possible, I strongly recommend using full-fat cream cheese for the best flavor and, more importantly, the best set and texture. Reduced-fat versions have more water content, which can make the filling softer and less stable. Similarly, full-fat whipped topping provides better structure than its reduced-fat counterparts.
My orange layer didn’t thicken. What went wrong?
The most common reasons for the orange layer not thickening are not heating it enough or not stirring constantly. Cornstarch needs to reach a certain temperature and be cooked briefly (just a minute or two once it thickens and becomes clear) while stirring to activate its thickening properties. Make sure you bring the mixture to a gentle boil while stirring and cook it until it visibly thickens and looks glossy and clear, not milky.
Can I make these ahead of time?
Absolutely! These Orange Dream Bars are an excellent make-ahead dessert. In fact, making them the day before you plan to serve them is ideal, as it allows for that crucial overnight chilling period which guarantees they are perfectly set and easy to slice. Keep them covered loosely in the refrigerator.
How long do Orange Dream Bars last in the refrigerator?
Stored properly in an airtight container in the refrigerator, these bars will typically last for 3-4 days. The graham cracker crust may soften slightly over time, but the flavor will still be delicious.
Can I freeze Orange Dream Bars?
Yes, you can! Freeze the whole pan (un cut) or individual bars (cut) by wrapping them tightly in plastic wrap and then aluminum foil. They can be frozen for up to 1-2 months. Thaw them overnight in the refrigerator before serving. Note that the texture of the creamy layer might change slightly after freezing, but they will still be tasty.
Why is the chilling time so important for Orange Dream Bars?
Chilling time is absolutely critical for both the crust and the layers to set. For the crust, chilling hardens the melted butter, binding the crumbs together. For the creamy layer, chilling helps the cream cheese and whipped topping firm up. For the orange layer, chilling allows the cornstarch-thickened mixture to gel completely and create a firm, sliceable layer. Rushing this step is the main reason bars don’t hold their shape.
Enjoy Your Homemade Orange Dream Bars!
See? Making perfectly set, absolutely delicious Orange Dream Bars isn’t tricky at all when you know the little secrets! This recipe delivers on flavor, texture, and that satisfying feeling of slicing into a dessert that holds its shape beautifully. Whether you’re bringing them to a gathering or enjoying them as a sunny treat just for yourself, they are sure to bring a smile.
Give this recipe a try and let me know what you think in the comments below! Did you add any fun variations? How did that perfect slice feel? Don’t forget to share this recipe with friends and family!
Orange Dream Bars

Ingredients
- 1 and 1/2 cups graham cracker crumbs
- 1/4 cup granulated sugar
- 1/2 cup unsalted butter melted
- 2 packages 8 ounce cream cheese softened
- 1 cup powdered sugar
- 1 teaspoon vanilla extract
- 1 container 8 ounce whipped topping thawed (like Cool Whip)
- 1 cup fresh orange juice
- 1/4 cup granulated sugar
- 2 tablespoons cornstarch
- 1 tablespoon lemon juice (optional for brightness)
- Fresh orange slices for garnish
- Additional graham cracker crumbs for topping
Directions
- Prepare the crust Mix graham cracker crumbs sugar and melted butter in a medium bowl Press firmly into the bottom of a 9×13 inch baking pan Chill in the refrigerator for at least 15 minutes while you prepare the filling
- Make the creamy filling In a large bowl beat the softened cream cheese and powdered sugar until smooth Add the vanilla extract and beat until combined Gently fold in the thawed whipped topping until no streaks remain this is key for a smooth yet stable texture Do not overmix
- Spread the creamy filling evenly over the chilled crust Smooth the top with a spatula Return the pan to the refrigerator while you make the orange layer
- Prepare the orange layer In a small saucepan whisk together the orange juice granulated sugar and cornstarch If using add the lemon juice Heat over medium heat stirring constantly until the mixture thickens and becomes clear Remove from heat and let cool slightly about 5 10 minutes stirring occasionally
- Spoon or pour the cooled orange layer over the creamy filling Spread gently to cover the surface
- Chill the dessert Cover the pan loosely with plastic wrap and refrigerate for at least 4 hours or preferably overnight This crucial chilling time allows the layers especially the cream cheese and orange mixture to set up firmly ensuring clean slices later
- To serve Cut the bars into squares Top each bar with whipped topping additional graham cracker crumbs and a fresh orange slice if desired Enjoy your perfectly set and delicious orange dream bars