Ah, the irresistible pull of raw cookie dough! Who hasn’t stood by the mixer, spoon in hand, just dying to sneak a bite? There’s something incredibly nostalgic and comforting about that rich, sweet mixture before it hits the oven. But we all know the warnings about raw flour and eggs (though this recipe uses no eggs!). Even without eggs, finding an edible cookie dough that isn’t gritty, dry, or just… well, weird has been a bit of a quest for me. I wanted that authentic, soft, fudgy texture you crave straight from the mixing bowl.
Friends, I’m thrilled to tell you I finally cracked the code! This Peanut Butter Cookie Dough Dream is everything you hope for in a safe-to-eat cookie dough. It’s smooth, incredibly flavorful, and has that dreamy, scoopable consistency that makes it perfect for devouring by the spoonful, layering into desserts, or just enjoying straight from the bowl. Get ready to meet your new favorite treat – no baking required!
Reasons This Peanut Butter Cookie Dough Dream Is a Keeper
Beyond satisfying that intense craving for raw dough, this Peanut Butter Cookie Dough Dream recipe brings a lot to the table:
- Completely Safe: Thanks to a simple but essential step, you can indulge without worry.
- Perfect Texture: It’s not crumbly, it’s not too sticky. It hits that sweet spot of soft, scoopable, and satisfying.
- Packed with Flavor: Classic peanut butter and chocolate combination in a delightful new form.
- No Baking Required: Whip it up anytime the craving strikes – no oven needed!
- Versatile: Enjoy it plain, layered in parfaits, rolled into balls, or mixed into other treats.
- Quick & Easy: Comes together in minutes once your flour is prepped.
Gathering Your Ingredients for This Dreamy Edible Dough
Creating this perfect Peanut Butter Cookie Dough Dream starts with a handful of simple ingredients, most of which you likely already have in your pantry. Each one plays a crucial role in achieving that irresistible flavor and, more importantly, the perfect, edible texture we’re aiming for.
Here’s what you’ll need to bring this delightful treat to life:
- All-Purpose Flour: This forms the structure of our dough. It’s vital that we address the safety aspect of consuming raw flour, which can sometimes contain bacteria. We’ll go over the easy steps to heat treat it properly, ensuring a safe and enjoyable treat.
- Unsalted Butter, Softened: Butter is essential for richness and helps bring the dough together. Using unsalted butter gives you control over the saltiness. Make sure it’s properly softened to cream easily with the sugars – think “room temperature,” not melted!
- Granulated Sugar: Provides sweetness and helps create that classic cookie dough structure when creamed with butter.
- Packed Brown Sugar: This is key for moisture, chewiness, and that wonderful hint of molasses flavor characteristic of classic chocolate chip cookies. Packing the brown sugar ensures you have the correct amount for the right texture and sweetness.
- Creamy Peanut Butter: The star of this particular dream! Use a smooth, creamy peanut butter for the best texture in the dough. Avoid natural peanut butter that separates, as it can make the dough oily or inconsistent.
- Milk or Non-Dairy Milk: This is one of the secrets to the perfect texture! Just a tablespoon or two of milk helps bind the dough and makes it perfectly pliable and scoopable. You can use regular dairy milk or your favorite non-dairy alternative like almond or oat milk.
- Vanilla Extract: A must-have flavor enhancer that ties all the sweet ingredients together beautifully. Use pure vanilla extract for the best results.
- Salt: Just a pinch to balance the sweetness and enhance all the other flavors. Don’t skip it!
- Chocolate Sauce or Melted Chocolate: For swirling and layering – because peanut butter and chocolate are meant to be together! Store-bought chocolate sauce is easy, or you can quickly melt some chocolate chips or chopped bar chocolate.
- Chopped Peanut Butter Cups: These little bites of heaven are mixed into the dough and used generously for topping. Chop them into varying sizes for different textures in each bite.
Crafting Your Peanut Butter Cookie Dough Dream: Step-by-Step Perfection
Ready to make this edible cookie dough magic happen? The process is incredibly straightforward, focusing on technique to get that ideal, scoopable consistency. Follow these steps, and you’ll be indulging in no time!
-
Safety First: Heat Treat the Flour. This initial step is absolutely crucial for making the flour safe to consume raw. You have a couple of easy options. The quickest is to spread the measured flour onto a microwave-safe plate. Microwave it on high power, stopping and stirring it thoroughly every 30 seconds. Continue this for a total of 60 to 90 seconds. The goal is for the flour to reach an internal temperature of 160 degrees Fahrenheit, which you should check with an instant-read thermometer to be sure. Alternatively, if you prefer using your oven, spread the flour in a thin layer on a baking sheet and bake it at 300 degrees Fahrenheit for about 10 to 12 minutes, giving it a good stir halfway through. This gentle heat treatment kills any potential bacteria without toasting the flour too much. Whichever method you choose, let the heat-treated flour cool completely before moving on. It needs to be back to room temperature so it doesn’t melt your butter.
-
Cream the Butter and Sugars. In a large mixing bowl, combine your softened unsalted butter with the granulated sugar and packed brown sugar. Use an electric mixer (handheld or stand mixer) or a sturdy whisk and some elbow grease to beat these ingredients together until the mixture becomes light and fluffy. This usually takes a few minutes, and you’ll notice the color gets paler yellow. Creaming incorporates air, contributing to a lighter texture in the final dough.
-
Add the Peanut Butter. Spoon the creamy peanut butter into the bowl with the creamed butter and sugars. Mix again, either with the electric mixer or a spatula, until the peanut butter is fully incorporated and the mixture is smooth and uniform in color and consistency. Scrape down the sides of the bowl as needed to ensure everything is well combined.
-
Introduce the Vanilla and Salt. Stir in the vanilla extract and the salt. Give it another quick mix to distribute these flavor enhancers throughout the dough base.
-
Gradually Add the Flour. Now it’s time to bring in our star base ingredient! Gradually add the completely cooled, heat-treated all-purpose flour to the wet ingredients. Mix on a low speed or stir by hand until the flour is just combined. At this stage, the mixture will look quite dry and crumbly, almost like wet sand. Don’t be tempted to overmix here; just get the flour incorporated.
-
Master the Texture with Milk. This is the magic step! The key to the perfect, scoopable, non-crumbly texture is adding liquid gradually. Add the milk (or non-dairy milk) one tablespoon at a time to the flour-butter mixture. After adding a tablespoon, mix until it’s incorporated before deciding if you need more. You are looking for a consistency that resembles traditional cookie dough – one that holds together when you squeeze a bit between your fingers but isn’t sticky or overly wet. The full two tablespoons might be perfect, or you might find you need a tiny bit less or a little bit more depending on factors like humidity and how well your flour was heat treated. Go slow and stop as soon as you reach that dreamy dough consistency.
-
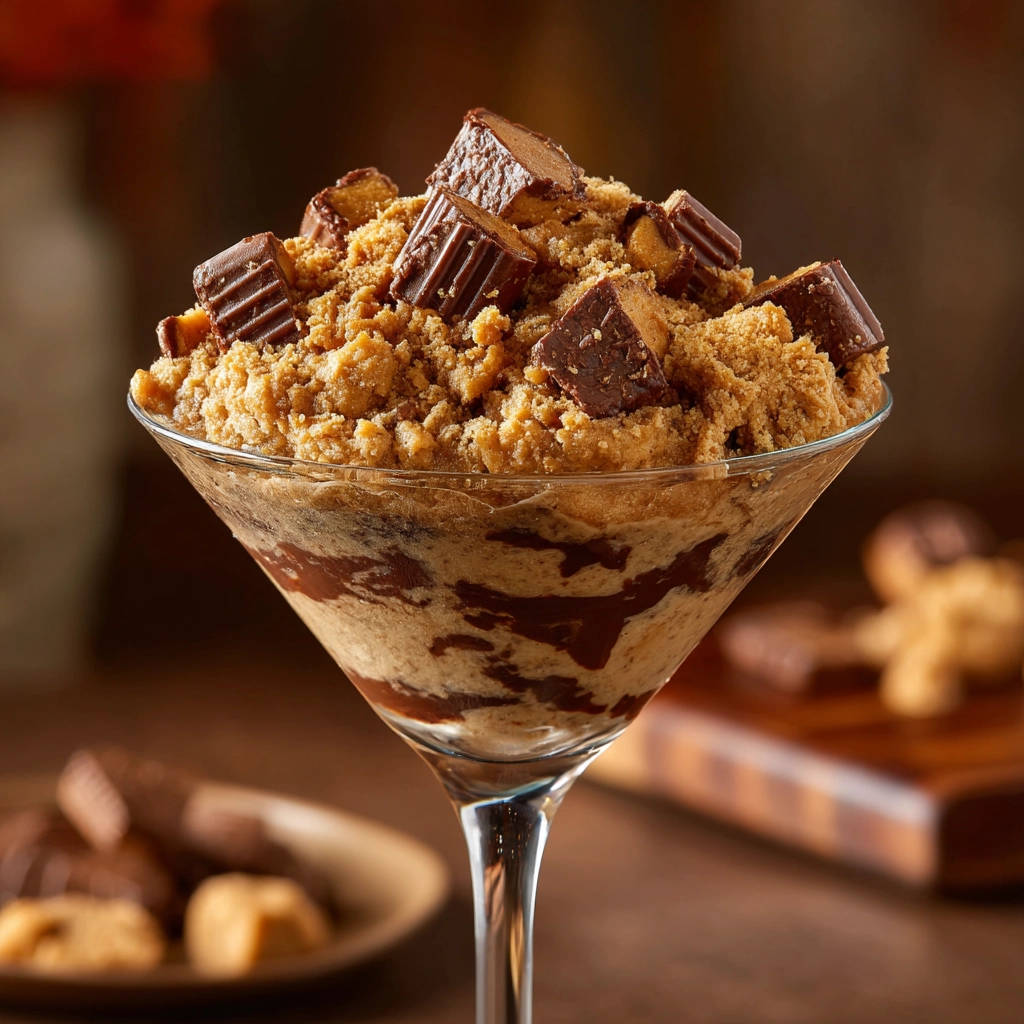
Prep Your Serving Glasses (Optional but Fun!). If you plan to serve this layered dessert style, grab your dessert glasses or small jars. Drizzle or swirl chocolate sauce or melted chocolate around the inside walls of the glasses. This isn’t just for looks; it adds another layer of chocolatey goodness to every bite!
-
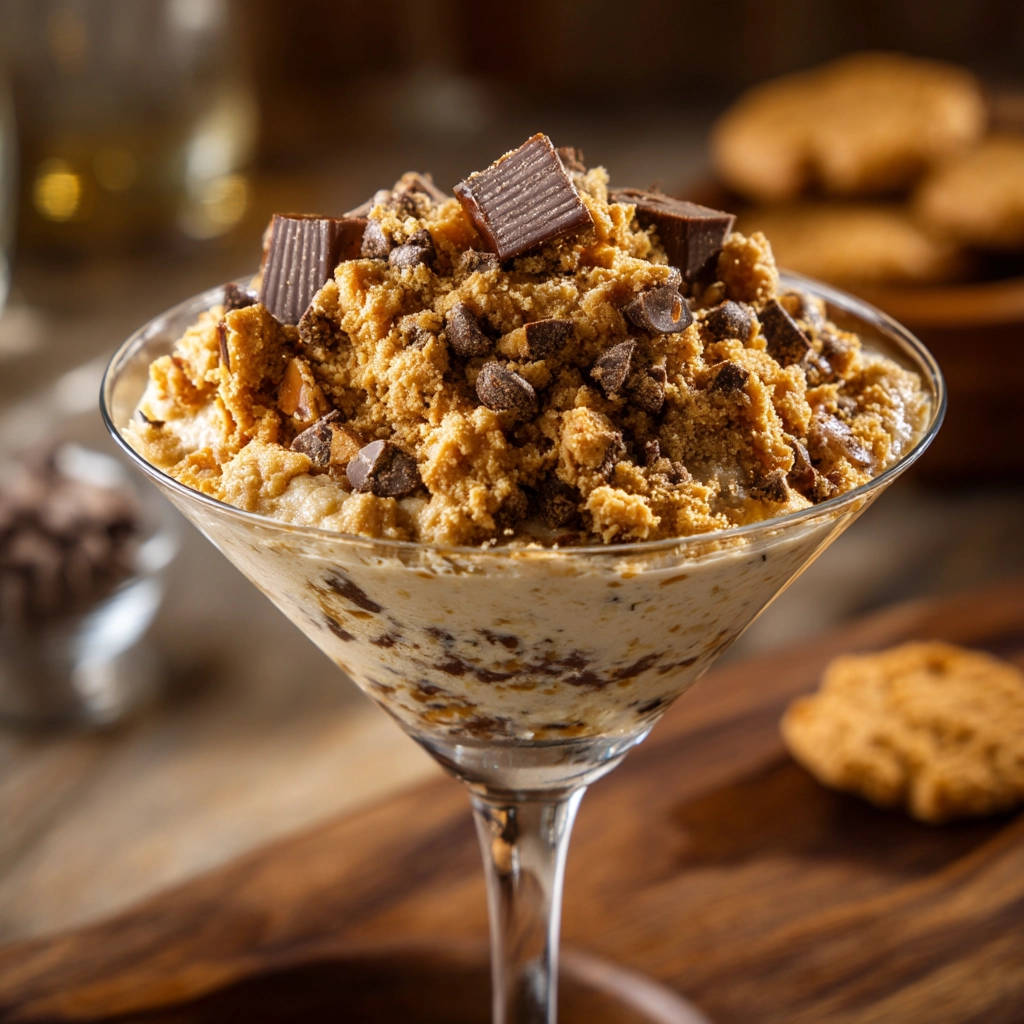
Layer Up the Dream. Spoon layers of your delicious edible cookie dough mixture into the prepared glasses. Between the layers of dough, scatter a generous amount of your chopped peanut butter cups. Repeat layering until the glasses are mostly full.
-
Finish and Serve. Top the glasses generously with more chopped peanut butter cups. For extra texture, you can crumble some of the cookie dough mixture on top too. Serve these delightful Peanut Butter Cookie Dough Dreams immediately for a softer, meltier experience, or pop them in the fridge for about 30 minutes to an hour for a slightly firmer, yet still perfectly scoopable, treat.
Tips for Perfect Edible Peanut Butter Cookie Dough
Making edible cookie dough is pretty forgiving, but a few pointers can help ensure yours turns out absolutely perfect every time:
- Don’t Skip Heat Treating: I know, it adds an extra step, but properly heat treating the flour is essential for safety and contributes to a better texture. Raw flour can contain harmful bacteria, so please, don’t skip this! Make sure it cools completely afterward.
- Softened Butter is Key: If your butter isn’t soft enough, it won’t cream properly with the sugars, leading to a less smooth dough base.
- Add Liquid Gradually: This is the MOST important step for texture control. Add the milk one tablespoon at a time and mix thoroughly before adding more. You want the dough to just come together and be scoopable, not wet or sticky.
- Taste and Adjust: Once your dough is mixed, give it a little taste! You can add a tiny pinch more salt if it feels too sweet, or even a splash more vanilla.
- Get Creative with Mix-ins: While peanut butter cups are divine, feel free to experiment! Chocolate chips (milk, dark, or white), mini marshmallows, chopped peanuts, or even crushed pretzels would be delicious additions. Think about other favorite candy bar combinations too!
- Storage: Store any leftover edible cookie dough in an airtight container in the refrigerator for up to a week. It will firm up when chilled, but you can let it sit at room temperature for a few minutes or microwave it briefly (just a few seconds!) to soften it if needed. You can also freeze it for longer storage (up to 3 months).
- Make Dough Balls: Roll the chilled dough into small balls for easy snacking or adding to other desserts, like topping creamy chocolate chip ice cream or incorporating into a homemade cookie dough blizzard style treat.
Serving Suggestions: More Ways to Enjoy Your Dream Dough
While layering it in glasses with chocolate and peanut butter cups is a fantastic way to serve this Peanut Butter Cookie Dough Dream, don’t stop there! The possibilities are deliciously endless.
Scoop it like ice cream into bowls, especially if you’ve chilled it for a firmer texture. It’s heavenly on its own or drizzled with extra chocolate or peanut butter sauce. Roll small amounts into bite-sized balls for a quick snack or to decorate cakes and cupcakes. Crumble it over brownies or even fudgy brownies for an extra layer of texture and flavor. You could even spread a layer between cookies or graham crackers for simple cookie sandwiches. For another no-bake dessert idea, consider pairing it with something like an easy no-bake chocolate cream loaf for a truly indulgent platter.
Your Edible Cookie Dough Questions Answered (FAQ)
Why do I need to heat treat the flour?
Raw flour can contain harmful bacteria like E. coli, just like raw eggs can contain salmonella. Heat treating the flour by microwaving or baking it to 160°F kills these potential pathogens, making it safe to consume without baking. It also slightly changes the starch structure, which helps create a better, less “raw” or powdery texture in the finished edible dough.
Can I use natural peanut butter?
Using natural peanut butter (the kind that separates) isn’t recommended for this specific recipe. The oils can separate from the solids in the dough, leading to an inconsistent and potentially greasy texture. Creamy, stabilized peanut butter works best here for a smooth, uniform dough.
How long does this edible cookie dough last?
Stored in an airtight container, your Peanut Butter Cookie Dough Dream will last in the refrigerator for up to a week. For longer storage, you can freeze it for up to 3 months. If frozen, let it thaw in the refrigerator or at room temperature for a bit before enjoying.
Can I bake this dough into cookies?
No, this recipe is specifically formulated for edible, unbaked consumption. It doesn’t contain leavening agents (like baking soda or powder) in the correct ratios needed for baking traditional cookies, and the fat and sugar balance is different. Attempting to bake it would likely result in flat, greasy, or hard discs rather than soft cookies.
What if my dough is too dry or too wet?
The milk step is key to texture control. If your dough is too dry and crumbly after adding the initial milk, add a few drops more milk (literally, drops!) or a tiny drizzle of chocolate sauce and mix until it comes together. If it accidentally becomes too wet or sticky, you can try mixing in a tiny amount more cooled, heat-treated flour (start with a teaspoon) until it reaches the desired consistency. This is why adding the milk gradually is so important!
Do I have to use peanut butter cups?
While they are fantastic and complement the peanut butter dough perfectly, you can certainly swap them out! Chocolate chips (any variety), mini M&M’s, chopped pretzels, or even a swirl of marshmallow fluff would make delicious variations.
Enjoy Your Homemade Peanut Butter Cookie Dough Dream!
See? Achieving that perfect, safe, edible cookie dough texture isn’t a pipe dream after all! With just a few simple steps and the right combination of ingredients, you can whip up this incredible Peanut Butter Cookie Dough Dream anytime the craving strikes.
Whether you layer it, scoop it, or just dive in with a spoon, this recipe is sure to become a favorite for satisfying that raw cookie dough urge. Give it a try and let me know what you think in the comments below! Happy dreaming (and eating)!
Peanut Butter Cookie Dough Dream

Ingredients
- 1 cup all-purpose flour
- 1/2 cup unsalted butter softened
- 1/4 cup granulated sugar
- 1/2 cup packed brown sugar
- 1/4 cup creamy peanut butter
- 2 tablespoons milk or non-dairy milk
- 1 teaspoon vanilla extract
- 1/4 teaspoon salt
- 1/2 cup chocolate sauce or melted chocolate
- 1 cup chopped peanut butter cups
Directions
- To ensure safety and improve texture, heat treat the flour. Spread the flour on a microwave-safe plate and microwave on high for 60 to 90 seconds, stirring every 30 seconds, until it reaches 160 degrees Fahrenheit (use a thermometer to check). Alternatively, spread flour on a baking sheet and bake at 300 degrees Fahrenheit for 10-12 minutes, stirring halfway. Let the heat treated flour cool completely. This step is crucial for the perfect texture and safety.
- In a large bowl, cream together the softened butter, granulated sugar, and brown sugar until light and fluffy.
- Add the peanut butter and mix until well combined and smooth.
- Stir in the vanilla extract and salt.
- Gradually add the cooled, heat treated flour to the butter mixture, mixing until just combined. The mixture will look crumbly at first.
- This is the texture secret: Add the milk, one tablespoon at a time, mixing after each addition, until the dough reaches your desired consistency. You might not need all the milk, or you might need a tiny bit more. You’re looking for a texture that holds together like cookie dough but isn’t sticky or overly wet. Avoid adding too much liquid at once.
- Swirl or drizzle chocolate sauce inside dessert glasses.
- Layer the edible cookie dough mixture and chopped peanut butter cups in the glasses.
- Top generously with more chopped peanut butter cups and cookie dough crumble. Serve immediately or chill for a firmer texture.