There’s a special kind of magic in a perfectly baked blondie. It’s not quite a brownie (though we love fudgy brownies around here!), but its own wonderful thing – a rich, chewy bar with that signature vanilla-caramel flavor. But let’s be honest, getting that dreamy, soft, chewy texture just right can feel like chasing a baking unicorn sometimes, can’t it?
Too long in the oven and you’re left with a dry, crumbly disappointment. Not long enough, and you’ve got a gooey mess that won’t set. It’s enough to make you sigh!
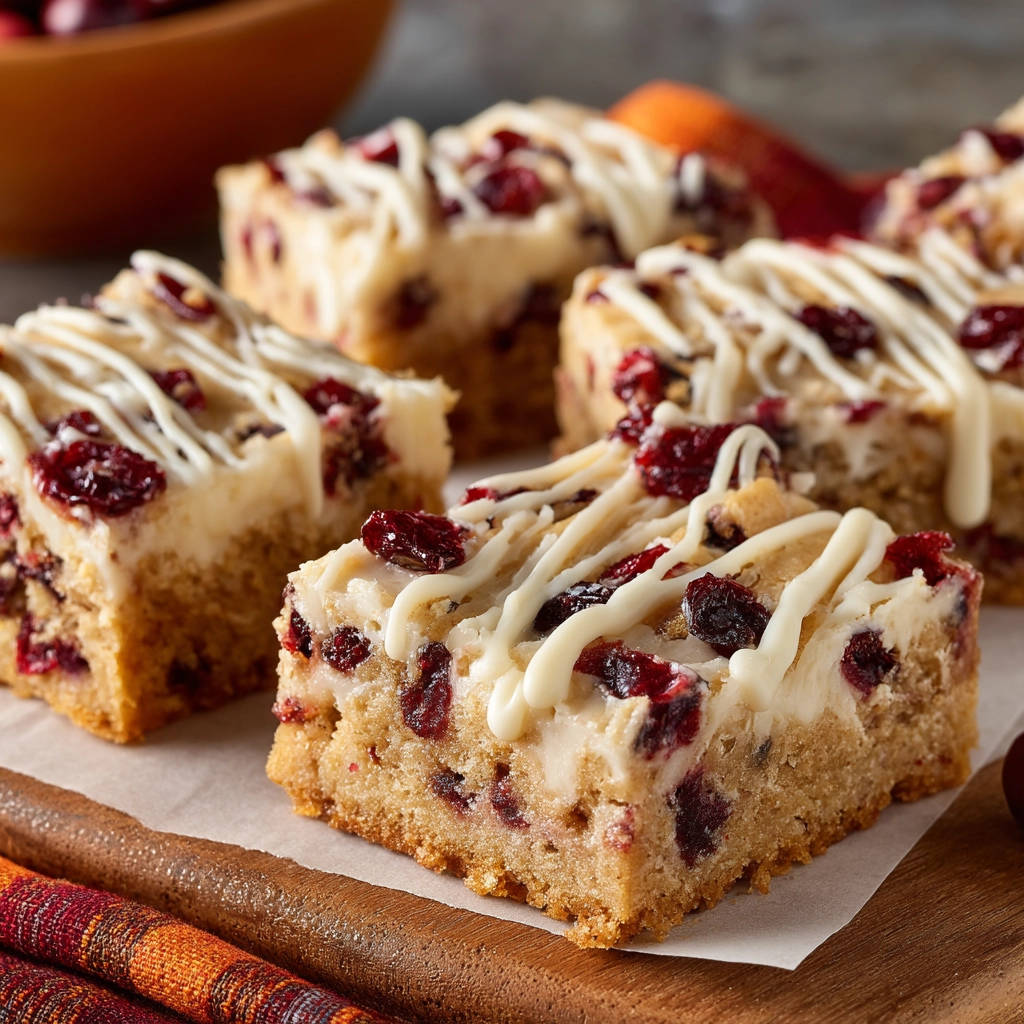
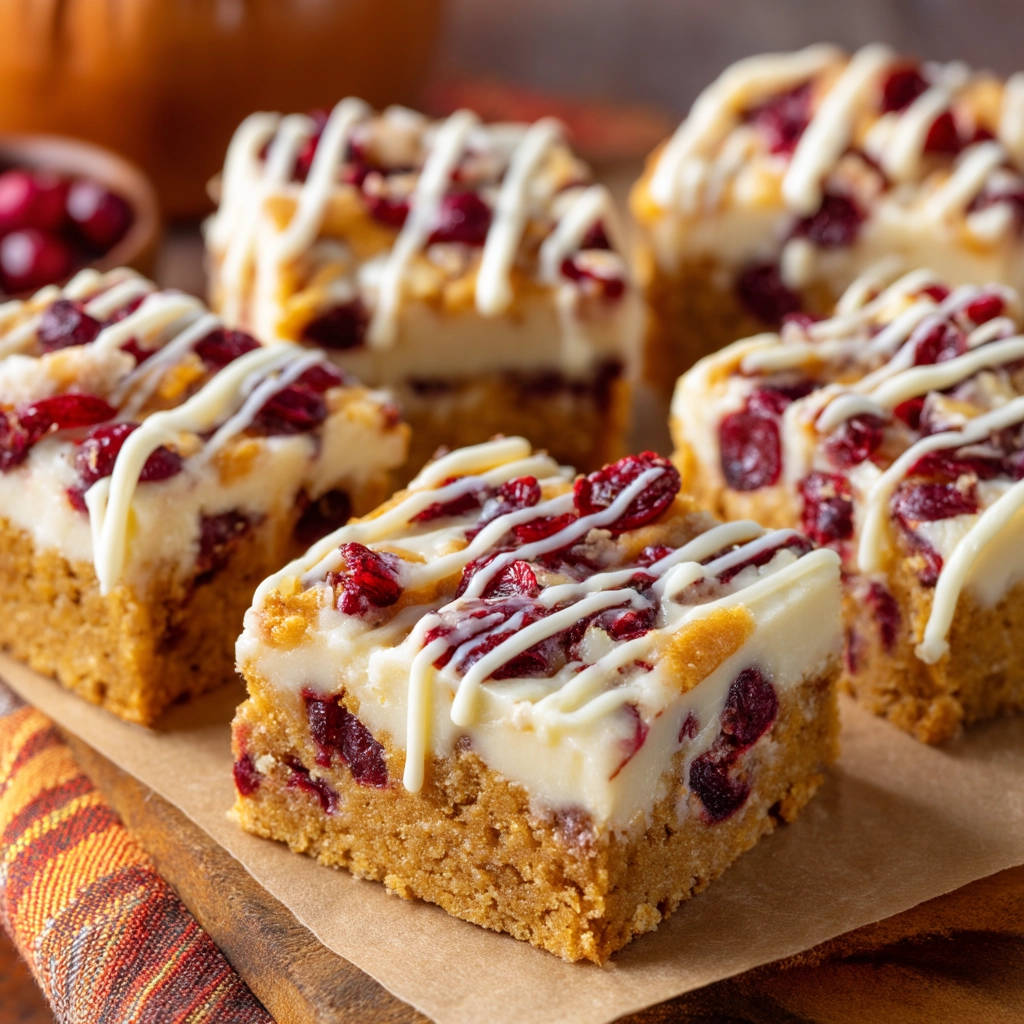
But don’t you worry! After countless batches (and maybe a few less-than-perfect moments), I finally cracked the code to consistently amazing cranberry white chocolate blondies. The secret? It all comes down to knowing exactly what to look for in those crucial final minutes of baking. Once you learn this simple trick, you’ll bake perfect blondies every single time. These Cranberry White Chocolate Blondies, with their delightful pops of tart cranberry and sweet white chocolate, are about to become your new go-to favorite!
Why You’ll Adore These Blondies
What makes these Cranberry White Chocolate Blondies stand out from the rest? It’s more than just the delicious combination of flavors:
- The Texture is Everything: We’re talking ultimate chewiness around the edges, yielding to a soft, slightly fudgy center. This recipe guarantees it.
- Sweet & Tart Harmony: The bright, tangy dried cranberries cut through the rich sweetness of the blondie base and the creamy white chocolate, creating a perfectly balanced bite.
- Simple Ingredients, Big Flavor: You likely have most of these pantry staples on hand already, making these an easy treat to whip up anytime.
- That Drizzle Tho: The optional white chocolate drizzle adds an extra touch of elegance and sweetness that takes these from simple bar to special occasion treat.
- Quick & Easy: With minimal prep time, you can be enjoying warm blondies in under an hour (plus that all-important cooling period!).
Gathering Your Ingredients for Amazing Cranberry White Chocolate Blondies
Creating that signature chewy, rich blondie requires just a few key players. Think of these ingredients as the foundation for our perfectly textured bars. The right balance is crucial for that delightful bite.
Here’s what you’ll need. Pay attention to the type of sugar and butter – they play specific roles in achieving that desired chewiness and depth of flavor.
- Unsalted Butter: We start with melted butter. Melting the butter helps create a denser, chewier blondie texture compared to creaming softened butter with sugar, which incorporates more air. Using unsalted butter gives you control over the final saltiness of the baked good. You’ll need 1/2 cup, which is a standard stick in many places.
- Light Brown Sugar: This is the star for that classic blondie flavor and texture! Packed light brown sugar provides moisture thanks to its molasses content, contributing significantly to the chewy texture and adding those wonderful caramel-like notes that define a blondie. You’ll need 1 cup, packed firmly into your measuring cup.
- Large Egg: A single large egg helps bind the ingredients together and contributes to the structure and richness of the bars. Ensure it’s at room temperature if possible, as it incorporates more smoothly into the batter.
- Vanilla Extract: Essential for enhancing all the other flavors and providing that warm, classic baked good aroma. Use a good quality pure vanilla extract for the best results – 1 teaspoon is perfect.
- All-Purpose Flour: The main structural component. Just 1 cup is needed. Ensure you measure it correctly by spooning it into the measuring cup and leveling it off, rather than scooping directly from the bag (which can compact the flour and result in too much).
- Baking Powder: Provides just a little lift to prevent the blondies from being too dense, while still maintaining that signature chewiness. You only need 1/2 teaspoon.
- Salt: A touch of salt is critical for balancing the sweetness and bringing out the depth of the other flavors. Don’t skip it! 1/4 teaspoon is just right.
- Dried Cranberries: These gems provide the perfect chewy, tart counterpoint to the sweet blondie. 1 cup adds a generous amount of berry goodness throughout the bars. Look for plump, moist cranberries.
- White Chocolate Chips (Optional, for Drizzling): For that extra touch of sweetness and visual appeal. You’ll melt 1/2 cup to drizzle over the cooled blondies. Make sure you choose good quality chips that melt smoothly.
Having all your ingredients prepped and measured before you start mixing will make the process even smoother!
Crafting Your Perfect Cranberry White Chocolate Blondies: Step-by-Step
Ready to create baking magic? Follow these steps closely, paying special attention to the baking time – that’s where our secret trick comes in!
- Prepare for Baking: Get your oven ready! Preheat it to 350 degrees F (175 degrees C). This ensures your blondies bake evenly from the moment they enter the oven. Next, prepare your 8×8 inch baking pan. You can grease and lightly flour it, but my favorite method is lining it with parchment paper. Be sure to leave a generous overhang on two sides. This parchment paper acts like handles, making it super easy to lift the cooled blondies out of the pan for clean cutting later.
- Combine Wet Ingredients (Part 1): In a medium-sized bowl, pour in your melted unsalted butter and add the packed light brown sugar. Use a whisk to combine them thoroughly. Mix until the sugar is completely incorporated into the butter and you have a smooth, slightly thick mixture. This step helps dissolve some of the sugar and lays the foundation for that moist, chewy base.
- Combine Wet Ingredients (Part 2): Now, beat in the large egg and the vanilla extract. Continue mixing until the batter looks smooth and has a nice, glossy sheen. The egg adds richness and structure, and the vanilla infuses everything with wonderful flavor. Don’t overbeat here, just mix until everything is beautifully combined.
- Combine Dry Ingredients: Grab a separate, smaller bowl. Whisk together the all-purpose flour, baking powder, and salt. Whisking them together ensures the baking powder and salt are evenly distributed throughout the flour, which helps with uniform rising and flavor.
- Combine Wet and Dry: Add the dry ingredients mixture gradually to the wet ingredients bowl. Using your whisk or a spatula, mix until just combined. You’ll see streaks of flour disappear, but stop mixing as soon as the dry bits are incorporated. Overmixing can develop the gluten in the flour too much, leading to tough, cakey blondies instead of chewy ones.
- Add the Cranberries: Gently stir in the cup of dried cranberries using a spatula or wooden spoon. The batter will be quite thick at this point, so take your time to distribute the cranberries relatively evenly throughout the mix.
- Prepare for the Oven: Spoon the thick batter into your prepared 8×8 inch baking pan. Use the back of a spoon or an offset spatula to spread the batter evenly into the corners and level the top surface. Ensure it’s flat so they bake uniformly.
- The Perfect Bake Time Trick: Place the pan in your preheated 350°F (175°C) oven. Bake for 25 to 30 minutes. Now, here’s the crucial part – start checking them right at the 25-minute mark. What are you looking for? The edges should appear set and be turning a light golden brown. The center, however, is the key! It should still look slightly soft, maybe even a little undercooked or jiggly in the very middle. When you insert a toothpick into the center, it should NOT come out clean. Instead, it should have moist crumbs attached – this indicates the center is cooked but still moist and developing that perfect chewy texture. If the toothpick comes out clean, they are likely already overbaked and will be dry once cooled. Remember, residual heat will continue to cook them as they cool.
- Cool Completely: This step is non-negotiable for that perfect texture and clean cutting! Once you take the blondies out of the oven (using the toothpick test from step 8!), place the pan on a wire rack. Let them cool completely in the pan. This allows the residual heat to finish cooking the center and gives the bars time to set and firm up properly. Attempting to cut warm or hot blondies will result in a crumbly mess. Patience here pays off!
- Melt White Chocolate (Optional): If you’re adding the drizzle, now’s the time. Once the blondies are absolutely, completely cool (this can take a couple of hours!), gently melt the white chocolate chips. The easiest way is in a microwave-safe bowl, heating in 30-second bursts and stirring well after each, until smooth and pourable. Alternatively, you can use a double boiler. Be careful not to overheat white chocolate, as it can seize.
- Drizzle and Set: Once the white chocolate is melted, drizzle it decoratively over the cooled blondies in the pan. Let the white chocolate set completely. You can speed this up by popping the pan into the refrigerator for 10-15 minutes, but room temperature is fine too.
- Cut and Serve: Once the white chocolate is set (if using), use the parchment paper overhang to carefully lift the entire blondie slab out of the pan onto a cutting board. Cut into 16 equal squares. Now, they are ready to enjoy!
Tips for Your Best Blondies Yet
Mastering these Cranberry White Chocolate Blondies is easy with a few extra pointers. These tips will help ensure your batch is absolutely perfect every single time.
- Don’t Overmix: We touched on this in the steps, but it’s worth repeating. Once the dry ingredients hit the wet, mix only until no dry streaks remain. Overmixing develops gluten, leading to a cakey texture instead of that desired chewiness.
- Trust the Toothpick Trick: Seriously, this is the game changer. A toothpick with moist crumbs attached is your sign of blondie success. A clean toothpick means you’ve gone too far!
- Cool Completely: I know, it’s hard to wait! But cooling allows the internal structure of the blondie to set, ensuring they are perfectly chewy and hold their shape when cut. Trying to cut them warm will result in crumbling.
- Ingredient Quality Matters: Using fresh baking powder and good quality vanilla extract and chocolate chips makes a noticeable difference in the final flavor.
- Variations Welcome: While these cranberry white chocolate blondies are fantastic as is, feel free to experiment! Swap the white chocolate chips for dark chocolate or milk chocolate. Add chopped nuts like walnuts or pecans along with the cranberries. You could even add a swirl of cranberry sauce (be mindful of moisture) or a sprinkle of orange zest to enhance the flavors. Looking for other sweet bar ideas? Check out our recipe for S’mores Brownie Squares!
- Proper Storage: Once cooled and cut, store the blondies in an airtight container at room temperature for up to 3-4 days.
What to Serve With Cranberry White Chocolate Blondies
These blondies are absolutely delightful on their own, but they also pair beautifully with a few things. A cold glass of milk is a classic choice, of course! For a little extra decadence, you could serve them slightly warmed with a scoop of vanilla ice cream. If you’re serving them as part of a dessert spread, they’d be lovely alongside other simple treats. Maybe some Classic Baked Cheesecake for contrast in texture or some light and airy whipped cream.
Your Cranberry White Chocolate Blondies Questions Answered (FAQ)
Got questions? I’ve got answers! Here are some common things people ask about making blondies.
Q: Why did my blondies turn out dry?
A: The most common culprit is overbaking! This is exactly why the “moist crumbs” toothpick trick is so important. If you bake them until the toothpick comes out clean, the moisture evaporates, resulting in a dry, crumbly texture. Oven temperatures can vary, so trust the visual cues and the toothpick test over the exact time stated in the recipe.
Q: My blondies are gooey and don’t set in the middle, even after cooling. What happened?
A: This usually means they were underbaked. While you want the center to look slightly soft when they come out of the oven, it should still feel somewhat set around the edges. If the center is liquidy or the toothpick comes out with raw batter (not just moist crumbs), they needed a few more minutes. Make sure your oven is properly preheated and calibrated.
Q: Can I use frozen cranberries instead of dried?
A: I strongly recommend using dried cranberries for this recipe. Frozen or fresh cranberries will release too much moisture during baking, which can significantly affect the texture of the blondies and make them soggy in the middle. Dried cranberries provide that concentrated flavor and chewy texture without adding excess liquid.
Q: How long do these blondies last? Can I freeze them?
A: Stored in an airtight container at room temperature, these blondies will stay fresh and chewy for about 3-4 days. For longer storage, you can absolutely freeze them! Once completely cooled and cut, wrap individual squares tightly in plastic wrap, then place them in a freezer-safe bag or container. Thaw at room temperature. They should last in the freezer for up to 2-3 months.
Q: What’s the difference between a blondie and a brownie?
A: Great question! The main difference lies in the chocolate (or lack thereof!). Brownies get their rich, dark flavor and color from cocoa powder and/or melted chocolate. Blondies, on the other hand, are essentially vanilla-based bar cookies. They get their flavor from brown sugar, butter, and vanilla, resulting in a caramel-like taste and typically a lighter color, hence “blondie.” Think of a blondie as a vanilla counterpart to a chocolate brownie.
Enjoy Your Homemade Cranberry White Chocolate Blondies!
Armed with the secret bake time trick and these detailed steps, you are now ready to bake the most deliciously chewy, perfectly textured Cranberry White Chocolate Blondies you’ve ever had! They are wonderful for sharing at parties, adding to a lunchbox, or simply enjoying with a cup of tea or coffee. The combination of the sweet white chocolate and tart cranberries is truly irresistible.
Give this recipe a try, and let me know what you think! Did the baking trick work wonders for you? Leave a comment below and share your experience. Happy baking!
Cranberry White Chocolate Blondies

Ingredients
- 1/2 cup unsalted butter, melted
- 1 cup packed light brown sugar
- 1 large egg
- 1 teaspoon vanilla extract
- 1 cup all-purpose flour
- 1/2 teaspoon baking powder
- 1/4 teaspoon salt
- 1 cup dried cranberries
- 1/2 cup white chocolate chips (for drizzling, optional)
Directions
- Preheat your oven to 350 degrees F (175 degrees C). Grease and flour an 8×8 inch baking pan or line it with parchment paper, leaving some overhang on the sides to lift the bars out easily.
- In a medium bowl, whisk together the melted butter and brown sugar until well combined.
- Beat in the egg and vanilla extract until the mixture is smooth and glossy.
- In a separate small bowl, whisk together the flour, baking powder, and salt.
- Gradually add the dry ingredients to the wet ingredients, mixing until just combined. Be careful not to overmix the batter.
- Gently stir in the dried cranberries. The batter will be thick.
- Spread the batter evenly into the prepared baking pan.
- This is the trick for perfect texture: Bake for 25 to 30 minutes, but start checking around 25 minutes. You want the edges to be set and lightly golden brown, but the center should still look slightly soft and not quite fully cooked. A toothpick inserted into the center should come out with moist crumbs attached, NOT clean. If it comes out clean, they are likely overbaked and will be dry. The residual heat will finish cooking them as they cool.
- Let the blondies cool completely in the pan on a wire rack. This step is important for them to set properly before cutting.
- Once completely cool, melt the white chocolate chips gently (in a microwave-safe bowl in 30 second intervals, stirring in between, or over a double boiler). Drizzle the melted white chocolate over the cooled bars.
- Let the white chocolate set before lifting the bars out of the pan using the parchment paper overhang and cutting them into 16 squares.