
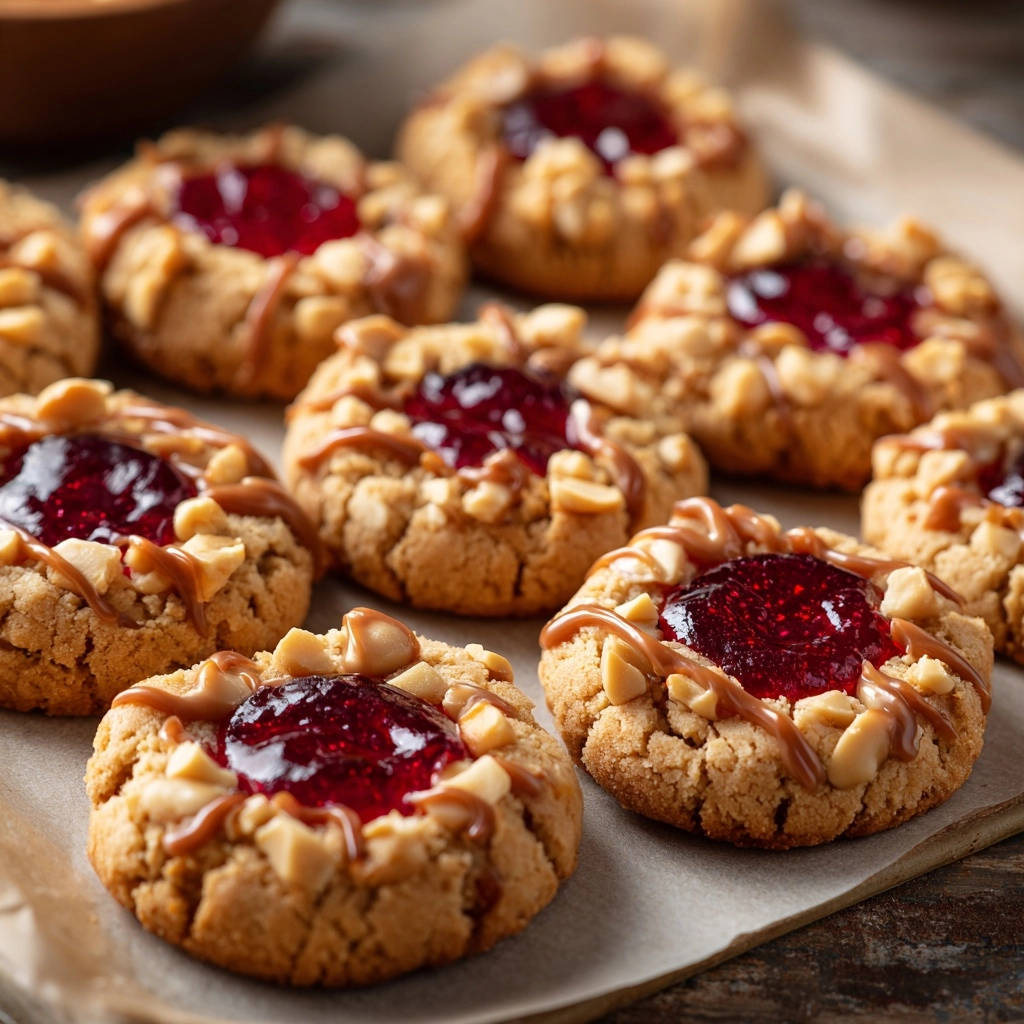
There’s nothing quite as disappointing as biting into a homemade peanut butter cookie, only to find it dry and crumbly. For years, I chased that elusive perfectly soft and tender texture, especially in a classic like these Perfect PB&J Thumbprint Cookies.
This recipe isn’t just about combining ingredients; it’s about a game-changing technique that ensures every single cookie emerges from the oven delightfully chewy, with a vibrant jam center and satisfying crunch. Get ready for a reliable cookie masterpiece that evokes pure nostalgia with every bite.
Why These Perfect PB&J Thumbprint Cookies Stand Out
The Secret to Never-Dry, Always-Tender Cookies
The true magic behind these cookies lies in a specific chilling technique and precise baking cues. This approach ensures the fats firm up, preventing excessive spreading and locking in moisture for that irresistible, melt-in-your-mouth texture you crave.
A Beloved Classic, Elevated for Any Occasion
Taking the universally loved peanut butter and jelly combination, this recipe transforms it into an elegant thumbprint cookie. It’s a delightful nostalgic treat that feels sophisticated enough for a gathering, yet comforting enough for a simple afternoon snack.
Quick Prep, Impressive Results
Despite their gourmet appearance and incredible texture, these cookies require just 20 minutes of active preparation time. This efficiency makes them an ideal choice for busy bakers seeking impressive results without the extensive fuss.
Your Baking Toolkit: Essential Equipment for Success
Having the right tools makes all the difference when baking these thumbprint cookies. Each piece helps ensure consistency and ease throughout the process.

Electric Mixer (Stand or Handheld): Crucial for properly creaming butter and sugars, incorporating essential air for a light texture.
Large and Medium Mixing Bowls: Essential for separating wet and dry ingredients before combining them smoothly.
Rubber Spatula: Perfect for scraping down the sides of bowls and gently folding in dry ingredients without overmixing.
Measuring Spoons and Cups: Accuracy in baking is paramount, especially for dry ingredients and leavening agents.
Baking Sheets and Parchment Paper: Parchment prevents sticking, ensures even baking, and makes cleanup a breeze.
Wire Cooling Rack: Allows air circulation around the cookies, preventing sogginess and ensuring they cool completely.
Small Spoon or 1/2 Teaspoon Measuring Spoon: Ideal for precisely filling the cookie indentations with jam.
The Heart of the Cookie: Ingredient Spotlight
Building the Perfect Dough Base
The foundation of these peanut butter cookies relies on a precise balance of ingredients. Each component plays a vital role in achieving that sought-after tender, chewy texture.
Unsalted Butter (softened): Creaming softened butter creates air pockets, contributing to a light and fluffy cookie structure.
Creamy Peanut Butter: Provides richness and essential moisture. Opt for a classic, smooth variety for consistency, avoiding natural styles that can separate.
Granulated Sugar & Light Brown Sugar: The combination offers both crispness from granulated sugar and chewiness from the molasses in brown sugar.
Large Egg: Acts as a binder, adding structure and moisture to the dough.
Vanilla Extract: Enhances the overall flavor profile, complementing both peanut butter and jam.
All-Purpose Flour: Provides the main structure. Proper measuring (spooned and leveled) prevents a dense cookie.
Baking Soda & Salt: Baking soda helps with spread and tenderness, while salt balances sweetness and brings out the nutty flavor.
The Sweet Center & Crunchy Topping
These elements transform a simple cookie into a dynamic sensory experience, offering bursts of flavor and contrasting textures.
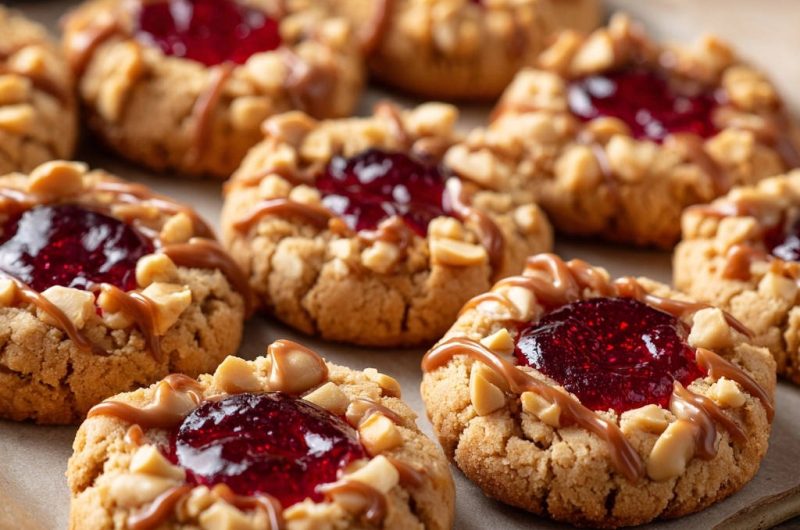
Raspberry or Strawberry Jam: Choose a good quality, thicker jam that won’t spread too much during baking. Its fruity tartness cuts through the rich peanut butter.
Chopped Roasted Peanuts: Adds a fantastic crunch and intensifies the nutty flavor. Ensure they’re finely chopped for better adherence to the dough.
Caramel Sauce (optional): A drizzle of warm caramel elevates the cookies, adding an extra layer of sweetness and sticky decadence. For homemade, try this simple caramel recipe for incredible depth.
Mastering the Method: Step-by-Step Perfect PB&J Thumbprint Cookies
-
Creaming for Air and Fluffiness:
In a large bowl, use an electric mixer to combine the softened butter, creamy peanut butter, granulated sugar, and light brown sugar. Beat these ingredients together for 2-3 minutes until the mixture appears light and fluffy.
This crucial step incorporates air, which is vital for achieving that desired soft and tender cookie texture. Don’t rush this stage, as it sets the foundation for your dough.
-
Incorporating Wet Ingredients:
Next, beat in the large egg and vanilla extract. Continue mixing until they are fully incorporated into the creamed mixture.
Ensure no streaks of egg remain, as this affects the dough’s consistency and final cookie texture.
-
Preparing Dry Ingredients:
In a separate medium bowl, whisk together the all-purpose flour, baking soda, and salt. Whisking ensures these dry ingredients are evenly distributed, so the leavening agent works uniformly.
-
Gentle Mixing for a Tender Crumb:
Gradually add the whisked dry ingredients to the wet mixture. Mix on low speed, just until everything is combined and no dry streaks of flour are visible.
Avoid overmixing! Overworking the dough develops gluten, which can lead to a tough, less tender cookie. Mix only until barely combined.
-
The Chilling Secret for Perfect Texture:
For that perfectly soft and chewy result, cover your cookie dough and chill it in the refrigerator for at least 30 minutes. This step is a game-changer for these thumbprint cookies.
Chilling allows the fats in the butter and peanut butter to firm up, preventing the cookies from spreading too much during baking. It also allows the flour to fully hydrate, leading to a moister and more flavorful cookie.
-
Oven Prep:
While the dough chills, preheat your oven to 375°F (190°C). Line a baking sheet with parchment paper to prevent sticking and ensure easy removal.
-
Shaping and Coating:
Once chilled, roll the cookie dough into 1-inch balls. Place your chopped roasted peanuts in a shallow dish.
Roll each dough ball thoroughly in the peanuts, pressing gently to ensure a good, even coating. This adds a delightful crunch and classic peanut butter aesthetic.
-
Indentation Creation:
Place the coated dough balls onto the prepared baking sheet, leaving about 2 inches of space between each. Use your thumb or the back of a 1/2 teaspoon measuring spoon to create a clear indentation in the center of each cookie.
Make the indent deep enough to hold the jam but not so deep that you break through the bottom of the cookie.
-
Filling the Centers:
Carefully spoon about 1/2 teaspoon of your chosen raspberry or strawberry jam into the center of each indentation. Don’t overfill, as it might bubble over during baking.
-
Baking to Perfection (The “Soft Center” Rule!):
Bake the cookies for 9-11 minutes, or until the edges are lightly golden. The crucial part here is to remove the cookies from the oven when they still look slightly soft and underbaked in the center.
They will continue to cook and set on the hot baking sheet as they cool, ensuring they remain perfectly moist and chewy, never dry or crumbly. This “carry-over cooking” is key to perfection.
-
Cooling for Optimal Set:
Allow the cookies to cool on the baking sheet for 5 minutes before carefully transferring them to a wire rack. This initial cooling period allows them to firm up slightly before handling.
Let them cool completely on the wire rack. Rushing this step can lead to breakage or a less-than-ideal texture.
-
The Optional Caramel Drizzle:
Once the cookies have cooled completely, for an extra touch of indulgence, drizzle them generously with caramel sauce. This adds another layer of flavor and visual appeal, making your Perfect PB&J Thumbprint Cookies truly shine.
Chef’s Secrets: Elevating Your PB&J Thumbprint Cookies Game
The Importance of Ingredient Temperature
Ensure your unsalted butter is genuinely softened, not melted or too cold. Butter that’s too firm won’t cream properly, leading to a denser cookie. Too soft, and it can result in greasy cookies that spread excessively.
Don’t Skimp on the Chill Time!
The 30-minute chilling period isn’t optional; it’s fundamental. This allows the butter to firm up, preventing your cookies from spreading into flat discs during baking. It also gives the flour time to hydrate, contributing to a truly soft and tender crumb.
Preventing Jam Bleed-Out
Choose a good quality, thicker jam. Runnier jams are more prone to bubbling over or sinking. If your jam seems thin, you can gently warm it slightly and stir in a tiny pinch of cornstarch before filling (about 1/4 teaspoon per 1/2 cup jam) to thicken it, then let it cool before using.
Customizing Your Cookie Experience
While raspberry or strawberry jam is classic, feel free to experiment! Apricot, grape, or even orange marmalade can offer delightful twists. For a nuttier twist on the coating, consider finely chopped pecans or walnuts instead of peanuts. If you want to explore other cookie variations, you might enjoy making pecan crumble cookies for a different texture experience.
Achieving the Perfect Golden Hue Without Overbaking
Keep a close eye on the edges. They should be just lightly golden, not deeply browned. The centers will still appear soft, but this indicates they are done. Trust this visual cue over extended bake times to avoid dry cookies.
Troubleshooting Common Cookie Quandaries
My Cookies Are Spreading Too Much!
This is usually due to butter that was too warm or insufficient chilling time. Ensure your butter is softened but still cool to the touch. Always chill your dough for the full recommended 30 minutes, or even longer if your kitchen is warm.
You can also try chilling your baking sheets before placing the dough on them; a cold surface helps prevent immediate spread.
Why Are My Thumbprint Cookies Dry and Crumbly?
Overmixing the dough is a common culprit, developing too much gluten and making the cookies tough. Also, overbaking is a major factor; remember to remove them when the centers still look slightly soft. They will firm up as they cool.
My Jam Sank or Melted Away!
This often happens with jams that are too thin or if the indentations aren’t deep enough. Use a thicker jam, or as suggested earlier, thicken a runny jam slightly with a tiny bit of cornstarch. Ensure your indentations are well-formed and hold the jam securely.
The Peanuts Aren’t Sticking Well.
Ensure your chopped peanuts are truly finely chopped. Larger pieces will have trouble adhering. Also, make sure the cookie dough balls are rolled firmly before coating; a slightly sticky surface helps the peanuts cling.
Beyond the Bake: Serving, Storing, & Creative Twists
Delightful Serving Suggestions
These cookies are wonderful on their own, but also pair beautifully with a glass of cold milk or a hot cup of tea or coffee. They make a charming addition to any dessert platter or cookie exchange.
Proper Storage for Lasting Freshness
Store your cooled Perfect PB&J Thumbprint Cookies in an airtight container at room temperature. Layer them between sheets of parchment paper to prevent sticking and maintain their freshness.
Can You Make These Cookies Ahead?
Absolutely! The cookie dough can be made up to 2-3 days in advance and stored in the refrigerator. Just be sure to allow it to warm slightly at room temperature for about 10-15 minutes before rolling and shaping, as it will be quite firm.
Creative Jam & Peanut Butter Flavor Combinations
Don’t stop at raspberry! Experiment with blackberry, apricot, or even grape jam for different fruit notes. For a fun twist on the peanut butter, consider using almond butter or cashew butter. You could also drizzle with white chocolate instead of caramel for a different kind of sweetness.
Your Perfect PB&J Thumbprint Cookie Questions Answered
Can I Use Crunchy Peanut Butter?
While the recipe calls for creamy peanut butter for a consistent dough texture, you can certainly experiment with crunchy peanut butter. Be aware that the added peanut pieces might make the dough slightly more challenging to roll smoothly.
What’s the Best Type of Jam for Thumbprint Cookies?
Thicker, fruit-only jams or preserves work best as they are less likely to bubble over or sink. High-quality raspberry or strawberry jams are classic choices, but explore your favorites!
Can I Freeze PB&J Thumbprint Cookie Dough or Baked Cookies?
Yes, both can be frozen! For dough, roll into balls, make indentations, then freeze on a baking sheet until solid. Transfer to a freezer-safe bag for up to 2-3 months. Bake from frozen, adding a minute or two to the bake time.
Baked cookies can also be frozen in an airtight container for up to 1 month. Thaw at room temperature before serving.
Are There Gluten-Free Alternatives for This Recipe?
While this recipe uses all-purpose flour, you can often substitute a 1:1 gluten-free baking flour blend (ensure it contains xanthan gum) for a gluten-free version. Results may vary slightly in texture, but it’s a popular adaptation.
How Long Do These Cookies Stay Fresh?
When stored properly in an airtight container at room temperature, these Perfect PB&J Thumbprint Cookies will stay fresh for up to 5-7 days. The chewiness and flavor are best within the first 3-4 days.
Bake, Share, & Savor Your PB&J Masterpiece!
Now that you’re armed with the secrets to making truly exceptional Perfect PB&J Thumbprint Cookies, it’s time to get baking! This recipe is designed to deliver consistent, delicious results every time, ensuring your efforts are met with smiles and requests for more.
Whether you’re baking for family, friends, or just yourself, these soft, chewy, and jam-filled treats are sure to become a cherished favorite. Don’t hesitate to share your baking successes or any creative twists you try!
Perfect PB&J Thumbprint Cookies
Course: DessertCuisine: American CuisineDifficulty: easy24
cookies20
minutes10
minutes30
minutesAmerican Cuisine
Ingredients
1/2 cup (1 stick) unsalted butter, softened
1/2 cup creamy peanut butter
1/2 cup granulated sugar
1/2 cup packed light brown sugar
1 large egg
1 teaspoon vanilla extract
1 1/4 cups all-purpose flour
1/2 teaspoon baking soda
1/4 teaspoon salt
1/2 cup raspberry jam (or strawberry jam)
1/2 cup chopped roasted peanuts
1/4 cup caramel sauce, for drizzling (optional, but highly recommended!)
Directions
- In a large bowl, using an electric mixer, cream together the softened butter, creamy peanut butter, granulated sugar, and brown sugar until the mixture is light and fluffy, about 2-3 minutes. This incorporates air and helps with the final texture.
- Beat in the egg and vanilla extract until well combined.
- In a separate medium bowl, whisk together the all-purpose flour, baking soda, and salt.
- Gradually add the dry ingredients to the wet ingredients, mixing on low speed just until combined. Be careful not to overmix, as this can lead to a tougher cookie.
- For that perfect soft and chewy texture, cover the cookie dough and chill it in the refrigerator for at least 30 minutes. This helps the fats firm up, which prevents spreading during baking and contributes to a moister, chewier cookie.
- Preheat your oven to 375 degrees Fahrenheit. Line a baking sheet with parchment paper.
- Roll the chilled dough into 1-inch balls. Place the chopped peanuts in a shallow dish, then roll each dough ball in the peanuts to coat.
- Place the coated dough balls onto the prepared baking sheet, about 2 inches apart. Use your thumb or the back of a measuring spoon to create an indentation in the center of each cookie.
- Spoon about 1/2 teaspoon of raspberry jam into the center of each indentation.
- Bake for 9-11 minutes, or until the edges are lightly golden. Crucially, remove the cookies from the oven when they still look slightly soft in the center. They will continue to set as they cool, ensuring they stay perfectly moist and never dry.
- Let the cookies cool on the baking sheet for 5 minutes before transferring them to a wire rack to cool completely.
- Once cooled, drizzle with caramel sauce if desired. Enjoy your perfectly soft and delicious thumbprint cookies!
Notes
- Chilling the dough for at least 30 minutes is crucial for the perfect soft and chewy texture, and prevents spreading during baking.


