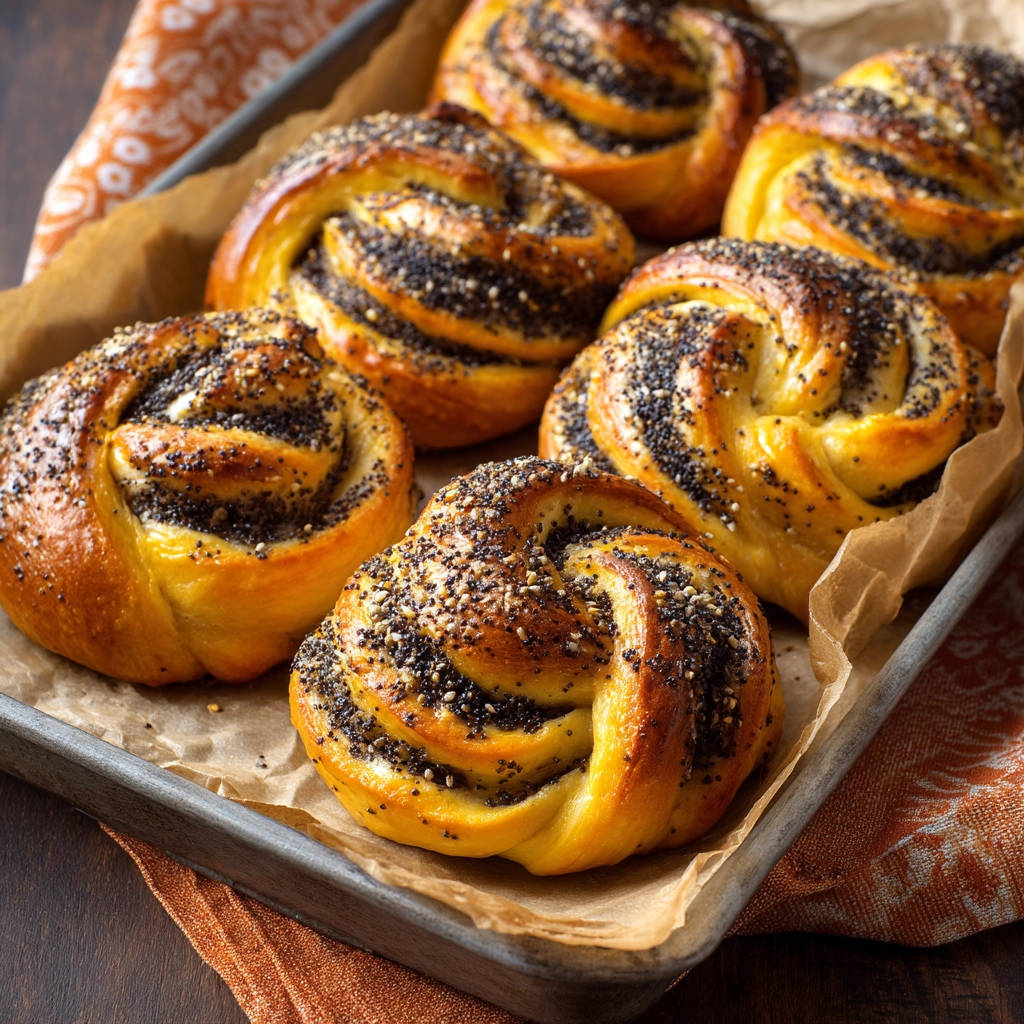
Why You’ll Fall in Love with These Poppy Seed Swirl Rolls
These aren’t just any old rolls. They are a baking triumph! Here’s why this recipe is about to become your go-to for poppy seed deliciousness:
- They boast an incredibly soft and tender crumb, thanks to the specific combination of ingredients and careful technique.
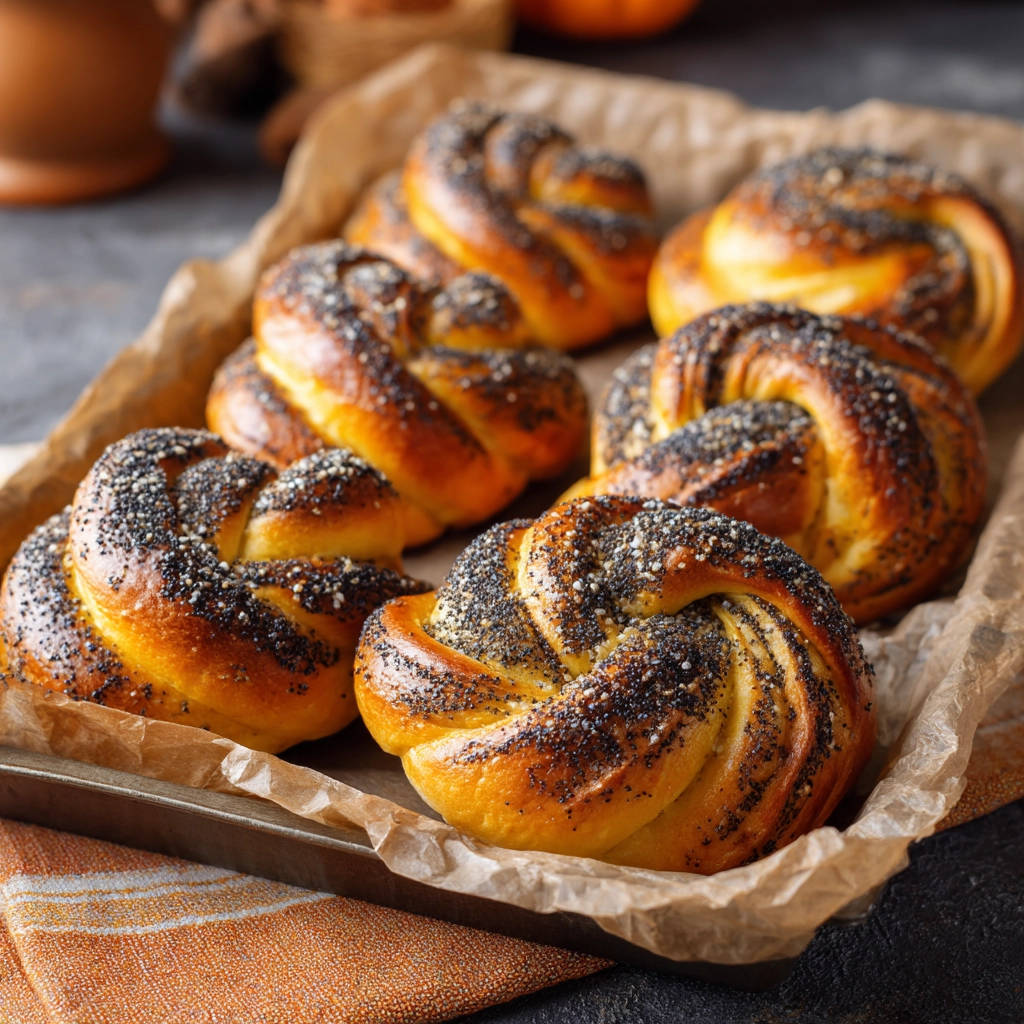
- The visual appeal is undeniable – that beautiful swirl is always a crowd-pleaser.
- The sweet poppy seed filling offers a unique, subtly nutty flavor that’s comforting and addictive.
- While they require some rising time, the active work is manageable and incredibly rewarding.
- They’re perfect for so many occasions – breakfast, brunch, a snack with coffee, or even alongside a savory meal.
Say goodbye to dry, tough rolls and hello to pure baking happiness. These poppy seed swirl rolls are here to stay!
Gathering Your Ingredients for Perfect Poppy Seed Swirl Rolls
Creating magic in the kitchen always starts with gathering the right components. This recipe uses simple, everyday ingredients, but the specific ratios and how we handle them make all the difference in achieving that desired softness. You’ll need:
- Warm milk: Ideally between 105-115°F (40-46°C). This specific temperature range is crucial for waking up our yeast without killing it. Think of it as a warm, inviting bath for your little yeast friends!
- Active dry yeast: The leavening star! Make sure it’s fresh. If your yeast isn’t active (it won’t get foamy in the milk/sugar mixture), your dough won’t rise.
- Granulated sugar: Used in two places! A little goes into the dough to feed the yeast and add tenderness, and the rest is combined with the poppy seeds for the sweet, flavorful filling.
- 1 large egg, plus 1 egg yolk: The combination of a whole egg and an extra yolk adds richness, moisture, and contributes significantly to that lovely tender crumb. The fat from the yolk is a game-changer.
- Unsalted butter, melted: We use melted butter both in the dough for richness and tenderness, and crucially, for brushing the dough before filling and brushing the rolls after baking to lock in moisture and keep the crust soft. Using unsalted butter gives you control over the salt level in your rolls.
- Salt: Essential for balancing the sweetness and enhancing all the flavors. It also helps regulate the yeast activity and strengthens the gluten structure.
- All-purpose flour: The structure of our rolls. We’ll use between 3 ½ to 4 cups. The exact amount can vary depending on humidity and how you measure, so pay attention to the dough’s texture rather than sticking rigidly to the quantity. Adding too much flour is a common culprit for dry rolls!
- Poppy seeds: The namesake ingredient! When combined with sugar and butter, they create a wonderfully sweet and slightly crunchy filling that’s absolutely delicious.
- Optional: Sesame seeds: For a little extra texture and a subtle nutty flavor on top. They pair surprisingly well with poppy seeds!
Having all your ingredients measured and ready before you start mixing makes the process smooth and enjoyable. It’s like setting the stage for a delicious performance!
Crafting Your Poppy Seed Swirl Rolls: Step-by-Step to Softness
Alright, let’s get our hands doughy! Baking is a tactile experience, and making these rolls is incredibly satisfying. We’ll walk through each step, focusing on the techniques that ensure your rolls are perfectly soft and moist from the inside out.
- Activate Your Yeast: In a large mixing bowl, gently combine the warm milk (remember that ideal temperature!), the active dry yeast, and the initial ¼ cup of sugar. Give it a quick stir. Now, let this mixture sit quietly for about 5 to 10 minutes. What you’re looking for is a foamy, frothy layer to appear on the surface. This foam tells you your yeast is alive, happy, and ready to work its magic. If you don’t see foam, your yeast might be old or the milk temperature was off, and it’s best to start again with fresh yeast.
- Add Wet Ingredients: Once your yeast is bubbly and active, whisk in the large egg, the extra egg yolk, the melted butter (that’s cooled slightly so it doesn’t cook the egg!), and the salt. Whisk until everything is well combined and the mixture looks smooth.
- Mix and Knead the Dough: Now, it’s time for the flour. Gradually add the all-purpose flour, mixing it in with a spoon or a stand mixer on low speed. Start with 3 ½ cups and mix until a shaggy dough forms – it will look rough and not fully cohesive yet. Turn this shaggy dough out onto a lightly floured surface. Begin kneading the dough. This is where you develop the gluten, which gives the rolls structure. Knead for about 6 to 8 minutes, either by hand or with a dough hook on medium speed. Your goal is a dough that is smooth, elastic, and slightly sticky but pulls away from your hands or the sides of the bowl. Add the remaining flour, a tablespoon at a time, only if the dough is excessively sticky and won’t form a cohesive ball. Resist the urge to dump in too much flour, as this is one of the main reasons rolls turn out tough and dry.
- First Rise (Bulk Fermentation): Lightly grease a clean bowl – a little cooking spray or butter works well. Place your beautifully kneaded dough into the bowl, turning it over to coat the entire surface lightly with grease. Cover the bowl snugly with plastic wrap or a clean kitchen towel. Place the bowl in a warm spot in your kitchen. This could be near a sunny window, on top of a warm appliance, or even in an oven that’s been turned off but is still slightly warm (not hot!). Let the dough rise for 60 to 90 minutes, or until it has visibly doubled in size. The warmer the spot, the faster it will rise. This first rise develops flavor and creates a light texture.
- Prepare the Filling: While your dough is happily rising, you can prepare the simple poppy seed filling. In a small bowl, combine the ½ cup of poppy seeds with the ¼ cup of granulated sugar for the filling. Give it a quick stir to mix. This filling is simple, but the combination of textures and flavors is perfect once baked.
- Shape the Rolls: Once your dough has doubled, gently punch it down to release the air. Turn the dough out onto a lightly floured surface again. Roll the dough using a rolling pin into a large rectangle, aiming for dimensions of approximately 12×18 inches. Try to get the thickness as even as possible so your swirls are consistent.
- Butter and Fill: Brush the entire surface of the rolled-out dough evenly with the 2 tablespoons of melted butter. Make sure to get right to the edges! Now, evenly sprinkle the poppy seed and sugar mixture all over the buttered dough. Leave a small border (about ½ inch) along one of the long edges. This border will help seal the roll. If you’re using optional sesame seeds, sprinkle them over the poppy seed mixture now.
- Roll ‘Em Up: Starting from the long edge opposite the border you left, tightly roll up the dough into a log. Try to keep the roll as tight and uniform as possible to ensure beautiful, defined swirls in your finished rolls. Pinch the seam closed along the border edge to seal the log.
- Slice and Place: Use a sharp knife or, for really clean cuts, a piece of dental floss (unflavored!). Slide the floss under the log, cross the ends over the top, and pull to slice through. Cut the log into 8 equal slices. Place these slices cut-side up on a baking sheet that you’ve lined with parchment paper. Leave some space between each roll, as they will puff up during the second rise and baking.
- Second Rise and Preheat: Loosely cover the rolls on the baking sheet. You can use plastic wrap or a clean kitchen towel again. Let them rise for another 30 to 45 minutes, or until they look visibly puffy. During the last 15 minutes of this second rise, preheat your oven to 375°F (190°C). Preheating ensures the oven is at the correct temperature when the rolls go in, contributing to an even bake.
- Bake Until Golden: This is the moment of truth for avoiding dryness! Place the baking sheet in the preheated oven and bake for 18 to 22 minutes. Watch them closely during the last few minutes. The key is to bake them just until the tops are a beautiful golden brown. As soon as they hit that color, they are likely done! Over-baking, even by a few minutes, is the enemy of moist, tender rolls.
- Brush with Butter (The Secret!): Immediately upon taking the rolls out of the oven, generously brush the tops with the remaining melted butter. Don’t be shy! This step is crucial. The hot rolls absorb the butter, adding incredible moisture and ensuring the crust stays soft as they cool. This is one of the “cracked the code” techniques mentioned earlier!
- Cool Slightly and Serve: Let the rolls cool on the baking sheet for just a few minutes. They are best served warm, when they are at their absolute softest and the filling is slightly gooey.
See? It’s a straightforward process, and paying attention to the little details like dough consistency, yeast activity, and baking time makes all the difference!
Tips for Perfect Poppy Seed Swirl Rolls Every Time
Even with a great recipe, a few extra tips can elevate your baking game. Here are some pointers to ensure your poppy seed swirl rolls are nothing short of spectacular:
- Measure Flour Correctly: The range of 3 ½ to 4 cups is there for a reason. Don’t scoop flour directly from the bag with your measuring cup – this compacts it, leading to too much flour. Instead, spoon flour into your measuring cup and level it off with a straight edge. This “spoon and level” method is more accurate. Pay attention to the dough’s feel during kneading – it should be slightly sticky but manageable.
- Understand Your Rising Environment: A warm, draft-free spot is ideal for rising. If your kitchen is cool, you can create a warm environment by placing the covered bowl in your turned off oven with the light on (the heat from the bulb is often enough). Alternatively, you can place the bowl in a larger bowl filled with warm (not hot) water.
- Don’t Skip the Double Rise: Both the first (bulk) rise and the second rise after shaping are important. The first rise develops flavor and structure, while the second rise (proofing) makes the rolls light and airy. Rushing these steps will result in dense rolls.
- Master the Bake Time: As emphasized in the instructions, watching for that golden brown color is key. Every oven is different, so the 18-22 minutes is a guideline. Trust your eyes and err on the side of slightly underdone rather than overdone if you’re unsure. A roll that’s slightly pale but feels light is better than one that’s dark and hard.
- Use Quality Butter: Since butter is featured in the dough, the filling, and the final brush, its quality shines through. Use a good quality unsalted butter for the best flavor.
By keeping these tips in mind, you’re well on your way to consistently amazing poppy seed swirl rolls!
Serving Suggestions for Your Delicious Swirls
These soft poppy seed swirl rolls are incredibly versatile. They make a fantastic addition to a weekend breakfast or brunch spread, perhaps alongside some fresh fruit or a savory egg dish like a cheesy potato and egg scramble. They’re also wonderful as a simple afternoon snack with a cup of coffee or tea. Don’t hesitate to serve them warm with a little extra butter, if desired. Their sweet-nutty flavor makes them a delightful counterpart to lighter savory meals too, though they certainly shine on their own or as part of a dessert selection. Looking for other sweet treats to bake? Our Classic Cinnamon Rolls or Blueberry Delight might be just the thing!
Your Poppy Seed Swirl Roll Questions Answered (FAQ)
Got questions? Baking can sometimes feel intimidating, but it doesn’t have to be! Here are some common questions about making these soft poppy seed swirl rolls:
What if my yeast doesn’t get foamy?
If your mixture of warm milk, yeast, and sugar doesn’t foam up after 5-10 minutes, your yeast is likely dead or the milk temperature was too hot or too cold. Yeast is a living organism! Discard the mixture and start over with fresh yeast and carefully measured warm milk (using a thermometer is best for accuracy). Active yeast is crucial for successful rising.
Can I make the dough ahead of time?
Yes, you can! After the first rise and shaping the rolls, place the cut rolls on the parchment-lined baking sheet, cover them tightly with plastic wrap, and refrigerate them overnight (up to 12-18 hours). In the morning, take them out of the fridge about 1-1.5 hours before you plan to bake them to allow them to come to room temperature and get slightly puffy before baking as directed.
Can I substitute ingredients in the filling?
While the classic poppy seed and sugar filling is traditional and delicious, you could experiment. A thin layer of fruit preserves (like raspberry) or even a touch of lemon zest mixed with the sugar could offer a different flavor profile. Remember to keep the filling relatively thin to avoid it spilling out during rolling and baking.
My rolls seem dense. What went wrong?
Density is usually a result of one or two things: either not enough rising time (the yeast didn’t do its job fully) or adding too much flour during the kneading process. Make sure your yeast is active, give the dough sufficient time for both rises, and be mindful of adding flour only as needed to get a slightly sticky, elastic dough.
How do I store leftover poppy seed swirl rolls?
Store cooled rolls in an airtight container at room temperature for 2-3 days. To reheat and enjoy that fresh-baked softness, microwave a roll for 15-30 seconds or warm it gently in a low oven (around 300°F / 150°C) for a few minutes until soft.
Can I freeze these rolls?
Absolutely! You can freeze baked and cooled rolls in an airtight container or freezer bag for up to 2-3 months. Thaw at room temperature and reheat as described above. For optimal freshness, you can also freeze the shaped but unbaked rolls. Place them on the baking sheet and freeze until solid, then transfer to a freezer bag. When ready to bake, place frozen rolls on a baking sheet, let them thaw and rise at room temperature (this will take longer than a standard rise, maybe 1.5-2.5 hours), then bake as usual.
Enjoy Your Homemade Poppy Seed Swirl Rolls!
There you have it! The simple secrets to incredibly soft, moist, and utterly delightful poppy seed swirl rolls. Baking bread and rolls at home is one of life’s great pleasures, and mastering a recipe like this is so rewarding. The aroma filling your kitchen, the beautiful golden swirl, and that first tender bite make every minute spent worth it. Give this recipe a try, and I promise you won’t go back to dry, crumbly rolls. Share them with family and friends, or keep them all to yourself (we won’t tell!). Did you make these poppy seed swirl rolls? I’d love to hear how they turned out! Leave a comment below and let me know your favorite part. Happy baking!
Poppy Seed Swirl Rolls

Ingredients
- 1 cup warm milk (105-115F)
- 2 and 1/4 teaspoons active dry yeast
- 1/4 cup granulated sugar
- 1 large egg, plus 1 egg yolk
- 1/2 cup unsalted butter, melted
- 1 teaspoon salt
- 3 and 1/2 to 4 cups all purpose flour
- 1/2 cup poppy seeds
- 1/4 cup granulated sugar (for filling)
- 2 tablespoons melted butter (for brushing)
- Optional: 1 tablespoon sesame seeds
Directions
- In a large bowl, combine the warm milk, yeast, and 1/4 cup sugar. Let sit for 5-10 minutes until foamy.
- Whisk in the egg, egg yolk, melted butter, and salt.
- Gradually add the flour, mixing until a shaggy dough forms. Turn out onto a floured surface and knead for 6-8 minutes until smooth and elastic. Add more flour a tablespoon at a time if needed, but avoid adding too much which can make the dough tough. The dough should be slightly sticky but pull away from your hands.
- Place the dough in a lightly greased bowl, turning to coat. Cover and let rise in a warm place for 60-90 minutes, or until doubled in size.
- While the dough is rising, prepare the filling by combining the poppy seeds and 1/4 cup sugar in a small bowl.
- Punch down the dough and turn it out onto a lightly floured surface. Roll it into a large rectangle, about 12×18 inches.
- Brush the surface of the dough evenly with the melted butter. Sprinkle the poppy seed sugar mixture evenly over the buttered dough, leaving a small border along one long edge. Sprinkle with sesame seeds if using.
- Starting from the long edge opposite the border, tightly roll up the dough into a log.
- Using a sharp knife or dental floss, cut the log into 8 equal slices. Place the slices cut-side up on a baking sheet lined with parchment paper, leaving space between them.
- Cover the rolls loosely and let rise again for 30-45 minutes, or until puffy. Preheat your oven to 375F (190C) during the last 15 minutes of rising.
- Bake for 18-22 minutes, or until the tops are golden brown. This is the key to avoiding dryness. Watch them closely and remove as soon as they reach that golden color. Over-baking is the enemy of moist rolls!
- Immediately upon removing the rolls from the oven, generously brush the tops with the remaining melted butter. This adds moisture and keeps the crust soft as they cool.
- Let the rolls cool slightly on the baking sheet before serving warm.