There’s a certain magic that happens when creamy cheesecake meets the cozy warmth of pumpkin spice. It’s a combination that just feels like a hug in dessert form, perfect for chilly evenings or festive gatherings. But let’s be honest, few things are as disappointing as anticipating that smooth, luxurious texture and instead biting into a cheesecake bar that’s grainy, rubbery, or cracked.
We’ve all been there! Achieving that perfectly smooth, crack-free cheesecake often feels like a culinary mystery. But what if we told you there’s a simple, yet crucial, trick that can make your pumpkin swirl cheesecake bars turn out incredibly creamy and luscious every single time? Get ready to unlock the secret to pumpkin cheesecake bliss right in your own kitchen!
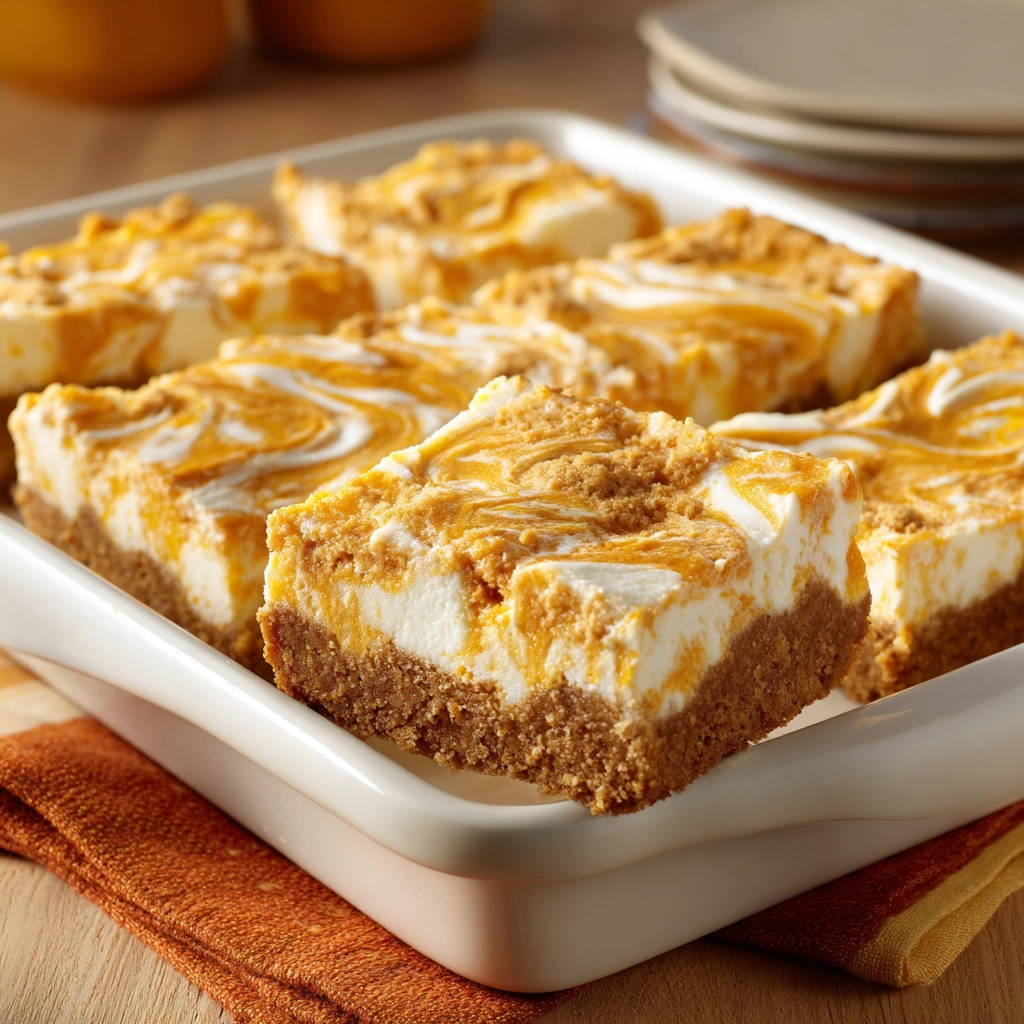
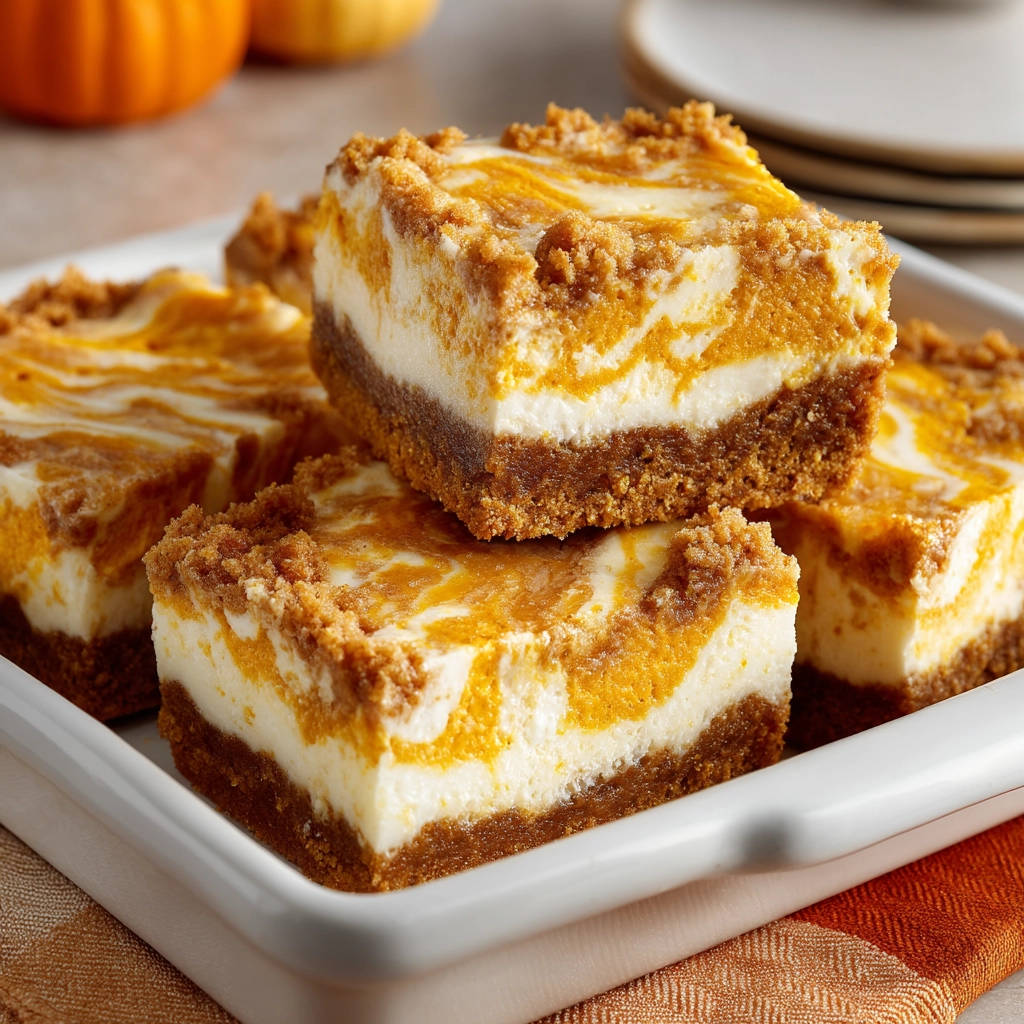
These Pumpkin Swirl Cheesecake Bars aren’t just another dessert; they’re a delightful experience. The contrast between the buttery graham cracker crust, the velvety smooth pumpkin-spiced cheesecake filling, and a delicate crumble topping is simply irresistible. Plus, making them in bar form makes them super easy to slice and share (or not share – we won’t judge!).
Why These Pumpkin Swirl Cheesecake Bars Will Be Your New Favorite
What makes this recipe stand out? Beyond the incredible flavor combination, these bars are designed for success, ensuring that coveted creamy texture:
- The star attraction: a cheesecake filling that is guaranteed smooth thanks to a specific mixing technique.
- A beautiful visual: the easy pumpkin swirl creates an impressive look with minimal effort.
- Perfectly spiced: the classic blend of cinnamon, nutmeg, and cloves sings with the pumpkin flavor.
- Simple format: baking in a 9×13 inch pan makes slicing into bars quick and easy.
- That crumble topping: adds delightful texture and a hint of brown sugar sweetness that complements the creamy filling.
Forget finicky water baths! This recipe relies on smart techniques and proper cooling to give you cheesecake bars that are both delicious and gorgeous.
Gathering Your Ingredients for Creamy Pumpkin Swirl Cheesecake Bars
Creating these perfect pumpkin swirl cheesecake bars starts with gathering the right ingredients, prepared correctly. Each component plays a vital role, from the sturdy base to the spiced, creamy filling and the sweet crumb topping. Let’s look at what you’ll need and why.
For the foundation, we start with a classic graham cracker crust. You’ll need 1 1/2 cups of graham cracker crumbs, which is typically made from about 10-12 full graham cracker sheets. These crumbs provide a slightly sweet, tender base that holds up beautifully to the rich filling. We mix them with 1/4 cup of granulated sugar for a touch more sweetness and 1/2 cup of unsalted butter, melted. The melted butter acts as the binder, coating the crumbs and allowing them to press together into a solid crust.
The heart of these bars is, of course, the filling. The most critical ingredient here is 2 blocks (8 ounces each) of full-fat cream cheese. It is absolutely essential that your cream cheese is softened to room temperature. Cold cream cheese will result in a lumpy filling, which no amount of beating can fully fix. Trust us, room temp is key for that silky smooth finish! We sweeten the cream cheese with 3/4 cup of granulated sugar.
The pumpkin flavor comes from 1/2 cup of canned pumpkin puree. Be sure to grab plain pumpkin puree, not pumpkin pie filling, which has added sugars and spices that will throw off the balance of the recipe. The signature fall spices – 1 teaspoon vanilla extract, 1/2 teaspoon ground cinnamon, 1/4 teaspoon ground nutmeg, and 1/8 teaspoon ground cloves – enhance the pumpkin and add warmth and depth. And finally, 2 large eggs, also at room temperature, are the binders that set the cheesecake. Having them at room temperature helps them incorporate more evenly into the cream cheese mixture without seizing or chilling the batter, which can sometimes lead to lumps.
To finish everything off, a simple yet effective crumble topping adds wonderful texture. You’ll combine 1/2 cup all-purpose flour, 1/4 cup packed light brown sugar (the packed brown sugar adds moisture and a hint of caramel flavor that white sugar doesn’t), and 1/4 teaspoon ground cinnamon for extra spice. Finally, 1/4 cup of unsalted butter, cold and cut into small cubes, is cut into the dry ingredients to create those delightful coarse crumbs.
Here is the full list for easy reference:
- For the Crust:
- 1 1/2 cups graham cracker crumbs (about 10-12 full sheets)
- 1/4 cup granulated sugar
- 1/2 cup unsalted butter, melted
- For the Filling:
- 2 blocks (8 ounces each) cream cheese, softened to room temperature
- 3/4 cup granulated sugar
- 1/2 cup canned pumpkin puree (not pie filling)
- 1 teaspoon vanilla extract
- 1/2 teaspoon ground cinnamon
- 1/4 teaspoon ground nutmeg
- 1/8 teaspoon ground cloves
- 2 large eggs, room temperature
- For the Topping:
- 1/2 cup all-purpose flour
- 1/4 cup packed light brown sugar
- 1/4 teaspoon ground cinnamon
- 1/4 cup unsalted butter, cold and cut into small cubes
Crafting Your Bars: Step-by-Step to Creamy Perfection
Now that you have your ingredients ready, let’s walk through the process. Making these pumpkin swirl cheesecake bars is straightforward, especially when you pay attention to a few key steps that ensure that smooth, creamy texture.
- Prep Your Space: Begin by preheating your oven to 350 degrees F (175 degrees C). Lightly grease a standard 9×13 inch baking pan. This simple step helps ensure your bars won’t stick later on.
- Build the Base: In a medium bowl, combine your graham cracker crumbs and granulated sugar. Pour the melted butter over the top and stir everything together until the crumbs are evenly moistened, resembling wet sand. Transfer this mixture to your prepared baking pan. Use the bottom of a glass or a flat measuring cup to firmly and evenly press the crumb mixture into the bottom of the pan. Compact it well – a tight crust won’t fall apart when you slice the bars. Bake this crust for 8-10 minutes, just until the edges look lightly golden and fragrant. Set it aside to cool slightly while you prepare the filling.
- Start the Silky Filling (The First Secret): This is where the magic begins for that creamy texture. In a large bowl, with your electric mixer, beat the softened cream cheese on medium speed. Your goal here is to get it absolutely smooth and free of any tiny lumps. Take your time with this step; it’s crucial! Scrape down the sides and bottom of the bowl often. Once the cream cheese is like velvet, add the granulated sugar and continue beating until it’s well combined and smooth, again scraping the bowl as needed.
- Introduce the Pumpkin & Spice: Now, add the canned pumpkin puree, vanilla extract, cinnamon, nutmeg, and cloves to the cream cheese mixture. Switch your mixer to low speed and beat just until these wet and dry ingredients are fully combined and the mixture is smooth and uniformly colored. Avoid overmixing here; we just want everything incorporated.
- Add the Eggs Gently (The Second Secret): This is the other critical step for preventing cracks and ensuring a smooth, dense texture. Add the large, room-temperature eggs one at a time. Beat on low speed only until each egg is just incorporated before adding the next. As soon as the last egg is blended in and you no longer see streaks of yolk or white, STOP MIXING. Overmixing once the eggs are in introduces too much air, which can cause the cheesecake to puff up too much in the oven and then fall or crack as it cools. Gentle is key here!
- Layer the Filling: Pour about two-thirds of your creamy plain cream cheese filling evenly over the slightly cooled graham cracker crust in the pan.
- Create the Pumpkin Portion: Add the pumpkin mixture you made in step 4 to the remaining one-third of the plain filling that’s left in your mixing bowl. Stir this gently by hand with a spatula or spoon until it’s just combined into a beautiful, pumpkin-flavored filling. Don’t overwork it.
- Swirl for Show: Drop spoonfuls of this pumpkin filling over the plain filling layer already in the pan. Try to distribute the spoonfuls somewhat evenly. Now, take a knife or a skewer and gently run it through the fillings to create swirls. Be careful not to over-swirl, or you’ll lose the distinct pattern and just end up with uniformly colored pumpkin cheesecake. A few deliberate passes are usually enough to create a lovely marbled effect.
- Top it Off: In a small bowl, combine the flour, brown sugar, and cinnamon for your crumble topping. Add the cold, cubed butter. Using a pastry blender or your fingertips, cut the butter into the dry ingredients until the mixture resembles coarse crumbs. Sprinkle this topping evenly over the swirled filling in the pan.
- Bake Until Set: Place the pan in your preheated oven and bake for 40-50 minutes. You’ll know they’re ready when the edges look set (not browned) and the center is just slightly soft and jiggly when you gently shake the pan. It shouldn’t look wet or liquidy in the center, but a little wobble is perfect. Overbaking will lead to a dry, potentially cracked texture, so watch carefully. The center will continue to set as it cools.
- Master the Cool Down (The Final Secret): This is another crucial step for preventing those dreaded cracks and achieving that perfect smooth texture. Turn off your oven, crack the oven door open slightly (you can stick a wooden spoon in the door to keep it ajar), and let the cheesecake bars cool inside the oven for about 30-60 minutes. This slow, gradual cooling transition from hot oven to room temperature helps the cheesecake set evenly and gently. After this period, remove the pan from the oven and let it cool completely on a wire rack. The cooling process is just as important as the baking!
- Chill and Slice: Once the bars are completely cool to the touch (this takes a few hours at room temperature), cover the pan tightly with plastic wrap and refrigerate for at least 2 hours. Chilling is essential for the cheesecake to firm up properly, making it easy to slice into neat bars. When you’re ready to slice, use a sharp knife. For the cleanest cuts, wipe the knife blade clean with a warm, damp cloth between each slice.
Tips for Perfect Pumpkin Swirl Cheesecake Bars Every Time
Achieving that dreamy, creamy texture and beautiful swirl is simple when you follow these tips:
- Room Temperature Ingredients: We mentioned it before, but it bears repeating! Ensuring your cream cheese and eggs are truly at room temperature is non-negotiable for a smooth, lump-free filling. It allows them to emulsify properly.
- Beat the Cream Cheese FIRST: Don’t add sugar or other ingredients until the cream cheese is completely smooth on its own. This builds a proper creamy base.
- Don’t Overmix the Eggs: Stop mixing the moment the eggs are just incorporated. Excess air leads to cracks and a less dense texture.
- Slow and Gentle Cooling: The two-stage cooling process – in the turned-off oven, then on a wire rack – is key to preventing temperature shock that can cause cracking.
- Use Plain Pumpkin Puree: Pumpkin pie filling contains added sweeteners and thickeners that will alter the recipe’s balance and texture.
- Storage: Keep leftover pumpkin swirl cheesecake bars covered tightly in the refrigerator for up to 4-5 days. For longer storage, you can wrap individual bars or the whole pan (once sliced) tightly in plastic wrap, then foil, and freeze for up to 1-2 months. Thaw in the refrigerator.
These bars are fantastic on their own, but feel free to get creative! A dollop of whipped cream or a sprinkle of extra cinnamon on top can elevate them even further. If you love baking with pumpkin, you might also enjoy making Spiced Pumpkin Cupcakes for another seasonal treat!
What to Serve With Your Pumpkin Swirl Cheesecake Bars
These bars are rich and satisfying, making them perfect with a simple accompaniment. A hot cup of coffee or tea is always a classic choice. If you’re leaning into the fall theme, a homemade Pumpkin Spice Latte would be a perfect pairing! For something a little lighter, just a simple swirl of homemade whipped cream takes them over the top without adding too much sweetness.
Your Pumpkin Swirl Cheesecake Bars Questions Answered (FAQ)
Why is my cheesecake filling grainy?
This is most commonly caused by not starting with properly softened cream cheese. Cold cream cheese doesn’t beat smooth, leaving tiny lumps that result in a grainy texture even after baking. Ensure your cream cheese is at room temperature before you begin mixing.
My cheesecake bars cracked on top, what happened?
Cracking is usually a sign of overbaking or cooling too quickly. Overbaking dries out the edges while the center is still setting, causing tension. Rapid cooling exposes the warm cheesecake to too much cold air too fast. Following the two-stage cooling method (in the turned-off oven, then on the counter) helps the temperature change more gradually, minimizing cracks.
Can I use homemade pumpkin puree?
Yes, you can! Just make sure it is actual pumpkin puree and not a watery mixture. If your homemade puree seems very wet, you might want to blot some of the excess moisture out with a paper towel before adding it to the batter to ensure the correct consistency.
Can I make these bars gluten-free?
You can easily adapt the crust by using gluten-free graham cracker crumbs. For the topping, ensure your all-purpose flour is a certified gluten-free blend. The cheesecake filling itself is naturally gluten-free.
How long do the bars need to chill before slicing?
A minimum of 2 hours in the refrigerator is essential for the cheesecake to fully set and firm up. For the cleanest slices, chilling for 4 hours or even overnight is even better. Chilling allows the structure to stabilize.
Can I swap the spices?
Absolutely! While cinnamon, nutmeg, and cloves are classic, you could add a pinch of ground ginger or allspice for slightly different warming notes. Adjust to your personal preference, but these three create that quintessential pumpkin pie spice flavor.
These sound amazing! Do you have other easy bar recipes?
We sure do! If you love the simplicity of dessert bars, you might also enjoy our Apple Crumble Bars or, for another cheesecake option, check out our Orange Crumble Cheesecake Bars. For a completely different kind of bar, our Pumpkin Patch Bars offer a delightful change of pace.
Enjoy Your Homemade Pumpkin Swirl Cheesecake Bars!
With just a couple of simple tricks – properly softened cream cheese and eggs, and careful cooling – you can easily achieve bakery-quality Pumpkin Swirl Cheesecake Bars right at home. The creamy texture, the delightful pumpkin swirl, and the sweet crumble topping make these a truly special treat.
Whether you’re making them for a holiday gathering, a weeknight dessert, or just because you’re craving that perfect pumpkin spice flavor, this recipe delivers. Give them a try and see just how easy it is to get that incredibly smooth, creamy finish!
Have you made these Pumpkin Swirl Cheesecake Bars? We’d love to hear how they turned out! Leave a comment below and let us know your favorite part. Happy baking!
Pumpkin Swirl Cheesecake Bars

Ingredients
- For the Crust:
- 1 1/2 cups graham cracker crumbs (about 10-12 full sheets)
- 1/4 cup granulated sugar
- 1/2 cup unsalted butter, melted
- For the Filling:
- 2 blocks (8 ounces each) cream cheese, softened to room temperature
- 3/4 cup granulated sugar
- 1/2 cup canned pumpkin puree (not pie filling)
- 1 teaspoon vanilla extract
- 1/2 teaspoon ground cinnamon
- 1/4 teaspoon ground nutmeg
- 1/8 teaspoon ground cloves
- 2 large eggs, room temperature
- For the Topping:
- 1/2 cup all-purpose flour
- 1/4 cup packed light brown sugar
- 1/4 teaspoon ground cinnamon
- 1/4 cup unsalted butter, cold and cut into small cubes
Directions
- Preheat oven to 350 degrees F (175 degrees C). Lightly grease a 9×13 inch baking pan.
- Make the crust: In a medium bowl, combine graham cracker crumbs and sugar. Pour in melted butter and stir until crumbs are evenly moistened. Press the mixture firmly and evenly into the bottom of the prepared baking pan. Bake for 8-10 minutes, or until lightly golden. Set aside to cool slightly while you make the filling.
- Make the filling: In a large bowl, using an electric mixer, beat the softened cream cheese on medium speed until it is completely smooth and creamy, with no lumps. This is key for a smooth texture. Add the granulated sugar and continue beating until well combined and smooth, scraping down the sides of the bowl as needed.
- Add the pumpkin puree, vanilla extract, cinnamon, nutmeg, and cloves to the cream cheese mixture. Beat on low speed just until combined and smooth.
- Here’s the creamy secret: Add the eggs one at a time, beating on low speed just until each egg is incorporated before adding the next. Do NOT overmix once the eggs are added; overmixing introduces too much air which can cause cracking and affect texture. Stop mixing as soon as the last egg is just blended in.
- Pour about two-thirds of the plain cream cheese filling over the cooled crust.
- Add the pumpkin mixture to the remaining one-third of the plain filling in the mixing bowl. Stir gently until just combined into a pumpkin flavored filling.
- Drop spoonfuls of the pumpkin filling over the plain filling in the pan. Using a knife or skewer, gently swirl the pumpkin mixture into the plain filling. Do not over-swirl.
- Make the topping: In a small bowl, combine the flour, brown sugar, and cinnamon. Cut in the cold butter using a pastry blender or your fingertips until the mixture resembles coarse crumbs. Sprinkle this topping evenly over the swirled filling.
- Bake for 40-50 minutes, or until the edges are set and the center is just slightly soft and jiggly when the pan is gently shaken. Avoid overbaking. The center will finish setting as it cools.
- Cooling for perfect texture: Turn off the oven, crack the oven door open slightly, and let the cheesecake bars cool inside the oven for about 30-60 minutes. This slow cooling helps prevent the filling from falling or cracking and ensures that lovely smooth texture. Remove from the oven and cool completely on a wire rack.
- Once completely cool, cover and refrigerate for at least 2 hours before slicing into bars. For clean slices, use a sharp knife wiped clean between cuts.