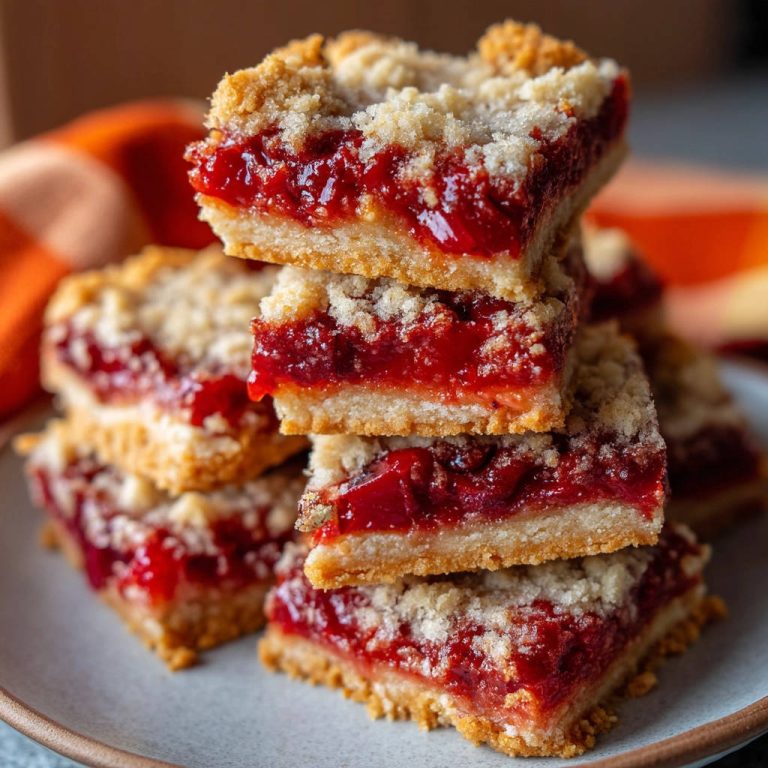
Is there anything more disappointing than biting into a seemingly perfect dessert bar only to discover a soggy, unappetizing crust? The texture is just…wrong. But fear not, fellow bakers! I’m thrilled to share my Raspberry Dream Bars recipe, complete with a foolproof method to guarantee a crisp, perfectly baked crust every single time. These bars are bursting with sweet-tart raspberry flavor nestled in a creamy, dreamy filling, all sitting atop a delightfully crunchy graham cracker base. Get ready to impress your friends and family with this delightful treat – it’s easier than you think!
Why You’ll Love These Raspberry Dream Bars
These Raspberry Dream Bars are more than just delicious; they’re a baking triumph! Here’s why you’ll be making them again and again:
- No Soggy Crust Guarantee: The secret is in the pre-baking! This simple step creates a moisture barrier, ensuring a crisp and sturdy base.
- Bursting with Raspberry Flavor: The combination of raspberry jam and fresh raspberries creates a symphony of sweet and tart flavors that will tantalize your taste buds.
- Creamy Dreamy Filling: The cream cheese filling is rich, smooth, and perfectly balanced with just the right amount of sweetness.
- Easy to Make: Despite their impressive presentation, these bars are surprisingly simple to whip up.
- Perfect for Any Occasion: From casual gatherings to elegant parties, these bars are always a crowd-pleaser.
Gathering Your Ingredients for Raspberry Dream Bars
Before we dive into the baking process, let’s gather our ingredients. We’ll be creating three distinct layers: a crunchy graham cracker crust, a creamy and luscious filling, and a bright and fruity topping. The interplay of these textures and flavors is what makes these bars so irresistible. Choosing high-quality ingredients will truly elevate the final product.
- For the Graham Cracker Crust:
- 1 1/2 cups graham cracker crumbs: These form the foundation of our bars. You can buy pre-made crumbs or crush your own graham crackers for a slightly more rustic texture.
- 1/3 cup granulated sugar: Adds a touch of sweetness to complement the buttery graham crackers.
- 6 tablespoons unsalted butter, melted: Binds the crumbs together and creates a rich, buttery flavor. Be sure to use unsalted butter so you can control the amount of salt in the recipe.
- For the Cream Cheese Filling:
- 2 (8 ounce) packages cream cheese, softened: The star of the filling! Ensure your cream cheese is properly softened to avoid lumps and create a smooth, creamy texture. Full-fat cream cheese is highly recommended for the best flavor and texture.
- 1 cup granulated sugar: Sweetens the filling and balances the tanginess of the cream cheese.
- 1 teaspoon vanilla extract: Enhances the overall flavor and adds a touch of warmth. Use pure vanilla extract for the best results.
- 2 large eggs: Binds the filling together and adds richness.
- For the Raspberry Swirl and Topping:
- 1/2 cup raspberry jam: Provides a concentrated burst of raspberry flavor. Choose a high-quality jam with a vibrant color and delicious taste. Seedless jam works best for a smoother texture, but seeded jam adds a nice visual appeal.
- 2 cups fresh raspberries: Adds a touch of freshness and visual appeal to the finished bars. If fresh raspberries aren’t available, you can use frozen raspberries (thawed and drained) but the texture may be slightly softer.
Crafting Your Raspberry Dream Bars: Step-by-Step
Now for the fun part: bringing these Raspberry Dream Bars to life! Follow these step-by-step instructions carefully, and you’ll be rewarded with a truly delightful dessert. Remember, the key to a perfect crust is that initial pre-baking step, so don’t skip it!
- Preheat the oven: Start by preheating your oven to 350 degrees F (175 degrees C). This ensures that the crust and filling bake evenly. Make sure your oven rack is in the center position.
- Prepare the graham cracker crust: In a medium bowl, combine the graham cracker crumbs, sugar, and melted butter. Mix until well combined and the mixture resembles wet sand. This mixture will be pressed into the baking pan to form the crust.
- Press the crust into the pan: Press the graham cracker mixture evenly into the bottom of an ungreased 9×13 inch baking pan. Use the bottom of a measuring cup or your fingers to firmly pack the crumbs down to create a compact crust. A well-packed crust is crucial for preventing it from crumbling after baking.
- Bake the crust alone: Here’s the magic step! Bake the crust alone for 10 minutes. This pre-baking process creates a barrier that prevents the moisture from the cream cheese filling from seeping into the crust, resulting in a wonderfully crisp base. Set aside to cool slightly while you prepare the filling.
- Make the cream cheese filling: In a large bowl, beat the softened cream cheese and sugar until smooth and creamy. This is best done with an electric mixer. Make sure there are no lumps of cream cheese remaining. Mix in the vanilla extract. Beat in the eggs one at a time, mixing well after each addition. Be careful not to overmix at this stage, as it can incorporate too much air and cause the filling to puff up and then sink.
- Assemble the bars: Gently spread the cream cheese mixture evenly over the pre-baked crust. Be careful not to press too hard, as this could disrupt the crust.
- Add the raspberry swirl: Drop spoonfuls of raspberry jam randomly over the cream cheese layer. Then, using a knife or skewer, swirl the jam into the cream cheese filling to create a marbled effect. Be careful not to over-swirl, as this can muddy the colors and make the bars look less appealing.
- Bake the bars: Bake for 25-30 minutes, or until the filling is set. The filling should be slightly jiggly in the center but not liquid. If the crust starts to brown too quickly, you can loosely tent the pan with foil.
- Cool and chill: Let the bars cool completely in the pan on a wire rack. Once cooled, cover the pan and chill in the refrigerator for at least 2 hours before topping with fresh raspberries. Chilling helps the filling to set completely and makes the bars easier to cut.
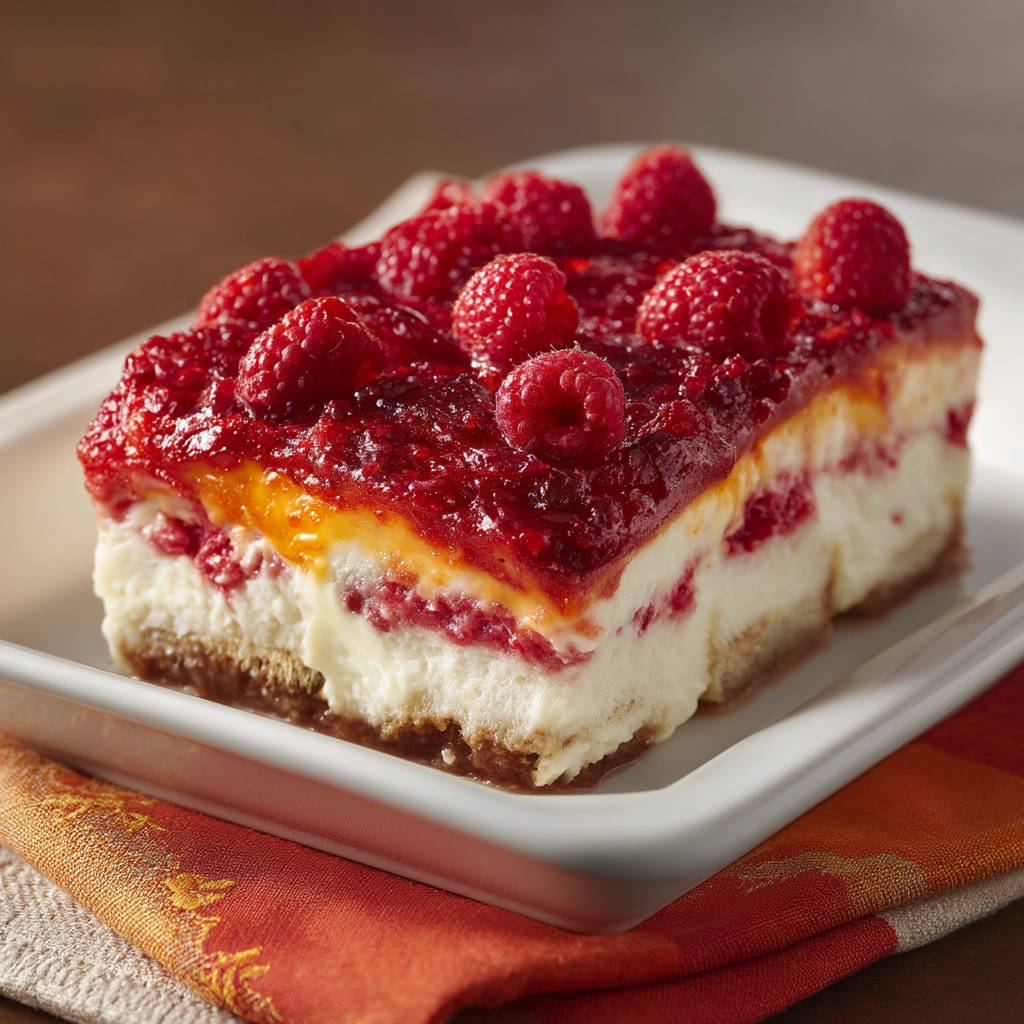
- Garnish and serve: Before serving, top the bars with fresh raspberries. Cut into bars and serve.
Tips for Perfect Raspberry Dream Bars Every Time
Want to take your Raspberry Dream Bars to the next level? Here are a few tips and tricks to ensure baking success:
- Soften the Cream Cheese: This is crucial for a smooth, lump-free filling. Leave the cream cheese at room temperature for at least 30 minutes, or even longer if your kitchen is cold.
- Don’t Overmix the Filling: Overmixing can incorporate too much air, causing the filling to puff up and then sink, leading to cracks. Mix just until the ingredients are combined.
- Get Creative with the Swirl: Use a toothpick, skewer, or the tip of a knife to create your raspberry swirl. Experiment with different patterns for a unique look.
- Chill Thoroughly: Chilling the bars completely before cutting ensures clean slices and prevents the filling from being too soft.
- Try different jams!: While raspberry is classic, you could try other berry jams such as strawberry or blueberry. You could also use multiple types of jam in one batch!
What to Serve With Raspberry Dream Bars
These Raspberry Dream Bars are delicious on their own, but they also pair well with a variety of accompaniments. A dollop of whipped cream or a scoop of vanilla ice cream adds extra decadence. For a lighter touch, serve them with a side of fresh fruit salad. Looking for a different type of dessert? Consider making a batch of easy caramel nut dessert jars.
Your Raspberry Dream Bars Questions Answered (FAQ)
Can I use frozen raspberries instead of fresh?
Yes, you can use frozen raspberries, but be sure to thaw them completely and drain any excess liquid before adding them to the top of the bars. Frozen raspberries tend to be softer than fresh raspberries, so they may not hold their shape as well.
Can I make these bars ahead of time?
Absolutely! In fact, these bars are even better when made a day ahead of time, as it allows the flavors to meld together and the filling to set completely. Store them covered in the refrigerator.
Can I freeze Raspberry Dream Bars?
Yes, you can freeze these bars for up to 2 months. Wrap them tightly in plastic wrap and then in foil, or place them in an airtight freezer container. Thaw them in the refrigerator overnight before serving.
Can I use a different type of crust?
Yes, you can substitute the graham cracker crust with other types of crusts, such as an Oreo cookie crust or a shortbread crust. Adjust the baking time accordingly.
Enjoy Your Homemade Raspberry Dream Bars!
Congratulations! You’ve successfully conquered the challenge of the soggy crust and created a batch of irresistible Raspberry Dream Bars. These bars are a true testament to the power of simple ingredients and a little baking know-how. Now, go ahead and indulge in the sweet, tangy, creamy, and crunchy goodness. Don’t forget to share your baking triumphs (and any variations you try!) in the comments below. And if you enjoyed this recipe, be sure to share it with your friends and family. Happy baking!
Raspberry Dream Bars (Stops Soggy Crust!)

Ingredients
- 1 1/2 cups graham cracker crumbs
- 1/3 cup granulated sugar
- 6 tablespoons unsalted butter, melted
- 2 (8 ounce) packages cream cheese, softened
- 1 cup granulated sugar
- 1 teaspoon vanilla extract
- 2 large eggs
- 1/2 cup raspberry jam
- 2 cups fresh raspberries
Directions
- Preheat oven to 350 degrees F (175 degrees C).
- In a medium bowl, combine graham cracker crumbs, sugar, and melted butter. Press mixture evenly into the bottom of an ungreased 9×13 inch baking pan.
- BAKE CRUST ALONE for 10 minutes. This is the key to preventing a soggy crust. Baking it before adding the filling creates a barrier against the moisture from the cream cheese mixture.
- In a large bowl, beat cream cheese and sugar until smooth. Mix in vanilla. Beat in eggs one at a time.
- Gently spread cream cheese mixture over the pre-baked crust.
- Drop spoonfuls of raspberry jam over the cream cheese layer. Swirl jam into the cream cheese using a knife.
- Bake for 25-30 minutes, or until the filling is set.
- Let cool completely before topping with fresh raspberries. Cut into bars and serve.