
There’s nothing quite like the disappointment of a beautiful no-bake pie with a soggy crust. I’ve been there, and after much experimentation, I’ve perfected a simple yet foolproof technique that guarantees your no-bake crust stays perfectly firm and crisp, right to the very last bite.
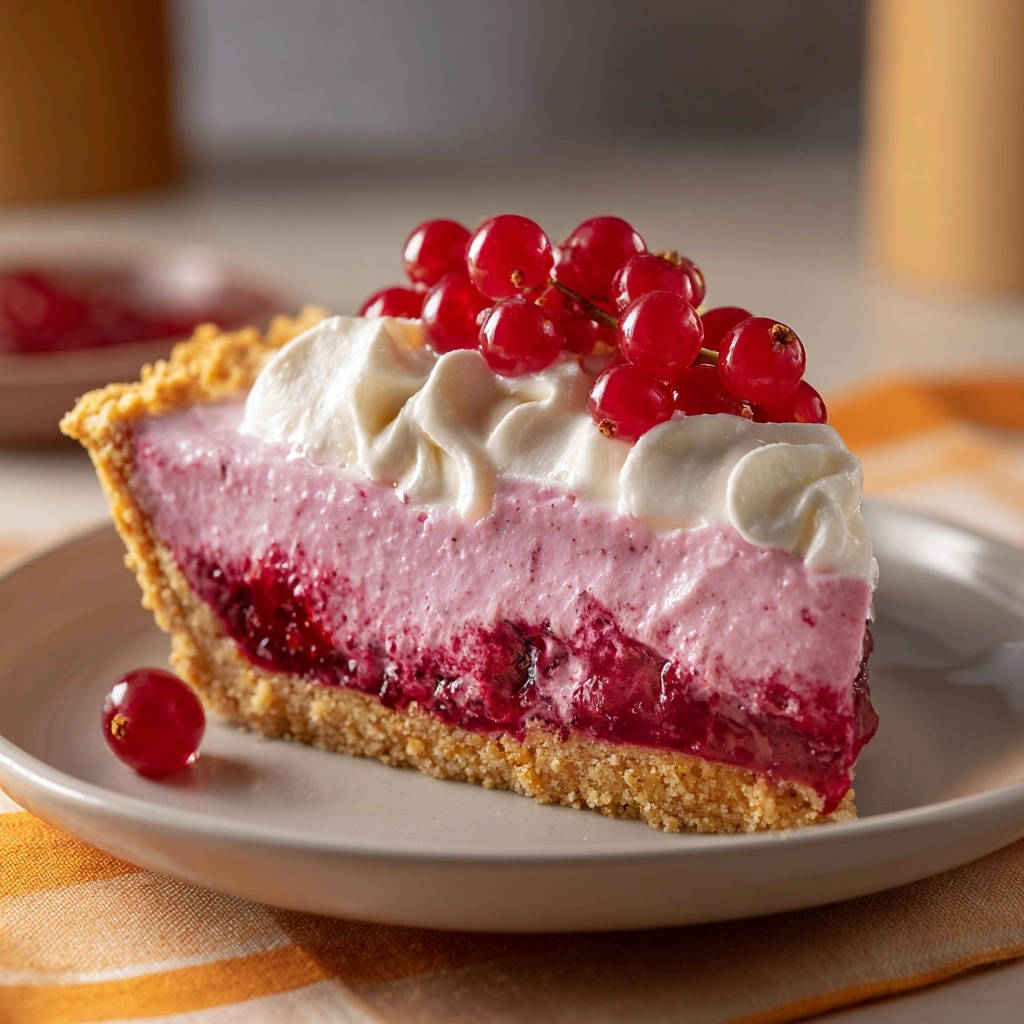
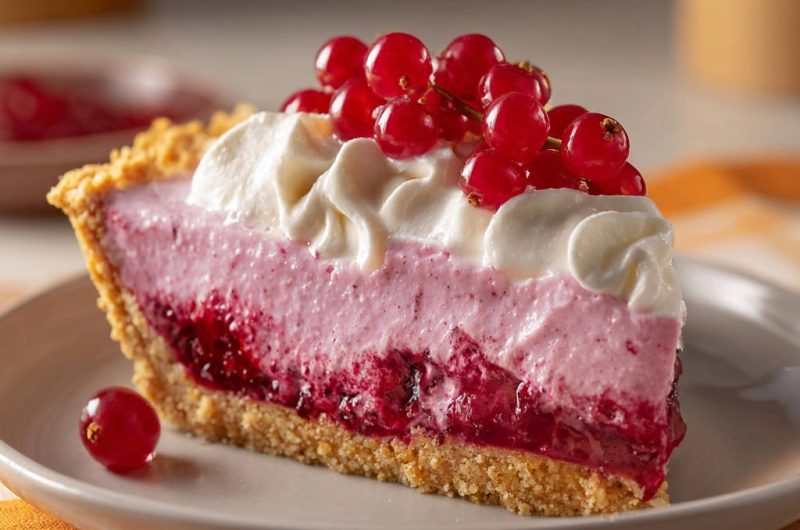
This Red Berry Dream Pie isn’t just a stunning dessert; it’s a testament to achieving that delightful, stable foundation every single time. Get ready to impress with layers of vibrant berry flavor and luxurious cream, all built on a reliably crunchy base.
Why This Red Berry Dream Pie is Your New Go-To Dessert
The Anti-Soggy Crust Secret: No More Mushy Bases!
The core innovation here is in the crust preparation. By combining precise ingredient ratios with a critical firm compression technique and a quick chill, we create a graham cracker crust that stands up beautifully to the creamy filling. This method locks in the crispness, ensuring a delightful crunch with every forkful.
Layers of Delight: A Symphony of Textures and Flavors
This Red Berry Dream Pie features three harmonious layers. A vibrant, slightly tart berry compote provides a burst of fresh fruit flavor, perfectly balanced by a rich, smooth cream cheese layer. Topped with light, airy whipped cream and fresh currants, it’s a textural and flavorful masterpiece.
Effortless Elegance: Simple Steps, Stunning Results
Despite its impressive appearance, this pie is surprisingly easy to assemble. The no-bake nature means less time in the kitchen and more time enjoying. It’s the perfect dessert to elevate any occasion, from a casual family dinner to a festive gathering.
The Building Blocks: What You’ll Need for Your Dream Pie
For the Unbeatable Graham Cracker Crust
Graham cracker crumbs: These form the backbone of your crisp crust. Ensure they are finely crushed for best cohesion.

Granulated sugar: A touch of sweetness that also aids in caramelization and binding.
Unsalted butter, melted: High-quality unsalted butter is crucial. It binds the crumbs and provides a rich flavor without adding excess salt.
Crafting the Vibrant Berry Compote
Fresh or frozen mixed red berries: Red currants, raspberries, and pitted cherries offer a fantastic blend of sweet and tart. Using frozen berries is convenient and works just as well.
Granulated sugar: Balances the tartness of the berries, creating a perfectly sweet compote.
Lemon juice: A splash of fresh lemon juice brightens the berry flavors and adds a zesty note.
Cornstarch and cold water: These combine to form a slurry, which is essential for thickening the compote to the perfect consistency. It ensures the compote sets without being runny.
Achieving the Creamy Berry Perfection
Cream cheese, softened: Room temperature cream cheese is non-negotiable for a smooth, lump-free creamy layer. It whips up beautifully when softened.
Powdered sugar: Dissolves easily, contributing to a silky-smooth texture and a balanced sweetness.
Vanilla extract: Adds a classic, comforting aroma and enhances the overall sweetness of the cream.
Cold heavy cream: Keeping your heavy cream very cold is key for achieving stiff, stable peaks when whipped, ensuring a light and airy filling.
Prepared berry compote: A portion of your freshly made compote is folded in, infusing the creamy layer with fruit flavor and a beautiful pink hue.
The Fluffy Finishing Touch: Whipped Topping & Garnish
Cold heavy cream, powdered sugar, vanilla extract: These are the standard ingredients for a perfect homemade whipped cream. Cold cream whips up faster and holds its shape longer.
Fresh red currants: These delicate berries provide a beautiful, elegant garnish and a final pop of fresh, tart flavor.
Essential Kitchen Tools for Red Berry Pie Success
Mixing & Prepping Must-Haves
Mixing Bowls: You’ll need several, including one for the crust, one for the compote, and separate bowls for the cream cheese mixture and whipping cream.
Whisk: Essential for combining dry ingredients and whisking the cornstarch slurry.
Electric Mixer: A hand mixer or stand mixer is indispensable for quickly and efficiently beating the cream cheese and whipping the heavy cream to stiff peaks.
Medium Saucepan: For cooking down the berry compote.
Measuring Cups and Spoons: Accurate measurements are crucial for the right texture and consistency in all layers.
The Right Bakeware for Setting Up
9-inch Pie Plate: The standard size for this Red Berry Dream Pie. Glass or ceramic plates work well for even chilling.
Flat-Bottomed Glass or Measuring Cup: This is your secret weapon for pressing the graham cracker crust incredibly firmly into the pie plate, preventing sogginess.
Your Path to Perfection: Assembling Your Red Berry Dream Pie
Creating the Foolproof Firm Crust
In a medium bowl, combine your graham cracker crumbs, granulated sugar, and melted unsalted butter. Mix thoroughly until every crumb is evenly moistened. Now for the critical part: press this mixture very firmly and evenly into the bottom and up the sides of your 9-inch pie plate.
Use the bottom of a flat glass or a measuring cup to pack it down really tightly. This firm compression is crucial; it removes air pockets, making the crust dense and stable, which prevents it from turning mushy when the wet fillings are added. Place the crust in the freezer for at least 15 minutes or refrigerate for 30 minutes to set completely.
Simmering the Sweet Berry Compote
In a medium saucepan, combine the mixed red berries, granulated sugar, and lemon juice. Cook this mixture over medium heat, stirring occasionally. The berries will begin to break down and release their juices, and the mixture will start to simmer in about 5-7 minutes.
While the berries simmer, whisk together the cornstarch and cold water in a small separate bowl until completely smooth-this is your cornstarch slurry. Stir this slurry into the simmering berry compote, continuing to stir constantly for about 1-2 minutes until the mixture visibly thickens. This thickening step is vital for the compote’s texture. Remove from heat and allow it to cool completely before using. Once cool, measure out 1/2 cup for the creamy berry layer and set it aside.
Whipping Up the Creamy Berry Layer
In a large bowl, use your electric mixer to beat the softened cream cheese, powdered sugar, and vanilla extract until the mixture is completely smooth and creamy, with no lumps remaining.
In a separate, very cold bowl, beat the 1 cup of cold heavy cream until stiff peaks form. The cream should hold its shape when you lift the beaters. Gently fold the reserved 1/2 cup of cooled berry compote into the cream cheese mixture. This infuses the creamy layer with beautiful color and flavor.
Finally, gently fold the whipped cream into the berry-cream cheese mixture until just combined and no white streaks remain. Overmixing here will deflate the whipped cream, so be gentle.
Assembling Your Magnificent Layers
Take your chilled crust from the freezer or refrigerator. Pour the remaining cooled berry compote (the larger portion) evenly into the bottom of the crust. Then, carefully spoon the creamy berry layer on top of the compote, gently spreading it out to create an even, smooth second layer.
The Crucial Chill: Setting Your Pie
This step is absolutely essential for the pie’s structural integrity. Refrigerate the pie for at least 4 hours, or preferably overnight. This extended chilling time allows all the layers to firm up completely, ensuring clean slices and a stable pie.
Decorating for that ‘Wow’ Factor
Just before you’re ready to serve, prepare the final whipped cream topping. In a very cold bowl, beat the remaining 1 cup of cold heavy cream with 2 tablespoons of powdered sugar and 1/2 teaspoon of vanilla extract until stiff peaks form.
Spoon or pipe the whipped cream generously onto the chilled pie. Garnish with fresh red currants for an elegant finish. Slice the Red Berry Dream Pie while it’s still cold for the cleanest cuts and that perfect firm crust experience.
Chef’s Secrets: Elevating Your Red Berry Dream Pie
Mastering the Crust Compression
When pressing the crust, ensure you distribute the crumbs evenly before compacting. Use firm, consistent pressure across the entire surface and up the sides. A flat-bottomed measuring cup is excellent for this, allowing you to roll and press for maximum density.
Cooling the Compote: Why It Matters
Allowing the berry compote to cool completely is critical. Adding warm compote to the creamy layer will melt the cream cheese and whipped cream, resulting in a runny, unstable filling. Patience here ensures a beautifully set pie.
Whipping Cream Perfectly: Stiff Peaks Every Time
For best results, chill your mixing bowl and beaters for 10-15 minutes before whipping cream. Cold equipment, combined with very cold heavy cream, will help you achieve stiff, stable peaks quickly and prevent over-whipping to butter.
Optimal Chilling for Structural Integrity
Resist the urge to cut the chilling time short. The 4-hour minimum allows the fat in the cream cheese and cream to solidify fully, and the compote to set, ensuring your Red Berry Dream Pie holds its shape beautifully when sliced.
Creative Garnishes Beyond Currants
While fresh red currants are stunning, feel free to get creative with your garnish. A light dusting of powdered sugar, fresh mint leaves, or a mix of other berries like blueberries or raspberries can add visual appeal. For another delightful berry treat, consider making balsamic strawberries with cream.
Common Questions & Quick Fixes for Your Dream Pie
Why Is My Crust Still Soggy?
A soggy crust typically means it wasn’t pressed firmly enough. Ensure you really compact the crumbs, leaving no air pockets. Insufficient chilling time for the crust also plays a role; ensure it’s properly set before adding fillings.
My Berry Compote Isn’t Thickening!
This often happens if the cornstarch slurry isn’t whisked smooth or if it wasn’t cooked long enough after adding. Return it to medium heat, stirring constantly, for another minute or two. If still too thin, mix another half teaspoon of cornstarch with a tablespoon of cold water and slowly whisk it in, cooking for a minute until thickened.
Cream Cheese Mixture is Lumpy
Lumps in your cream cheese mixture usually mean the cream cheese wasn’t softened enough. Always ensure it’s at room temperature before beating. Beat it alone first until completely smooth before adding any sugar or vanilla.
Pie Isn’t Setting Firmly
The most common culprit here is insufficient chilling time. The pie truly needs the full 4 hours, or preferably overnight, to solidify. Also, ensure your heavy cream was whipped to stiff peaks; soft peaks won’t provide enough structure to the filling.
Serving, Storing, and Enjoying Your Pie to the Fullest
How to Store Leftover Red Berry Dream Pie
Store any leftover Red Berry Dream Pie tightly covered in the refrigerator. It will stay fresh and delicious for up to 3-4 days. Covering it prevents the crust from absorbing refrigerator odors and helps maintain its crispness.
Can I Make This Pie Ahead of Time?
Absolutely! This Red Berry Dream Pie is an excellent make-ahead dessert. You can prepare it a full day in advance, allowing it to chill overnight for optimal setting. This makes entertaining a breeze!
Ideal Serving Temperatures and Pairings
This pie is best served chilled, straight from the refrigerator. The cold temperature enhances the refreshing berry flavor and keeps the layers firm. Pair it with an extra dollop of fresh whipped cream, a scoop of vanilla bean ice cream, or a light sparkling wine for a truly decadent experience.
Your Top Red Berry Dream Pie Questions Answered
Can I Use Different Berries?
Yes, you can absolutely customize the berries! While mixed red berries offer a unique flavor, this recipe works beautifully with just raspberries, or a combination including blueberries or blackberries. Just ensure they are ripe and fresh or properly thawed if frozen.
Is This Pie Gluten-Free?
To make this Red Berry Dream Pie gluten-free, simply substitute regular graham cracker crumbs with certified gluten-free graham cracker crumbs. All other ingredients are naturally gluten-free, making it an easy adaptation.
Can I Freeze Red Berry Dream Pie?
Freezing this pie is not recommended. The dairy components, especially the whipped cream and cream cheese, can separate and change texture upon thawing, becoming watery or grainy. It’s best enjoyed fresh within a few days of making.
What’s the Best Way to Slice This Pie?
For clean, beautiful slices, use a sharp, thin knife. Dip the knife in hot water and wipe it clean between each slice. This technique helps the knife glide through the creamy layers and compote without dragging or tearing.
Ready to Bake Your Red Berry Dream Pie Masterpiece?
Now that you’re armed with the secrets to a perfectly crisp crust and vibrant berry layers, there’s no stopping you from creating this show-stopping Red Berry Dream Pie. It’s a truly delightful dessert that combines elegance with approachable techniques, perfect for any home baker.
Don’t wait to try this recipe! Whip up your own berry-filled delight and share your creations. We love to see your results and hear your feedback in the comments below. Happy baking!
Red Berry Dream Pie
Course: DessertCuisine: American CuisineDifficulty: easy8
servings30
minutes1800
minutesAmerican Cuisine
Ingredients
For the Crust:
1 and 1/2 cups graham cracker crumbs
1/4 cup granulated sugar
1/4 cup unsalted butter, melted
For the Berry Compote Layer:
2 cups fresh or frozen mixed red berries (such as red currants, raspberries, or pitted cherries)
1/2 cup granulated sugar
1 tablespoon lemon juice
1 tablespoon cornstarch
2 tablespoons cold water
For the Creamy Berry Layer:
8 ounces cream cheese, softened
1/2 cup powdered sugar
1 teaspoon vanilla extract
1 cup cold heavy cream
1/2 cup of the prepared berry compote
For the Topping:
1 cup cold heavy cream
2 tablespoons powdered sugar
1/2 teaspoon vanilla extract
1/2 cup fresh red currants for garnish
Directions
- Prepare the Anti-Soggy Crust: In a medium bowl, combine the graham cracker crumbs, sugar, and melted butter. Mix until well combined and the crumbs are evenly moistened. Press the mixture very firmly and evenly into the bottom and up the sides of a 9-inch pie plate. Use the bottom of a glass or a measuring cup to pack it down really tightly. This firm compression is crucial for a stable, non-soggy base. Place the crust in the freezer for at least 15 minutes or refrigerate for 30 minutes to set.
- Make the Berry Compote: In a medium saucepan, combine the berries, sugar, and lemon juice. Cook over medium heat, stirring occasionally, until the berries break down and the mixture begins to simmer, about 5-7 minutes. In a small bowl, whisk together the cornstarch and cold water until smooth. Stir the cornstarch mixture into the berry compote and continue to cook, stirring constantly, until the mixture thickens, about 1-2 minutes. Remove from heat and let cool completely. Once cool, measure out 1/2 cup for the creamy berry layer and set aside.
- Prepare the Creamy Berry Layer: In a large bowl, beat the softened cream cheese, powdered sugar, and vanilla extract with an electric mixer until smooth and creamy. In a separate cold bowl, beat the 1 cup of cold heavy cream until stiff peaks form. Gently fold the 1/2 cup of the cooled berry compote into the cream cheese mixture. Then, gently fold in the whipped cream until no streaks remain.
- Assemble the Pie: Pour the remaining cooled berry compote (the larger portion) into the chilled crust and spread evenly. Carefully spoon the creamy berry layer on top of the compote, spreading it gently to create an even layer.
- Chill to Set: Refrigerate the pie for at least 4 hours, or preferably overnight, to allow all the layers to set completely. This chilling time is essential for the structure of the pie.
- Decorate and Serve: Just before serving, prepare the whipped cream topping. In a cold bowl, beat the 1 cup of cold heavy cream, 2 tablespoons powdered sugar, and 1/2 teaspoon vanilla extract until stiff peaks form. Spoon or pipe the whipped cream onto the chilled pie. Garnish generously with fresh red currants. Slice and serve cold for the perfect firm crust experience.
Notes
- The firm compression of the crust and the extended chilling time are crucial for success.


