Let’s be real, nothing puts a damper on dessert dreams quite like a dry, crumbly chocolate cake. We’ve all been there, expecting a moist, tender bite and getting… well, cardboard. It’s frustrating! For years, I chased that elusive perfectly moist texture, trying recipe after recipe, often ending up disappointed.
But after much experimentation, I stumbled upon a game-changing technique that ensures an incredibly moist and tender rich chocolate cake every single time. Seriously, this is the one that finally unlocked the secret! It’s a simple addition that makes all the difference, blooming the chocolate flavor while creating a cake that stays wonderfully soft and delicious for days. Get ready to bake the best homemade chocolate cake you’ve ever made.
Why You’ll Absolutely Love This Rich Chocolate Cake Recipe
This isn’t just another chocolate cake; it’s the one you’ll come back to again and again. It delivers on its promise of moisture, but it offers so much more:
- Unbeatable Moisture: Thanks to one special ingredient, this cake stays incredibly moist and tender, even days after baking.
- Deep, Rich Chocolate Flavor: The method helps the cocoa powder shine, giving you that intense chocolatey goodness you crave.
- Surprisingly Simple: Despite the stunning results, the process is straightforward and uses common pantry staples.
- Perfect Texture: It’s not just moist, but also light and fluffy – a perfect crumb every time.
- Versatile Frosting: We’re including a simple, adaptable buttercream frosting recipe that’s the perfect partner to this cake.
Gathering Your Ingredients for the Ultimate Rich Chocolate Cake
Creating a standout cake starts with understanding the building blocks. This recipe relies on a combination of standard baking ingredients, each playing a crucial role in achieving that perfect moist texture and rich flavor. Let’s take a look at what you’ll need and why.
The base of our cake begins with your standard dry components. We’re using all-purpose flour as the structure, combined with granulated sugar not just for sweetness, but also to aid in moisture retention. A generous amount of unsweetened cocoa powder is essential for that deep chocolate taste; using a good quality cocoa will really elevate the flavor.
For lift and tenderness, we employ a dynamic duo: baking soda and baking powder. These leavening agents work together to give the cake its light crumb. A touch of salt balances the sweetness and enhances the chocolate flavor.
The wet ingredients bring richness and help activate the leaveners. You’ll need two large eggs, which provide structure and moisture. Milk adds liquid and helps create a tender crumb. Vegetable oil is our fat of choice here because it contributes significantly to moisture and keeps the cake soft over time, arguably better than butter in this specific formula. A good splash of vanilla extract is key for rounding out the flavors.
Now for the magic ingredient – the hot liquid! You’ll need one cup of hot water or, for an extra depth of flavor, hot brewed coffee. This hot liquid is responsible for blooming the cocoa powder, intensifying its chocolatey aroma and taste, and is the secret weapon for ensuring unparalleled moisture in this rich chocolate cake.
Ingredients Needed
- 2 cups all-purpose flour
- 1 ¾ cups granulated sugar
- ¾ cup unsweetened cocoa powder
- 1 teaspoon baking soda
- ½ teaspoon baking powder
- 1 teaspoon salt
- 2 large eggs
- 1 cup milk
- ½ cup vegetable oil
- 2 teaspoons vanilla extract
- 1 cup hot water or hot brewed coffee
And of course, a rich chocolate cake deserves a luscious frosting! This recipe includes a simple, classic buttercream that can be easily customized. You’ll need half a cup of softened unsalted butter as the creamy base. Powdered sugar is used for sweetness and structure in the frosting. You have the option to add another quarter cup of unsweetened cocoa powder for a chocolate buttercream, or use ¼ cup milk plus 1 teaspoon vanilla extract for a classic vanilla base, perfect for turning into a mocha frosting. A few tablespoons of milk or heavy cream help achieve the right consistency, and more vanilla extract boosts the flavor.
For a delicious mocha twist on the frosting, dissolve 1 teaspoon of instant coffee granules in 1 tablespoon of hot milk and add it to the buttercream. And don’t forget the finishing touch: chocolate shavings for garnish!
For the Frosting
- ½ cup unsalted butter, softened
- 2 cups powdered sugar
- ¼ cup unsweetened cocoa powder (optional, for chocolate frosting)
- OR ¼ cup milk + 1 teaspoon vanilla extract (for vanilla/mocha base)
- 2 tablespoons milk or heavy cream
- 1 teaspoon vanilla extract
- Optional: 1 teaspoon instant coffee granules dissolved in 1 tablespoon hot milk (for mocha flavor)
- Chocolate shavings for garnish
Crafting Your Rich Chocolate Cake: Step-by-Step Guide to Moist Perfection
Now that we have our ingredients ready, let’s walk through the process of making this incredibly moist and delicious chocolate cake. Each step is designed to contribute to the final perfect texture and rich flavor.
-
Prepare Your Baking Environment: Start by preheating your oven to 350 degrees F (175 degrees C). Proper oven temperature is crucial for even baking. Get your 9×13 inch baking pan ready by thoroughly greasing and flouring it. This ensures your beautiful cake releases cleanly after baking.
-
Combine the Dry Foundation: In your largest mixing bowl, measure out your dry ingredients: the all-purpose flour, granulated sugar, cocoa powder, baking soda, baking powder, and salt. Give these a good whisk together. You want to make sure the leavening agents and salt are evenly distributed throughout the flour and cocoa, otherwise, you might get uneven rise.
-
Introduce the Wet Ingredients: To the bowl of dry ingredients, add your eggs, milk, vegetable oil, and vanilla extract. Using an electric mixer, start on a low speed to prevent a flour cloud, then increase to medium speed. Beat the mixture for a full two minutes. As you mix, be sure to pause and scrape down the sides and bottom of the bowl with a spatula. This ensures all the ingredients are fully incorporated into a smooth batter, preventing pockets of dry ingredients.
-
The Moisture Secret – Adding Hot Liquid: This is the step that makes all the difference! Carefully pour the hot water (or hot brewed coffee, if using) into the batter while gently stirring. Don’t be alarmed – the batter will become quite thin, almost like a thick liquid. This is exactly how it should be! The hot liquid does two wonderful things: it ‘blooms’ the cocoa powder, bringing out a much richer, deeper chocolate flavor, and it’s absolutely essential for creating that signature moist, tender crumb we’re aiming for.
-
Pour and Prepare for Baking: Once the hot liquid is just incorporated (don’t overmix at this stage!), pour the now-thin batter into your prepared 9×13 inch pan. Gently spread it evenly to ensure a level cake. The thin consistency helps it spread easily on its own, but a little nudge with a spatula can help.
-
Bake to Perfection: Slide the pan into your preheated oven. Bake for 30 to 35 minutes. The best way to check if it’s done is to insert a wooden skewer or toothpick into the very center of the cake. It should come out clean, with no wet batter clinging to it (a few moist crumbs are okay, but no wet batter!). Avoid opening the oven door too early or too often, as this can affect the cake’s rise.
-
Cooling Steps: Once baked, remove the cake from the oven. Let it cool in the pan for about 10 minutes. This initial cooling time in the pan helps the cake set slightly before you move it. After 10 minutes, carefully invert the cake onto a wire rack. Allow it to cool completely on the rack before even thinking about frosting. Frosting a warm cake is a recipe for disaster – the frosting will melt and slide off!
-
Whip Up the Frosting: While the cake is cooling, you can make your delicious frosting. In a medium bowl, take your softened unsalted butter and beat it until it’s light and creamy. This usually takes a few minutes with an electric mixer.
-
Add Sweetness and Flavor: Gradually begin adding the powdered sugar to the creamy butter, beating well after each addition. If you’re making chocolate frosting, this is the time to also add your unsweetened cocoa powder along with the powdered sugar. Beat until everything is combined.
-
Achieve the Perfect Consistency: Add the milk or heavy cream, the vanilla extract, and if you’re going for that delicious mocha flavor, stir in the dissolved instant coffee granules now. Beat on medium speed until the frosting is light and fluffy. If it seems too thick to spread, add a little more milk, just one teaspoon at a time, until you reach the desired consistency. If it’s too thin, you can add a little more powdered sugar (a tablespoon at a time) to thicken it up. Be patient and adjust slowly.
-
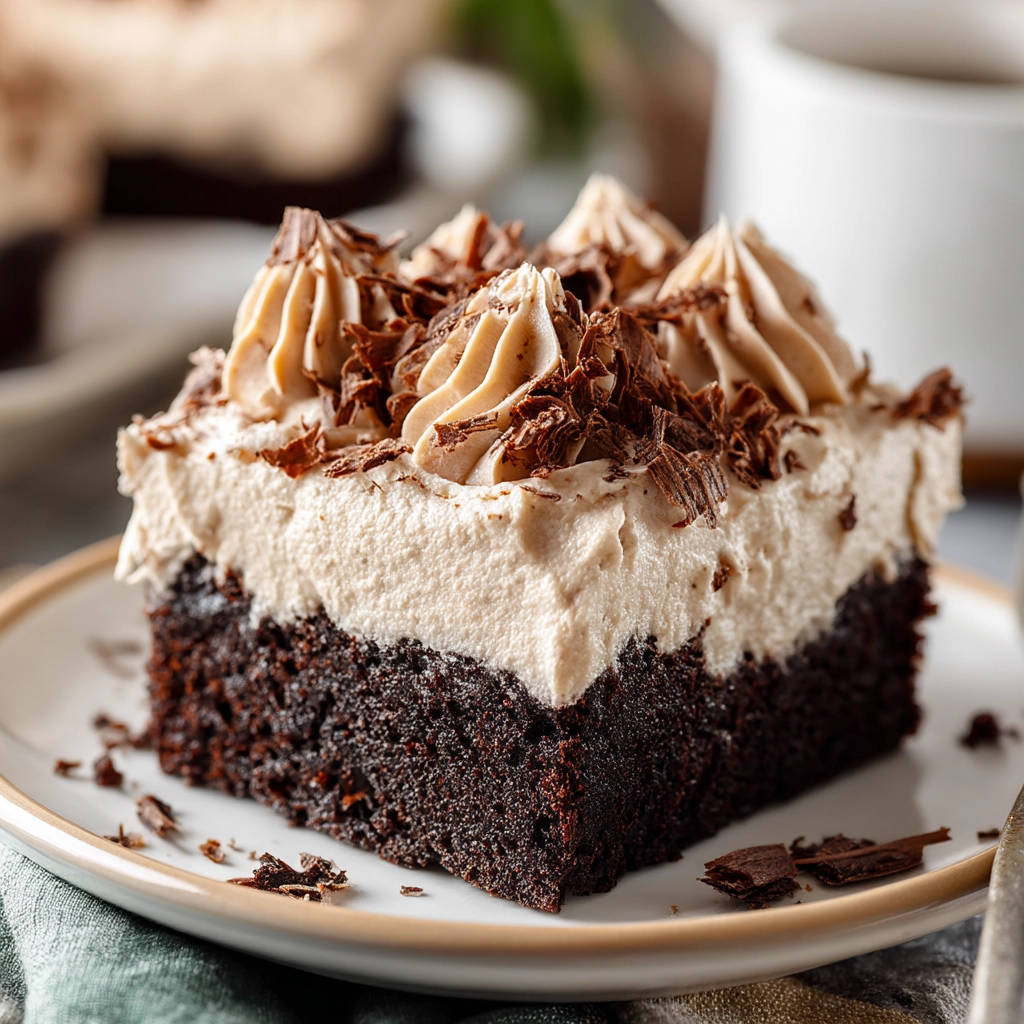
Frosting Time!: Ensure your cake is completely cool to the touch. Use an offset spatula to spread the frosting evenly over the top of the cake. For a more decorative look, you could transfer the frosting to a piping bag fitted with your favorite tip (like a large star tip) and pipe swirls or patterns over the surface.
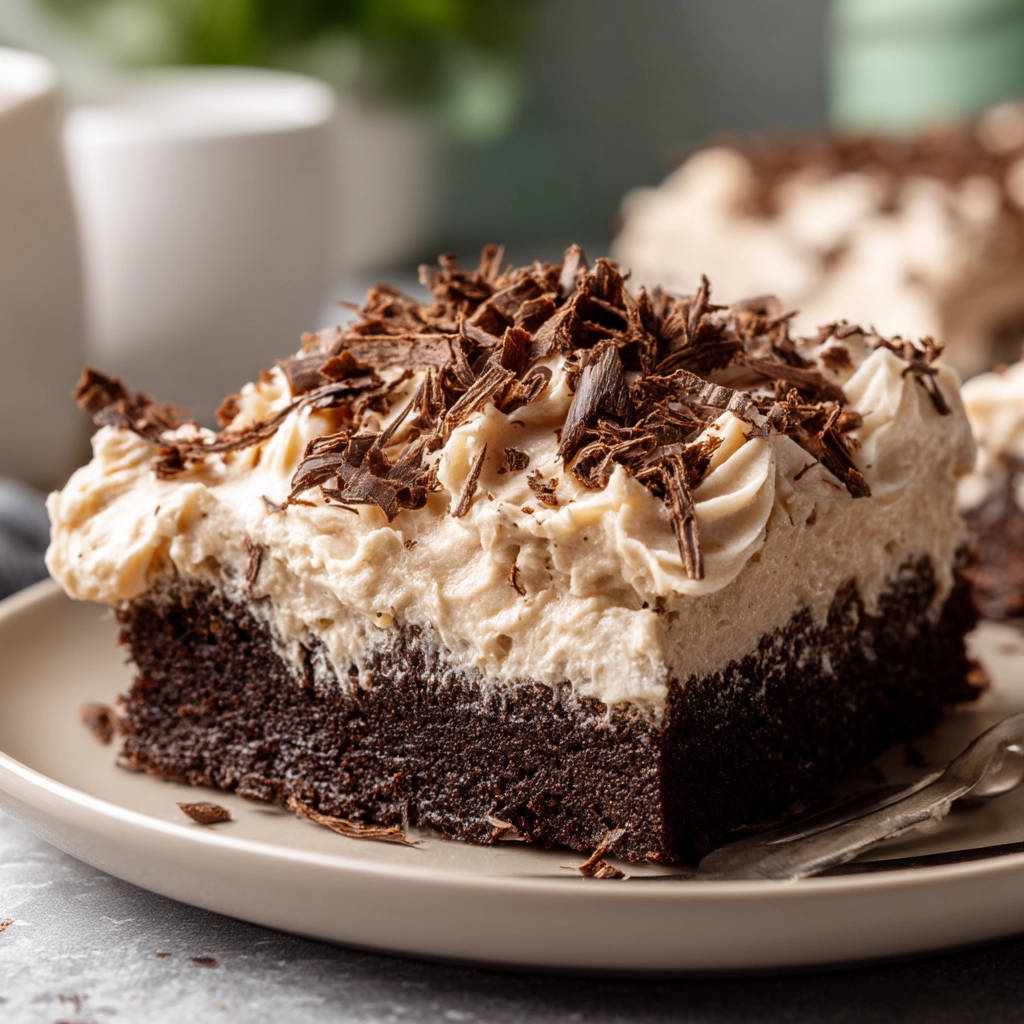
-
Final Touches: Before slicing and serving, sprinkle some chocolate shavings over the top of the frosted cake for an extra touch of elegance and chocolatey goodness. It makes it look as amazing as it tastes!
Tips for a Perfectly Moist Chocolate Cake Every Time
Achieving consistent results with baking, especially with something as classic as a rich chocolate cake, often comes down to a few key details. Here are some tips to ensure your cake turns out moist and delicious every single time you bake it:
- Measure Flour Correctly: Don’t scoop flour directly from the bag with your measuring cup. This packs it down, resulting in too much flour and a dry cake. Instead, spoon the flour lightly into your measuring cup and level off the excess with a straight edge.
- Use Hot Coffee for Deeper Flavor: While hot water works perfectly for moisture and blooming the cocoa, using hot brewed coffee (the same amount, 1 cup) will significantly enhance the chocolate flavor without making the cake taste like coffee. It’s a classic pairing for a reason! If you enjoy coffee flavors, you might also like to try our Ultimate Frozen Chocolate Drink or a simple Homemade Pumpkin Spice Latte for another cozy treat.
- Don’t Overmix: Once you add the wet ingredients to the dry, mix only until just combined. Overmixing can develop the gluten in the flour too much, leading to a tougher, drier cake. The hot liquid step involves stirring, not vigorous beating.
- Trust the Thin Batter: Seriously, resist the urge to add more flour! The batter is supposed to be thin because of the hot liquid. This is what creates that incredible moisture.
- Check for Doneness Accurately: The toothpick test is your best friend. Insert it into the center of the cake. If it comes out clean or with just a few moist crumbs attached, the cake is ready. If there’s wet batter, bake for a few more minutes and test again. Overbaking is a major culprit for dry cake!
- Cooling is Crucial: Don’t rush the cooling process. Letting the cake cool fully on a wire rack before frosting prevents the frosting from melting and allows the cake’s structure to set properly.
- Softened Butter for Frosting: Ensure your butter is truly softened for the frosting – not melted, but soft enough that your finger makes a slight indentation when pressed. Cold butter won’t cream properly, leading to lumpy frosting.
- Store Properly: Once frosted, store the cake covered at room temperature for up to 2-3 days. If you need to store it longer, or if your kitchen is warm, you can store it in the refrigerator, but bring it back to room temperature before serving for the best texture.
What to Serve With Your Rich Chocolate Cake
This rich chocolate cake is a showstopper all on its own, but pairing it with a few complementary items can elevate the experience:
- A scoop of vanilla ice cream or whipped cream is a classic and always welcome addition.
- Fresh berries, like raspberries or strawberries, add a lovely touch of brightness and cut through the richness of the chocolate.
- A simple dusting of powdered sugar can be elegant if you decide against a full frosting.
- For a sophisticated pairing, consider a small glass of milk or, for adults, a rich coffee drink like our Mocha Frappe (minus any adult ingredients).
Your Rich Chocolate Cake Questions Answered (FAQ)
Got questions about making this delicious and moist chocolate cake? Here are some common queries and their answers to help you bake with confidence.
Can I make this into cupcakes?
Yes, absolutely! This recipe can be easily converted into cupcakes. Simply line muffin tins with cupcake liners and fill them about two-thirds full with the batter. The baking time will be shorter, typically around 18-22 minutes. Use the toothpick test to check for doneness.
Can I make this recipe gluten-free?
While this recipe is written for all-purpose flour, you may be able to substitute a good quality 1:1 gluten-free baking blend. Results can vary depending on the blend used, so you might need to experiment slightly with baking time or liquid amounts. I haven’t tested this specific recipe with gluten-free flour myself, but many cake recipes adapt well.
Can I make this cake dairy-free?
You can likely make the cake portion dairy-free by substituting the milk with a non-dairy milk alternative like almond milk, soy milk, or oat milk. Ensure your cocoa powder is dairy-free. For the frosting, you would need to use a dairy-free butter substitute and a non-dairy milk alternative. Always check ingredient labels if dairy allergies are a concern.
Why is the batter so thin after adding the hot liquid?
As mentioned in the instructions, the thin batter is completely normal and intentional! The hot water or coffee dissolves the cocoa powder fully and helps create a very moist crumb structure as the cake bakes and cools. Don’t add extra flour to thicken it.
What kind of cocoa powder should I use?
This recipe works well with natural unsweetened cocoa powder. You could potentially use Dutch-process cocoa, but because it reacts differently with leavening agents, you might get slightly different results in terms of rise and flavor intensity. Natural cocoa typically provides a classic, robust chocolate flavor when paired with baking soda, as in this recipe.
How should I store leftover cake?
Once the cake is frosted, the best way to store it is covered tightly at room temperature. A cake dome or a container with a lid works well. It should stay wonderfully moist for 2-3 days. If you need to keep it longer, or if your home is warm, you can refrigerate it, but letting it sit at room temperature for 30-60 minutes before serving will bring back the best texture.
Enjoy Your Homemade Rich Chocolate Cake!
There you have it – the secret to a truly rich, decadent, and most importantly, moist chocolate cake that will impress everyone lucky enough to get a slice. This recipe takes the fear out of dry cake and delivers pure chocolate bliss.
Whether you’re baking for a special occasion, a casual get-together, or just because you deserve a treat, this rich chocolate cake is sure to hit the spot. Pair it with your favorite frosting variation and a simple garnish, and get ready for rave reviews.
Give this recipe a try and let me know how it turns out! Leave a comment below and tell me your favorite frosting choice – classic chocolate, vanilla, or mocha? Happy Baking!
Rich Chocolate Cake

Ingredients
- For the Cake:
- 2 cups all-purpose flour
- 1 3/4 cups granulated sugar
- 3/4 cup unsweetened cocoa powder
- 1 teaspoon baking soda
- 1/2 teaspoon baking powder
- 1 teaspoon salt
- 2 large eggs
- 1 cup milk
- 1/2 cup vegetable oil
- 2 teaspoons vanilla extract
- 1 cup hot water (or hot brewed coffee)
- For the Frosting:
- 1/2 cup unsalted butter, softened
- 2 cups powdered sugar
- 1/4 cup unsweetened cocoa powder (optional, for chocolate frosting) or 1/4 cup milk + 1 teaspoon vanilla extract (for vanilla/mocha frosting base as shown)
- 2 tablespoons milk or heavy cream
- 1 teaspoon vanilla extract
- Optional: 1 teaspoon instant coffee granules dissolved in 1 tablespoon hot milk (for mocha flavor)
- Chocolate shavings for garnish
Directions
- Preheat oven to 350 degrees F (175 degrees C). Grease and flour a 9×13 inch baking pan.
- In a large bowl, whisk together the flour, sugar, cocoa powder, baking soda, baking powder, and salt. Make sure everything is well combined.
- Add the eggs, milk, vegetable oil, and vanilla extract to the dry ingredients. Beat with an electric mixer on medium speed for 2 minutes, scraping down the sides of the bowl as needed.
- This is the key step for moisture: Carefully stir in the hot water (or hot coffee). The batter will be thin, this is normal. This hot liquid blooms the cocoa, enhancing the flavor, and is crucial for that moist texture.
- Pour the thin batter into the prepared pan and spread evenly.
- Bake for 30 to 35 minutes, or until a wooden skewer inserted into the center comes out clean.
- Let the cake cool in the pan for 10 minutes before inverting it onto a wire rack to cool completely.
- While the cake cools, make the frosting. In a medium bowl, beat the softened butter until creamy.
- Gradually beat in the powdered sugar. If making chocolate frosting, add cocoa powder with the sugar.
- Add the milk or cream, vanilla extract, and optional dissolved coffee granules (if using for mocha). Beat on medium speed until light and fluffy. If the frosting is too thick, add a little more milk, 1 teaspoon at a time. If too thin, add a little more powdered sugar.
- Once the cake is completely cool, spread the frosting evenly over the top using an offset spatula or pipe using a piping bag fitted with a large star tip for decorative swirls.
- Garnish with chocolate shavings before serving.