Oh, phyllo dough. It’s one of those ingredients that promises so much – delicate, shatteringly crisp layers of pastry perfection – yet can sometimes deliver… well, less than impressive results. If you’ve ever embarked on a phyllo journey hoping for that bakery-style flakiness only to end up with something a bit dense or even soggy, you are definitely not alone! For the longest time, my own attempts at phyllo dishes, including these delightful savory cheese phyllo squares, left me wanting. I knew the potential was there, but achieving those distinct, ethereal layers felt like mastering a secret art.
Guess what? The secret isn’t some ancient family scroll or advanced culinary degree. It’s simple, straightforward, and utterly game-changing. Once I unlocked this technique, making Savory Cheese Phyllo Squares transformed from a hopeful gamble into a guaranteed success story. Get ready to experience the joy of perfectly crisp, golden phyllo wrapped around a rich, tangy cheese filling. These squares are fantastic as an appetizer, a light lunch, or a unique side dish!
Why You’ll Absolutely Adore These Savory Cheese Phyllo Squares
Beyond finally achieving that coveted flaky texture, there are so many reasons these cheese squares deserve a spot in your recipe rotation:
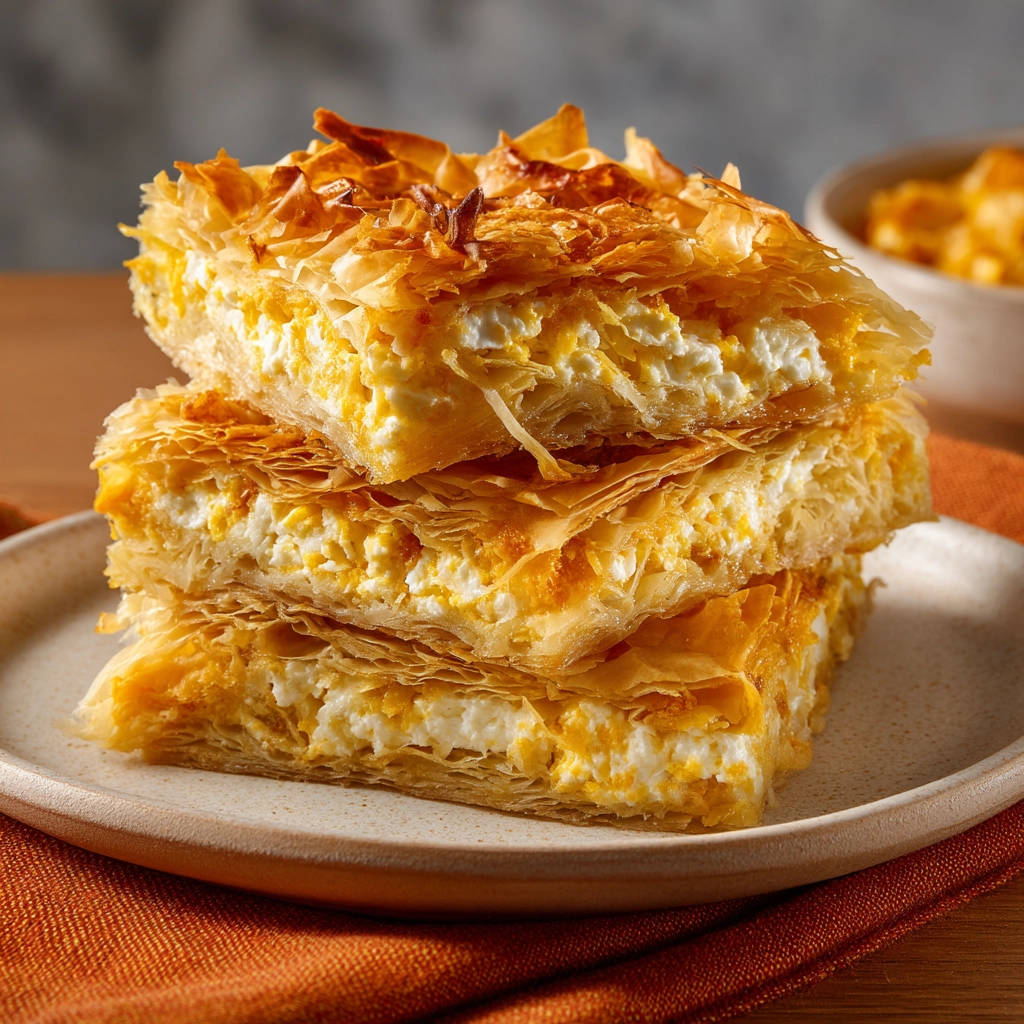
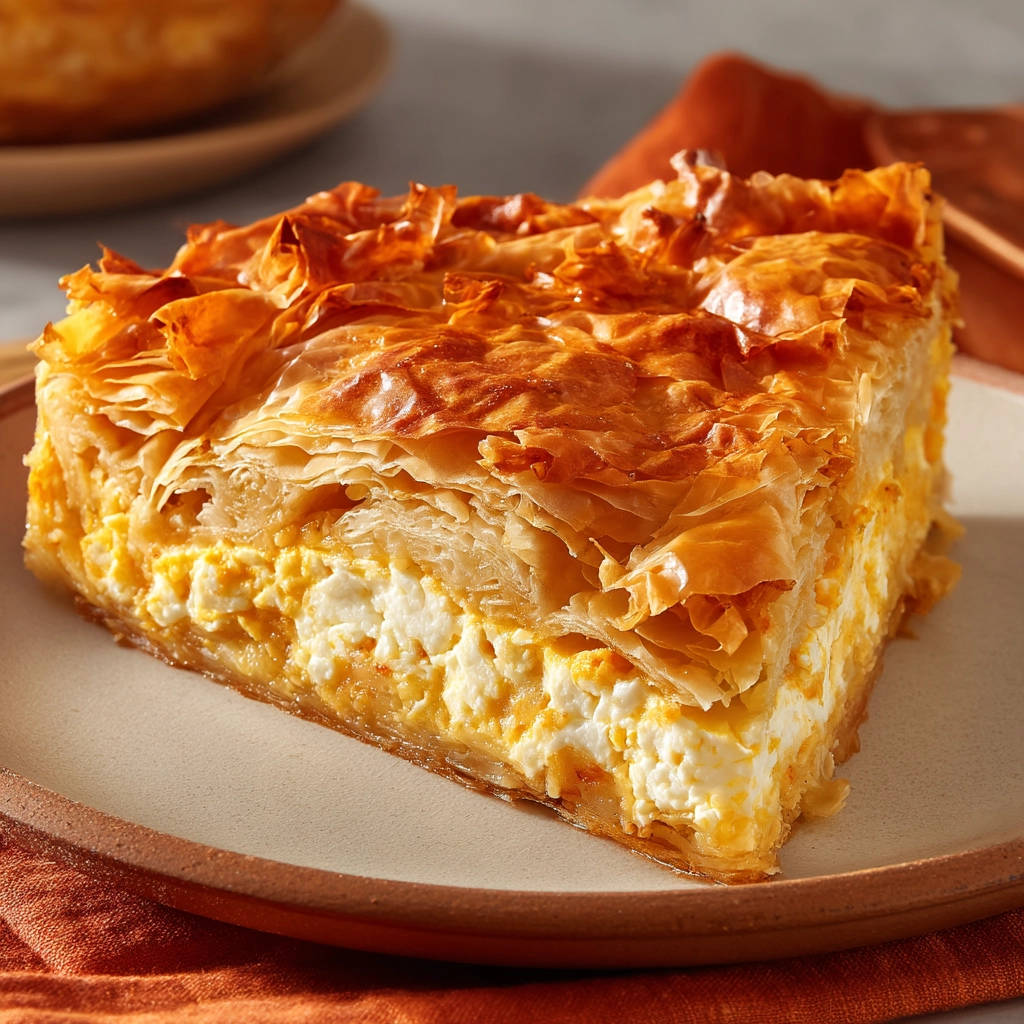
- The Texture: This is the star! We’re talking about layers so crisp they crackle when you cut into them, providing a delightful contrast to the creamy filling.
- Simple, Flavorful Filling: A classic combination of tangy feta and creamy cottage cheese creates a savory, satisfying core without being overly complicated.
- Surprisingly Easy: While phyllo might seem intimidating, the actual process is quite simple once you understand the core technique. It’s more assembly than complex cooking.
- Versatile: Perfect for entertaining, holidays, brunch, or just a special weeknight treat. They look impressive but require minimal fuss.
Forget flat, sad phyllo. We’re entering a new era of glorious, golden, Savory Cheese Phyllo Squares!
Gathering Your Ingredients for Flaky Savory Cheese Phyllo Squares
Crafting these incredibly flaky cheese squares starts with a simple, yet effective list of ingredients. Each component plays a crucial role in building both the structure and the delicious flavor of the final dish.
Here’s what you’ll need to have on hand:
- Frozen Phyllo Dough: This is the foundation of our flaky masterpiece. You’ll need one pound, typically found in the freezer section of most grocery stores. Remember, proper thawing is key to prevent tearing, so plan ahead!
- Unsalted Butter or Olive Oil: You’ll need one cup, melted. This is the ‘secret weapon’ ingredient! Brushing generous amounts of fat between each layer of phyllo is precisely what creates separation during baking, allowing each layer to crisp up individually instead of sticking together in a dense block. Unsalted butter offers classic rich flavor, while olive oil provides a lighter, Mediterranean touch.
- Feta Cheese: Sixteen ounces, crumbled. Feta is a must for its signature tangy, salty punch. Its crumbly texture integrates beautifully into the filling, ensuring pockets of intense flavor. Choose a good quality feta for the best taste.
- Cottage Cheese: Eight ounces. While feta brings the tang, cottage cheese provides the creamy binder for the filling. It adds moisture and helps create a smooth, unified texture that complements the crispy shell.
- Large Eggs: Two of them. Eggs act as a binder for the cheese filling, helping it set and providing structure so the filling doesn’t ooze out while baking.
- Salt and Black Pepper: A quarter teaspoon of each. These basic seasonings enhance the inherent flavors of the cheeses and the overall savory profile of the squares. Adjust to your personal preference, but start with this amount.
Having all your ingredients prepped and ready to go will make the assembly process smooth and stress-free, which is particularly helpful when working with delicate phyllo.
Crafting Your Savory Cheese Phyllo Squares: Step-by-Step to Flakiness
Now for the fun part – bringing it all together! This process is less about complicated techniques and more about patient assembly and understanding the ‘why’ behind each step. Follow these guidelines, and you’ll be rewarded with beautifully flaky Savory Cheese Phyllo Squares.
- The All-Important Thaw: Your phyllo dough needs to be fully thawed before you even think about unrolling it. The package instructions usually recommend thawing overnight in the refrigerator. Once thawed, it’s crucial to let the sealed package sit at room temperature for about an hour before you plan to use it. This relaxation period makes the delicate sheets pliable and significantly reduces the chance of them tearing as you separate them. Patience here pays off!
- Prep Your Baking Canvas: While your phyllo is coming to temperature, preheat your oven to 375 degrees F (190 degrees C). Get your 9×13 inch baking dish ready by greasing the bottom and sides. This helps prevent sticking and encourages even browning.
- Whip Up the Creamy Filling: In a medium-sized bowl, combine the crumbled feta cheese, creamy cottage cheese, both large eggs, the salt, and the black pepper. Grab a fork or a spatula and mix everything together thoroughly. You want a well-combined filling where the feta is distributed evenly throughout the cottage cheese and egg mixture.
- Protect Your Precious Phyllo: Unroll the thawed phyllo dough carefully. Phyllo dries out incredibly fast when exposed to air, becoming brittle and impossible to work with. To prevent this disaster, keep the stack of phyllo sheets covered at all times while you’re working. A slightly damp, clean kitchen towel or a sheet of plastic wrap placed directly over the unused dough works wonders. Lift the cover only when you’re ready to take the next sheet.
- Layer One: The Foundation: Carefully lift a single sheet of phyllo dough and lay it flat in the bottom of your prepared baking dish. Don’t worry if it wrinkles a little or hangs over the edge; you can gently fold or trim excess later if needed, though a little overhang can help seal the edges. Now, using a pastry brush, gently but thoroughly brush the entire surface of this phyllo sheet with your melted butter or olive oil. Make sure to get all the way to the edges. This layer of fat is CRITICAL – it’s what prevents the sheets from sticking together and allows them to crisp up into distinct layers.
- Build the Base: Continue layering phyllo sheets, one at a time, into the dish. After placing each new sheet, generously brush its entire surface with melted butter or oil before adding the next. Repeat this process until you have used approximately half of the phyllo dough sheets. Be generous with the butter/oil! It might seem like a lot, but this fat is what creates the incredible flakiness we’re after.
- Add the Savory Heart: Once your base layers are built, take the bowl of cheese filling and spread it evenly over the top layer of buttered phyllo in the dish. Use a spatula to make sure it’s distributed right up to the edges.
- Top it Off: Now, take the remaining phyllo sheets and begin layering them on top of the cheese filling, just as you did for the base. Place one sheet, brush it completely with melted butter or oil, then add the next sheet and repeat. Continue this until all the phyllo sheets are used. Make sure the very top sheet is also well coated with butter for that beautiful golden finish.
- The Score for Success: Before the phyllo goes into the oven, it’s helpful to score the top layers. Use a sharp knife to gently cut through the top sheets of pastry, forming squares or diamonds. Try to score all the way down to the filling layer, but be careful not to cut through the filling itself and scrape the bottom of the dish. Scoring helps you cut the finished squares neatly after baking and allows steam to escape during the cooking process, contributing to crispier layers.
- Bake to Golden Perfection: Place the dish in your preheated oven. Bake for about 40 to 45 minutes. Keep an eye on it towards the end of the baking time. You’re looking for a gorgeous golden brown color across the top and the phyllo layers should appear visibly puffed and crispy throughout.
- Cool and Serve: Once baked, carefully remove the Savory Cheese Phyllo Squares from the oven. Let the pie cool slightly in the baking dish for about 10 to 15 minutes before cutting. This brief cooling period allows the filling and the layers to set a bit, making it much easier to cut along your scored lines without everything falling apart.
Tips for Perfect Savory Cheese Phyllo Squares Every Time
Want to ensure your cheese phyllo squares are absolutely spot-on? Here are a few extra tips I’ve learned along the way:
- Handle Phyllo with Care: It’s delicate stuff! Work gently and deliberately when separating sheets. If one tears slightly, it’s usually not a big deal; just patch it with a small piece or cover it with the next layer, ensuring you still butter over it.
- Butter, Butter, Butter!: I can’t stress this enough. Don’t be shy with the melted butter or oil. Every single layer needs a good, even coating from edge to edge for maximum flakiness.
- Experiment with Cheese: While feta and cottage cheese are classic, you can certainly play with the filling. Add a little grated Parmesan, a sprinkle of mozzarella, or even a bit of creamy ricotta alongside or in place of the cottage cheese for a different texture.
- Add Some Freshness: A sprinkle of fresh chopped dill, parsley, or chives mixed into the cheese filling adds a wonderful burst of freshness. A pinch of nutmeg or a dash of cayenne pepper can also elevate the savory flavor.
- Storage: If you have leftovers (a rare occurrence!), store them in an airtight container in the refrigerator for 2-3 days.
- Reheating: To bring back that glorious crispiness, reheat leftovers in a toaster oven or standard oven at around 350°F (175°C) until heated through and the phyllo is crisp again. Microwaving will make them soft.
What to Serve With Your Savory Cheese Phyllo Squares
These flaky squares are incredibly versatile! They make a perfect appetizer or snack on their own, but they also pair beautifully with other dishes.
Consider serving them alongside a fresh, crisp salad. Our Easy Kale Salad or Crispy Roasted Brussels Sprouts would offer a lovely textural and flavor contrast.
They can also complement a light main course. If you’re looking for other appetizer ideas for a gathering, consider adding our Appetizer Pinwheels or Cheesy Baked Taquitos to the spread for a variety of handheld bites.
For a simple meal, pair them with a warm bowl of soup, like a classic tomato or vegetable soup. The possibilities are deliciously endless!
Your Savory Cheese Phyllo Squares Questions Answered (FAQ)
Let’s tackle some common questions you might have about making these flaky cheese squares.
Can I prepare the cheese filling ahead of time?
Absolutely! You can mix the feta, cottage cheese, eggs, salt, and pepper up to a day in advance. Store it in an airtight container in the refrigerator. This can help streamline the assembly process on baking day.
My phyllo is tearing constantly! What am I doing wrong?
The most common culprits are not thawing the dough completely or not letting it come to room temperature before working with it. Ensure it thaws overnight in the fridge and rests on the counter in its packaging for the recommended hour. Also, make sure you keep the unused sheets covered with a slightly damp towel or plastic wrap while you work. Working gently is also key.
Do I have to use butter? Can I use oil instead?
Yes, you can definitely use olive oil as suggested in the ingredients. It will still provide the fat needed for separation and crispiness. Olive oil will give the squares a slightly different, perhaps lighter, flavor profile compared to butter, which offers a richer taste. A neutral oil like vegetable or canola oil could also work, but butter or olive oil are typically preferred for flavor.
Can I freeze the baked Savory Cheese Phyllo Squares?
Technically, yes, but the texture might not be quite as perfect after freezing and thawing as it is when fresh. The phyllo can lose some of its ultimate crispness. If you do freeze, wrap cooled squares tightly in plastic wrap and then foil. Reheat from frozen or thawed in a low oven (around 300-325°F or 150-160°C) until heated through and re-crisped.
What if I don’t have a 9×13 inch dish?
You can use a baking dish of a similar volume. A slightly smaller dish might result in thicker layers, while a larger one might mean thinner layers and potentially faster cooking time. Adjust layering and baking time as needed, keeping an eye on the golden color and crispiness.
Enjoy Your Homemade Savory Cheese Phyllo Squares!
There you have it – the simple secret to achieving those sought-after flaky layers in your Savory Cheese Phyllo Squares. No more flat, disappointing results! Just glorious, golden pastry wrapped around a delightful cheesy filling. Whether you’re making them for a special occasion or just because, these squares are sure to impress with their texture and flavor.
Give this recipe a try, embrace the buttering process, and get ready to bite into pure flaky bliss. Let me know in the comments below how yours turn out!
Savory Cheese Phyllo Squares

Ingredients
- 1 pound frozen phyllo dough, thawed
- 1 cup unsalted butter, melted (or use olive oil)
- 16 ounces feta cheese, crumbled
- 8 ounces cottage cheese
- 2 large eggs
- 1/4 teaspoon salt
- 1/4 teaspoon black pepper
Directions
- Thaw phyllo dough according to package instructions, usually overnight in the refrigerator, then bring to room temperature for about an hour before using. This prevents it from tearing easily.
- Preheat oven to 375 degrees F (190 degrees C). Grease a 9×13 inch baking dish.
- In a medium bowl, combine the crumbled feta cheese, cottage cheese, eggs, salt, and pepper. Mix well until the filling is evenly combined.
- Unroll the thawed phyllo dough. Keep the sheets covered with a slightly damp towel or plastic wrap while you work to prevent them from drying out.
- Lay one sheet of phyllo dough in the bottom of the prepared baking dish. Gently brush the entire surface of the phyllo sheet with melted butter or oil, making sure to get butter all the way to the edges. This brushing between layers is the key to creating separation and flakiness.
- Repeat this process, layering and generously brushing each individual phyllo sheet with melted butter or oil, until you have used half of the phyllo dough sheets. Don’t skimp on the butter between layers; this is what makes them flaky!
- Evenly spread the cheese filling over the layered phyllo dough in the dish.
- Take the remaining phyllo sheets and repeat the layering and brushing process over the filling. Place one sheet on top of the filling, brush it with melted butter or oil, then add the next sheet and brush it, continuing until all the phyllo sheets are used. Ensure the top layer is also well brushed.
- Before baking, use a sharp knife to gently score the top layers of the pie into squares or diamonds. Score all the way down to the filling, but try not to cut through the filling layer itself. This helps with cutting after baking and allows steam to escape.
- Bake for 40 to 45 minutes, or until the top is golden brown and the pastry is puffed and crispy throughout.
- Let the pie cool slightly in the dish for about 10-15 minutes before cutting along the scored lines and serving. This allows the layers to set a bit.