There’s nothing more disheartening than meticulously crafting beautiful mini tartlets, only to have them stubbornly cling to the pan when you try to remove them.
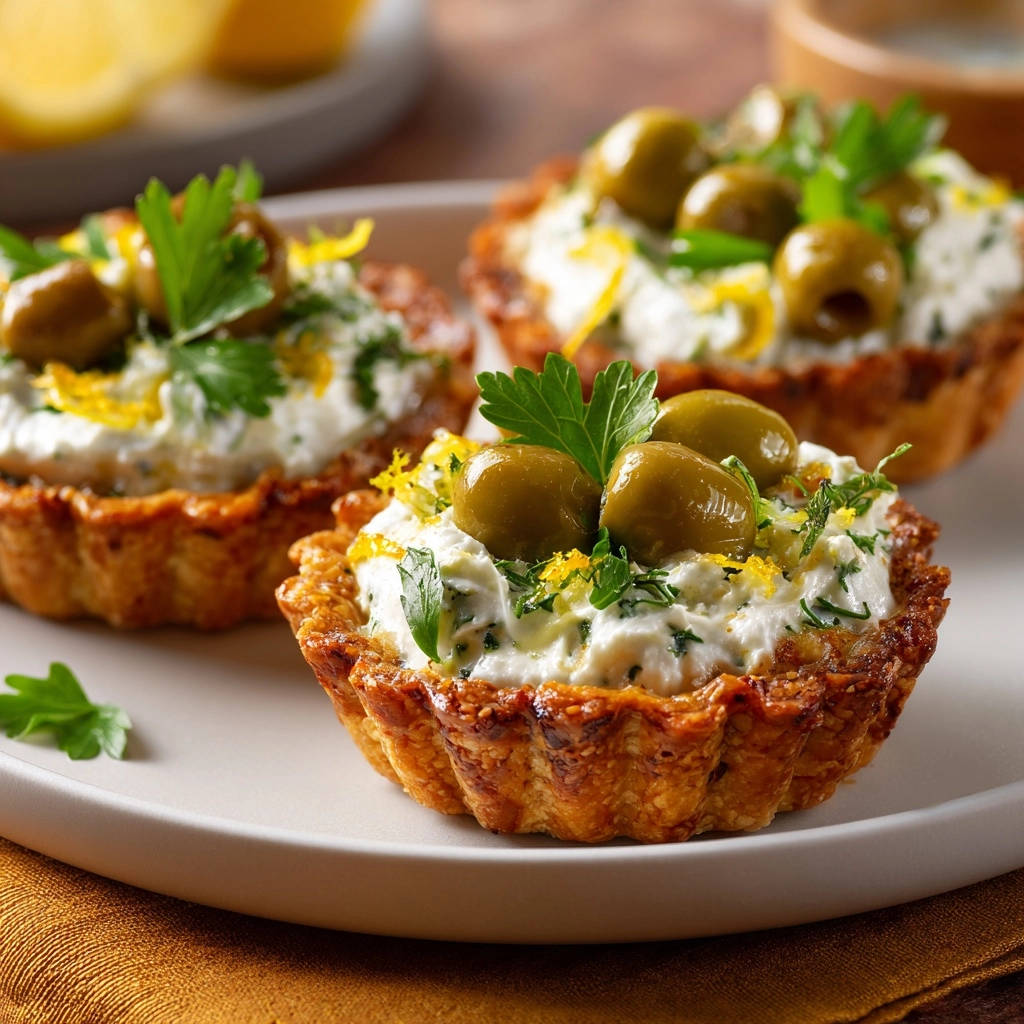
But my recipe for these delightful Savory Mediterranean Tartlets comes with a simple, expert trick that guarantees they’ll slide out perfectly, looking like they came straight from a gourmet bakery.
Get ready to impress with these creamy, tangy bites, effortlessly presented every single time.
Why These Savory Mediterranean Tartlets Will Become Your Go-To Appetizer
The Foolproof Release Method: No More Sticking!
The number one frustration with mini tartlets is often the sticking. My method, refined over years, ensures each tartlet effortlessly releases from its mold, preserving its delicate shape and beautiful fluted edges.
You’ll achieve picture-perfect, bakery-quality results every single time, without the usual stress or wasted effort.
A Symphony of Mediterranean Flavors
These Savory Mediterranean Tartlets burst with the vibrant tastes of the Mediterranean coast.
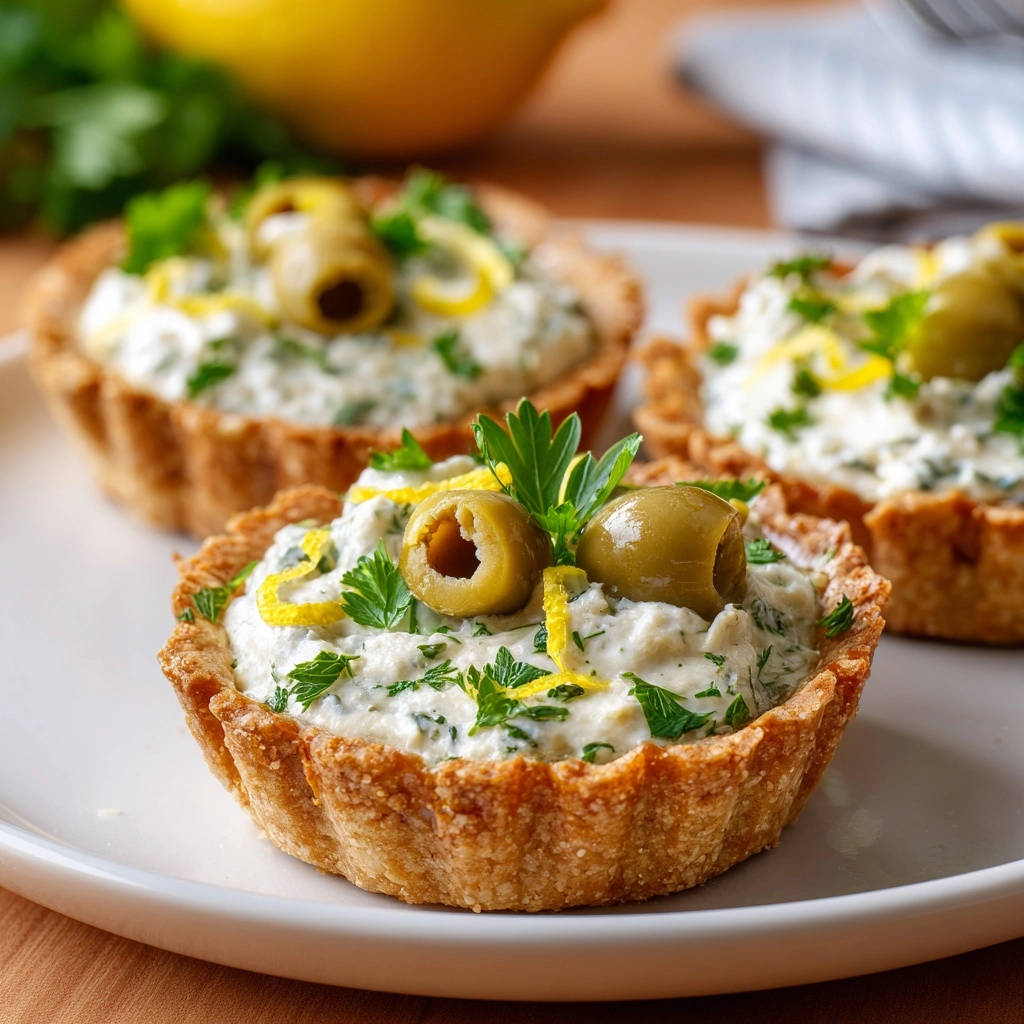
A creamy, tangy feta filling is perfectly balanced with fresh herbs and a bright citrus note, creating an incredibly satisfying and light bite that appeals to almost everyone.
Elegant & Effortless Entertaining
Whether you’re hosting a sophisticated brunch, a casual get-together, or simply need an elegant appetizer, these mini tarts fit the bill perfectly.
Their individual portions make serving a breeze, and their beautiful presentation elevates any spread without requiring hours of complicated work.
Crafting Perfection: The Essential Ingredients for Your Tartlets
For the Flaky, Never-Stick Crust
The foundation of our perfect tartlet is a supremely flaky, tender crust that practically melts in your mouth.
All-Purpose Flour: Provides the structure. Ensure it’s fresh for best results.
Salt: Essential for enhancing the flavor of the crust itself, balancing the richness of the butter.
Very Cold Unsalted Butter: This is crucial for flakiness. Cold butter creates pockets of steam in the oven, yielding that desirable layered texture.
Ice Water: Keeps the butter cold and helps the dough just come together without overworking it. Using ice water prevents gluten development.
The Creamy, Tangy Feta Filling
The heart of these Mediterranean appetizers is their incredibly flavorful, balanced filling.
Softened Cream Cheese: Provides the essential creamy base and richness. Ensure it’s truly softened for a smooth filling.
Crumbled Feta Cheese: Adds that signature tangy, salty Mediterranean punch. Look for good quality feta packed in brine for best flavor and texture.
Fresh Parsley: Brings a bright, herbaceous freshness that complements the cheeses beautifully.
Fresh Lemon Juice & Zest: The secret to lifting all the flavors and adding a crucial tangy brightness that cuts through the richness of the cheeses.
Black Pepper: A simple seasoning that enhances all the other flavors.
The Finishing Touch: Simple Yet Striking Toppings
These simple additions elevate your Savory Mediterranean Tartlets from delicious to truly memorable.
Pitted Green Olives: Offer a briny, savory counterpoint and a lovely textural contrast to the creamy filling.
Fresh Parsley Sprigs: Provide a pop of color and an additional layer of fresh herb aroma.
Extra Lemon Zest: A final dusting brightens the overall flavor and aroma, making each bite even more invigorating.
Gather Your Culinary Gear: Essential Tools for Tartlet Success
Standard Baking Equipment
You’ll likely have most of these versatile tools already in your kitchen, making preparation straightforward.
Large Mixing Bowl: For combining crust ingredients.
Medium Mixing Bowl: Perfect for whisking together the creamy filling.
Whisk or Spatula: For mixing and incorporating ingredients smoothly.
Rolling Pin: Essential for achieving an even thickness for your tartlet dough.
Measuring Cups & Spoons: For accurate ingredient proportions, which is key in baking.
Specialized Tartlet Aids
These specific tools will ensure your mini tarts come out beautifully and effortlessly.
Mini Tartlet Molds: The star of the show! Fluted molds create a classic, elegant look, but plain ones work just as well.
Pastry Blender or Your Fingertips: Ideal for cutting cold butter into flour for that perfect crumbly texture.
Cookie Cutter (slightly larger than molds): Ensures uniform, perfectly shaped dough circles for your tartlet shells.
Your Guide to Savory Mediterranean Tartlets: From Prep to Plate
- Prepare the Crust:
In a large bowl, whisk together the all-purpose flour and salt until well combined. This ensures even seasoning throughout your crust.
Add the very cold, cubed unsalted butter. Using a pastry blender or your fingertips, quickly cut the butter into the flour until the mixture resembles coarse crumbs, with some pea-sized pieces of butter still visible.
Gradually add ice water, one tablespoon at a time, mixing gently until the dough just comes together. Be careful not to overmix, as this develops gluten and can lead to a tough crust.
- Chill the Dough:
Form the dough into a disk, wrap it tightly in plastic wrap, and refrigerate for at least 30 minutes.
This chilling step is absolutely crucial for easy handling; it also re-firms the butter, which prevents sticking and ensures a tender, flaky baked crust.
- Prepare Tartlet Molds for Foolproof Release:
While your dough chills, generously grease your 6-8 mini tartlet molds (about 3-4 inches in diameter) with butter or a non-stick cooking spray.
Then, lightly dust them with flour, gently tapping out any excess. This meticulous preparation creates a vital barrier between the crust and the mold, guaranteeing clean, effortless release every time.
- Form the Tartlet Shells:
On a lightly floured surface, roll out the chilled dough to about 1/8 inch thickness. Aim for an even thickness to ensure uniform baking.
Using a cookie cutter slightly larger than your tartlet molds (to account for the sides), cut out dough circles.
Carefully press each dough circle into a prepared mold, gently easing it into the fluted sides. Trim any excess dough from the edges for a neat finish.
Prick the bottom of each crust several times with a fork. This prevents the crust from puffing up during pre-baking, ensuring a flat base for your filling.
- Pre-bake the Crusts:
Preheat your oven to 375°F (190°C). Place the prepared tartlet shells on a baking sheet and bake for 10-12 minutes, or until they are lightly golden around the edges.
This crucial step, often called blind baking, sets the crust and prevents it from becoming soggy once the filling is added.
Remove them from the oven and let them cool slightly in their molds before adding the filling.
- Make the Filling:
In a medium bowl, combine the softened cream cheese, crumbled feta cheese, finely chopped fresh parsley, lemon juice, 1 teaspoon lemon zest, and black pepper.
Mix until all ingredients are well combined and the mixture is creamy and smooth. Ensure there are no large lumps of cream cheese for the best texture.
- Fill and Bake:
Spoon the creamy feta mixture evenly into each pre-baked tartlet shell, filling them almost to the top.
Return the filled tartlets to the oven and bake for another 8-10 minutes, or until the filling is warmed through and lightly set. The top might turn a very light golden.
- Cool and Remove (The Key Step):
This is where the magic truly happens for effortless release! Allow the baked tartlets to cool completely in their molds on a wire rack for at least 15-20 minutes, or even longer.
As they cool, the butter in the crust re-firms just enough, causing the tartlet to slightly shrink and pull away from the mold edges.
Once sufficiently cooled, gently twist or push from the bottom of the mold (if removable) to loosen and lift them out. Patience here is key to avoiding breakage.
- Garnish and Serve:
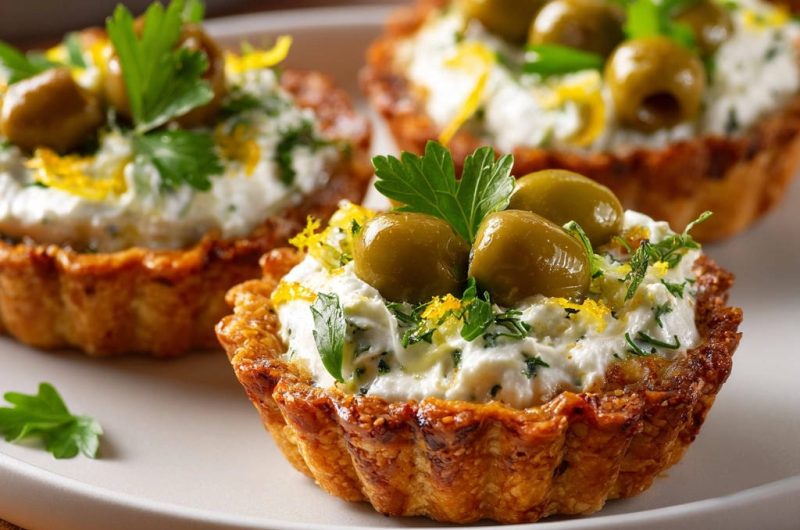
Once removed from the molds, top each Savory Mediterranean Tartlet with a few pitted green olives for a briny bite.
Add a fresh parsley sprig and a delicate sprinkle of fresh lemon zest for vibrant color and aroma.
Serve these elegant appetizers warm or at room temperature, as both offer a delightful experience.
The “No-Stick” Secret: Ensuring Flawless Tartlet Release Every Time
The Power of Proper Pan Preparation
Many recipes simply say “grease the pan,” but for delicate tartlets, it’s far more specific. Our method of generously greasing AND then lightly flouring the molds creates a non-stick barrier that is unparalleled.
The grease provides the initial slip, while the flour creates a microscopic layer that prevents the dough from adhering directly to the metal, ensuring a clean break every time.
Chilling the Dough: More Than Just Handling Ease
While chilling dough makes it easier to roll and handle, its role in preventing sticking is equally vital. When cold, the butter in the dough is firm and less likely to melt prematurely in the oven.
This allows the crust to set quickly and pull away from the mold as it bakes, rather than sticking and becoming absorbed into the pan.
The Cooling Crucible: Patience Pays Off
This is perhaps the most overlooked yet critical step. Removing hot tartlets from their molds is a recipe for disaster, as the butter is still too soft and the crust too fragile.
Allowing the tartlets to cool completely in their molds allows the butter to re-solidify. This re-firming causes a slight contraction of the crust, naturally releasing its grip on the mold and making removal effortless and intact.
Elevate Your Tartlets: Pro Tips for Savory Mediterranean Perfection
Don’t Overmix the Crust: The key to a flaky crust is minimizing gluten development. Mix the dough only until it just comes together, with visible pieces of butter remaining. An overmixed dough will result in a tough, unappetizing crust.
Adjust Your Filling Flavors: Feel free to customize the filling! For an extra layer of flavor, consider finely chopping and adding a tablespoon of sun-dried tomatoes or roasted red peppers. A pinch of dried dill or oregano can also enhance the Mediterranean profile. Even a tiny bit of minced garlic can add depth.
Precision in Pricking: Before pre-baking, thoroughly prick the bottom of each tartlet shell with a fork. This creates vents that allow steam to escape during baking, preventing the crust from puffing up and ensuring a perfectly flat base for your filling.
Visual Cues for Doneness: Don’t rely solely on the timer. For the pre-bake, look for lightly golden edges on the crusts. For the filled tartlets, the filling should appear lightly set and firm, perhaps with a faint golden hue around the very edges, indicating it’s warmed through and cooked.
Mastering the Garnish: The garnish isn’t just for looks; it adds fresh flavor and texture. Arrange olives artistically. For extra flair, use a microplane to zest lemon directly over the tartlets just before serving for an intense citrus aroma. Consider a small sprig of fresh dill alongside parsley for added elegance.
Troubleshooting Your Tartlets: Common Hurdles & Smart Solutions
“My Tartlets are Sticking to the Molds!”
This is usually due to insufficient pan preparation or impatient removal. Ensure your molds are thoroughly greased AND floured before pressing in the dough.
Most importantly, allow the baked tartlets to cool completely in their molds before attempting to remove them. The butter needs to re-firm to release cleanly.
“Why is My Crust Soggy?”
A soggy crust is typically a result of skipping or shortening the pre-baking step. Always blind bake your crusts until lightly golden and set before adding the wet filling.
Additionally, avoid overfilling the tartlets, as too much filling can also contribute to a less crisp crust.
“My Filling is Too Runny!”
Ensure your cream cheese is properly softened before mixing; this helps it blend smoothly without needing extra liquid.
If adding other wet ingredients like sun-dried tomatoes, ensure they are well-drained and patted dry. Overmixing the filling can also incorporate too much air, making it seem less dense.
“The Crust Shrunk Too Much!”
Crust shrinkage often occurs when the dough is overworked, developing too much gluten, or if it wasn’t chilled long enough.
Handle the dough minimally when preparing the crust, and always ensure it has a full 30 minutes (or more) of chilling time before rolling and forming.
Planning Ahead: Make-Ahead & Storage Tips for Your Tartlets
Can I Make the Dough Ahead of Time?
Absolutely! The dough for these Savory Mediterranean Tartlets can be made up to 2-3 days in advance.
Form it into a disk, wrap it tightly in plastic wrap, and store it in the refrigerator. Let it sit at room temperature for about 10-15 minutes before rolling to make it pliable.
Storing Baked Savory Mediterranean Tartlets
Baked tartlets can be stored in an airtight container at room temperature for up to 2 days, or in the refrigerator for up to 4 days.
For best texture, allow them to come to room temperature or gently rewarm in a low oven before serving.
Freezing for Future Feasts
You can freeze unbaked tartlet shells: line them on a baking sheet, freeze until solid, then transfer to a freezer bag for up to 1 month. Bake from frozen, adding a few minutes to the bake time.
Baked Savory Mediterranean Tartlets can also be frozen for up to 1 month. Freeze solid on a baking sheet, then transfer to a freezer-safe container. Thaw in the refrigerator and rewarm gently in the oven for optimal enjoyment.
Beyond the Plate: Creative Serving Ideas for Savory Mediterranean Tartlets
Perfect Pairings
These versatile Savory Mediterranean Tartlets pair beautifully with a variety of complementary dishes and beverages.
Serve them alongside a crisp arugula and pomegranate salad, a light tomato soup, or a simple platter of fresh fruit.
For drinks, consider a chilled dry white wine, a refreshing sparkling water with lemon, or even a classic creamy homemade hummus alongside.
Occasions to Serve
These elegant mini tartlets are ideal for almost any gathering where you want to serve something special yet easy.
They shine as an appetizer for dinner parties, a delightful addition to holiday buffets, or a chic offering for bridal or baby showers. They even make a wonderful, light lunch component.
Your Savory Mediterranean Tartlets Questions Answered
Can I Use Different Cheeses in the Filling?
Absolutely! While feta is classic, you can certainly experiment. Try substituting part of the feta with goat cheese for a tangier profile, or add a tablespoon of grated Parmesan for a saltier, nutty note.
Ricotta cheese can also be incorporated for an even creamier, milder texture, just be sure to drain it well if it seems watery.
What if I Don’t Have Mini Tartlet Molds?
No problem! You can use a standard muffin tin for slightly larger, cup-shaped tartlets. Adjust baking time accordingly, likely a few minutes longer.
Alternatively, roll the dough into squares, place filling in the center, and fold corners to create free-form hand pies, though the texture and cooking time will differ. For another savory pastry option, consider a skillet potato and mushroom tart.
Can I Make These Gluten-Free?
Yes, you can! Substitute the all-purpose flour in the crust with a good quality gluten-free all-purpose flour blend that contains xanthan gum.
The texture might be slightly different, possibly a bit more delicate, but the savory flavors will still shine through beautifully.
How Can I Make These Even Healthier?
For a lighter version, you can use reduced-fat cream cheese, though it might impact the creaminess slightly.
Consider incorporating finely grated zucchini or spinach (ensure excess moisture is squeezed out) into the filling for added vegetables and nutrients. You could also use whole wheat pastry flour for part of the crust, which will add fiber.
Ready to Impress? Share Your Savory Mediterranean Tartlets Masterpiece!
Now that you’re armed with the secrets to perfectly releasing, bakery-beautiful Savory Mediterranean Tartlets, it’s time to get baking!
These elegant bites are guaranteed to be a hit at your next gathering, bringing a taste of the Mediterranean sunshine to your table.
Don’t hesitate to share your culinary creations with us. Happy baking!
Savory Mediterranean Tartlets
Course: AppetizerCuisine: Mediterranean cuisineDifficulty: easy6
tartlets45
minutes20
minutes60
minutesMediterranean cuisine
Ingredients
For the Crust:
1 1/4 cups all purpose flour
1/2 teaspoon salt
1/2 cup (1 stick) unsalted butter, very cold and cubed
2-3 tablespoons ice water
For the Filling:
8 ounces cream cheese, softened
4 ounces feta cheese, crumbled
1/4 cup fresh parsley, finely chopped
1 tablespoon fresh lemon juice
1 teaspoon lemon zest (plus more for garnish)
1/4 teaspoon black pepper
For the Topping:
1/2 cup pitted green olives
Fresh parsley sprigs, for garnish
Lemon zest, for garnish
Directions
- Prepare the Crust: In a large bowl, whisk together flour and salt. Add the cold, cubed butter and cut it into the flour using a pastry blender or your fingertips until the mixture resembles coarse crumbs with some pea sized butter pieces. Gradually add ice water, one tablespoon at a time, mixing until the dough just comes together. Be careful not to overmix.
- Chill the Dough: Form the dough into a disk, wrap it in plastic wrap, and refrigerate for at least 30 minutes. This chilling step is crucial for easy handling and helps prevent sticking later.
- Prepare Tartlet Molds for Foolproof Release: While the dough chills, generously grease your 6-8 mini tartlet molds (fluted or plain, about 3-4 inches in diameter) with butter or a non-stick cooking spray. Then, lightly dust them with flour, tapping out any excess. This thorough preparation creates a barrier that prevents sticking.
- Form the Tartlet Shells: On a lightly floured surface, roll out the chilled dough to about 1/8 inch thickness. Using a cookie cutter or knife, cut out circles slightly larger than your tartlet molds. Carefully press each dough circle into a prepared mold, gently pressing it into the fluted sides and trimming any excess dough from the edges. Prick the bottom of each crust several times with a fork.
- Pre-bake the Crusts: Preheat oven to 375F (190C). Bake the tartlet shells for 10-12 minutes, or until lightly golden. This helps set the crust and prevents a soggy bottom. Remove from oven and let cool slightly.
- Make the Filling: In a medium bowl, combine softened cream cheese, crumbled feta cheese, chopped parsley, lemon juice, 1 teaspoon lemon zest, and black pepper. Mix until well combined and creamy.
- Fill and Bake: Spoon the cream cheese mixture evenly into the pre-baked tartlet shells. Return the filled tartlets to the oven and bake for another 8-10 minutes, or until the filling is warmed through and lightly set.
- Cool and Remove (The Key Step): This is where the magic happens for easy release! Let the baked tartlets cool in their molds on a wire rack for at least 15-20 minutes. As they cool slightly, the butter in the crust re-firms just enough, allowing the tartlets to release cleanly. Once slightly cooled, gently twist or push from the bottom of the mold (if removable) to loosen and lift them out.
- Garnish and Serve: Top each tartlet with a few pitted green olives, a fresh parsley sprig, and a sprinkle of fresh lemon zest. Serve warm or at room temperature.
Notes
- Features a key technique for perfectly released, non-stick tartlets.