Okay, let’s be honest. Who hasn’t experienced the sheer disappointment of biting into a chicken drumstick only to find it… dry? It’s like the flavor and moisture just vanished! For years, I struggled to get consistently tender chicken when cooking drumsticks at home. Baking often left them rubbery, frying felt messy, and sometimes even grilling could result in a less-than-perfect bite.
But I discovered a secret, a simple technique that changed everything. It’s called braising, and when done in a skillet, it transforms humble chicken drumsticks into incredibly tender, fall-off-the-bone pieces of deliciousness bathed in a rich, savory sauce. This Skillet Braised Chicken Drumsticks recipe is the answer to all your dry chicken woes, and it’s surprisingly easy!
Why These Skillet Braised Chicken Drumsticks Are a Weeknight Winner
There are so many reasons to fall in love with this method and this specific recipe:
- Say Goodbye to Dry Chicken: The braising technique ensures moist, succulent results every single time. This is the ultimate trick for juicy chicken.
- Flavor Powerhouse: Searing the drumsticks first builds incredible depth, which is then amplified by simmering them in a flavorful liquid with aromatic vegetables.
- One-Skillet Convenience: Everything happens in one pan, minimizing cleanup – a major win on busy evenings!
- Budget-Friendly: Chicken drumsticks are an economical cut, making this a delicious meal that’s easy on your wallet.
- Adaptable: While this base recipe is fantastic, it’s also a great canvas for variations based on what you have on hand or what you’re craving.
Gathering Your Ingredients for Tender Braised Drumsticks
Part of the magic of this recipe lies in its simplicity. You don’t need a long list of fancy ingredients to achieve spectacular results. The key is quality and how you handle each component.
We start, of course, with the star: chicken drumsticks. This cut is perfect for braising because the connective tissue and bone help keep the meat moist and tenderize beautifully over low, slow heat. Look for drumsticks that are roughly uniform in size so they cook evenly.
To build our flavor foundation, we’ll use a little cooking oil for searing, allowing us to get that gorgeous golden-brown crust that adds so much depth. A large onion, thinly sliced, provides sweetness and becomes wonderfully tender as it cooks down in the sauce. We also use tomatoes – a pint of cherry tomatoes or a drained can of diced tomatoes work equally well – to add acidity and a touch of natural sweetness to the braising liquid, which becomes our flavorful sauce.
The braising liquid itself is simple: chicken broth or even water. Chicken broth adds more savory flavor, but water works in a pinch as the chicken, onion, and tomatoes will contribute plenty of taste. We enhance the chicken and vegetable flavors further with a simple blend of dried spices. The recipe suggests paprika, garlic powder, and onion powder – classic flavor enhancers that pair wonderfully with chicken and tomatoes. Of course, salt and black pepper are essential for seasoning generously at every stage. Finally, fresh parsley or cilantro adds a bright, fresh finish right before serving.
Here’s the specific list to make shopping easy:
- 8 chicken drumsticks
- 2 tablespoons cooking oil (like olive, vegetable, or canola)
- 1 large onion, sliced
- 1 pint cherry tomatoes or 1 can (about 14.5 oz) diced tomatoes, drained
- 1.5 cups chicken broth or water
- 2 teaspoons dried spices (such as paprika, garlic powder, onion powder, or a blend)
- Salt, to taste
- Black pepper, to taste
- Fresh parsley or cilantro, chopped, for garnish
Crafting Your Skillet Braised Chicken Drumsticks: Step-by-Step to Success
Ready to transform those drumsticks? Follow these steps, paying attention to the ‘why’ behind each one, and you’ll be rewarded with perfectly juicy, flavorful chicken.
-
Prep the Drumsticks: This might seem minor, but patting your chicken drumsticks completely dry with paper towels is crucial! Moisture on the surface prevents searing, which means less flavor. Once they’re nice and dry, season them generously all over. Don’t be shy with the salt, pepper, and your dried spices (like paprika, garlic powder, onion powder). Coating them evenly now ensures every bite is flavorful.
-
Sear for Flavor: Heat the cooking oil in a large, oven-safe skillet over medium-high heat. You want the oil shimmering but not smoking. Carefully add the seasoned drumsticks to the hot skillet in a single layer. Work in batches if necessary to avoid overcrowding – overcrowding cools the pan and prevents proper searing. Sear the drumsticks on all sides until they are deeply golden brown, which usually takes about 5 to 7 minutes total. This beautiful brown crust is pure flavor gold! Once seared, remove the drumsticks from the skillet and set them aside on a plate.
-
Soften the Onions: Reduce the heat in your skillet to medium. Add the sliced onions. Cook them, stirring occasionally, until they soften and turn translucent. This takes about 5 minutes. Cooking the onions slowly helps release their sweetness and build a base for the sauce.
-
Introduce the Tomatoes: Add the cherry or diced tomatoes to the skillet with the softened onions. Cook for just 2 to 3 minutes, stirring and using your spoon to gently break down the tomatoes, especially if using cherry tomatoes. The tomatoes add a lovely tang and body to the sauce.
-
Deglaze and Simmer: Pour the chicken broth or water into the skillet. Use a wooden spoon or spatula to scrape the bottom of the skillet, loosening any browned bits left from searing the chicken and cooking the vegetables. These bits are packed with flavor! Bring the liquid to a gentle simmer.
-
Return the Chicken: Nestling the seared drumsticks back into the simmering onion and tomato mixture. Arrange them so they are partially submerged in the liquid – ideally, the broth should come about halfway up the sides of the drumsticks. This ensures they braise properly.
-
The Magic of Low and Slow Braising: Cover the skillet tightly with a lid or foil. Reduce the heat to low. You want the liquid to maintain a very gentle simmer, just a few lazy bubbles. Let the drumsticks cook covered for 25 to 30 minutes. This is the critical braising step! The low, moist heat breaks down the connective tissues in the chicken, resulting in incredibly tender, juicy meat without drying it out.
-
Finish and Thicken (Optional): After the covered simmering time, uncover the skillet. Increase the heat slightly to medium and let the sauce simmer uncovered for another 5 to 10 minutes. This allows some of the liquid to evaporate, thickening the sauce slightly if desired. Before serving, always check that the internal temperature of the thickest part of the chicken reaches 175 degrees Fahrenheit (about 79 degrees Celsius) using an instant-read thermometer. This guarantees they are safely cooked and perfectly tender.
-
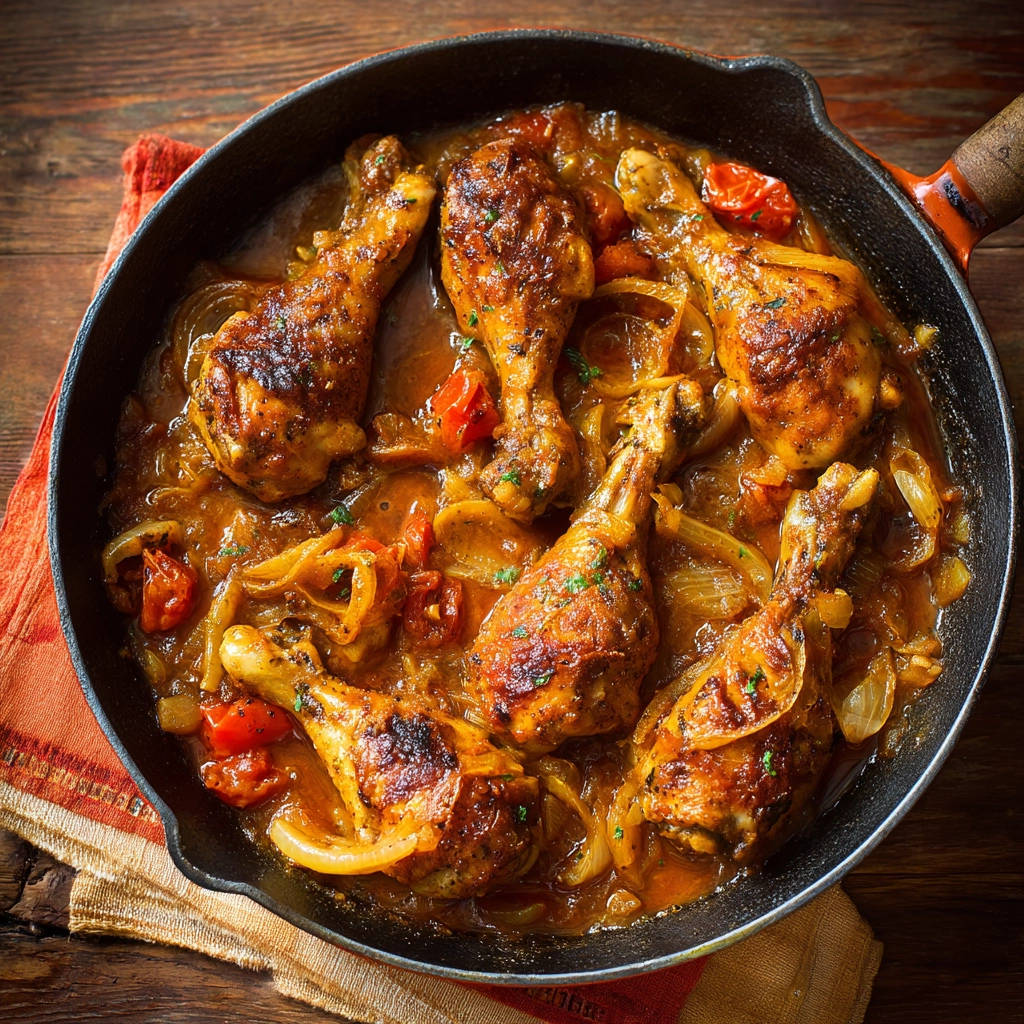
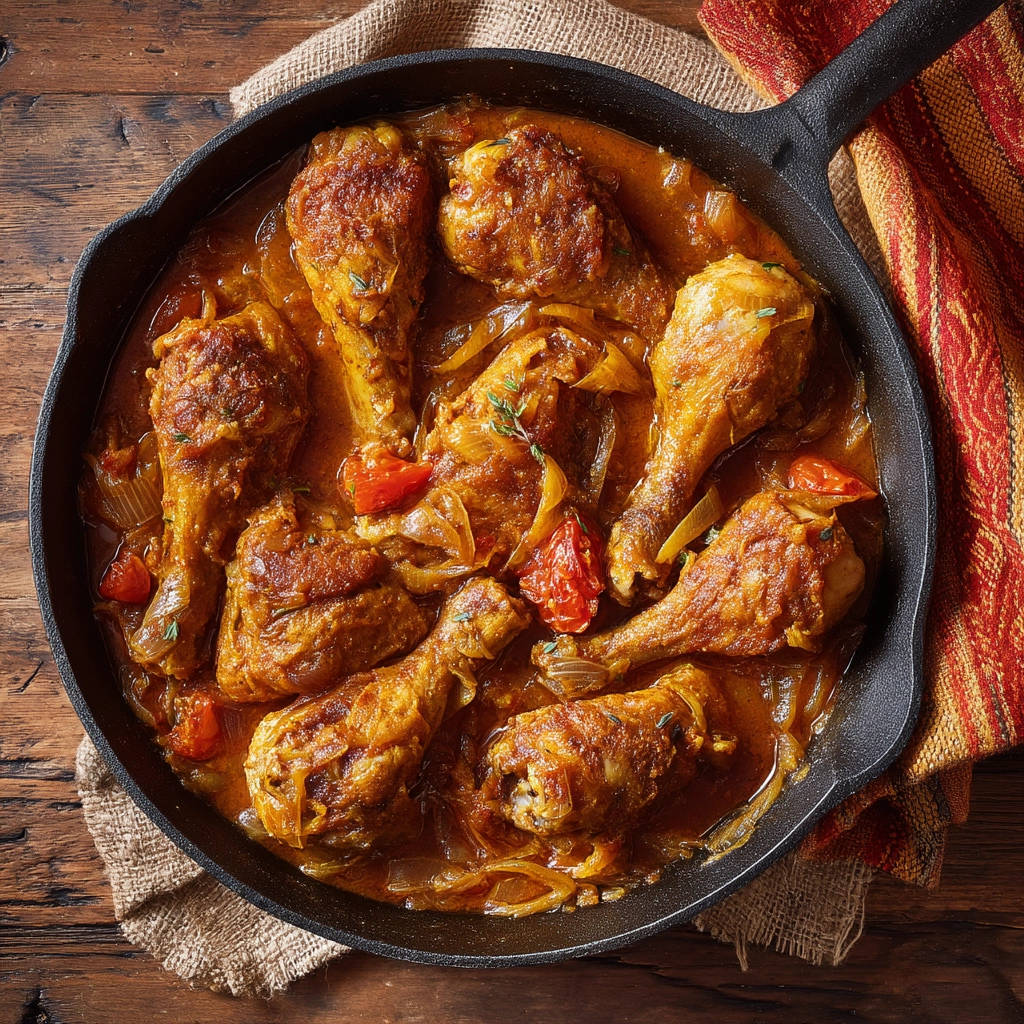
Garnish and Serve: Remove the skillet from the heat. Garnish generously with fresh chopped parsley or cilantro. The fresh herbs add a burst of color and freshness that beautifully complements the rich, savory sauce. Serve hot, spooning that delicious sauce over the drumsticks.
Tips for Perfect Skillet Braised Chicken Drumsticks Every Time
Achieving perfectly tender and juicy braised chicken drumsticks is simple, but a few extra tips can elevate your results:
- The Skillet Matters: Use a heavy-bottomed skillet, like cast iron or enameled cast iron. These retain heat exceptionally well, which is key for consistent searing and steady simmering during braising. Make sure it has a tight-fitting lid or foil will work well.
- Don’t Rush the Sear: That golden crust isn’t just for looks! Searing locks in flavor and contributes to a richer sauce. Give the drumsticks enough time on each side to develop that beautiful color.
- Low and Slow is Key: Resist the urge to turn up the heat during the covered simmering phase. The goal is a gentle braise, not a rapid boil. This allows the meat to tenderize slowly without becoming tough.
- Spice It Up: The recipe uses a basic spice blend, but feel free to customize! Try adding a pinch of smoked paprika, a dash of cayenne for heat, or some dried Italian herbs for a different flavor profile.
- Checking for Doneness: While the braising time is a good guideline, using a meat thermometer is the most accurate way to ensure your chicken is cooked through and perfectly tender. 175°F (79°C) is ideal for dark meat like drumsticks, as it gives the connective tissue time to break down.
- Storing Leftovers: Cooled braised drumsticks can be stored in an airtight container in the refrigerator for 3-4 days. Reheat gently in a skillet with a little extra broth or water to keep them moist.
What to Serve With Your Juicy Chicken Drumsticks
These Skillet Braised Chicken Drumsticks are incredibly versatile and pair well with a variety of side dishes. The rich, flavorful sauce is perfect for spooning over something starchy. Mashed potatoes, rice (like our Easy Mexican Rice), or even crusty bread to soak up the sauce are excellent choices. For a lighter option, consider roasted vegetables or a simple green salad. Our Crispy Roasted Brussels Sprouts or Easy Kale Salad would complement the dish beautifully.
Your Skillet Braised Chicken Drumsticks Questions Answered (FAQ)
Have a question about making the best braised drumsticks? Here are some common ones:
Can I use chicken thighs instead of drumsticks?
Absolutely! Chicken thighs are also dark meat and will braise beautifully using the same method and timing. They are often slightly larger, so just ensure their internal temperature reaches 175°F (79°C) before serving. If you enjoy exploring different chicken preparations, you might also like our recipe for Creamy Skillet Chicken, which uses thighs.
How can I thicken the sauce further?
If after simmering uncovered the sauce isn’t as thick as you’d like, you have a couple of options. You can either continue simmering it uncovered for a few more minutes, or you can remove the chicken again and whisk a slurry of 1 tablespoon cornstarch mixed with 2 tablespoons cold water into the simmering sauce. Let it bubble gently for a minute or two to thicken.
Can I prepare parts of this recipe ahead of time?
You can definitely do some prep work! You can pat dry and season the chicken drumsticks a few hours ahead of time and keep them in the refrigerator. You can also slice the onion in advance. The full cooking process is best done just before serving for the best texture and flavor.
What if I don’t have chicken broth?
Water will work perfectly fine! The onions, tomatoes, and chicken itself will create a flavorful broth as they braise. If you have vegetable broth, that would also be a good substitute.
Why is the internal temperature for drumsticks higher than chicken breast?
Dark meat cuts like drumsticks and thighs contain more connective tissue than white meat breasts. Cooking them to a slightly higher temperature (175°F vs. 165°F for breast) allows this connective tissue to break down fully, rendering the meat incredibly tender and juicy, rather than tough.
Enjoy Your Homemade Skillet Braised Chicken Drumsticks!
Gone are the days of dry, disappointing chicken drumsticks! With this simple braising technique, you can achieve unbelievably tender and juicy results right in your skillet. It’s a comforting, flavorful meal that’s perfect for any night of the week.
Give this Skillet Braised Chicken Drumsticks recipe a try and let me know what you think in the comments below! Did you try any variations? What sides did you serve? I love hearing about your kitchen adventures!
Skillet Braised Chicken Drumsticks

Ingredients
- 8 chicken drumsticks
- 2 tablespoons cooking oil
- 1 large onion sliced
- 1 pint cherry tomatoes or 1 can diced tomatoes drained
- 1.5 cups chicken broth or water
- 2 teaspoons dried spices (like paprika garlic powder onion powder)
- Salt to taste
- Black pepper to taste
- Fresh parsley or cilantro chopped for garnish
Directions
- Pat the chicken drumsticks completely dry with paper towels. Season generously all over with salt pepper and the dried spices.
- Heat the cooking oil in a large oven safe skillet over medium high heat. Add the drumsticks and sear on all sides until deeply golden brown about 5 to 7 minutes total. This step helps build flavor. Remove the drumsticks from the skillet and set aside.
- Add the sliced onions to the skillet. Reduce heat to medium and cook stirring occasionally until softened and translucent about 5 minutes.
- Add the tomatoes to the skillet and cook for 2 to 3 minutes stirring to break them down slightly.
- Pour in the chicken broth or water scraping the bottom of the skillet to loosen any browned bits. Bring the liquid to a simmer.
- Return the seared drumsticks to the skillet nestling them into the onion and tomato mixture. The liquid should come about halfway up the sides of the drumsticks.
- Cover the skillet with a lid or foil. Reduce the heat to low and simmer gently for 25 to 30 minutes. This is the key to juicy chicken. Cooking low and slow in the moist environment of the covered skillet allows the connective tissues in the drumsticks to break down making the meat incredibly tender without drying it out.
- Uncover the skillet. Increase the heat slightly to medium and simmer for another 5 to 10 minutes uncovered to allow the sauce to thicken slightly if desired. Check that the internal temperature of the chicken reaches 175 degrees Fahrenheit at the thickest part.
- Garnish with fresh chopped parsley or cilantro before serving.