Oh, chicken drumsticks. They hold so much promise – juicy, flavorful, easy to eat. But haven’t we all been there? Anticipating that perfect bite, only to find the meat disappointingly tough and dry? It’s a common kitchen heartbreak!
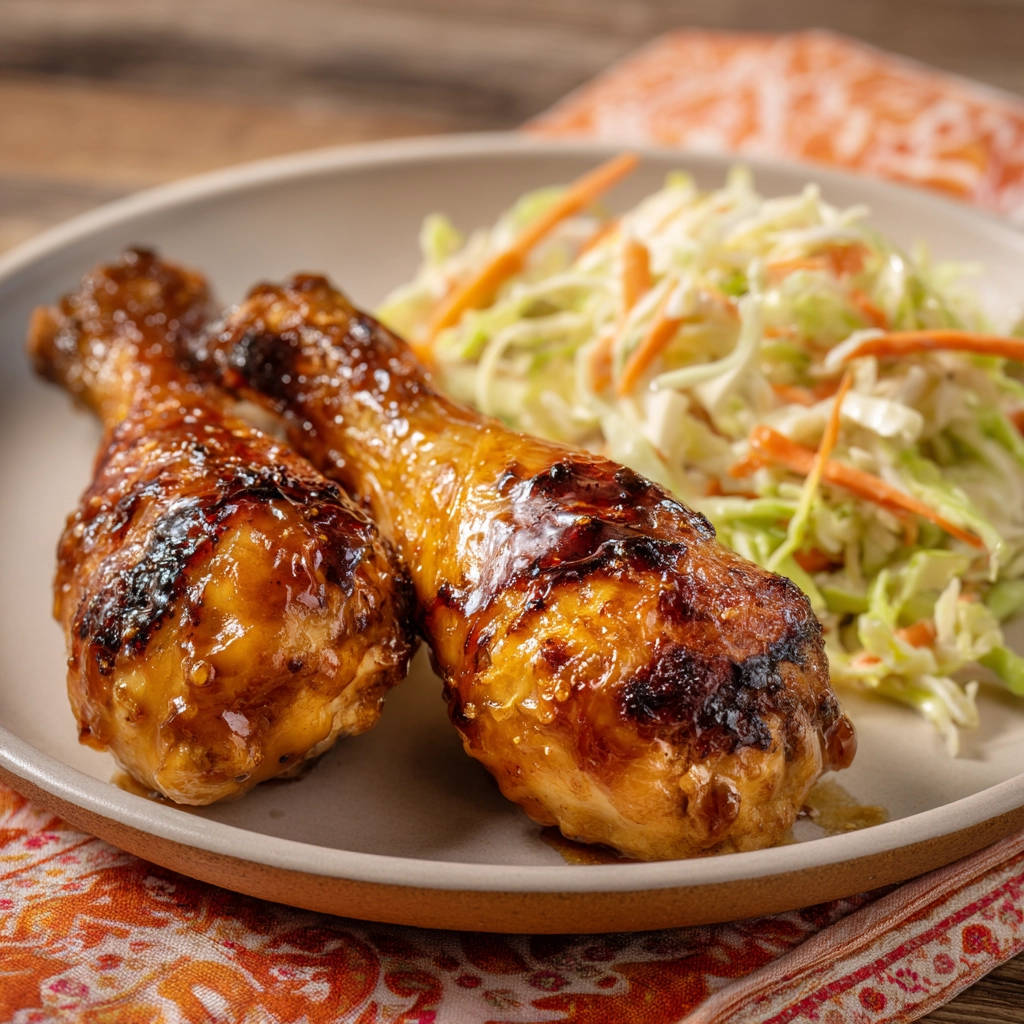
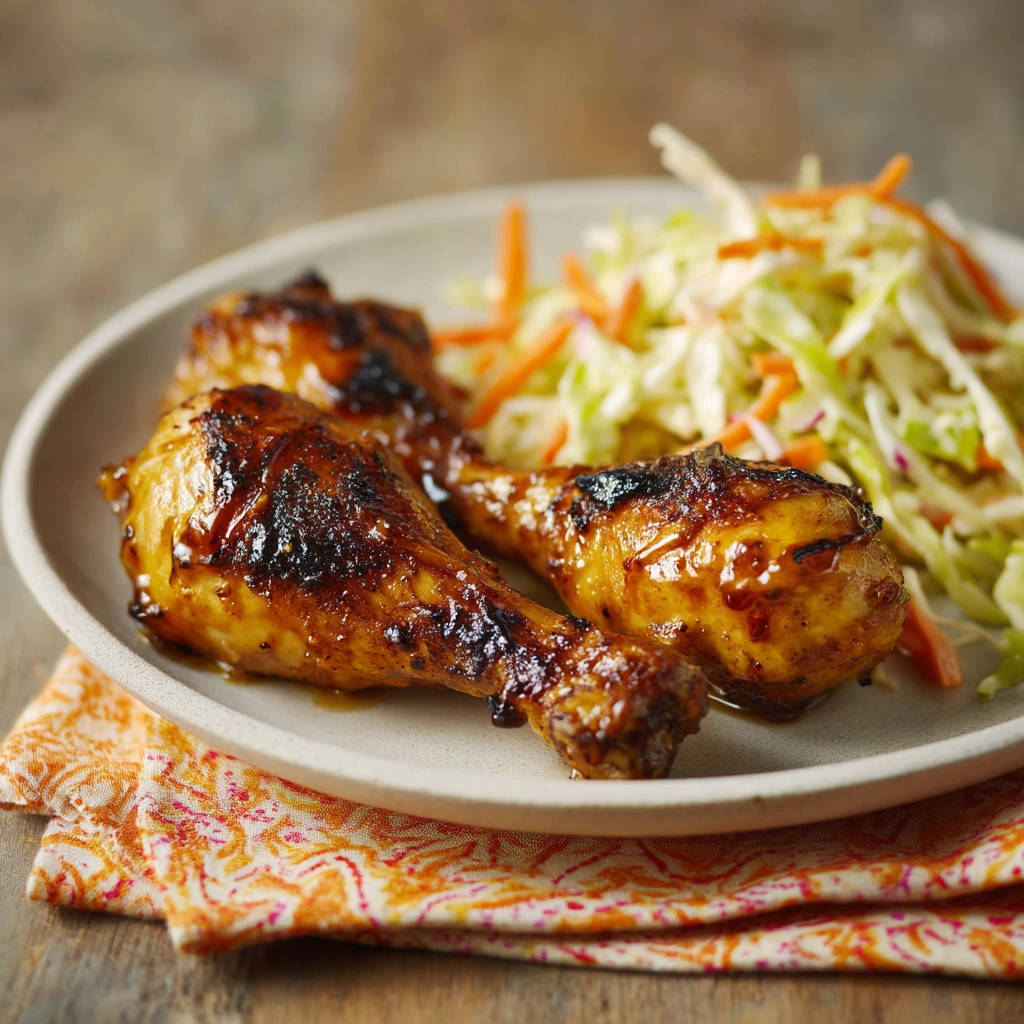
Well, prepare to turn that heartbreak into culinary triumph! I’m so excited to share my absolute favorite way to make Sticky Glazed Chicken Drumsticks that are unbelievably moist, incredibly flavorful, and boast that coveted, slightly caramelized sticky glaze. The secret isn’t fancy techniques or obscure ingredients; it’s a simple temperature trick during baking that guarantees succulent chicken legs every single time. Get ready to say goodbye to dry chicken forever!
Why You’ll Love These Sticky Glazed Chicken Drumsticks
These aren’t just any chicken drumsticks. This recipe delivers on flavor, texture, and ease, making it a weeknight hero or a casual weekend star.
- Effortlessly Juicy: The key is in the two-stage baking process. Starting at a higher temperature helps the skin render and crisp slightly, while finishing at a lower temperature ensures the meat cooks through gently, locking in all those precious juices.
- Irresistibly Sticky Glaze: The balance of savory soy sauce, sweet honey (or maple syrup!), tangy apple cider vinegar, and warming ginger and garlic creates a glaze that bakes down into a beautifully sticky, shiny coating you won’t be able to get enough of.
- Simple Ingredients: You likely have most of these pantry staples on hand right now. No need for a special trip to the store!
- Minimal Prep: Just a little mixing and seasoning, and the oven does most of the work. Clean up is easy too, thanks to lining the baking sheet.
- Family Favorite: Let’s be honest, who doesn’t love picking up a glazed drumstick? This recipe is always a hit with kids and adults alike.
Gathering Your Ingredients for Sticky Glazed Chicken Drumsticks
Let’s talk about the components that make this recipe sing. It’s a simple list, but each item plays a crucial role in achieving that perfect sticky, juicy result.
You’ll need about 6 to 8 chicken drumsticks. Look for drumsticks that are roughly uniform in size so they cook evenly. Patting them very, very dry before seasoning is a critical first step – it helps the skin get that lovely rendered quality instead of being flabby.
We start by giving the drumsticks a light coating with vegetable oil, along with a sprinkle of salt and black pepper. The oil helps with browning and also allows the salt and pepper to adhere better, seasoning the chicken itself before the glaze even comes into play.
The magic truly happens in the glaze! This is where the sweet, savory, and tangy notes come together. The base is soy sauce, providing that essential salty, umami depth. If you need this recipe to be gluten-free, tamari is a fantastic substitute and works perfectly.
For sweetness and that sticky texture, we turn to honey or maple syrup. Either works beautifully! Honey offers a classic sticky sweetness, while maple syrup lends a slightly different, earthy richness. Apple cider vinegar is key to balancing the sweetness of the honey or maple syrup and the richness of the soy sauce; its acidity brightens the whole flavor profile.
Brown sugar adds another layer of sweetness, but more importantly, its molasses content contributes to the glaze’s deep color and slightly chewy stickiness as it caramelizes in the oven. Finally, garlic powder and ground ginger infuse the glaze with warm, aromatic flavors that complement the chicken wonderfully.
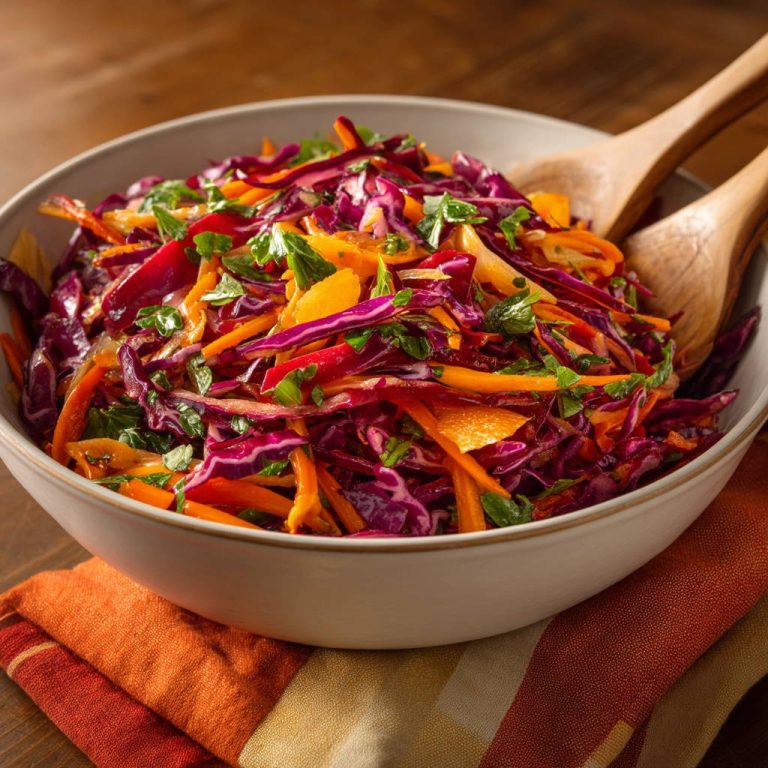
And let’s not forget the simple yet essential coleslaw ingredients! A small head of green cabbage and a couple of carrots, shredded, form the base. The creamy, tangy dressing is a quick whisk-up of mayonnaise, more apple cider vinegar for tang, a touch of sugar to balance, and salt and pepper. This coleslaw provides the perfect crisp, cool contrast to the warm, sticky chicken.
Here’s a quick look at everything you’ll need:
- 6-8 chicken drumsticks
- 2 tablespoons vegetable oil
- 1/2 cup soy sauce (or tamari for gluten-free)
- 1/4 cup honey or maple syrup
- 2 tablespoons apple cider vinegar
- 1 tablespoon brown sugar
- 1 teaspoon garlic powder
- 1/2 teaspoon ground ginger
- Salt and black pepper to taste
- For the coleslaw:
- 1 small head green cabbage, shredded
- 2 carrots, shredded
- 1/2 cup mayonnaise
- 2 tablespoons apple cider vinegar
- 1 tablespoon sugar
- Salt and pepper to taste
Crafting Your Sticky Glazed Chicken Drumsticks: Step-by-Step
Ready to make some magic happen? Follow these steps closely, paying attention to the tips, and you’ll be rewarded with drumsticks that are far from dry!
-
Prepare for Baking: Start by getting your oven ready. Preheat it to a hot 400 degrees F (200 degrees C). This initial high heat is important for getting that skin rendered nicely. While the oven heats up, line a baking sheet with foil or parchment paper. Trust me, this makes cleanup unbelievably easy, especially with a sticky glaze!
-
Prep the Drumsticks: This step is crucial for preventing dry chicken. Take your drumsticks and pat them extremely dry with paper towels. Get into all the nooks and crannies. Dry skin is key to it crisping up instead of steaming. Place the dried drumsticks in a large bowl. Drizzle them generously with the vegetable oil and sprinkle them all over with salt and black pepper. Give them a good toss to ensure each drumstick is evenly coated. This initial seasoning is vital for flavor all the way through the meat.
-
Whisk the Glaze: In a separate medium bowl, it’s time to build that incredible sticky glaze. Whisk together the soy sauce (or tamari), honey or maple syrup, apple cider vinegar, brown sugar, garlic powder, and ground ginger. Whisk until the brown sugar is mostly dissolved and everything is well combined. Give it a taste – you should get a balance of sweet, savory, and tangy. This is the liquid gold that will coat your drumsticks!
-
Arrange on the Pan: Take your seasoned drumsticks and arrange them on the prepared baking sheet. Make sure they are in a single layer and leave some space between each one. This spacing is important because it allows the hot air to circulate around each drumstick, promoting even cooking and better browning. If they’re too crowded, they’ll steam instead of bake.
-
First Bake: Place the baking sheet in your preheated 400 degree F oven. Let them bake for 25 minutes. During this time, the chicken will start to cook through, and the high heat will begin working on rendering that skin and creating a base layer of flavor.
-
Apply the First Layer of Glaze: Carefully remove the baking sheet from the oven after the initial 25 minutes. Now for the fun part! Take your glaze mixture and brush each drumstick generously. Get it all over! But don’t use all of it – be sure to reserve a good amount of the glaze for basting later in the cooking process. This first glaze layer will start to bake onto the chicken.
-
Reduce Heat and Continue Baking: Return the drumsticks to the oven, but this time, immediately reduce the oven temperature down to 375 degrees F (190 degrees C). This is the “secret weapon” step! Reducing the temperature allows the drumsticks to finish cooking more gently. It prevents the meat from drying out while giving the glaze time to set, thicken, and caramelize into that gorgeous, sticky coating without burning.
-
Finishing Bake and Basting: Continue baking for another 20-25 minutes. The exact time will depend on the size of your drumsticks. The most reliable way to know they are done is to use a meat thermometer. Insert it into the thickest part of the thigh, making sure you’re not touching the bone. You’re looking for an internal temperature of 175 degrees F (80 degrees C). During this final baking period, take the reserved glaze and baste the drumsticks once or twice. This adds more layers of flavor and stickiness, ensuring a beautiful, glossy finish.
-
Make the Coleslaw: While the chicken finishes its final bake or rests, you can whip up the coleslaw. In a medium bowl, combine the shredded cabbage and carrots. In a smaller bowl, whisk together the mayonnaise, apple cider vinegar, sugar, salt, and pepper until you have a smooth, creamy dressing. Pour the dressing over the shredded vegetables and toss everything together until the cabbage and carrots are well coated. This refreshing slaw is the perfect side dish.
-
Rest and Serve: Once the drumsticks are out of the oven and have reached their target temperature, transfer them to a plate or cutting board. This is another crucial step for juicy chicken! Let them rest for 5-10 minutes before serving. Resting allows the juices, which have been pushed to the surface during cooking, to redistribute back throughout the meat. Cutting into them too soon will result in those delicious juices running out onto the plate, leaving your chicken dry. Serve the sticky glazed drumsticks hot alongside that delightful, tangy coleslaw. If you’re looking for other easy side dishes that pair well with chicken, consider our Easy Crispy Roasted Potatoes or a fresh Creamy Cucumber Salad!
Tips for Perfect Sticky Glazed Drumsticks Every Time
Want to ensure your sticky glazed chicken drumsticks are absolutely perfect? Keep these pro tips in mind!
- Pat Dry, Seriously: I can’t stress this enough! Wet skin steams, dry skin renders and starts to crisp. Use plenty of paper towels.
- Don’t Skip the Rest: Resting chicken, especially bone-in cuts like drumsticks, is non-negotiable for juiciness. That 5-10 minutes makes a world of difference.
- Use a Meat Thermometer: This is your best friend for perfectly cooked chicken. Eyeballing it can lead to dry or undercooked results. Aim for 175°F (80°C) in the thickest part, away from the bone.
- Gluten-Free? No Problem: Easily make this recipe gluten-free by simply swapping the soy sauce for tamari.
- Adjust Sweetness/Tang: Taste the glaze before you brush it on. Prefer it a little sweeter? Add a touch more honey or brown sugar. Want it tangier? A little more apple cider vinegar can do the trick.
- For Crispier Skin (Optional): While this method prioritizes juicy meat and sticky glaze, if you want super crispy skin, you can try finishing them under the broiler for 1-2 minutes after resting, watching them constantly so the glaze doesn’t burn. This is a high-risk, high-reward move for the glaze itself, so be cautious!
What to Serve With Sticky Glazed Chicken Drumsticks
These sticky glazed drumsticks are incredibly versatile! The tangy coleslaw included in the recipe is a classic pairing, offering a refreshing crunch against the rich chicken. But if you want to mix things up, here are a few other ideas:
They pair beautifully with simple starches like steamed rice, mashed potatoes, or Easy Pan-Fried Potatoes. For green veggies, consider Crispy Roasted Brussels Sprouts or simple steamed green beans. A light salad is also a great option to balance the meal. If you’re serving a crowd, these drumsticks disappear fast, so having plenty of sides is a good idea!
Your Sticky Glazed Chicken Drumsticks Questions Answered (FAQ)
Got questions about making the best baked sticky glazed chicken drumsticks? Here are some common ones I hear:
Can I use other chicken parts?
Yes, you can! This glaze and method work well for chicken thighs or even split chicken breasts, though cooking times will vary. Thighs cook similarly to drumsticks, maybe needing a few extra minutes. Split breasts will likely require less time, and you’ll want to monitor their internal temperature closely, aiming for 165°F (74°C) in the thickest part.
Can I make the glaze ahead of time?
Absolutely! You can whisk the glaze ingredients together several hours or even a day in advance. Store it in an airtight container in the refrigerator. Give it a quick whisk before using, as some ingredients might separate slightly.
How should I store leftovers?
Store any leftover drumsticks in an airtight container in the refrigerator for up to 3-4 days. The glaze might become less sticky when cold, but the flavor will still be fantastic.
How do I reheat leftover drumsticks?
For best results, reheat leftover drumsticks in the oven at 350°F (175°C) until heated through, usually about 15-20 minutes. This helps the skin and glaze retain some texture. Microwaving can heat them quickly but may result in tougher meat and a less appealing glaze texture.
My glaze looks like it’s burning, what did I do wrong?
This can happen if your oven runs hot or if you’re basting too early in the initial high-heat phase. The reduction in temperature after the first bake is crucial for preventing burning. If you notice it starting to darken too much during the final bake, you can loosely tent the baking sheet with foil. Ensure you are reducing the temperature as directed in step 7.
Why do I pat the chicken dry?
Patting the chicken dry is a key step for getting crispy skin. Excess moisture on the surface of the chicken essentially steams the skin instead of allowing it to brown and crisp up in the heat of the oven. Getting it very dry lets the skin render and develop color and texture.
Enjoy Your Homemade Sticky Glazed Chicken Drumsticks!
There you have it! A simple, foolproof method for achieving incredibly juicy, flavorful, and perfectly sticky glazed chicken drumsticks that will make everyone happy. This recipe is proof that you don’t need to be a gourmet chef to make chicken legs that are tender and moist with an amazing coating. The combination of sweet, savory, and tangy notes in the glaze, coupled with the simple temperature trick, creates a winning dish every time.
Give these a try for your next family dinner, potluck, or barbecue! I promise they won’t disappoint. If you make them, please come back and leave a comment below to let me know how they turned out! Your feedback always makes my day!
Sticky Glazed Drumsticks

Ingredients
- 6-8 chicken drumsticks
- 2 tablespoons vegetable oil
- 1/2 cup soy sauce (or tamari for gluten-free)
- 1/4 cup honey or maple syrup
- 2 tablespoons apple cider vinegar
- 1 tablespoon brown sugar
- 1 teaspoon garlic powder
- 1/2 teaspoon ground ginger
- Salt and black pepper to taste
- For the coleslaw:
- 1 small head green cabbage, shredded
- 2 carrots, shredded
- 1/2 cup mayonnaise
- 2 tablespoons apple cider vinegar
- 1 tablespoon sugar
- Salt and pepper to taste
Directions
- Preheat your oven to 400 degrees F (200 degrees C). Line a baking sheet with foil or parchment paper for easy cleanup.
- Pat the chicken drumsticks thoroughly dry with paper towels. This is a key step to helping the skin render nicely. Place drumsticks in a large bowl. Drizzle with vegetable oil and sprinkle with salt and pepper. Toss to coat evenly.
- In a separate bowl, whisk together the soy sauce, honey, apple cider vinegar, brown sugar, garlic powder, and ginger to make the glaze.
- Arrange the seasoned drumsticks on the prepared baking sheet, leaving some space between them.
- Bake for 25 minutes.
- Remove the baking sheet from the oven. Brush each drumstick generously with the glaze mixture. Reserve some glaze for later basting.
- Return the drumsticks to the oven and reduce the temperature to 375 degrees F (190 degrees C). This temperature reduction is crucial for ensuring the meat stays moist while the glaze sets and caramelizes.
- Continue baking for another 20-25 minutes, or until the drumsticks are cooked through and the internal temperature reaches 175 degrees F (80 degrees C) when checked with a meat thermometer inserted into the thickest part of the thigh, away from the bone. Baste with the reserved glaze once or twice during this final baking period.
- For the coleslaw, combine shredded cabbage and carrots in a bowl. In a small bowl, whisk together mayonnaise, apple cider vinegar, sugar, salt, and pepper until smooth. Pour dressing over the cabbage and carrots and toss to combine.
- Let the chicken drumsticks rest for 5-10 minutes before serving. Resting allows the juices to redistribute throughout the meat, preventing them from drying out when you cut into them. Serve the glazed drumsticks hot alongside the coleslaw.