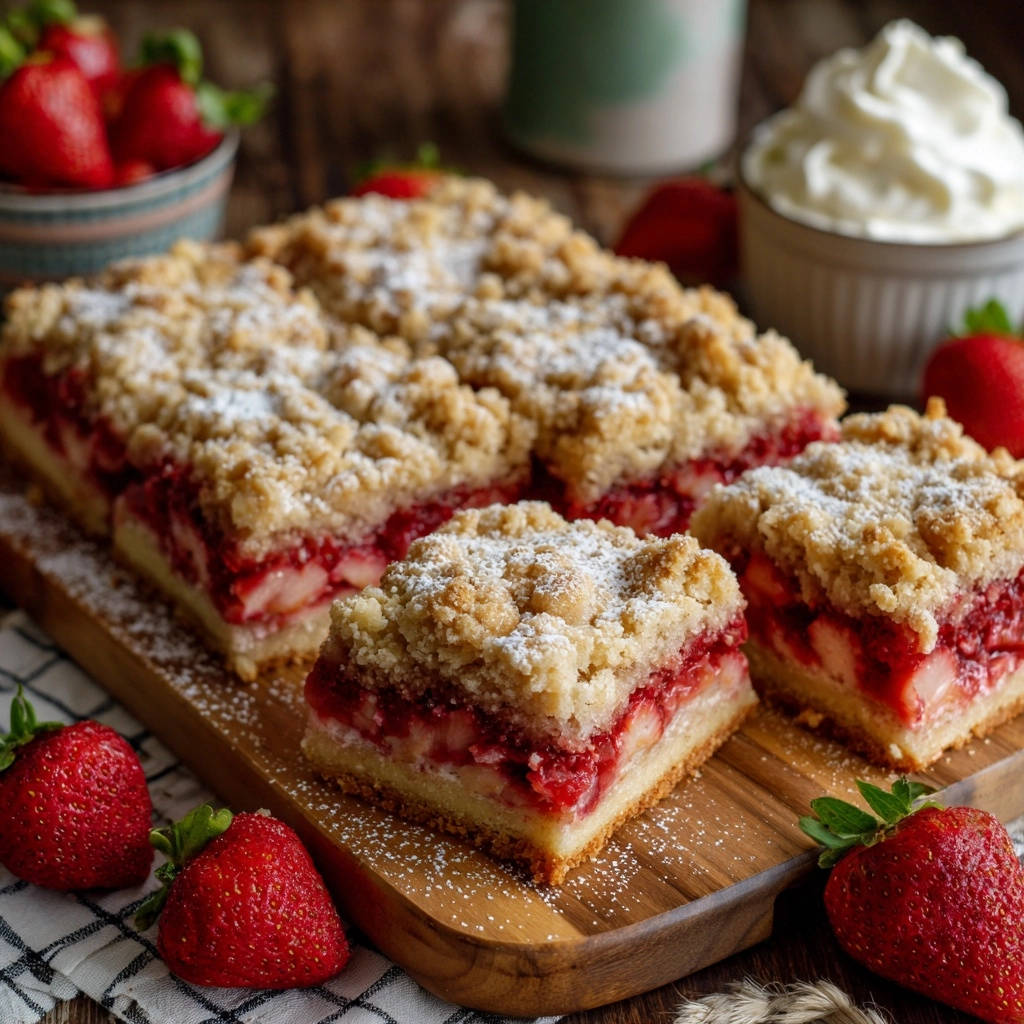
There’s nothing quite as disappointing as biting into a beautiful fruit bar only to discover a soggy crust. I’ve been there countless times, but after much trial and error, I’ve finally perfected the art of creating Strawberry Cream Crumb Bars with an unbelievably crisp, sturdy base.
This recipe isn’t just about delicious flavors; it’s engineered to solve that common “soggy bottom” problem, ensuring every bite delivers a delightful contrast of textures: a buttery, golden crumb, a luscious cream cheese layer, and a vibrant, juicy strawberry filling.
The Secret to Perfectly Crisp Strawberry Cream Crumb Bars
Beyond the Soggy Bottom Syndrome
Many fruit bar recipes fall victim to the dreaded soggy bottom, where the juicy fruit filling seeps into the crust, turning it into a soft, unappealing mess. This often happens because the crust isn’t adequately protected from the moisture of the fruit.
This recipe meticulously addresses this challenge with two critical steps that create a formidable barrier, guaranteeing a firm, crisp crust every single time. You’ll never experience a limp bottom crust again.
Layers of Irresistible Texture and Flavor
These Strawberry Cream Crumb Bars offer more than just a firm base; they deliver a symphony of textures and flavors. The bottom layer is a golden, buttery crumb, providing a satisfying crunch and richness.
Nestled atop is a velvety, tangy cream cheese filling, adding a creamy counterpoint to the sweetness. Finally, a vibrant, juicy strawberry layer, thickened just right, ensures a burst of fresh fruit flavor, all crowned with more golden, crumbly goodness.
Essential Ingredients for Your Luscious Crumb Bars
The Foundation: Crumb Base & Topping Elements
All-purpose flour forms the structural base for the delightful crumb. Granulated sugar provides sweetness, while a pinch of salt balances the flavors.
Using very cold, cubed unsalted butter is crucial for achieving that signature crumbly texture, preventing the mixture from becoming too dough-like. The cold butter melts slowly in the oven, creating pockets of steam that result in a flakier, crispier crumb.
The Creamy Heart: Decadent Filling Components
Softened full-fat cream cheese creates a smooth, tangy, and rich layer that perfectly complements the sweet fruit. Ensure it’s truly at room temperature for a lump-free, silky consistency.
Powdered sugar sweetens the cream cheese while keeping the texture light, and vanilla extract adds a comforting aromatic depth that ties all the flavors together beautifully.
Juicy Perfection: Strawberry Filling Stars
Fresh, ripe strawberries are the star, providing vibrant color and natural sweetness. Selecting firm, bright red berries with green caps is key for the best flavor and appearance.
Granulated sugar enhances the strawberry’s natural sweetness, while cornstarch is a crucial thickening agent. It ensures a perfectly set, non-runny fruit layer that won’t seep into your crisp crust, preventing a common pitfall.
Fresh lemon juice brightens the strawberry flavor and adds a subtle tangy counterpoint, preventing the filling from being overly sweet.
Garnish for a Grand Finale (Optional)
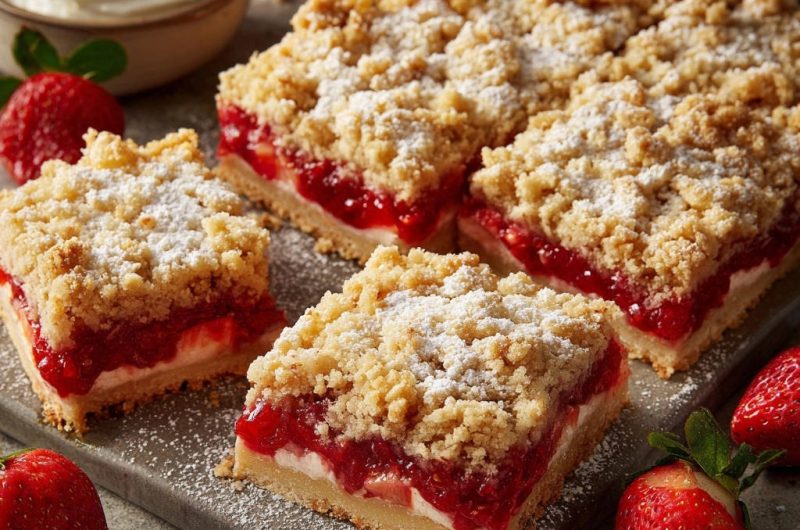
A dusting of powdered sugar adds a classic finish and touch of visual elegance. It’s a simple step that elevates the presentation of your bars.
A dollop of whipped cream or extra fresh strawberries elevate the serving experience, adding another layer of creamy texture and fresh fruit vibrancy.
Tools for Crumb Bar Success: What You’ll Need
9×13 Inch Baking Pan: An essential for achieving the correct bar thickness and consistent baking. A light-colored metal pan is recommended for even browning.
Parchment Paper: Highly recommended for easy lifting and clean cutting of the cooled bars. The overhang acts as handles, making removal effortless.
Large Mixing Bowls: Needed for preparing the crumb mixture, cream cheese layer, and strawberry filling separately. Having distinct bowls prevents cross-contamination of ingredients.
Pastry Blender or Food Processor: Ideal for efficiently cutting cold butter into the flour mixture, ensuring proper crumb texture. You can also use your fingertips, but a tool makes it quicker and prevents the butter from warming too much.
Wire Rack: Crucial for allowing the bars to cool completely and evenly, preventing condensation from forming on the bottom and helping them set properly.
Baking Brilliance: Step-by-Step Strawberry Cream Crumb Bars Guide
- Preheat Oven & Prepare Pan:
Set your oven to 375°F (190°C). This ensures the oven is at the correct temperature for immediate and even baking.
Lightly grease a 9×13 inch baking pan or, for effortless removal, line it with parchment paper, leaving a generous overhang on the sides. The parchment paper simplifies lifting the entire slab of bars out later.
- Craft the Crumb Base and Topping:
In a spacious bowl, whisk together the all-purpose flour, granulated sugar, and salt. This dry mixture forms the foundation of your buttery crumb.
Introduce the very cold, small pieces of unsalted butter. Using a pastry blender, your fingertips, or a food processor, work the butter into the flour mixture until a coarse, sandy texture forms, with some pea-sized butter pieces remaining. This technique is key for a tender, crumbly result, as it prevents gluten from over-developing.
- Form the Compact Base:
Take approximately two-thirds of your prepared crumb mixture and press it firmly and evenly into the bottom of the baking pan. A well-compacted base is key for structural integrity and prevents the crust from crumbling excessively when cut.
- The Anti-Soggy Base Secret (Part 1 – Pre-Bake):
Bake this pressed crust for 15 minutes, or until you notice the edges turning lightly golden. This pre-baking step creates a vital barrier against fruit juices, ensuring your crust remains perfectly crisp and firm under the moist filling.
Remove the pan from the oven and set it aside to cool slightly while you prepare the fillings, but keep the oven on. The slight cooling prevents the cream cheese from melting immediately upon contact.
- Prepare the Cream Cheese Layer:
In a medium bowl, beat the softened cream cheese with the powdered sugar and vanilla extract until the mixture is beautifully smooth and creamy. Ensure no lumps remain for a luscious, consistent texture in your finished bars.
- Whip Up the Strawberry Filling:
In a separate bowl, gently toss the hulled and sliced fresh strawberries with granulated sugar, cornstarch, and fresh lemon juice. The cornstarch is essential here to thicken the fruit juices during baking, preventing a watery filling that could compromise your perfectly pre-baked crust.
- Assemble Your Crumb Bars:
Carefully spread the smooth cream cheese mixture evenly over the partially baked crust. Its creamy texture will adhere nicely to the pre-baked base.
Then, spoon the prepared strawberry filling over the cream cheese layer, gently spreading it out to cover. Distribute the strawberries as evenly as possible for balanced flavor in every bite.
- Add the Crumb Topping:
Evenly sprinkle the remaining one-third of the crumb mixture over the strawberry filling. This forms the delightful, buttery top layer that will bake up golden and crisp.
- Bake to Golden Perfection:
Return the pan to the preheated oven and bake for an additional 35 to 40 minutes. The bars are ready when the crumb topping is golden brown and the strawberry filling is visibly bubbling, indicating it’s fully thickened.
- The Anti-Soggy Base Secret (Part 2 – Cool Completely):
This step is critical for a firm, non-soggy base: allow the bars to cool completely in the pan on a wire rack before attempting to cut or serve them. This allows the cream cheese and strawberry layers to properly set, making for clean, beautiful slices.
For even cleaner slices and enhanced firmness, consider chilling the bars in the refrigerator for at least 2 hours after they’ve cooled to room temperature. This further solidifies the layers.
- Garnish and Serve:
Once fully cooled and set, use the parchment paper overhang to carefully lift the entire slab of bars from the pan. This method is far easier than trying to dig them out directly.
Dust generously with powdered sugar just before serving. These Strawberry Cream Crumb Bars are delicious on their own or can be served with a dollop of whipped cream and a few extra fresh strawberries for an extra treat. They’re also reminiscent of the comforting flavors found in classic blueberry crumble bars or even creamy berry cheesecake bars, making them a versatile crowd-pleaser.
Mastering Your Bars: Expert Tips & Common Fixes
Unlocking the “Anti-Soggy” Secrets (Revisited)
Pre-Bake Your Crust: This isn’t just a suggestion; it’s a non-negotiable step. Baking the bottom crust before adding the fillings creates a physical barrier that fruit juices simply cannot penetrate, ensuring a crisp foundation.
Patience is Key: Cool Completely: It’s tempting to cut into these delicious bars early, but allowing them to cool completely (and chill, if possible) allows all the layers to set properly, preventing a messy, unset filling and contributing to that firm base. Warm fruit bars will always be softer and prone to falling apart.
Beyond the Basics: More Pro Baking Advice
Don’t Overwork the Crumb: Mix just until coarse crumbs form. Overworking develops gluten, which can lead to a tougher, less crumbly texture. Some visible butter pieces are perfectly fine and desired!
Soften Cream Cheese Properly: For a lump-free, silky smooth cream cheese layer, ensure your cream cheese is at room temperature. Cold cream cheese will result in a lumpy mixture that’s hard to spread evenly.
Uniform Slicing: For neat slices, run your knife under hot water and wipe it clean between each cut. This prevents sticking and drags, giving you beautiful, defined bars.
Troubleshooting Your Crumb Bar Challenges
Why Your Crust Might Be Soggy (And How to Fix It)
If your crust is still soggy despite following the recipe, double-check that you fully pre-baked it for the recommended time until lightly golden. Additionally, insufficient cooling is often the culprit; ensure the bars cool completely, ideally with a chilling period, before slicing.
Dealing with a Runny Fruit Filling
A runny strawberry filling typically indicates insufficient cornstarch or underbaking. Ensure you’ve measured the cornstarch accurately. The filling should be visibly bubbly during the final bake, which signals it’s properly thickening and that the cornstarch has activated.
Achieving That Perfect Golden Topping
If your crumb topping isn’t golden brown, it might need a few more minutes in the oven. Keep a close eye on it, as oven temperatures can vary significantly. If it’s browning too quickly, you can loosely tent the pan with foil for the remaining bake time to prevent over-browning.
From Oven to Table: Serving & Storing Your Delicious Creation
Presentation Perfect: Serving Ideas
These Strawberry Cream Crumb Bars are fantastic on their own, showcasing their distinct layers and flavors. Their vibrant color and crumbly texture make them a delightful treat for any occasion.
For an extra touch of indulgence, serve them with a light dusting of powdered sugar, a dollop of freshly whipped cream, or alongside a scoop of high-quality vanilla bean ice cream. These additions enhance the dessert experience.
Keeping Them Fresh: Storage Tips
Store leftover crumb bars in an airtight container in the refrigerator for up to 5-7 days. The chilled environment helps maintain the firm texture of the crust and ensures the cream cheese and fruit layers remain fresh and set.
Planning Ahead: Make-Ahead & Freezing Advice
You can prepare these bars a day or two in advance and store them in the refrigerator, allowing them ample time to set perfectly, which often improves their cut-ability. They’re a fantastic make-ahead dessert.
For longer storage, tightly wrap individual bars or the entire slab in plastic wrap, then foil, and freeze for up to 2-3 months. Thaw frozen bars in the refrigerator overnight before serving to maintain texture.
Your Top Questions About Strawberry Cream Crumb Bars Answered
Can I use frozen or other fruits?
While fresh strawberries are highly recommended for the best texture and vibrant flavor, you can use frozen strawberries. If using frozen, thaw them completely and drain off any excess liquid thoroughly before tossing with the sugar and cornstarch to prevent a watery filling.
Yes, you can substitute other fruits like raspberries, blueberries, or mixed berries. Adjust the amount of sugar and cornstarch slightly based on the natural sweetness and juiciness of your chosen fruit.
Making it Dairy-Free or Gluten-Free
For a gluten-free version, substitute a 1:1 gluten-free all-purpose flour blend (ensure it contains xanthan gum) for the wheat flour in the crumb mixture. Results are generally quite good.
For a dairy-free option, use a good quality dairy-free butter substitute and a plant-based cream cheese alternative. Be aware that results may vary slightly in texture and richness compared to the traditional dairy version.
How do I know when my bars are perfectly baked?
The bars are perfectly baked when the crumb topping is golden brown across the entire surface and the strawberry filling beneath is visibly bubbly. The bubbling indicates the cornstarch has activated and thickened the fruit juices properly.
A gentle jiggle of the pan should show the center is mostly set, not overly liquid or sloshy. If it looks too wet, give it a few more minutes.
Why did my cream cheese layer crack?
Cracking in the cream cheese layer usually occurs if the cream cheese was not fully softened before beating, leading to a less pliable mixture. It can also happen if the bars were cooled too quickly after baking.
Ensure your cream cheese is at true room temperature for a smooth mixture, and allow the bars to cool gradually on a wire rack before transferring them to the refrigerator, if chilling.
Ready to Bake? Share Your Strawberry Cream Crumb Bars Masterpiece!
With these detailed instructions and expert tips, you’re now equipped to create the most delicious and perfectly set Strawberry Cream Crumb Bars your family and friends have ever tasted. Say goodbye to soggy bottoms and hello to layers of sweet, tangy, and crumbly bliss!
This recipe is designed for success, turning common baking frustrations into triumphs. Get ready to impress with these irresistibly good bars!
We’d absolutely love to see your creations! Share your Strawberry Cream Crumb Bars on social media and tag us. Happy baking!
Strawberry Cream Crumb Bars
Course: DessertCuisine: American CuisineDifficulty: easy12
servings30
minutes50
minutes60
minutesAmerican Cuisine
Ingredients
For the Crumb Base and Topping:
2 and 1/2 cups all-purpose flour
1 cup granulated sugar
1/4 teaspoon salt
1 cup (2 sticks) unsalted butter, very cold and cut into small pieces
For the Cream Cheese Layer:
8 ounces cream cheese, softened
1/2 cup powdered sugar
1 teaspoon vanilla extract
For the Strawberry Filling:
4 cups fresh strawberries, hulled and sliced
1/2 cup granulated sugar
2 tablespoons cornstarch
1 tablespoon fresh lemon juice
For Garnish (Optional):
Powdered sugar for dusting
Whipped cream
Fresh strawberries
Directions
- Preheat your oven to 375°F (190°C). Lightly grease a 9×13 inch baking pan or line with parchment paper, leaving an overhang on the sides for easy removal.
- Prepare the Crumb Base and Topping: In a large bowl, whisk together the flour, granulated sugar, and salt. Add the cold butter pieces. Using a pastry blender, your fingertips, or a food processor, cut the butter into the flour mixture until coarse crumbs form. The mixture should resemble wet sand with some pea-sized pieces of butter remaining.
- Form the Base: Press about two-thirds of the crumb mixture evenly into the bottom of the prepared baking pan. Press firmly to create a compact layer.
- The Anti-Soggy Bottom Secret Part 1 (Pre-Bake): Bake the crust for 15 minutes, or until it’s lightly golden around the edges. This step is crucial for creating a barrier that prevents the fruit juices from making your crust soggy later. Remove from the oven and set aside while you prepare the fillings. Keep the oven on.
- Make the Cream Cheese Layer: In a medium bowl, beat the softened cream cheese with the powdered sugar and vanilla extract until smooth and creamy.
- Prepare the Strawberry Filling: In another bowl, gently toss the sliced strawberries with the granulated sugar, cornstarch, and lemon juice. The cornstarch is essential here to thicken the fruit juices during baking, preventing a watery filling that could seep into the crust.
- Assemble the Bars: Spread the cream cheese mixture evenly over the partially baked crust. Spoon the strawberry filling over the cream cheese layer, spreading it gently to cover.
- Add the Crumb Topping: Sprinkle the remaining one-third of the crumb mixture evenly over the strawberry filling.
- Bake: Return the pan to the oven and bake for an additional 35 to 40 minutes, or until the crumb topping is golden brown and the strawberry filling is bubbly.
- The Anti-Soggy Bottom Secret Part 2 (Cool Completely): Let the bars cool completely in the pan on a wire rack before cutting and serving. This allows the layers to set properly, especially the cream cheese and strawberry filling, ensuring clean slices and a firm, non-soggy base. Chilling them in the refrigerator for at least 2 hours after they cool can further enhance the set.
- Garnish: Once cooled, lift the bars out of the pan using the parchment paper overhang. Dust generously with powdered sugar just before serving. These bars are wonderful on their own or served with a dollop of whipped cream and a few fresh strawberries.
Notes
- Cool completely for best results and a firm base. Chilling in the refrigerator for at least 2 hours after cooling can further enhance the set.