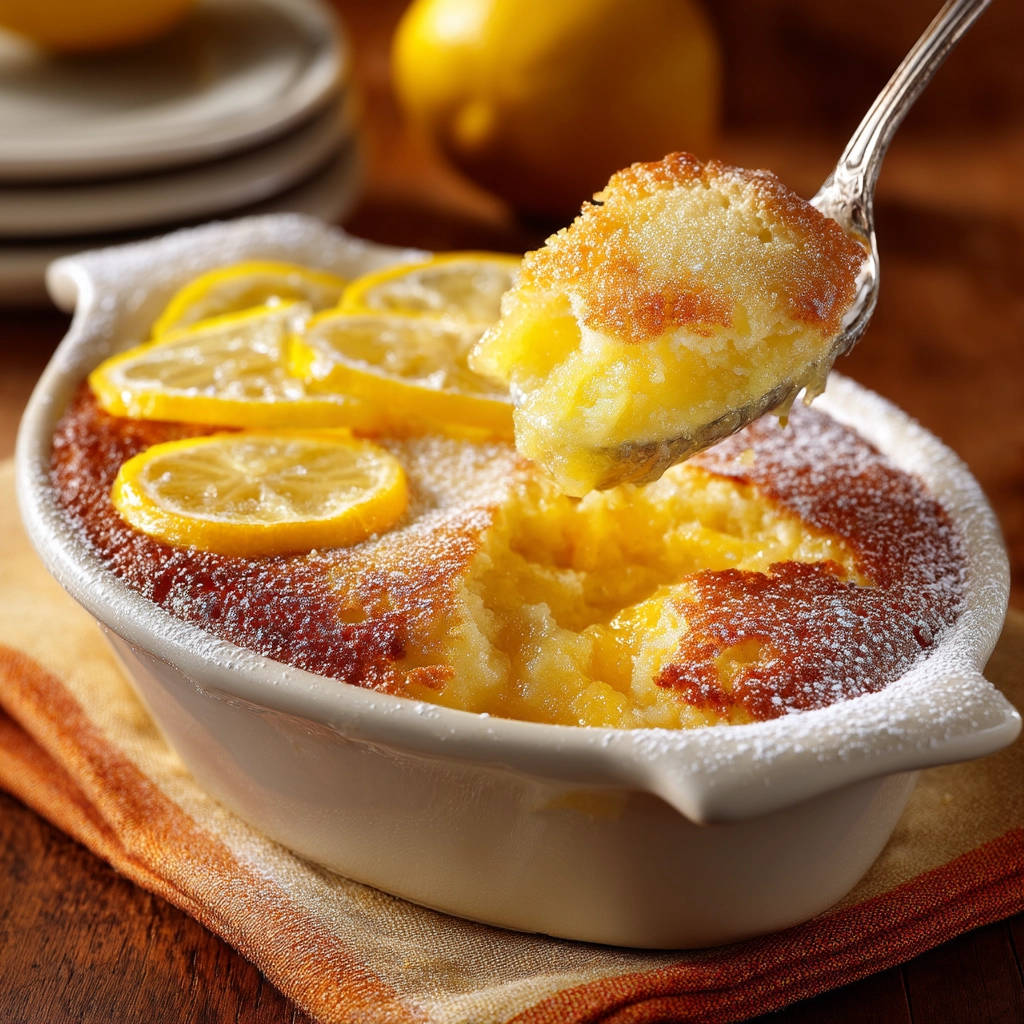
Oh, hello there! Ever tried to make a classic lemon pudding cake and felt like you were playing a balancing act? You want that magical separation: a light, airy cake floating above a luscious, creamy lemon pudding. Sometimes it works, sometimes… not so much. Well, after years of baking and a few less-than-perfect attempts, I finally cracked the code to getting those distinct, beautiful layers every single time. This isn’t just a recipe; it’s my secret weapon for a truly perfect Sunny Lemon Pudding Cake that will absolutely brighten your day!
This dessert is pure sunshine in a dish. The bright, zesty flavor of fresh lemon is utterly uplifting, and the contrast between the delicate cake top and the rich, velvety pudding underneath is simply divine. It’s warm, comforting, and looks so impressive, but honestly, it’s much simpler to achieve than you might think, especially with the technique I’m about to share.
Why This Sunny Lemon Pudding Cake is a Keeper
Beyond the gorgeous layers that make this dessert so special, there are so many reasons to fall in love with this particular recipe. It’s more than just a pretty face; it delivers on flavor and texture in a way that feels truly indulgent.
- Double Texture Delight: You get two wonderful textures in one bite – the soft, tender cake top and the smooth, rich pudding base. It’s a textural masterpiece.
- Brilliant Citrus Flavor: This cake is packed with real lemon flavor from both juice and zest, giving it that wonderfully tangy and aromatic punch that lemon lovers adore.
- Surprisingly Simple: While the result looks sophisticated, the process itself relies on a few key techniques that are easy to master, ensuring success even if you’re new to baking split-layer desserts.
- Warm & Comforting: Served warm, straight from the oven, it’s the ultimate comfort dessert, perfect for a cozy evening or a special gathering.
- Visual Appeal: That distinct separation is just so satisfying to see! It makes for a beautiful presentation, whether in a single dish or individual ramekins.
Making this layered lemon dessert brings a little bit of effortless elegance to your table. Let’s talk about what you’ll need to make this sunshine happen!
Gathering Your Ingredients for Sunny Lemon Pudding Cake
Creating this delicious dessert requires a few simple, everyday ingredients. The magic truly happens when these humble components come together with a little bit of care. Using fresh, quality ingredients will make a noticeable difference in the final vibrant lemon flavor.
Here’s what you’ll be gathering from your pantry and fridge:
- Large Eggs, Separated: We use the yolks for richness and the whites whipped separately to create the lift for the cake layer. Getting them to room temperature before separating can make whipping the whites easier. You’ll need 3 large eggs.
- Granulated Sugar: Provides sweetness and helps structure the cake and pudding. You’ll need 1 cup.
- All Purpose Flour: Just a small amount is needed. It helps bind the mixture and gives structure to the cake portion while allowing the pudding layer to form below. We’ll use 1/4 cup.
- Salt: A pinch of salt balances the sweetness and enhances all the flavors, especially the bright lemon. 1/4 teaspoon is perfect.
- Fresh Lemon Juice: The star ingredient! Freshly squeezed lemon juice gives the best, brightest flavor. Bottled can work in a pinch, but fresh is truly superior here. You’ll need 1/4 cup.
- Grated Lemon Zest: This is where the intense lemon aroma and essential oils live. Don’t skip this! Make sure to only grate the yellow part of the peel, avoiding the bitter white pith. You’ll need 1 tablespoon.
- Milk: The liquid base that combines with other ingredients to form the pudding layer as it bakes. Use whole milk for the richest results, though 2% will also work. 1 1/2 cups are needed.
- Unsalted Butter, Melted: Adds richness and a smooth texture to the batter. Melting it allows it to incorporate easily. You’ll need 1 tablespoon.
- Powdered Sugar (optional): For dusting the top before serving, adding a pretty, sweet finish.
- Lemon Slices (optional): For garnish, adding extra visual appeal and reinforcing the lemon theme.
Make sure all your ingredients are measured out before you begin. This makes the process much smoother and more enjoyable!
Crafting Your Sunny Lemon Pudding Cake: Step-by-Step
Ready to create this layered masterpiece? The process involves combining simple techniques that build towards that perfect result. Follow these steps carefully, and you’ll be rewarded with a beautifully separated lemon dessert.
- Prepare Your Baking Setup: First things first, get your oven ready. Preheat it to 350 degrees F (175 degrees C). Next, choose your baking dish – a 1 1/2 to 2-quart dish is ideal. Make sure you generously grease the inside; this helps with serving later. Then, find a larger baking pan that your chosen dish can sit inside. This outer pan is for the crucial water bath.
- Start the Yolk Batter: Grab a medium-sized bowl. Crack your separated egg yolks into it (save those whites!). Add the granulated sugar. Whisk these together until the mixture becomes noticeably pale yellow and slightly thicker. This process starts dissolving the sugar and creates a smooth base.
- Build the Batter Base: Sift or whisk the all-purpose flour and salt into the egg yolk and sugar mixture. Continue whisking until everything is smoothly combined. You don’t want any dry pockets of flour here, so keep going until it’s homogenous.
- Introduce the Liquids and Flavor: Now, gradually whisk in the fresh lemon juice, lemon zest, milk, and the melted unsalted butter. Take your time doing this, adding a little at a time as you whisk continuously. This helps the batter come together smoothly without lumps. You should end up with a relatively thin, smooth liquid batter at this stage.
- Whip the Egg Whites: This step is key for the cake layer! In a separate, completely clean and dry bowl (any grease or moisture can prevent the whites from whipping properly), use an electric mixer on high speed to beat the reserved egg whites. Beat them until they form stiff peaks. This means when you lift the beaters out, the peaks of egg white stand up straight. Be vigilant – stop as soon as stiff peaks form; overbeating can make them dry and difficult to fold.
- Lighten the Batter: Take about one-third of your beautifully whipped egg whites. Use a rubber spatula to gently fold them into the lemon batter. The goal here isn’t to fully combine, but to lighten the heavier batter base. Use a motion like cutting down through the mixture and lifting up from the bottom. Be gentle to preserve the air in the whites.
- Fold in Remaining Whites: Now, carefully add the remaining whipped egg whites. Gently fold them into the batter using the same technique. The key word here is gently. Do not overmix! You are trying to incorporate the whites just enough so there are no large clumps, but it’s perfectly okay, and even desirable, to see a few small streaks of white remaining. This gentle handling is absolutely critical for allowing the mixture to separate into its distinct cake and pudding layers during baking.
- Prepare for the Water Bath: Carefully pour your finished batter into the greased baking dish that you’ve already placed inside the larger baking pan. Now, here’s the magic trick: carefully pour hot (not boiling, but hot tap or recently boiled) water into the larger outer pan. Pour until the water comes about halfway up the sides of the baking dish holding the batter. This water bath (or bain-marie) insulates the dessert, ensuring it cooks evenly and gently. This even cooking encourages the pudding layer to form beautifully underneath the lighter cake layer.
- Bake to Perfection: Carefully transfer the entire setup (the outer pan with the water bath and the baking dish inside) to your preheated oven. Bake for 45 to 55 minutes. You’ll know it’s done when the top is a lovely golden brown and looks set and cake-like. You can gently insert a toothpick into the cakey top – it should come out clean from the top layer, but remember the bottom is pudding, so it will be moist underneath! Don’t expect a completely dry toothpick from the bottom layer.
- Cool Slightly Before Serving: Once baked, carefully remove the baking dish from the hot water bath (use oven mitts!). Let the dish cool on a wire rack for at least 10-15 minutes before serving. This allows the pudding layer to finish setting slightly.
- Finish and Serve: If desired, lightly dust the top of the warm cake with powdered sugar. You can also garnish with thin slices of fresh lemon for extra visual appeal. Serve this Sunny Lemon Pudding Cake warm. The textures and flavors are at their absolute best when warm.
Tips for Perfect Sunny Lemon Pudding Cake Every Time
Getting those perfect layers consistently might seem daunting, but a few simple tips can make all the difference. This recipe is quite forgiving, but paying attention to these details will elevate your results.
- Room Temperature Eggs: Using room temperature eggs makes separating the yolks and whites easier, and more importantly, allows the egg whites to whip up to their fullest volume, which is crucial for the cake layer.
- Clean Bowl for Whites: As mentioned in the steps, the bowl and beaters for whipping egg whites must be completely clean and free of any grease or yolk. Even a tiny bit can prevent the whites from reaching stiff peaks.
- Gentle Folding is Non-Negotiable: This is the most important technique for getting those distinct layers. Don’t stir or beat the egg whites into the batter. Use that gentle cut-and-fold motion with a spatula. Think of it as coaxing them in, not forcing them.
- The Water Bath is Your Friend: The water bath provides gentle, even heat, preventing the edges from setting too quickly and allowing the batter to separate naturally as it bakes. Ensure the water is hot when you add it to the larger pan.
- Don’t Overbake: Baking too long can dry out the cake layer and potentially affect the pudding. Watch for the visual cues mentioned in the steps – golden top and a set look. The toothpick test is for the top cake layer only!
- Ingredient Quality: Using fresh lemon juice and zest is key to the vibrant flavor. Zest provides essential oils that you just can’t get from juice alone.
- Dish Size Matters: Using a dish that is too large will result in a thinner cake layer and potentially affect the pudding consistency. A 1 1/2 to 2-quart dish is recommended for the stated baking time.
- Make it Ahead? This cake is best served warm shortly after baking for the ultimate texture experience. However, you can bake it a few hours ahead, let it cool, and gently rewarm portions in the oven if needed.
Serving Suggestions for Lemon Pudding Cake
This delightful dessert truly shines on its own, but a few simple additions can make it even more special. Serve it warm, allowing the comforting aroma to fill the air.
A simple dusting of powdered sugar adds a lovely touch and hints at the sweetness within. Thinly sliced fresh lemons or curls of lemon zest can enhance the visual appeal and the citrus theme. For extra indulgence, consider adding a dollop of freshly whipped cream or a scoop of vanilla bean ice cream that melts into the warm pudding.
While this is a dessert recipe, sometimes baking inspires trying other sweet treats. If you enjoy the bright flavors and baking, you might also enjoy making something like Luscious Lemon Cake or exploring other fruit-based bakes such as Classic Blueberry Scones.
Your Sunny Lemon Pudding Cake Questions Answered (FAQ)
Let’s tackle some common questions you might have about making this specific type of layered pudding cake. Understanding the ‘why’ behind certain steps can boost your confidence in the kitchen!
Why didn’t my pudding layer form, or why didn’t the layers separate?
This is the most common issue! The main culprits are usually overmixing the batter after adding the egg whites or an insufficient water bath. If you beat the egg whites in too vigorously instead of gently folding, you deflate the air needed for the cake layer, and the batter might not separate properly. Also, ensure the water bath is filled high enough (halfway up the dish) and is hot when you put it in the oven. The gentle, even heat from the water bath is essential for the magical separation.
How do I know for sure the cake is done baking?
Look for a set, golden brown top. When you insert a toothpick into the top, cakey layer, it should come out clean. Remember, the bottom is meant to be pudding, so a toothpick inserted lower into the dish will come out with moist pudding on it – this is correct! If the top looks liquidy or unset, it needs more time. Baking desserts that require a water bath, like this pudding cake or a Classic Baked Cheesecake, relies on visual cues and understanding how the different components should feel when cooked.
Can I make this in individual ramekins?
Absolutely! This recipe works beautifully in individual ramekins (about 6-8 small ones). You’ll still need to place them in a larger baking dish for the water bath. The baking time will be shorter, likely in the 30-40 minute range. Start checking around 30 minutes.
Is fresh lemon juice essential, or can I use bottled?
For the best, most vibrant flavor, fresh lemon juice is highly recommended. It has a brightness and acidity that bottled juice often lacks. The lemon zest is also crucial as it contains essential oils that contribute significantly to the aroma and flavor profile. Using both fresh juice and zest makes a big difference.
Can I substitute the type of milk?
While whole milk yields the richest pudding layer, you can use 2% milk with good results. Skim milk might make the pudding layer slightly less rich, but the cake should still form. I haven’t tested this with non-dairy milks, so I can’t speak to those results, but traditional milk interacts chemically to help create the pudding.
How should I store leftovers?
If you have any leftovers (a rare occurrence!), cover the baking dish tightly with plastic wrap and refrigerate. The pudding layer will firm up when chilled. It can be eaten cold, but it’s best gently rewarmed in a low oven (around 300°F/150°C) or briefly in the microwave to restore the delightful warm pudding texture.
Enjoy Your Homemade Sunny Lemon Pudding Cake!
There’s something truly special about a homemade dessert, and this Sunny Lemon Pudding Cake is no exception. The bright, zesty flavor, the comforting warmth, and those distinct, magical layers make it a real showstopper. It’s a recipe that brings a little ray of sunshine into your kitchen and onto your table.
Give this recipe a try and experience the joy of perfectly layered lemon goodness. I promise, once you master the gentle folding and the water bath, you’ll make this delightful dessert again and again. Happy baking!
Did you try this Sunny Lemon Pudding Cake? How did your layers turn out? Let me know in the comments below! I always love hearing about your kitchen adventures.
Sunny Lemon Pudding Cake

Ingredients
- 3 large eggs, separated
- 1 cup granulated sugar
- 1/4 cup all purpose flour
- 1/4 teaspoon salt
- 1/4 cup fresh lemon juice
- 1 tablespoon grated lemon zest
- 1 1/2 cups milk
- 1 tablespoon unsalted butter, melted
- Powdered sugar, for dusting (optional)
- Lemon slices, for garnish (optional)
Directions
- Preheat oven to 350 degrees F (175 degrees C). Grease a 1 1/2 to 2 quart baking dish. Set the baking dish in a larger baking pan.
- In a medium bowl, whisk together the egg yolks and sugar until pale and slightly thickened.
- Add the flour and salt to the yolk mixture and whisk until well combined and smooth.
- Gradually whisk in the lemon juice, lemon zest, milk, and melted butter until the batter is smooth.
- In a separate clean bowl, beat the egg whites with an electric mixer on high speed until stiff peaks form. Be careful not to overbeat.
- Gently fold about one third of the whipped egg whites into the lemon batter using a spatula to lighten it.
- Carefully fold the remaining egg whites into the batter until just combined. Do not overmix; a few small streaks of white are okay. This gentle folding is key to achieving the distinct layers.
- Pour the batter into the prepared baking dish placed in the larger pan. Carefully pour hot water into the larger pan around the baking dish, until the water comes about halfway up the sides of the baking dish. This water bath helps the pudding cook evenly and encourages the layers to form perfectly.
- Bake for 45 to 55 minutes, or until the top is golden brown and set, and a toothpick inserted into the cakey top comes out clean (it will be moist underneath).
- Remove the baking dish from the water bath and let it cool slightly before serving.
- Dust with powdered sugar and garnish with lemon slices, if desired. Serve warm.