Have you ever found yourself wrist-deep in a dessert ball mix, trying to coax it into a sphere, only for it to crumble and fall apart in your hands? It’s incredibly frustrating! That dream of perfectly round, dipped treats quickly turns into a messy nightmare. I’ve been there more times than I care to admit, but thankfully, I finally cracked the code.
I discovered a simple, fool-proof method that ensures your sweet dessert balls are wonderfully pliable, easy to roll, and hold their shape beautifully for dipping and decorating. Forget crumbly disasters; get ready for delightful, perfectly formed sweet dessert balls!
This recipe is not only incredibly easy to follow, but it also results in a batch of delicious, bite-sized treats that are perfect for parties, holidays, or just satisfying a sweet craving. Let’s get started!
Reasons These Sweet Dessert Balls Are a Keeper
Beyond just holding their shape, there are so many reasons you’re going to adore this sweet dessert ball recipe:
- They require just a few simple ingredients you likely already have in your pantry.
- No baking is involved – perfect for when you need a treat without heating up the kitchen.
- They’re endlessly customizable with different coatings and decorations.
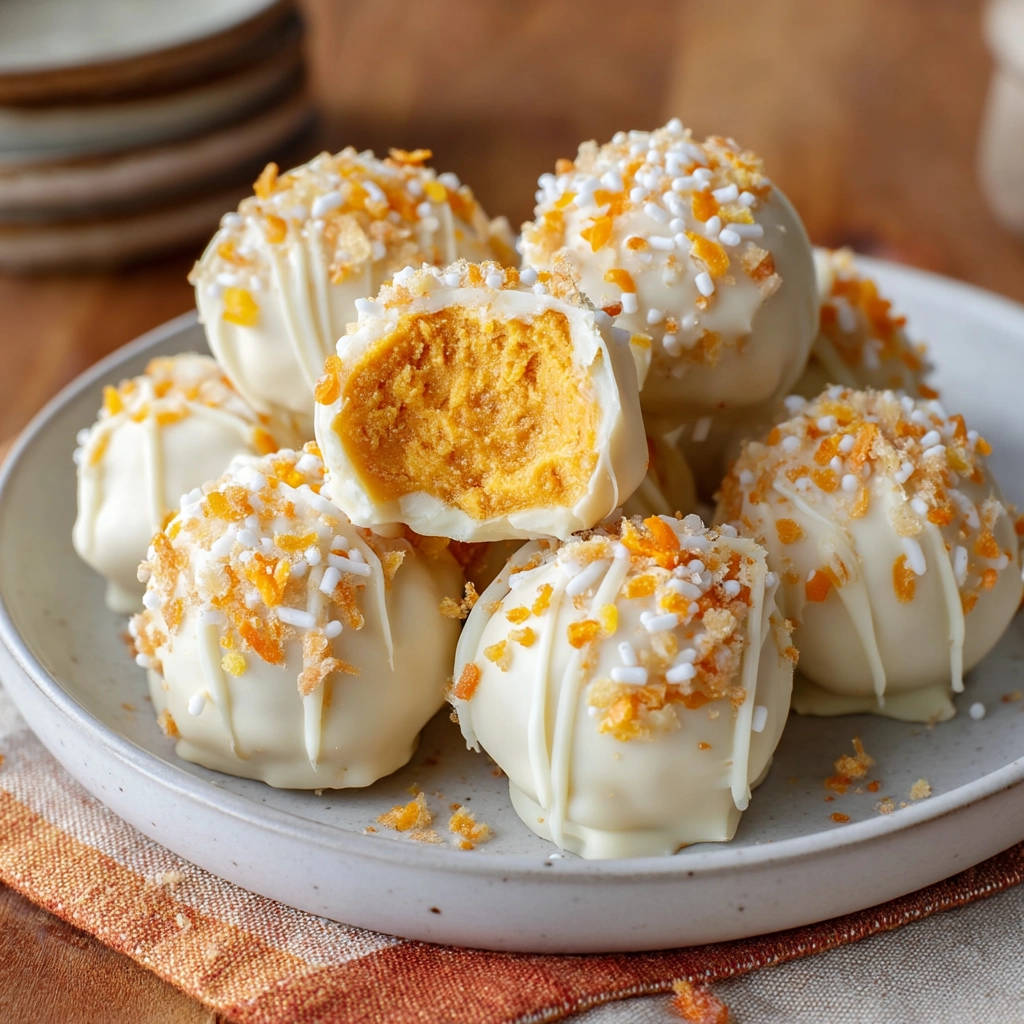
- The texture is wonderfully rich and decadent, almost like a truffle.
- Kids and adults alike absolutely love them!
- They make fantastic edible gifts.
Gathering Your Simple Ingredients for Perfect Sweet Dessert Balls
One of the beautiful things about these dessert balls is how few ingredients you actually need. Each component plays a vital role in achieving that perfect texture and delicious flavor. Think of these items as the building blocks for your bite-sized masterpieces.
The base of these sweet treats starts with crushed cookies, providing the structure and initial flavor. Vanilla wafers are classic, lending a simple, sweet vanilla note, but you can absolutely experiment here! Feel free to use similar crisp cookies like shortbread or even graham crackers for a different twist.
The magic binder that transforms dry crumbs into a workable “dough” is softened cream cheese. It’s absolutely critical that your cream cheese is at room temperature, soft enough to easily blend but not melted. This is the key ingredient that prevents the dreaded crumble.
For the coating, white chocolate chips or candy melts provide a smooth, sweet shell. Candy melts are often easier to work with as they melt more smoothly and set firmer, but good quality white chocolate chips work wonderfully too. Just be mindful when melting!
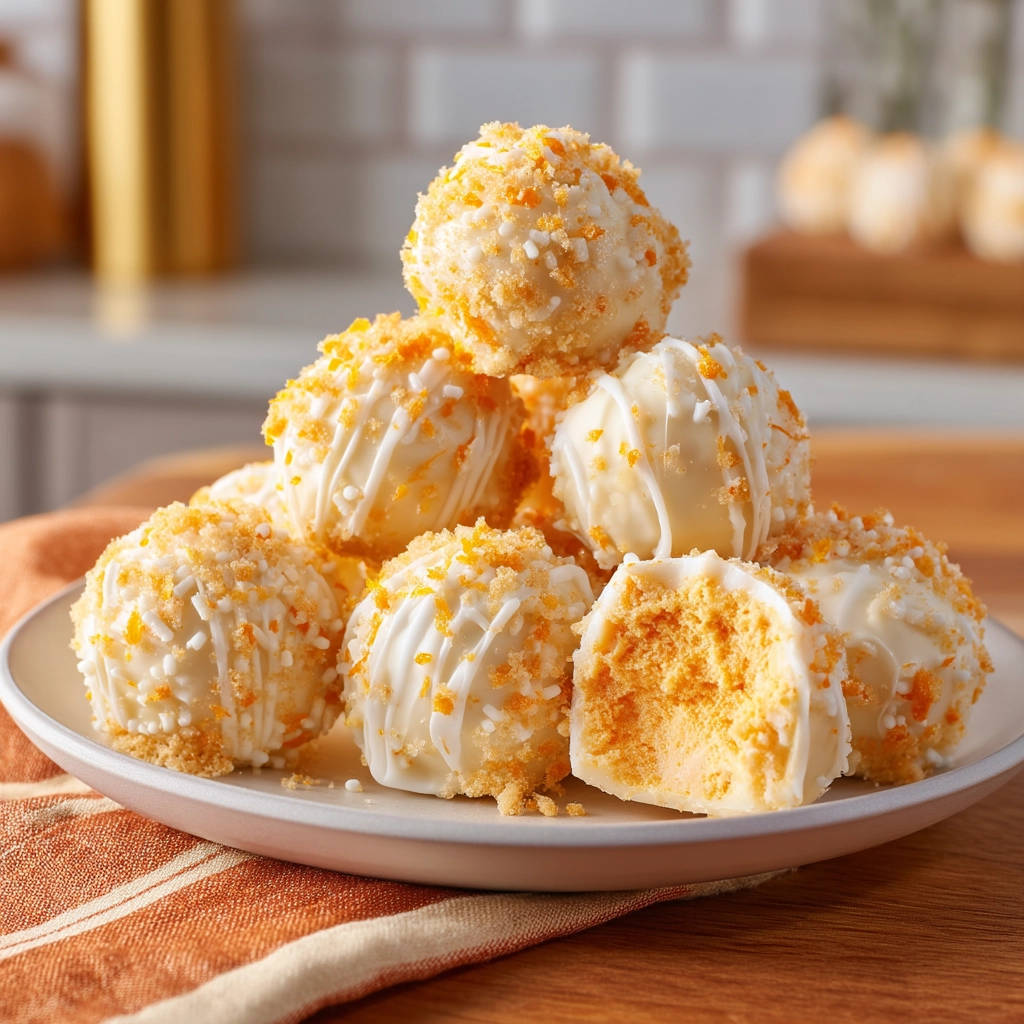
Finally, the fun part: decorations! Orange sprinkles are suggested, adding a pop of color and texture, but any sprinkles or fine cookie crumbs (maybe from your base cookie!) will work. An optional drizzle of extra melted white chocolate adds an extra touch of elegance.
Here’s the simple lineup you’ll need:
- 1 package (about 11-15 oz) crushed vanilla wafers or similar cookies
- 1 package (8 oz) cream cheese, softened
- 1 bag (10-12 oz) white chocolate chips or candy melts
- Orange sprinkles or fine cookie crumbs for decorating
- More white chocolate chips or candy melts for drizzling (optional)
Crafting Your Sweet Dessert Balls: Step-by-Step to Perfection
Making these delightful treats is straightforward, but paying attention to a couple of key stages will guarantee success. We’ll walk through each part of the process, highlighting the ‘why’ behind each action.
-
Start by preparing your cookie base. You need finely crushed cookies – think uniform crumbs, no large chunks. The easiest way to achieve this is using a food processor. Just pulse until you have fine crumbs. If you don’t have a food processor, you can place the cookies in a sturdy zip-top bag and use a rolling pin or the bottom of a heavy glass to crush them. Once crushed, transfer these crumbs to a medium-sized mixing bowl.
-
Now, introduce the softened cream cheese to the bowl with the cookie crumbs. Remember how important it is for the cream cheese to be properly softened? This is where it matters most.
-
Here is the absolute game-changer for texture: thoroughly mix the crumbs and softened cream cheese. Don’t be shy! Use a sturdy spoon, a spatula, or even clean hands to work the mixture until it’s completely combined. You’re looking for a consistency that resembles a thick dough – pliable, cohesive, and without any dry patches of crumbs. This thorough mixing ensures the cream cheese evenly coats and binds all the crumbs, making the mixture easily rollable without crumbling.
-
Cover the bowl tightly and place the mixture in the refrigerator. You’ll want to chill it for at least 30 minutes, or until it’s firm enough to handle comfortably. This chilling step is essential because it allows the cream cheese to firm up again, making the rolling process much cleaner and helping the balls maintain their shape.
-
Once the mixture is nicely chilled and firm, take it out of the refrigerator. Now it’s time to roll! Scoop out small portions and roll them between your palms into approximately 1-inch balls. As you roll each ball, place it onto a baking sheet that you’ve lined with parchment paper. The parchment paper is helpful because it prevents the balls from sticking to the pan, especially during the next chilling step.
-
After all your balls are rolled and lined up on the baking sheet, pop the sheet back into the refrigerator. Let them firm up for another 15-20 minutes. This second chill is crucial right before dipping. It ensures the balls are cold and firm, which helps the melted chocolate coating set quickly and evenly without causing the dessert ball itself to soften or melt into the chocolate.
-
While the balls are getting their final chill, prepare your chocolate coating. Place your white chocolate chips or candy melts into a microwave-safe bowl. Melt them in short intervals, specifically 30 seconds at a time. After each interval, remove the bowl and stir the chocolate thoroughly. Continue this process, stirring after each brief heating, until the chocolate is completely smooth and melted. Be very careful not to overheat the chocolate, as white chocolate can seize easily and become clumpy.
-
Now for the dipping! Take the chilled balls from the refrigerator. Using a fork or a specific dipping tool (they make this so much easier!), dip each ball into the melted coating. Lift the ball out, letting any excess chocolate drip back into the bowl. A smooth, even coating is what you’re aiming for.
-
Immediately after dipping, while the chocolate coating is still wet and soft, place the coated ball back onto the parchment-lined baking sheet. Quickly sprinkle it generously with your orange crumbs or sprinkles. If you want to add an extra touch, now is the time to drizzle additional melted white chocolate over some of the balls. The key is speed before the chocolate sets!
-
Once all the balls are dipped and decorated, you need to let the coating set. You can leave them at room temperature, which might take a little longer depending on how warm your kitchen is, or you can place the baking sheet back in the refrigerator for faster setting, usually just 10-15 minutes until the chocolate is firm to the touch.
Tips for Perfect Sweet Dessert Balls Every Time
Achieving those picture-perfect, non-crumbling sweet dessert balls is easy once you know the secrets. Here are my top tips to guarantee success:
- Cream Cheese Consistency is King: I cannot stress this enough – make sure your cream cheese is truly softened to room temperature. Cold cream cheese will not blend smoothly with the crumbs, leaving you with that frustrating crumbly mixture. Take it out of the fridge well in advance, or gently warm it in the microwave in 5-10 second bursts if you’re in a hurry, being careful not to melt it.
- Mix Thoroughly: Don’t just lightly combine the ingredients. Work the cream cheese and crumbs together until the mixture is uniform in color and texture, resembling a thick dough. Using your hands (clean, of course!) can be the most effective way to ensure there are no dry spots and everything is perfectly incorporated.
- Don’t Skip the Chilling: Both chilling steps are vital. The first chill firms the mix for easy rolling, and the second chill ensures the rolled balls are cold and stable for dipping, preventing them from melting the chocolate and causing a gloopy mess.
- Melt Chocolate Gently: White chocolate, especially chips, can be finicky. Melting in short intervals in the microwave and stirring frequently prevents overheating, which is the primary cause of seized or clumpy chocolate. If your chocolate does seize, you can try stirring in a tiny amount of vegetable oil or shortening (about ½ to 1 teaspoon per cup of chocolate) to try and salvage it, but prevention is easier!
- Prep Your Dipping Station: Have your melted chocolate, sprinkles, and parchment-lined baking sheet ready to go before you take the rolled balls out for their final chill. Dipping and decorating need to happen quickly while the balls are cold and the chocolate is easy to work with.
- Consider Candy Melts for Ease: While white chocolate chips are delicious, white candy melts are formulated to melt smoothly and set quickly, making the dipping process slightly less temperamental. If you’re new to candy coating, melts can be a great starting point.
Sweet Dessert Ball Variations
This basic recipe is a fantastic canvas for creativity! Once you’ve mastered the technique for sweet dessert balls, try these fun variations:
- Different Cookie Bases: As mentioned, experiment! Crushed Oreos make for a delicious chocolate-based ball (pair with dark or milk chocolate coating), shortbread adds a buttery richness, or even try ginger snaps for a spicier twist. You can get creative with flavors, much like trying different bases for easy no-bake desserts like our Easy No-Bake Chocolate Cream Loaf.
- Flavor Extracts: Add a few drops of vanilla, almond, peppermint, or even orange extract to the cream cheese mixture before mixing to infuse extra flavor.
- Chocolate Swaps: Use melted milk or dark chocolate instead of white for a richer flavor profile.
- Different Decorations: Roll in chopped nuts, shredded coconut, cocoa powder, powdered sugar, or use different colored sprinkles or sanding sugar.
Storing Your Sweet Dessert Balls
These dessert balls store wonderfully! Once the coating is fully set, place them in an airtight container. Layer them between sheets of parchment or wax paper to prevent sticking. Store them in the refrigerator for up to a week.
For longer storage, you can freeze them for up to 1-2 months. Thaw them in the refrigerator before serving.
Your Sweet Dessert Balls Questions Answered (FAQ)
Can I use other types of cookies besides vanilla wafers?
Absolutely! Crispy cookies work best as they crush easily and absorb the cream cheese nicely. Shortbread, graham crackers, or even crushed chocolate cookies (like Oreos, though you might want to use milk or dark chocolate coating) are great options. The key is to crush them finely and ensure they are fully incorporated with the softened cream cheese.
My mixture is still crumbly even after mixing. What went wrong?
The most common culprits are cream cheese that wasn’t soft enough, or not mixing the ingredients thoroughly enough. The cream cheese needs to be truly at room temperature and worked into every single crumb until you have a cohesive, dough-like mixture. Don’t be afraid to get your hands in there to really combine it!
Why did my chocolate coating seize or become thick and clumpy?
Chocolate seizing usually happens when it’s overheated or when even a tiny drop of water gets into the melted chocolate. Melt the chocolate in short intervals in the microwave, stirring frequently, and avoid melting it over direct high heat. Ensure your bowl and any tools are completely dry.
How far in advance can I make these?
These sweet dessert balls can be made a few days in advance and stored in the refrigerator. They actually benefit from chilling as it helps the flavors meld and the texture firm up perfectly.
Can I add anything else to the mix besides cookies and cream cheese?
You can add a tiny bit of extract for flavor, as mentioned in the variations. However, avoid adding liquids or anything that would introduce too much moisture, as this will affect the texture and make them hard to roll and dip.
Are these similar to cake pops?
Yes, they are very similar! Cake pops use crumbled cake mixed with frosting, while these use crushed cookies and cream cheese. The principle of mixing a dry base with a binder and coating is the same, resulting in a delicious, truffle-like dessert ball. If you enjoy simple dessert concepts, you might also like making Easy Chocolate Clusters.
Enjoy Your Homemade Sweet Dessert Balls!
There you have it – the secret to making sweet dessert balls that are easy to roll, hold their shape beautifully, and are absolutely delicious! These little bites are perfect for sharing, gifting, or simply treating yourself.
Say goodbye to crumbly mishaps and hello to perfectly formed, decadent sweet treats. Give this recipe a try and experience the difference that simple techniques can make. Let me know how yours turn out in the comments below! Happy rolling and dipping!
Sweet Dessert Balls

Ingredients
- 1 package (about 11-15 oz) crushed vanilla wafers or similar cookies
- 1 package (8 oz) cream cheese, softened
- 1 bag (10-12 oz) white chocolate chips or candy melts
- Orange sprinkles or fine cookie crumbs for decorating
- More white chocolate chips or candy melts for drizzling (optional)
Directions
- Finely crush the cookies or cake in a food processor or bag. Place crumbs in a medium bowl.
- Add the softened cream cheese to the bowl with the crumbs.
- This is key for them to hold shape! Mix the crumbs and cream cheese together thoroughly using a spoon, spatula, or even clean hands until completely combined and the mixture feels like a thick dough that can be easily rolled into a ball without crumbling apart. Make sure there are no dry spots.
- Cover the bowl and refrigerate the mixture for at least 30 minutes, or until firm enough to handle easily. This chilling is also important for them to roll beautifully and keep their form.
- Remove from refrigerator and roll the mixture into 1-inch balls. Place them on a baking sheet lined with parchment paper.
- Place the baking sheet back in the refrigerator for another 15-20 minutes to firm up the rolled balls before dipping.
- Melt the white chocolate chips or candy melts in a microwave-safe bowl in 30-second intervals, stirring after each, until smooth and completely melted. Be careful not to overheat.
- Dip each chilled ball into the melted coating, allowing excess to drip off back into the bowl. Use a fork or dipping tool for easier handling.
- Immediately after dipping, place the coated ball back on the parchment-lined baking sheet and sprinkle with orange crumbs or sprinkles. Drizzle with additional melted white chocolate if desired.
- Let the balls sit at room temperature until the coating is set, or refrigerate for faster setting.