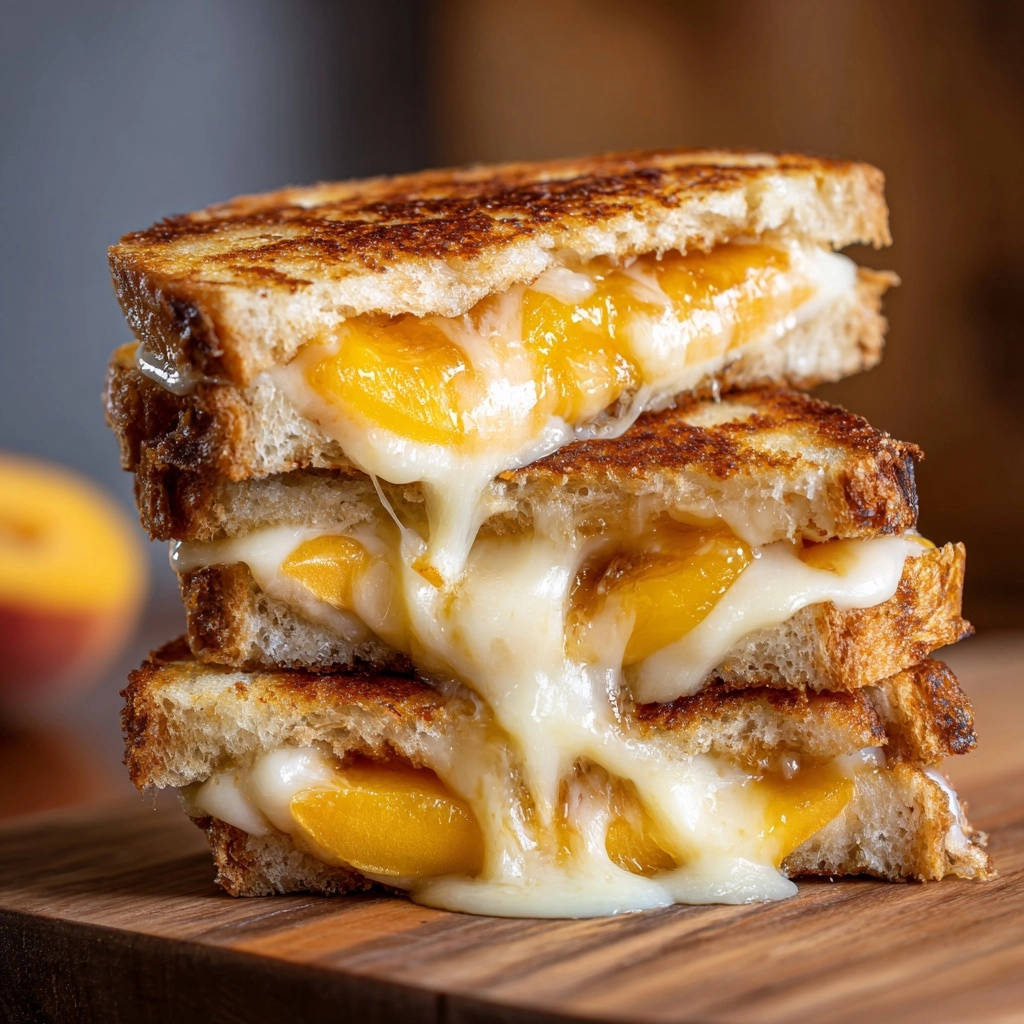
Summer is a time for basking in sunshine, enjoying warm evenings, and, of course, savoring those perfect, juicy peaches. While peaches are incredible in a classic peach crumble tart or eaten straight from the tree, have you ever considered putting them in a grilled cheese sandwich? It might sound unusual at first, but the combination of sweet, warm fruit and gooey, savory cheese is absolutely magical.
The challenge, however, often lies in preventing the bread from turning into a sad, soggy mess when you introduce juicy fruit. Nobody wants a floppy grilled cheese! After much experimentation, I’ve finally perfected a method for making sweet peach grilled cheese that ensures crispy, golden bread, perfectly melted cheese, and warm, tender peach slices without any unwanted moisture. Get ready to unlock the secret to this surprising and utterly delicious combination.
This recipe is quick, easy, and transforms simple ingredients into something truly special. It’s perfect for a light lunch, a delightful snack, or even a unique dinner when you want something a little different but incredibly comforting.
Why You Need This Sweet Peach Grilled Cheese in Your Life
Beyond just being a fun twist on a classic, there are so many reasons why this sweet peach grilled cheese will become a new favorite:
- It’s a brilliant combination of sweet and savory flavors that just works.
- Uses seasonal fruit at its peak freshness, bringing the taste of summer directly to your plate.
- Provides that ultimate comfort food experience – warm, gooey, cheesy, and satisfying.
- Surprisingly quick and easy to make, perfect for a spontaneous craving.
- It’s a guaranteed conversation starter!
Plus, who doesn’t love a grilled cheese sandwich? This version just takes things to a whole new, exciting level.
Essential Ingredients for the Perfect Peach Grilled Cheese
Crafting the ultimate peach grilled cheese starts with selecting the right components. Each ingredient plays a vital role in achieving that perfect balance of texture and flavor, ensuring you get that satisfying crispy bite followed by a rush of sweet, cheesy goodness. We’re not just listing ingredients; we’re talking about building layers of deliciousness!
Let’s start with the foundation: the bread. You’ll need four slices of rustic white or sourdough bread. Why rustic or sourdough? These types of bread tend to have a sturdier crumb and a better crust than standard sliced white bread. This structure is key because it helps them stand up to the moisture from the peaches and the heat of cooking without falling apart or getting soggy too quickly. Sourdough adds a lovely tangy note that complements the sweet peaches beautifully.
Next up is the external coating – the crucial element for achieving that golden, crispy exterior. You’ll need 2-4 tablespoons of unsalted butter or mayonnaise, softened. While butter is traditional for its rich flavor and browning capabilities, don’t dismiss mayonnaise! Mayonnaise, especially whole egg varieties, contains oil and egg that give an incredibly even, deeply golden crust and a subtle tang. Using unsalted butter allows you to control the saltiness of your sandwich.
Now for the star fruit! You need 1 ripe peach, pitted and thinly sliced. The ripeness is important – you want a peach that is sweet and fragrant, but still slightly firm. Avoid overly soft or mushy peaches, as they will release too much liquid during cooking. Thin slices are key so the peaches warm through quickly and evenly within the sandwich without requiring a long cook time that would compromise the bread’s crispness. For another way to enjoy summer fruit, consider making a baked berry french toast casserole.
And, of course, the cheese! We use a combination here for both meltability and flavor. You’ll need 1 cup of grated melting cheese, divided. Excellent choices include Monterey Jack, Gruyere, or Fontina. These cheeses melt beautifully, giving you that desirable gooey, stretchy pull. Gruyere adds a lovely nutty flavor that pairs wonderfully with peaches. Monterey Jack is milder and melts incredibly smoothly. To add a little depth and a touch of color, we also include an optional 1/4 cup of grated sharp cheddar cheese. Cheddar provides a familiar savory bite that contrasts nicely with the sweetness of the peach and the milder melting cheese. Exploring different cheese combinations is part of the fun! If you love cheesy dishes, you might also enjoy making a rich and creamy mac and cheese.
- 4 slices rustic white or sourdough bread
- 2-4 tablespoons unsalted butter or mayonnaise, softened
- 1 ripe peach, pitted and thinly sliced
- 1 cup grated melting cheese (Monterey Jack, Gruyere, or Fontina), divided
- 1/4 cup grated sharp cheddar cheese (optional)
Having all your ingredients prepped and ready before you start assembling makes the process smooth and enjoyable.
How to Make Sweet Peach Grilled Cheese: The Non-Soggy Method
The magic of this sweet peach grilled cheese lies in a few simple techniques that combat the dreaded sogginess. Follow these steps, pay attention to the heat, and you’ll be rewarded with a perfectly golden, ooey-gooey sandwich every time.
-
Prep Your Station & Coat the Bread: First things first, get organized! Clear your workspace. Take your four slices of bread. Generously butter or spread mayonnaise evenly on one side of each slice. Think of this as creating a flavorful, crispy shield. This coating is absolutely essential – it not only helps the bread brown beautifully but also creates a barrier that prevents moisture from the filling from seeping into the bread and making it soggy during cooking.
-
Build the First Cheese Layer: Lay two of the bread slices onto your clean surface, ensuring the buttered or mayo-coated side is facing down. These will be the bottoms of your sandwiches. Now, sprinkle half of your total grated cheese (this includes the sharp cheddar if you’re using it) evenly over the unbuttered side of these two slices. This initial layer of cheese creates another barrier and forms a delicious, melted base for the peaches.
-
Add the Star Ingredient: Carefully arrange your thinly sliced peach pieces over the cheese on both bread slices. Try to create a single, even layer of peaches. Here’s a pro tip baked into the step: make sure you don’t extend the peach slices all the way to the very edges of the bread. Leave a little border of cheese visible around the perimeter. This helps contain the filling as it melts and warms, preventing it from escaping and causing a messy, soggy edge.
-
Top with More Cheese: Sprinkle the remaining half of the grated cheese evenly over the layer of peaches on each sandwich half. This top layer of cheese works like glue, helping to hold the sandwich together and providing that lovely blanket of melted cheese that will surround the warm fruit.
-
Close the Sandwich: Gently place the remaining two slices of bread on top of the cheese and peach layers. Make sure the buttered or mayo-coated side of these top slices is facing upwards. Your sandwiches are now assembled and ready for the pan.
-
Preheat Your Pan (The Secret Weapon!): This step is arguably the most critical for achieving a non-soggy grilled cheese. Preheat a nonstick skillet or griddle over medium-low heat. Resist the urge to turn the heat up higher! Medium-low heat is essential because it allows the cheese inside to melt completely and the peaches to gently warm through and soften without cooking too quickly or releasing excessive moisture. High heat would burn the bread before the inside is ready. Mastering this temperature control is key to perfecting your grilled cheese technique.
-
Begin the Gentle Cooking Process: Carefully place the assembled sandwiches into your warm skillet. Cook them over that same medium-low heat for approximately 5-7 minutes per side. Be patient! This slow, gentle heat is exactly what you need. It gives the bread time to toast to a beautiful golden brown while allowing the cheese to melt into a glorious gooey state and the peaches to warm and slightly caramelize. If your skillet has a lid that fits loosely, covering it for the first few minutes on each side can help trap some heat, speeding up the melting process from above and ensuring the cheese is fully melted.
-
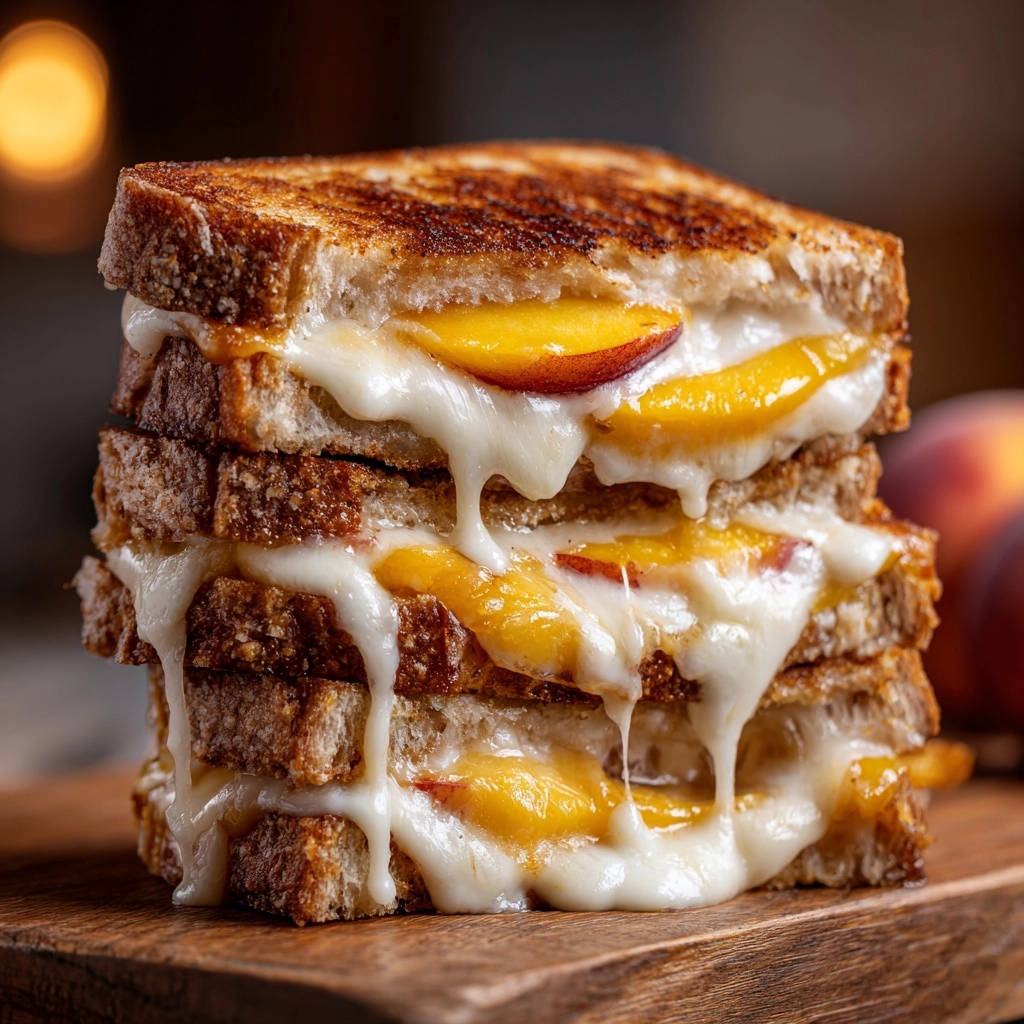
Flip and Finish: Once the first side is golden brown and releases easily from the pan, carefully flip the sandwiches using a wide spatula. Cook the second side for another 5-7 minutes, or until it is also deeply golden brown and toasted. You’ll know they’re ready when you see the cheese fully melted, perhaps starting to ooze slightly from the sides.
-
Rest for Perfection: This is a step often skipped, but it makes a difference! Once the sandwiches are cooked to golden, cheesy perfection, remove them from the skillet and place them on a cutting board. Let them rest undisturbed for 1-2 minutes before you slice them. This brief resting period allows the hot cheese filling to settle and firm up slightly. Skipping this can result in the warm, liquidy filling immediately running out when you make that first cut.
-
Slice and Serve Immediately: After the short rest, use a sharp knife to slice each sandwich in half, usually diagonally. Admire the beautiful layers of warm peaches and melted cheese! Serve your Sweet Peach Grilled Cheese immediately while it’s still wonderfully warm and the bread is crisp. Enjoy every sweet and savory bite!
Pro Tips for Your Sweet Peach Grilled Cheese Success
Ready to take your peach grilled cheese from great to absolutely unforgettable? Here are a few extra pointers and ideas:
-
Choose Your Peaches Wisely: While ripeness is key for sweetness, a peach that’s just slightly firm (not hard, but not mushy) is ideal. It will hold its shape better when sliced and warm through without collapsing or releasing too much liquid. If your peaches are very juicy, you can lightly blot the slices with a paper towel before assembling.
-
Cheese Combinations: Don’t be afraid to experiment with your cheese blend! Smoked Gouda can add a fantastic depth. Provolone is another great melting cheese. A touch of cream cheese spread thinly on the unbuttered side of the bread before adding the other cheese can add extra creaminess.
-
Enhance the Sweetness (Optional): For a little extra sweetness boost that complements the peaches, you could sprinkle a tiny pinch of brown sugar or a drizzle of honey over the peach layer before adding the top cheese. Don’t overdo it, as too much sugar can burn or make things too wet.
-
Add a Savory Twist: A sprinkle of fresh herbs like chopped basil or a very thin slice of prosciutto (if you include other meats in your diet, just skip if you don’t) between the cheese layers can add a surprising savory element that pairs beautifully with peaches and cheese. If you like sweet and savory, you might enjoy our sweet and savory bacon bites.
-
Bread Alternatives: While rustic white or sourdough is recommended for their structure, you can use other breads if they are sturdy enough. A good quality whole wheat or even a challah could work, though the cooking time might vary slightly.
-
Mayonnaise Magic: If you’ve never used mayonnaise on the outside of your grilled cheese instead of butter, give it a try! It spreads easily, contains oil for fantastic browning, and gives a crisp, golden crust without burning as quickly as butter sometimes can.
Serving Suggestions: What Pairs Well?
A sweet peach grilled cheese is hearty enough to stand on its own, but it also pairs wonderfully with a few simple sides. Because the sandwich is rich and comforting, think about fresh or light companions. A simple side salad with a light vinaigrette is a classic choice. Something like an easy kale salad or a refreshing arugula pomegranate salad would offer a lovely contrast in texture and flavor.
A cup of warm, comforting soup, like a classic chicken soup, can also be a delightful pairing, especially on a cooler day. For something really simple, a handful of your favorite potato chips or easy crispy roasted potatoes makes a satisfying crunch alongside the gooey sandwich.
Your Sweet Peach Grilled Cheese Questions Answered (FAQ)
Let’s tackle some common questions you might have about making this delightful sweet peach grilled cheese.
Can I use canned peaches instead of fresh?
While fresh peaches at their peak are highly recommended for the best flavor and texture, you could use canned peaches in a pinch. However, be extremely careful about moisture. Drain canned peaches very, very well and pat them dry with paper towels before slicing and adding them to the sandwich. They will be softer than fresh peaches and might release more liquid, so the low and slow cooking method becomes even more critical.
What’s the absolute best type of bread to use?
The “best” bread is subjective, but for this recipe, a rustic loaf or sourdough is definitely preferred. The key is a bread with good structure and body that can handle the filling without becoming waterlogged. Standard thin sandwich bread is more likely to get soggy. Look for loaves with a decent crust and a slightly denser crumb.
Can I make the sandwiches ahead of time?
Assembled grilled cheese sandwiches are always best cooked and served immediately. If you assemble them too far in advance, the moisture from the peaches and cheese can start to make the bread soggy before it even hits the pan. However, you can definitely prep your components ahead of time: slice the peach, grate the cheese, and have your bread ready. This makes the final assembly and cooking process super fast.
My grilled cheese is browning too fast but the cheese isn’t melted. What am I doing wrong?
This is the most common issue with grilled cheese in general, and especially with fruit! You are almost certainly cooking over heat that is too high. Remember that medium-low heat is your best friend here. It might feel slow, but that lower temperature gives the heat time to transfer through the bread to the inside, melting the cheese and warming the peaches, without burning the outside crust. Be patient, lower the heat, and give it more time.
What other types of fruit could I try?
Fun idea! Thinly sliced apples or pears can work well, especially in the fall. Just like with peaches, choose varieties that are ripe but firm. Berries can be trickier due to their high water content, but you could try a blend with cheese in something like a stuffed grilled cheese with blueberry sauce where the fruit is cooked separately or contained differently. The principle of managing moisture remains key for any fruit addition.
Enjoy Your Sweet & Savory Treat!
There you have it – the secret to a perfectly crispy, wonderfully gooey sweet peach grilled cheese that celebrates the best of summer fruit. It’s a simple concept elevated by mindful preparation and cooking techniques. This sandwich is a reminder that sometimes the most unexpected combinations can lead to the most delicious discoveries.
Give this recipe a try the next time you have beautiful ripe peaches on hand. I promise it will surprise and delight you! Don’t forget to come back and leave a comment to let me know how yours turned out or share any creative variations you tried. Happy cooking!
Sweet Peach Grilled Cheese

Ingredients
- 4 slices rustic white or sourdough bread
- 2-4 tablespoons unsalted butter or mayonnaise, softened
- 1 ripe peach, pitted and thinly sliced
- 1 cup grated melting cheese, such as Monterey Jack, Gruyere, or Fontina, divided
- 1/4 cup grated sharp cheddar cheese (optional, for flavor and color)
Directions
- Prepare your workstation. Butter or spread mayonnaise evenly on one side of each bread slice. This creates a nice barrier and helps with browning.
- Lay two slices of bread butter-side down on a clean surface. Sprinkle half of the grated cheese (including cheddar if using) over the cheese sides of these two slices.
- Arrange the peach slices evenly over the cheese on both bread slices. Try not to let the peaches go right to the edges, leaving a little space.
- Sprinkle the remaining half of the cheese over the peaches on both sandwiches.
- Place the remaining two slices of bread on top, butter-side up.
- Preheat a nonstick skillet or griddle over medium-low heat. This temperature is CRUCIAL for preventing sogginess and ensuring everything cooks evenly.
- Place the sandwiches in the warm skillet. Cook over medium-low heat for 5-7 minutes per side. This slow, gentle heat allows the cheese to melt completely and the peaches to warm through without releasing excessive moisture that would make the bread soggy. If your skillet has a lid, covering it for the first few minutes can help trap heat and speed up the melting from above.
- Flip the sandwiches carefully and cook for another 5-7 minutes, or until both sides are golden brown and toasted and the cheese is fully melted and oozing.
- Remove the sandwiches from the skillet and let them rest on a cutting board for 1-2 minutes before slicing. This brief rest helps the cheese settle and prevents the filling from immediately running out when you cut.
- Slice in half and serve immediately while warm.