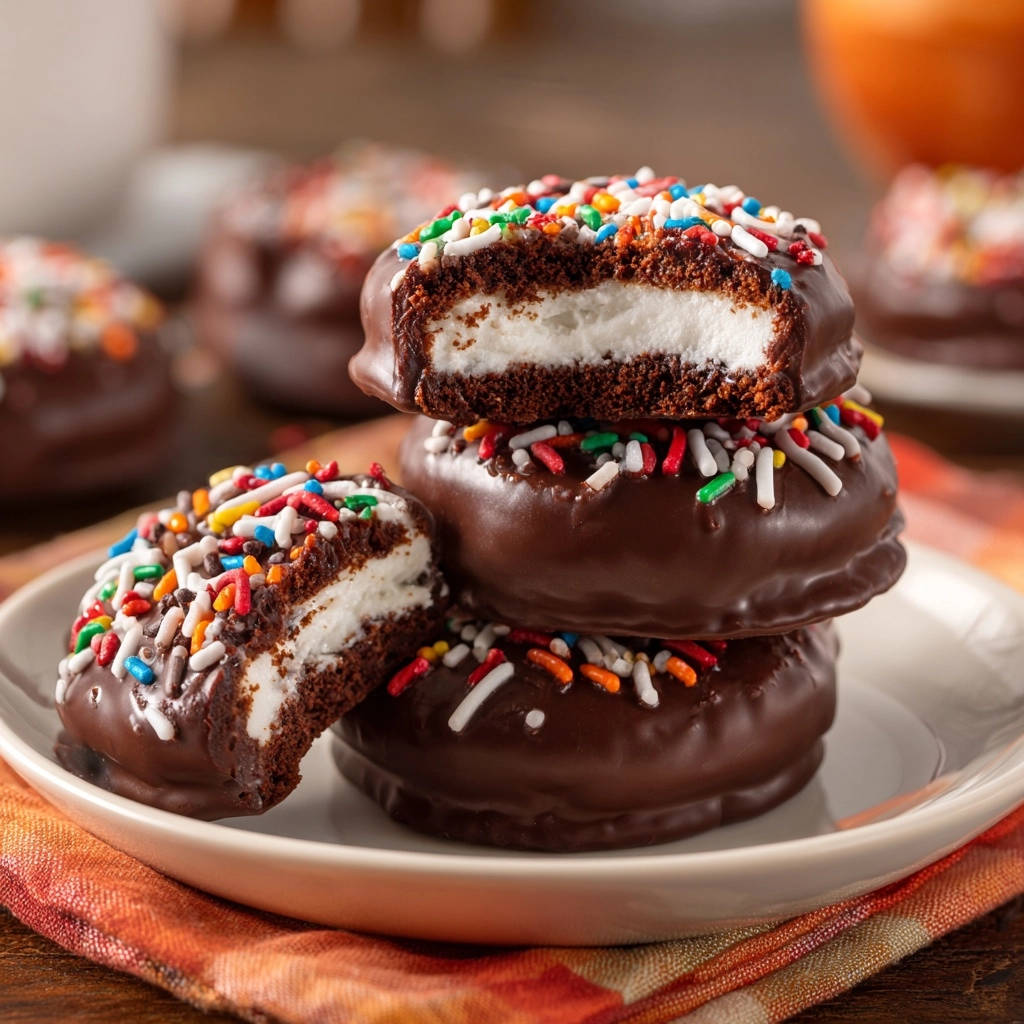
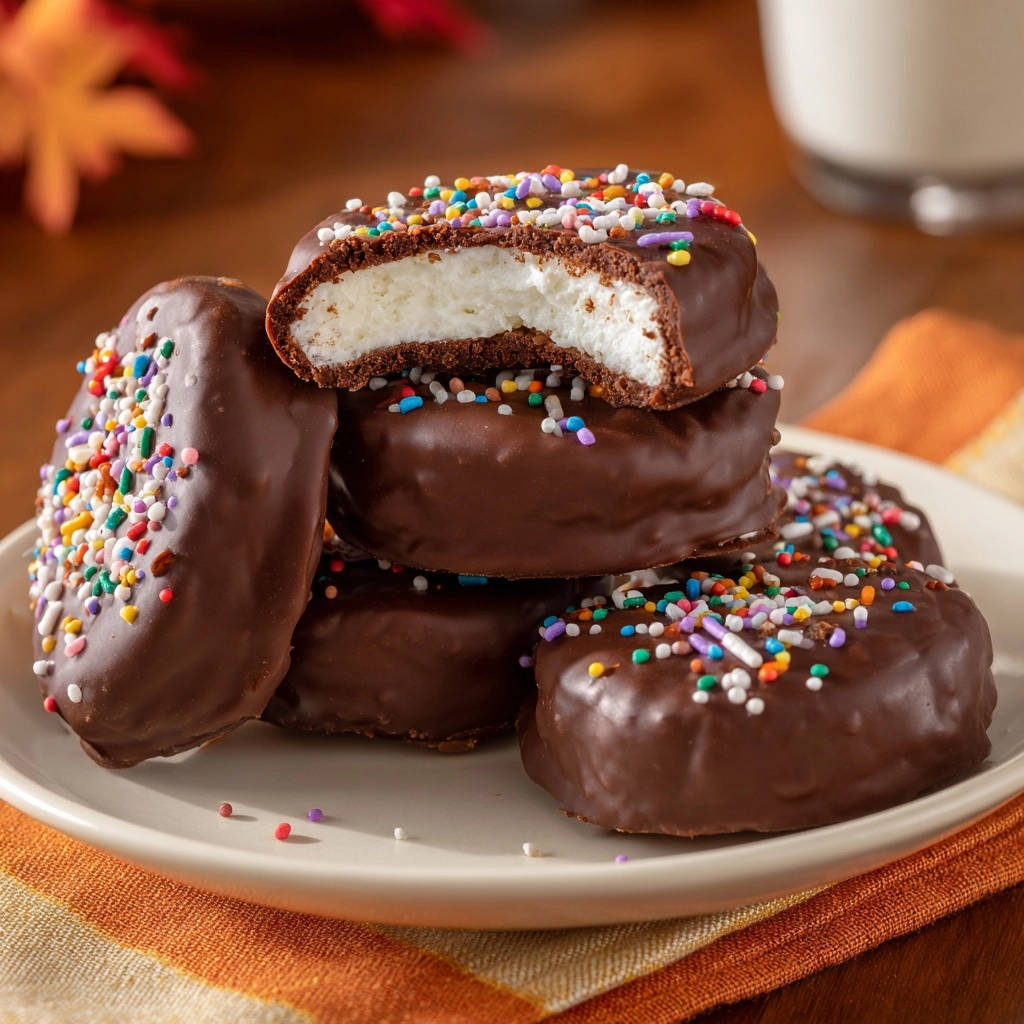
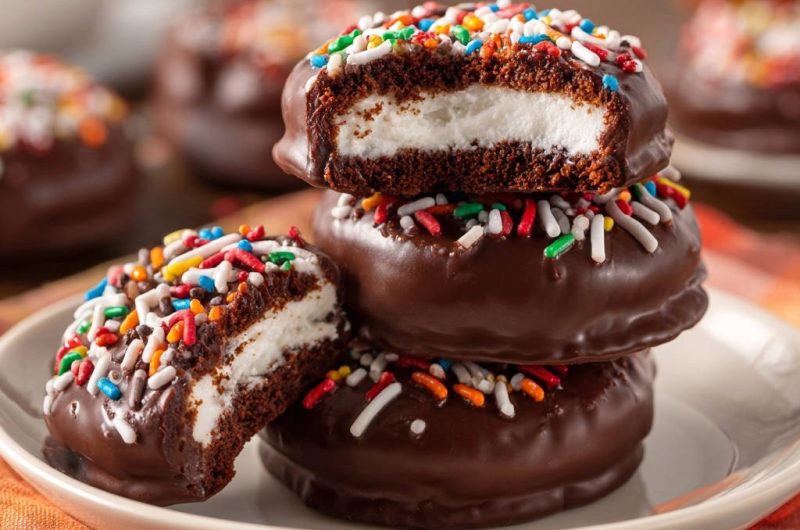
Biting into a dry, crumbly chocolate sandwich cookie is a culinary disappointment I’ve experienced far too many times. After years of perfecting, I’ve finally cracked the code to truly moist, tender cookies, leading to these show-stopping Ultimate Chocolate Cream Sandwich Cookies.
This recipe delivers intensely rich chocolate cakes paired with a dreamy, luxurious cream filling, ensuring every bite is pure bliss. It’s a guaranteed crowd-pleaser that will change how you bake these classic treats forever.
The Secret to Unfailingly Moist Chocolate Sandwich Cookies (Revealed!)
Say Goodbye to Dry, Crumbly Cookies
This recipe specifically combats dryness through a unique technique: hot brewed coffee. The heat interacts with the cocoa powder and fats, creating an incredibly tender, almost cake-like crumb that remains moist for days.
Intensely Rich Chocolate Flavor
The addition of hot coffee does more than just add moisture; it “blooms” the cocoa powder. This process intensifies the chocolate flavor, unlocking a deeper, more profound, and satisfying taste than you’d get from standard recipes.
The Dreamy, Creamy Center
Our homemade buttercream filling is crafted to be lusciously smooth and perfectly balanced in sweetness. It offers a delightful contrast to the rich chocolate cookies, far superior in texture and taste to any store-bought alternative.
A Treat for Every Occasion (and Easy to Share!)
These Ultimate Chocolate Cream Sandwich Cookies are a versatile delight. They travel exceptionally well, making them perfect for potlucks, parties, or as a thoughtful gift. They’re adored by all ages, making any gathering instantly sweeter.
Gather Your Baking Essentials for Ultimate Chocolate Cream Sandwich Cookies
Baking Sheets & Parchment Paper: These are essential for promoting even baking and preventing your delicate cookie bases from sticking. Parchment paper also simplifies cleanup significantly.
Mixing Bowls (Large & Medium): Having separate bowls for wet and dry ingredients streamlines the process. This allows for proper whisking and ensures all components are fully integrated without overmixing the final dough.
Whisks & Spatulas: A sturdy whisk is perfect for aerating dry ingredients and combining wet ones. A flexible spatula is ideal for gently folding wet into dry, preventing gluten development in the cookie dough.
Electric Mixer (Optional but Recommended): While not strictly necessary, an electric mixer, either handheld or stand, will make achieving a light, airy, and fluffy cream filling much faster and more effortless.
Wire Cooling Rack: Vital for allowing air to circulate around the cookies after baking. This prevents condensation and keeps them from becoming soggy, ensuring a perfect texture.
Key Ingredients for Perfectly Moist & Flavorful Chocolate Sandwich Cookies
For the Irresistible Chocolate Cake Cookies:
You’ll need all-purpose flour for structure, unsweetened cocoa powder for deep chocolate flavor, and baking soda with salt for leavening and balance. Granulated and light brown sugars provide sweetness and moisture.
Large eggs bind everything, while vegetable oil contributes to the cookies’ tender crumb. Vanilla extract enhances flavor, and most critically, hot brewed coffee “blooms” the cocoa, intensifying the chocolate and delivering unmatched moistness.
For the Dreamy Creamy Filling:
Softened unsalted butter is the base for our creamy filling, providing richness and structure. Powdered sugar (confectioners’ sugar) gives it sweetness and a smooth texture, ideally sifted to prevent lumps.
Vanilla extract adds warmth, and a few tablespoons of milk bring it all together, allowing you to adjust the filling to a perfect, spreadable consistency.
For the Dazzling Chocolate Glaze & Finish:
Semi-sweet chocolate chips melt down for a rich chocolate coating. Coconut oil (or vegetable oil) is crucial here, as it creates a wonderfully smooth, glossy glaze that sets beautifully. Rainbow sprinkles add a festive, eye-catching final touch.
Your Path to Ultimate Chocolate Cream Sandwich Cookies Perfection: A Detailed Guide
- Preheat & Prepare:
Set your oven to 350°F (175°C) and line two baking sheets with parchment paper. This preparatory step ensures a non-stick surface, guaranteeing your delicate cookie bases will release easily and bake evenly.
- Combine Dry Ingredients:
In a large bowl, whisk together the all-purpose flour, unsweetened cocoa powder, baking soda, salt, granulated sugar, and light brown sugar. Whisk thoroughly until all ingredients are well combined and there are no clumps, ensuring proper distribution for consistent results.
- Mix Wet Ingredients:
In a separate medium bowl, whisk the large eggs, vegetable oil, and vanilla extract until they are fully blended and homogenous. This creates a uniform liquid mixture ready to be incorporated into the dry components.
- Combine Wet and Dry:
Pour the whisked wet mixture into the bowl of dry ingredients. Mix with a sturdy spoon or spatula until the ingredients are just combined. At this stage, the batter will be quite thick and somewhat shaggy.
- The Hot Coffee Secret:
Gradually add the hot brewed coffee to the thick batter, mixing gently until it transforms into a smooth, cohesive dough. This step is crucial: the hot coffee “blooms” the cocoa, significantly intensifying the chocolate flavor and contributing to the cookie’s unique moist and tender texture. Avoid overmixing once the coffee is incorporated.
- Drop and Bake:
Using a rounded tablespoon, drop portions of batter onto your prepared baking sheets, ensuring about 2 inches of space between each to allow for spreading. Bake for 10-12 minutes, or until the edges appear set and the tops spring back slightly when gently touched. It is absolutely paramount not to overbake these cookies, as this is the primary secret to keeping them wonderfully moist and tender.
- Cooling Protocol:
Once baked, allow the cookies to cool undisturbed on the baking sheets for 5 minutes. This brief rest helps them firm up before transferring them carefully to a wire rack to cool completely. Patience here is key; attempting to fill warm cookies will cause the filling to melt.
- Craft the Creamy Filling:
While your cookie bases cool, begin preparing the dreamy filling. In a medium bowl, beat the softened unsalted butter until it is light and notably fluffy. Gradually add the powdered sugar, mixing until it’s fully incorporated and well combined.
Beat in the vanilla extract, then slowly incorporate the milk, adding one tablespoon at a time. Continue mixing until the filling achieves a perfectly smooth, wonderfully spreadable consistency that holds its shape.
- Assemble Your Sandwiches:
Once the cookies are completely cool to the touch, spread about 1 to 2 tablespoons of the luscious creamy filling onto the flat side of half of the cookies. Carefully top with the remaining cookies, gently pressing them together to form delightful, uniform sandwiches.
- Prepare the Glaze:
For that dazzling finish, combine the semi-sweet chocolate chips and coconut oil in a microwave-safe bowl. Microwave on high in 30-second intervals, stirring thoroughly after each interval, until the chocolate is fully melted and completely smooth. The coconut oil ensures a beautiful, professional-looking sheen.
- Dip & Decorate:
Dip the top of each assembled sandwich cookie into the warm, melted chocolate glaze. Gently tap off any excess chocolate against the bowl’s rim to prevent drips. Immediately, while the chocolate is still wet, sprinkle generously with festive rainbow sprinkles for a vibrant touch.
- Chill to Set & Store:
Place the newly glazed cookies on a clean, parchment-lined sheet or plate. Refrigerate for at least 30 minutes, or until the chocolate glaze is firmly set and no longer sticky. Store any leftover Ultimate Chocolate Cream Sandwich Cookies in an airtight container at room temperature.
Pro Tips for the Best Chocolate Sandwich Cookies, Every Time
Don’t Overmix the Dough: This is arguably the most crucial tip for tender cookies. Overmixing develops gluten, leading to a tough, dry texture. Mix only until the wet and dry ingredients are just combined.
Measure Ingredients Accurately: Precision matters, especially with flour and cocoa powder. For dry ingredients, use a kitchen scale for best results, or the ‘spoon and level’ method. Too much dry ingredient leads to dry cookies, while too little can result in a flat texture.
Hot Brewed Coffee is Key: The “hot” temperature of the coffee is non-negotiable for effectively blooming the cocoa powder, which unlocks its full flavor potential and contributes significantly to the cookies’ signature moistness. Do not substitute with cold coffee or plain water.
Quality Cocoa Matters: The flavor of your cookies is heavily dependent on the quality of your unsweetened cocoa powder. Investing in a good brand will elevate the overall chocolate intensity and depth of these delicious treats.
Cool Completely Before Filling: This step cannot be stressed enough. Attempting to fill warm cookies will cause the buttercream filling to melt and slide, creating a messy situation and compromising the cookie’s structure and appearance.
Consistency is Key for Filling: When adding milk to your cream filling, always do so slowly, one tablespoon at a time, until you reach the desired consistency. The goal is a perfectly smooth, fluffy cream that holds its shape well, not a runny liquid.
Chill Glazed Cookies: This final chilling step is vital for ensuring the chocolate glaze sets quickly and hardens to a beautiful, glossy, and smudge-proof finish. It also helps the cookies maintain their shape.
Troubleshooting Common Chocolate Sandwich Cookie Conundrums
Problem: My Cookies are Dry and Crumbly
Solution: This issue most commonly stems from overbaking or overmixing the dough. Ensure you bake only until the edges are just set and the tops spring back lightly to the touch, pulling them from the oven immediately. When mixing, stop as soon as the wet and dry ingredients are barely combined.
Problem: My Cookies Spread Too Much
Solution: While this recipe uses oil which is less prone to spread from softened butter, inaccurate measurement of liquid ingredients can contribute. High oven temperature can also cause excessive spreading. For a consistent shape, consider chilling the scooped cookie dough portions for 15-20 minutes on the baking sheet before baking.
Problem: My Cream Filling is Too Runny or Too Stiff
Solution: If your filling is too runny, gradually beat in more powdered sugar, about 1/4 cup at a time, until it thickens to the desired consistency. If it’s too stiff, add milk very slowly, a half teaspoon at a time, beating after each addition until it reaches a smooth, spreadable texture.
Problem: My Chocolate Glaze Isn’t Smooth or Shiny
Solution: Ensure your chocolate chips and coconut oil are fully melted and thoroughly combined by stirring well after each microwave interval. If the glaze appears too thick or dull, add a tiny bit more coconut oil (start with 1/2 teaspoon) and stir until it achieves that beautiful, professional sheen.
Extend the Enjoyment: Storage, Freezing, and Make-Ahead Tips
How to Store Your Baked Cookies
Once the chocolate glaze on your Ultimate Chocolate Cream Sandwich Cookies is fully set, store them in an airtight container. They will remain wonderfully fresh and tender at room temperature for up to 3-4 days. For optimal preservation, especially in warmer climates, a cool pantry or even the refrigerator is ideal.
Can You Make Them Ahead?
Absolutely! The baked and completely cooled chocolate cookie bases can be prepared a day or two in advance. Store them in an airtight container at room temperature until ready to assemble. The creamy filling can also be made ahead and stored in the refrigerator for up to 3 days; simply let it come to room temperature and re-whip briefly before use.
For the freshest taste and best appearance, assemble the cookies closer to when you plan to serve them, then glaze and chill.
Freezing for Future Cravings
You can successfully freeze the baked, unfilled chocolate cookie rounds for up to 2 months. Layer them with parchment paper in a freezer-safe, airtight container. Thaw them at room temperature before proceeding with the filling and glazing steps.
Alternatively, fully assembled and glazed Ultimate Chocolate Cream Sandwich Cookies can be frozen. Place them on a baking sheet until solid, then transfer them to a freezer bag for up to 1 month. Thaw them gently in the refrigerator before serving for a delightful treat whenever a craving strikes.
Your Ultimate Chocolate Cream Sandwich Cookies Questions, Answered
Can I use instant coffee instead of brewed?
While freshly brewed coffee is highly recommended for its superior flavor depth and unique “blooming” properties, you can substitute. Dissolve 1 teaspoon of instant coffee granules in 1 cup of hot water. The resulting flavor might be slightly less intense, but it will still contribute to the necessary moisture and a good chocolate flavor.
What if I don’t have vegetable oil?
You can readily substitute vegetable oil with another neutral-flavored oil without significantly altering the taste or texture of these cookies. Excellent alternatives include canola oil or light olive oil. Avoid stronger-flavored oils such as extra virgin olive oil, which could impart an undesirable taste.
Can I make these gluten-free?
Yes, this recipe is adaptable for gluten-free diets. Simply use a high-quality 1:1 gluten-free all-purpose flour blend that already contains xanthan gum. No other major adjustments should typically be required for the cookies themselves, though the texture might be subtly different.
How can I make the filling less sweet?
To reduce the sweetness of the creamy filling, you can slightly decrease the amount of powdered sugar. Start by reducing it by 1/4 cup, then taste and adjust as needed, possibly up to 1/2 cup reduction. Adding a tiny pinch of salt (about 1/8 teaspoon) to the filling can also beautifully balance the sweetness without actually making it less sweet.
Are these suitable for a party?
These Ultimate Chocolate Cream Sandwich Cookies are absolutely ideal for parties and gatherings! They are robust enough to transport well, visually impressive, and universally beloved by guests of all ages. They are sure to be a standout dessert at any event, much like a perfectly baked decadent chocolate cake or delightful mini chocolate caramel cheesecakes.
Ready to Impress? Share Your Ultimate Chocolate Cream Sandwich Cookies Masterpiece!
Now that you’re armed with the definitive secrets to crafting perfectly moist and intensely chocolatey Ultimate Chocolate Cream Sandwich Cookies, it’s time to bring this dream to your kitchen. This recipe is designed to become a beloved, go-to favorite for every special occasion or simply for an everyday indulgence.
We’d love to see your delicious creations! Share your baking triumphs with us online or tell us how these delightful treats turned out in the comments below. For more inspiring baking adventures and sweet delights, explore our collection of dessert recipes that are sure to impress.
Ultimate Chocolate Cream Sandwich Cookies
Course: DessertCuisine: American CuisineDifficulty: easy12
cookies30
minutes10
minutes60
minutesAmerican Cuisine
Ingredients
For the Chocolate Cake Cookies:
1 and 1/2 cups all-purpose flour
3/4 cup unsweetened cocoa powder
1 teaspoon baking soda
1/2 teaspoon salt
1 cup granulated sugar
1/2 cup packed light brown sugar
2 large eggs
1/2 cup vegetable oil
1 teaspoon vanilla extract
1 cup hot brewed coffee
For the Creamy Filling:
1/2 cup unsalted butter, softened
3 cups powdered sugar
1 teaspoon vanilla extract
2-3 tablespoons milk
For the Chocolate Glaze:
1 cup semi-sweet chocolate chips
1 tablespoon coconut oil or vegetable oil
1/4 cup rainbow sprinkles
Directions
- Preheat your oven to 350°F (175°C). Line two baking sheets with parchment paper.
- In a large bowl, whisk together the flour, cocoa powder, baking soda, salt, granulated sugar, and brown sugar until well combined.
- In a separate medium bowl, whisk together the eggs, vegetable oil, and vanilla extract.
- Pour the wet ingredients into the dry ingredients and mix with a spoon or spatula until just combined. The mixture will be thick.
- Gradually add the hot brewed coffee to the batter, mixing until smooth. The hot coffee helps to “bloom” the cocoa, intensifying the chocolate flavor and contributing to the incredible moistness and rich texture of the cookies. Do not overmix.
- Drop rounded tablespoons of batter onto the prepared baking sheets, spacing them about 2 inches apart.
- Bake for 10-12 minutes, or until the edges are set and the tops spring back slightly when gently touched. Do not overbake, as this is key to keeping them moist. Let the cookies cool on the baking sheets for 5 minutes before transferring them to a wire rack to cool completely.
- While the cookies cool, prepare the creamy filling. In a medium bowl, beat the softened butter until light and fluffy. Gradually add the powdered sugar, mixing until well combined. Beat in the vanilla extract, then slowly add the milk, one tablespoon at a time, until the filling reaches a smooth, spreadable consistency.
- Once the cookies are completely cool, spread about 1 to 2 tablespoons of filling on the flat side of half of the cookies. Top with the remaining cookies, gently pressing them together to form sandwiches.
- Prepare the chocolate glaze. In a microwave-safe bowl, combine the chocolate chips and coconut oil. Microwave on high in 30-second intervals, stirring after each, until the chocolate is melted and smooth.
- Dip the top of each sandwich cookie into the melted chocolate glaze. Gently tap off any excess chocolate. Immediately sprinkle with rainbow sprinkles.
- Place the glazed cookies on a clean parchment-lined sheet or plate and refrigerate for at least 30 minutes, or until the chocolate glaze is set. Store any leftover cookies in an airtight container.
Notes
- The hot coffee helps ‘bloom’ the cocoa, intensifying chocolate flavor and contributing to incredible moistness.