There’s truly nothing more frustrating than planning a delicious, comforting chicken dinner, only to slice into dry, tough meat. We’ve all experienced that disappointment! It can feel like a culinary crime when your chicken breast loses all its precious moisture during cooking. For years, I struggled with this common problem, wondering how restaurants always seemed to nail perfectly juicy chicken.
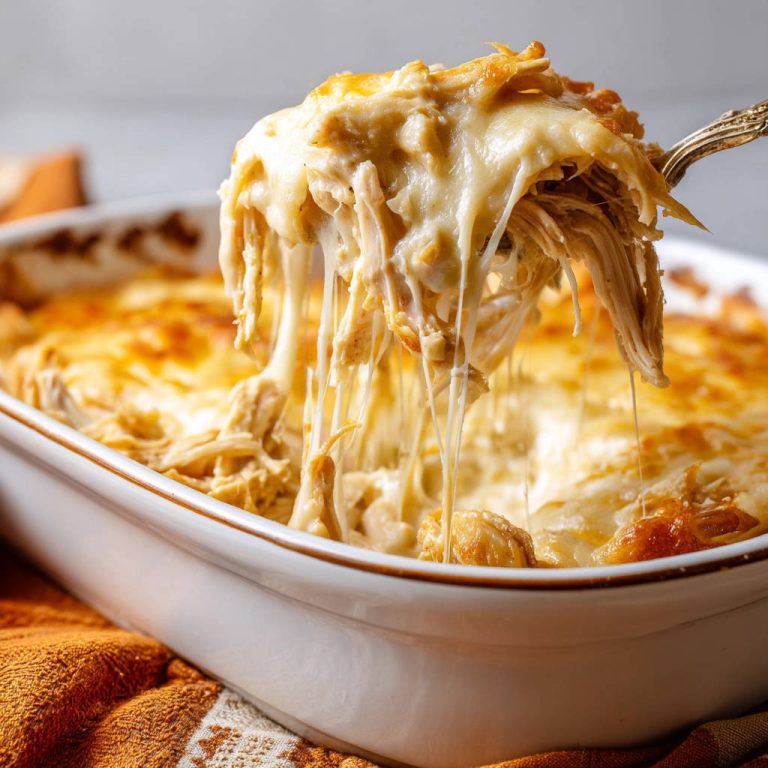
But I finally cracked the code, and it involves a simple yet crucial technique that guarantees tender, moist results every single time. Paired with a rich, flavorful pan gravy made right in the same skillet, this Skillet Chicken with Creamy Gravy recipe has become an absolute staple in my kitchen. This little trick completely transformed how I think about cooking chicken breasts, and I am so excited to share it with you so you can say goodbye to dry chicken forever!
Why You’ll Absolutely Love This Skillet Chicken Recipe
This isn’t just another chicken recipe; it’s a game-changer. Here are a few reasons why this will become your new favorite way to cook chicken:
- Guaranteed Juicy Chicken: The method I’ll show you ensures incredibly moist and tender results, even with lean chicken breasts.
- Incredible Flavor: Searing the chicken creates a beautiful crust, and those delicious browned bits are the foundation for an intensely flavorful gravy.
- One Pan Meal (Mostly!): The chicken and the gravy are cooked in the same skillet, minimizing cleanup.
- Quick & Easy: From start to finish, this meal is ready in about 30 minutes, making it perfect for busy weeknights.
- Versatile: While fantastic on its own, the chicken and gravy pair wonderfully with a variety of sides.
Gathering Your Ingredients for Skillet Chicken with Creamy Gravy
The beauty of this dish lies in its simplicity. You likely have most of these items in your pantry and refrigerator already. We’re focusing on quality ingredients to build layers of flavor, ensuring both the chicken and the gravy are absolutely delicious.
- Boneless, Skinless Chicken Breasts: We use four of these lean cuts. Choose breasts that are roughly the same thickness if possible, or pound thicker ends slightly to ensure even cooking. This is key to preventing one part from drying out while another finishes cooking.
- Olive Oil & Butter: A combination of fats is used for searing. The olive oil helps prevent the butter from burning at higher heat, while the butter adds wonderful flavor and contributes to that golden crust.
- Salt and Black Pepper: Simple seasonings are all you need to enhance the natural flavor of the chicken and the gravy. Don’t be shy when seasoning the chicken!
- Minced Garlic: Fresh garlic is essential for building aromatic depth in the gravy. It’s cooked briefly to release its fragrance without burning.
- All-Purpose Flour: This acts as a thickener for our pan gravy, creating a smooth, rich consistency when combined with the fats and liquid in the pan.
- Chicken Broth: The liquid base for the gravy. Using chicken broth reinforces the chicken flavor left behind in the skillet. Low-sodium broth gives you more control over the final seasoning.
- Heavy Cream or Milk: This is where the “creamy” in creamy gravy comes from! Heavy cream yields a richer, more decadent gravy, while milk (whole milk works best) provides a lighter option. Choose what you prefer or have on hand.
- Chopped Fresh Parsley: Added at the end, fresh parsley brightens the dish with a touch of color and a fresh, herbaceous note.
For serving, the recipe suggests classic pairings:
- Cooked Mashed Potatoes: A perfect vehicle for soaking up that glorious creamy gravy.
- Steamed Broccoli: Adds a healthy, green element and a bit of texture contrast.
Crafting Your Skillet Chicken with Creamy Gravy: Step-by-Step
Now for the fun part! Let’s walk through the process. Remember, the goal here is juicy chicken and a fantastic gravy, and paying attention to a few key details will make all the difference.
-
Prepare the Chicken: Pat Dry & Season Generously. Start by taking your chicken breasts and patting them completely dry using paper towels. This step is critical! Moisture on the surface prevents the chicken from searing and developing that beautiful golden-brown crust we want for flavor. Once dry, season both sides generously with salt and black pepper. Don’t underestimate the salt; it penetrates the meat and enhances its flavor.
-
Heat the Skillet for Searing. Place a large, heavy-bottomed skillet over medium-high heat. Add the olive oil and butter. Let the butter melt and get slightly bubbly. You want the skillet to be hot enough to create an immediate sear when the chicken is added. Medium-high is the sweet spot – hot enough for searing but not so hot that it burns the butter instantly.
-
Sear the Chicken. Carefully lay the seasoned chicken breasts into the hot skillet. Give them a little space if possible; overcrowding can lower the pan temperature. Let them sear undisturbed for about 4 to 5 minutes per side. You’re looking for a deep golden-brown color and a noticeable crust. This searing process not only adds flavor but also helps lock in juices.
-
Finish Cooking the Chicken. After searing both sides, reduce the heat to medium-low. This lower temperature allows the chicken to cook through gently without drying out the exterior further. Cover the skillet. Let the chicken cook for another 6 to 10 minutes. The exact time will depend heavily on the thickness of your chicken breasts. The best way to know they are done is to check the internal temperature of the thickest part using a meat thermometer – you’re aiming for 165 degrees Fahrenheit (74 degrees Celsius). Juices should run clear when pierced.
-
The Secret to Juicy Chicken: Rest, Rest, Rest! This is perhaps the most vital step for moist chicken. Once the chicken reaches 165°F, immediately remove it from the skillet and place it on a plate or cutting board. Loosely tent it with foil. Let it rest for at least 5 to 10 minutes. As the chicken rests, the juices that were forced to the center during cooking redistribute back throughout the meat, resulting in incredibly tender and moist chicken. Skipping this step means those juices will run out onto your plate instead of staying in the chicken!
-
Prepare the Skillet for Gravy. While the chicken is resting, we’ll make the rich gravy right in the same pan. Those browned bits left on the bottom of the skillet? They are packed with flavor (culinary term: fond!) and will make our gravy amazing. If there’s an excessive amount of leftover fat (more than about a tablespoon), you can carefully tilt the pan and pour some out, but be sure to leave the delicious browned bits and at least a tablespoon of fat.
-
Sauté the Garlic. Add the minced garlic to the skillet with the remaining fat and drippings. Cook over medium heat for about 30 seconds, stirring constantly, until you can smell its wonderful aroma. Be careful not to burn the garlic, as it can turn bitter.
-
Make the Roux. Sprinkle the 2 tablespoons of all-purpose flour directly into the skillet with the garlic and fat. Using a whisk, whisk constantly for 1 minute. This cooks out the raw flour taste. As you whisk, scrape up any browned bits from the bottom of the pan – this process is called deglazing and adds tremendous flavor to the gravy.
-
Add the Broth & Thicken. Slowly begin pouring in the chicken broth while whisking vigorously and constantly. This is crucial for preventing lumps in your gravy. Keep whisking until all the broth is incorporated and smooth. Bring the mixture to a gentle simmer and cook for 2 to 3 minutes, continuing to whisk occasionally, until the sauce has thickened slightly to a gravy consistency.
-
Finish the Gravy. Stir in the heavy cream (or milk) and the chopped fresh parsley. Stir gently to combine. Let the gravy simmer for just another 1 to 2 minutes until it is smooth, creamy, and heated through. Taste the gravy and add more salt and pepper if needed to get the seasoning just right. The flavor should be rich and savory.
-
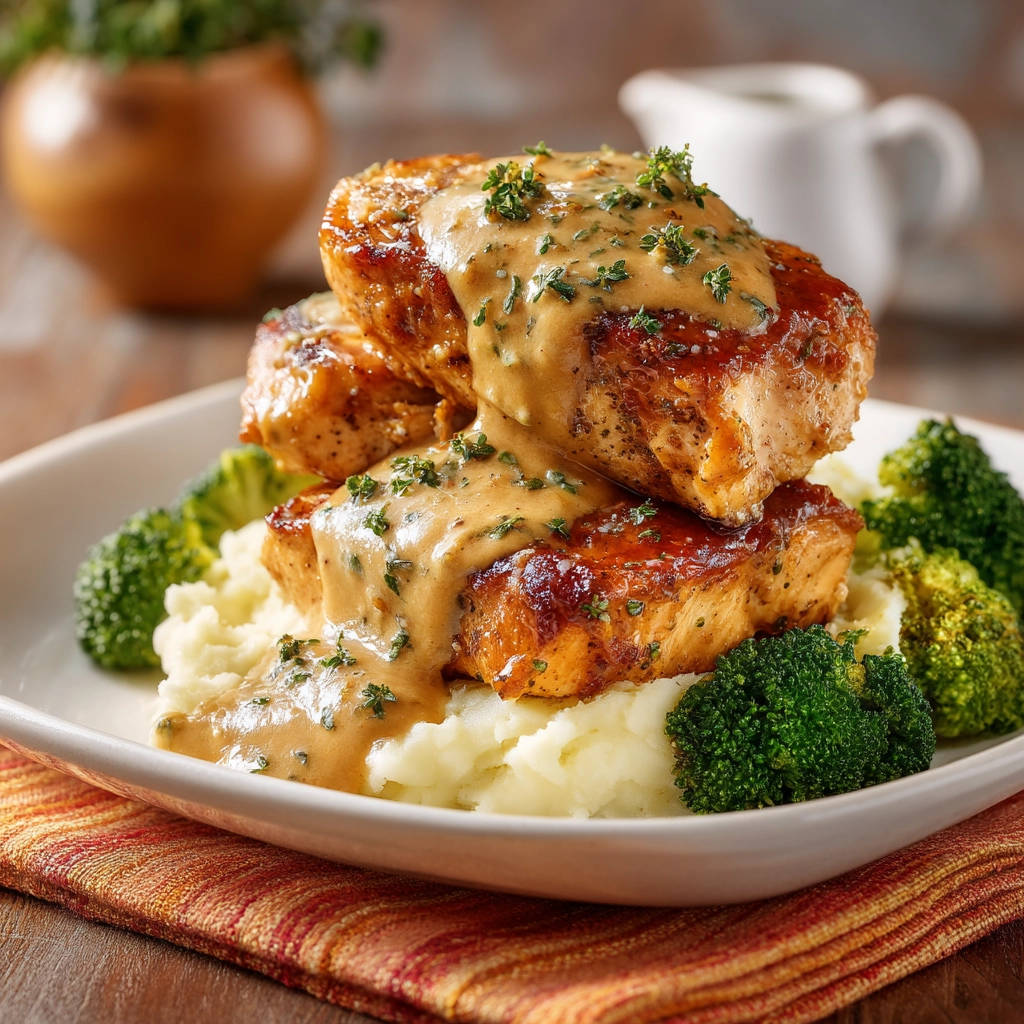
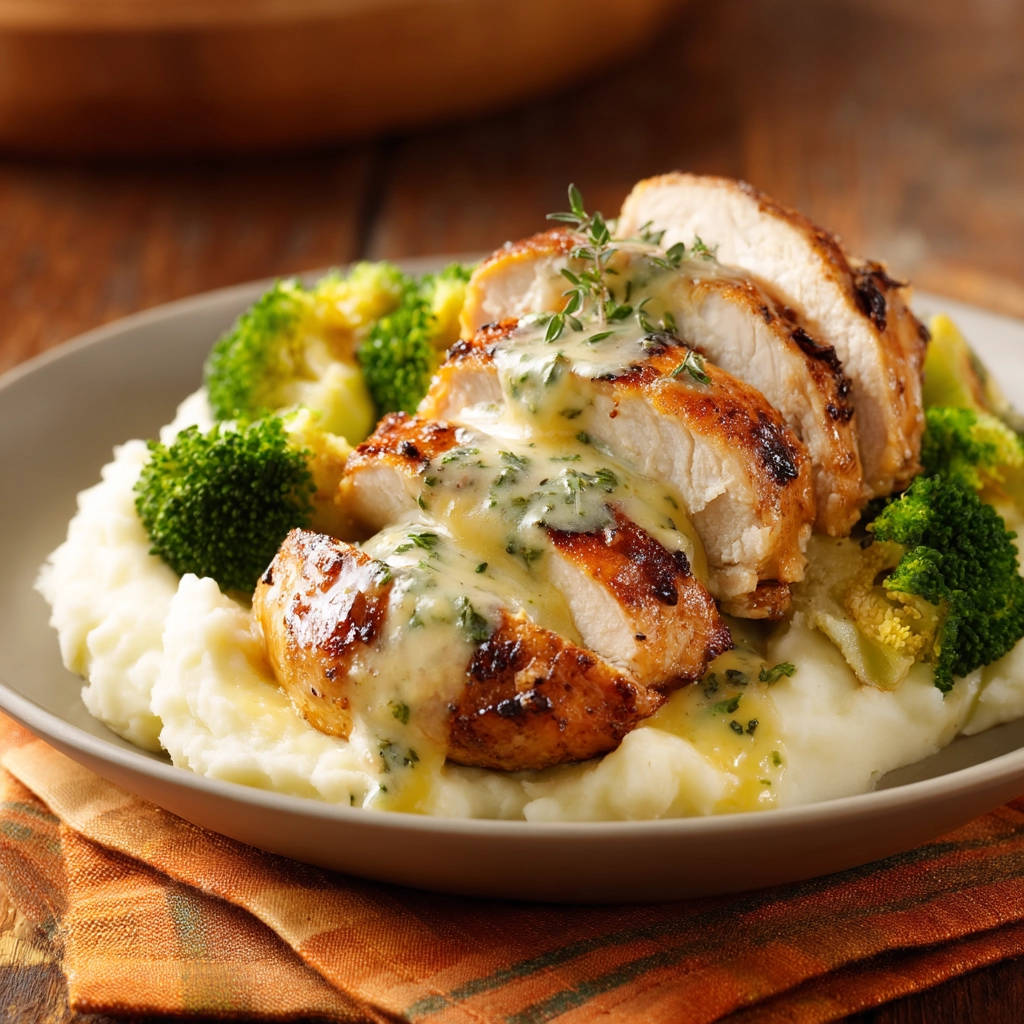
Serve. Slice or serve the rested chicken breasts whole. Place them over your desired sides, like fluffy mashed potatoes or tender steamed broccoli. Spoon that warm, luscious creamy gravy generously over the chicken and sides. Get ready to enjoy!
Tips for Perfect Skillet Chicken Every Time
Achieving perfectly juicy chicken and a smooth, flavorful gravy is easy when you know a few tricks. Here are some pro tips to help you master this dish:
- Chicken Thickness Matters: If your chicken breasts are very thick (over an inch), consider slicing them horizontally into thinner cutlets before cooking, or pound them gently to an even thickness. This ensures they cook faster and more evenly, reducing the risk of drying out.
- Hot Skillet is Key for Searing: Make sure your skillet is properly heated before adding the chicken. You should hear a good sizzle when the chicken hits the pan. A proper sear is essential for building flavor and preventing sticking.
- Don’t Overcrowd the Pan: Cook the chicken in batches if necessary. If you add too many chicken breasts at once, the pan temperature will drop, and the chicken will steam rather than sear, resulting in a lackluster crust and potentially tougher texture.
- Use a Meat Thermometer: This is the absolute best tool for guaranteeing juicy chicken. Visually checking is unreliable. Cook chicken breasts just until they reach 165°F (74°C) in the thickest part. It will continue to cook slightly as it rests.
- Resting is NON-NEGOTIABLE: Seriously, do not skip the resting step! It makes all the difference between dry chicken and incredibly juicy chicken. Those 5-10 minutes are crucial for the juices to redistribute.
- Smooth Gravy Secret: Whisk Constantly: When adding the flour and then the broth, whisking continuously is the key to a smooth, lump-free gravy. Make sure to scrape up all the browned bits (fond) from the bottom of the pan as you whisk the flour in; this adds tons of flavor.
- Adjust Gravy Consistency: If your gravy is too thick, whisk in a little extra chicken broth or cream until it reaches your desired consistency. If it’s too thin, let it simmer uncovered for a few more minutes to allow some liquid to evaporate, whisking occasionally.
- Herb Power: While parsley is classic, feel free to experiment with other fresh herbs like thyme or rosemary, adding them with the garlic.
- Cream vs. Milk: For the richest gravy, heavy cream is the way to go. If you want a lighter gravy, whole milk works well, but it won’t be quite as thick or luxurious. Avoid using lower-fat milk as it’s more likely to curdle when heated intensely.
What to Serve With Your Creamy Skillet Chicken
This Skillet Chicken with Creamy Gravy is a comforting main course that pairs beautifully with classic side dishes. The rich gravy is perfect for spooning over something that can absorb it nicely.
Our go-to pairings are creamy mashed potatoes and simple steamed broccoli, as suggested in the recipe. The potatoes are the ultimate vehicle for the gravy, and the broccoli adds a lovely fresh counterpoint.
Other fantastic options include:
- Cooked rice (white, brown, or even fluffy quinoa)
- Noodles (like egg noodles or pasta)
- Roasted vegetables (such as roasted butternut squash or carrots)
- Sautéed green beans or asparagus
- A simple side salad
- Crusty bread for dipping in the extra gravy
Your Skillet Chicken Questions Answered (FAQ)
Got questions about making the best Skillet Chicken with Creamy Gravy? Here are some answers to common queries:
Can I use chicken thighs instead of breasts?
Absolutely! Boneless, skinless chicken thighs are a great option and are often more forgiving than breasts because they contain more fat. The cooking time might need to be adjusted slightly; they may take a little longer to cook through, still aiming for an internal temperature of 165°F (74°C).
How can I make the gravy gluten-free?
To make the gravy gluten-free, substitute the all-purpose flour with a gluten-free all-purpose flour blend or use cornstarch. If using cornstarch, create a slurry by whisking 1 tablespoon of cornstarch with 2 tablespoons of cold chicken broth before adding it to the hot skillet in step 9. Whisk the cornstarch slurry into the simmering broth/dripping mixture and cook until thickened.
Can I add mushrooms or onions to the gravy?
Yes, that would be delicious! Sauté sliced mushrooms and/or diced onions in the skillet after removing the chicken and before adding the garlic (step 6). Cook them until softened and browned, then proceed with adding the garlic, flour, and liquids as directed.
How long does leftover Skillet Chicken with Creamy Gravy last?
Leftovers should be stored in an airtight container in the refrigerator for 3-4 days. Reheat gently on the stovetop or in the microwave, adding a splash of extra broth or milk if the gravy has thickened too much.
Can I freeze this dish?
You can freeze the cooked chicken and gravy, though the creamy gravy might change texture slightly (sometimes becoming a bit grainy) upon thawing and reheating. It’s generally best reheated gently on the stovetop, whisking well to try and bring back the smoothness. Thaw overnight in the refrigerator before reheating.
My gravy is lumpy! What did I do wrong?
Lumpy gravy usually happens when the flour isn’t fully cooked into the fat (the roux stage) or when the liquid is added too quickly without constant whisking. Ensure you whisk the flour for the full minute and pour in the broth very slowly while whisking vigorously. If you end up with lumps, you can try straining the gravy through a fine-mesh sieve before adding the cream, or even blend it briefly with an immersion blender if you don’t mind a completely smooth consistency.
Enjoy Your Homemade Skillet Chicken with Creamy Gravy!
Say goodbye to dry, disappointing chicken dinners! With this simple method and incredibly delicious creamy pan gravy, you’ll be serving up moist, flavorful chicken that your family will rave about. It’s quick enough for a weeknight but feels special enough for company.
Give this Skillet Chicken with Creamy Gravy a try tonight and let me know what you think in the comments below! Did the resting trick blow your mind? What sides did you pair it with? Happy cooking!
Skillet Chicken with Creamy Gravy

Ingredients
- 4 boneless skinless chicken breasts
- 1 tablespoon olive oil
- 2 tablespoons butter
- Salt and black pepper to taste
- 2 cloves garlic minced
- 2 tablespoons all purpose flour
- 1 and a half cups chicken broth
- Half cup heavy cream or milk
- 1 tablespoon chopped fresh parsley
- Cooked mashed potatoes for serving
- Steamed broccoli for serving
Directions
- Pat the chicken breasts completely dry with paper towels. This is important for getting a good sear. Season generously on both sides with salt and pepper.
- Heat the olive oil and butter in a large skillet over medium high heat until the butter is melted and slightly bubbling.
- Carefully add the chicken breasts to the hot skillet. Sear for 4 to 5 minutes per side, or until deeply golden brown and a crust has formed.
- Reduce the heat to medium low. Cover the skillet and cook for another 6 to 10 minutes, or until the internal temperature of the thickest part of the chicken reaches 165 degrees Fahrenheit. Cooking time will vary based on the thickness of the chicken breasts.
- This is the crucial step for juicy chicken: Remove the chicken from the skillet and place it on a plate or cutting board. Tent loosely with foil and let it rest for at least 5 to 10 minutes. Do not skip this! The juices redistribute, keeping the chicken moist.
- While the chicken rests, make the gravy in the same skillet. If there is excess grease, you can carefully pour some out, leaving about a tablespoon along with the pan drippings.
- Add the minced garlic to the skillet and cook for 30 seconds until fragrant.
- Sprinkle the flour into the skillet and whisk constantly for 1 minute to cook out the raw flour taste, scraping up any browned bits from the bottom of the pan.
- Slowly pour in the chicken broth while whisking constantly to prevent lumps. Bring to a simmer and cook for 2 to 3 minutes, or until the sauce has thickened slightly.
- Stir in the heavy cream or milk and the chopped parsley. Simmer for another 1 to 2 minutes until the gravy is smooth and creamy. Taste and adjust seasoning if needed.
- Serve the rested chicken breasts over mashed potatoes and steamed broccoli, spooning the warm gravy generously over the chicken.