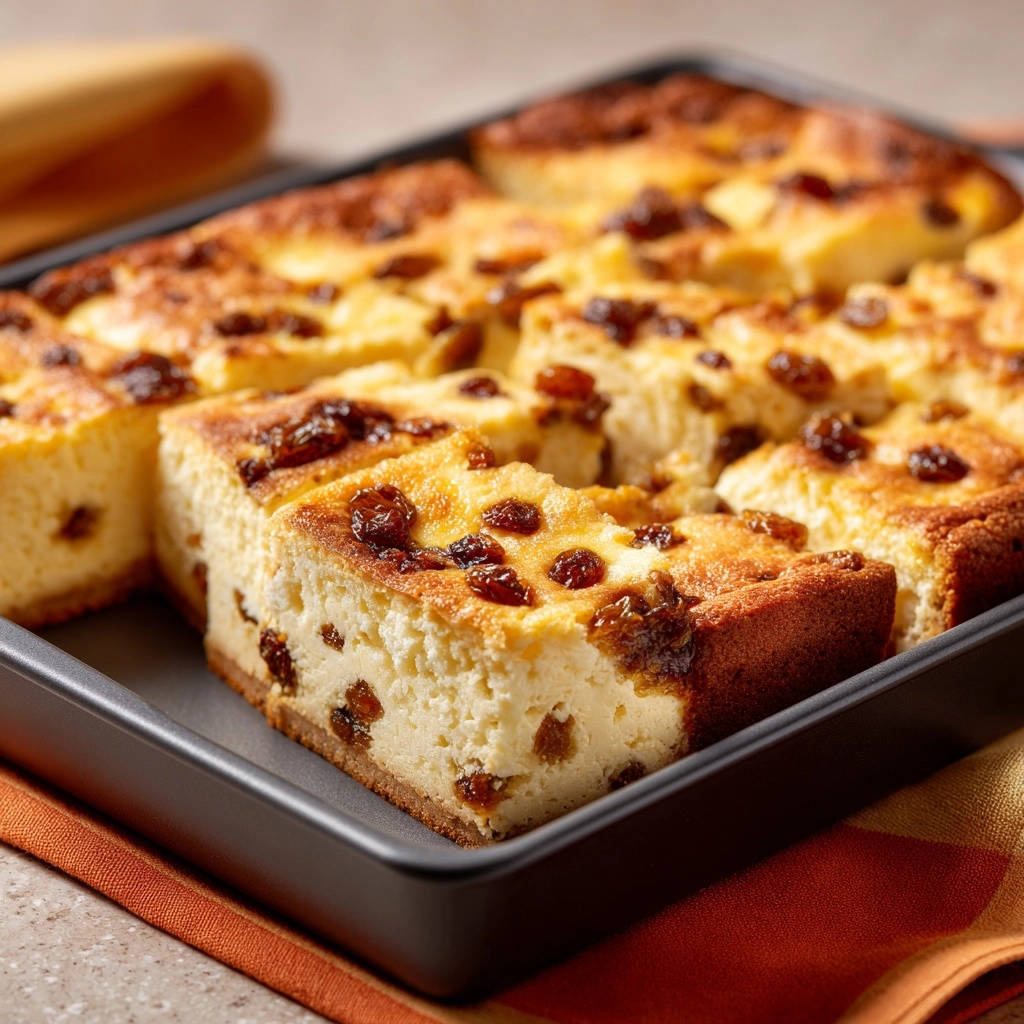
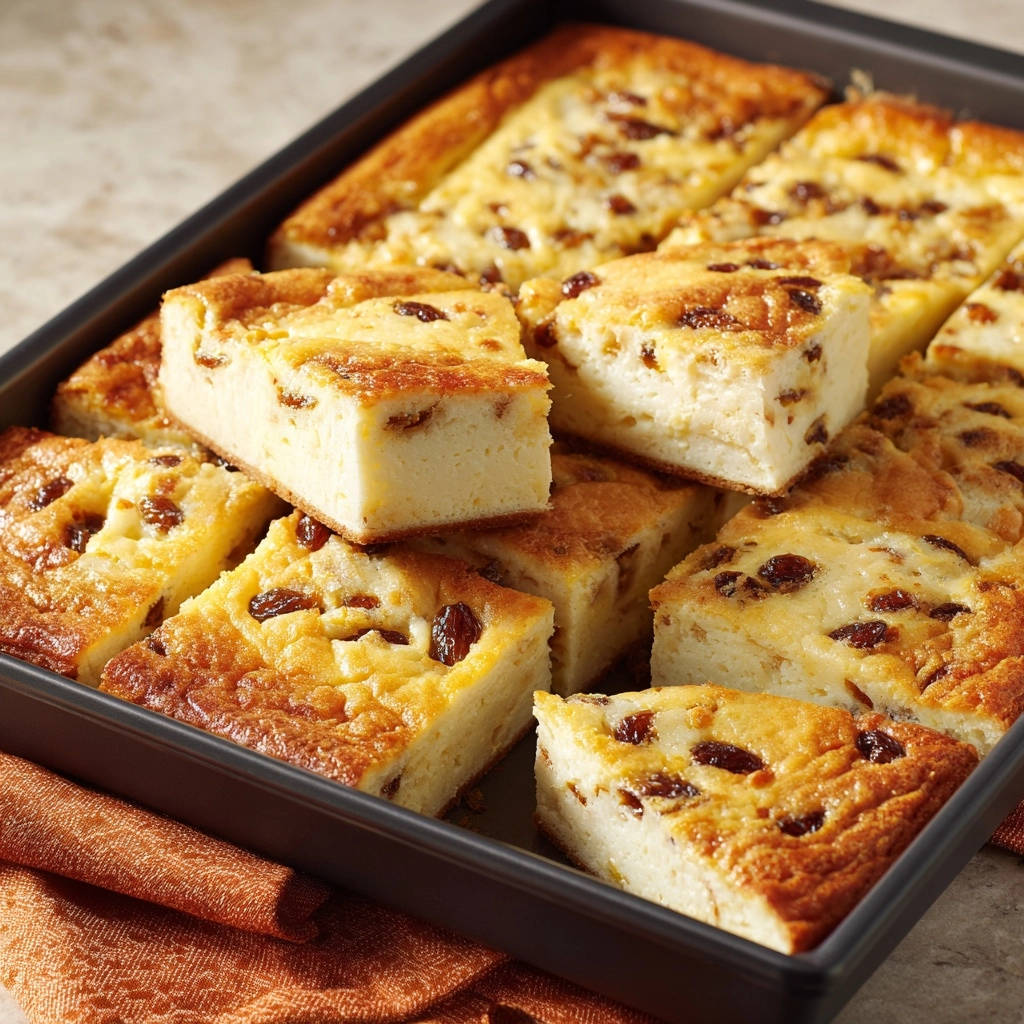
There’s nothing quite like the disappointment of a dessert where all the delicious mix-ins have sunk to the bottom. I’ve experienced it countless times, which led me on a mission to perfect these delightful Baked Cheese & Raisin Squares. This recipe ensures every single bite is packed with tender, plump raisins and a luscious, creamy cheese filling. With just 15 minutes of prep and 50 minutes of baking, you’ll achieve impressive results that serve 12-16, truly a game-changer for effortless, elegant baking.
Why These Squares Are Your New Go-To Dessert
The Game-Changing Secret: No More Sinking Raisins!
The frustration of unevenly distributed fruit is real, but this recipe eliminates it completely. Our simple flour-coating technique for the raisins is truly revolutionary.
It creates a thin, invisible barrier, ensuring every single raisin stays suspended evenly throughout the creamy filling. You’ll enjoy a balanced sweet-and-tangy bite, every time.
Unforgettable Texture: Smooth, Creamy, and Perfectly Tender
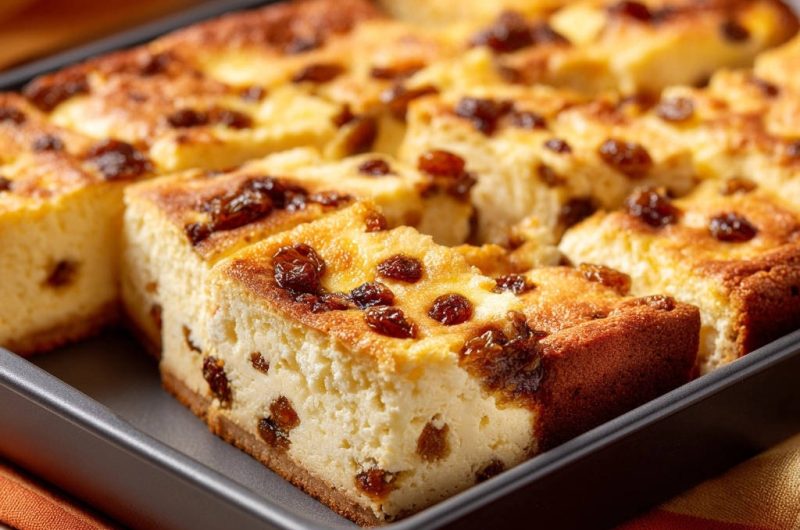
These squares offer a luxurious mouthfeel that sets them apart. The small curd cottage cheese bakes down into an incredibly smooth, silky filling, far from grainy or dense.
Combined with the crisp graham cracker crust and the tender chew of the raisins, each square provides a delightful contrast in textures. It’s a sophisticated yet comforting treat.
Simple Steps, Impressive Results: Baking Made Easy
Don’t let the elegant appearance fool you; these Baked Cheese & Raisin Squares are surprisingly straightforward to make. The steps are intuitive and designed for success, even for novice bakers.
You’ll confidently create a dessert that looks and tastes like it came from a professional bakery. This recipe prioritizes ease without compromising on quality or flavor.
Gather Your Goodness: What You’ll Need
The Complete Lineup for Deliciousness (Ingredients List)
- For the Crust:
- 1 1/2 cups graham cracker crumbs
- 1/4 cup granulated sugar
- 6 tablespoons unsalted butter, melted
- For the Filling:
- 24 ounces (3 cups) small curd cottage cheese
- 3 large eggs
- 1 cup granulated sugar
- 1/4 cup all purpose flour, divided
- 1 teaspoon vanilla extract
- 1/4 teaspoon salt
- 1 cup raisins
Crust Essentials: Building the Golden Foundation
Graham cracker crumbs form the perfect buttery base. Opt for fine crumbs for a cohesive crust that won’t crumble easily when sliced.
Granulated sugar adds a touch of sweetness, while melted unsalted butter binds everything together and imparts richness. Ensure the butter is fully melted for even saturation.
Filling Finesse: Dairy, Eggs, and Flavor Balancers
Small curd cottage cheese is paramount here; it provides the signature creamy texture when blended. Its subtle tang beautifully complements the sweetness of the raisins and sugar.
Large eggs act as a crucial binder, giving the filling structure and helping it set. Granulated sugar sweetens the filling, while all-purpose flour thickens it slightly, preventing a watery consistency.
Vanilla extract offers warmth and depth of flavor, enhancing the overall sweetness. A pinch of salt balances the sweetness and brings out all the other flavors.
The Star Mix-In: Prepping Your Raisins for Success
Raisins are the sweet, chewy gems in these squares. The key is their preparation: tossing them with a small amount of all-purpose flour.
This flour coating creates a non-stick barrier, preventing the raisins from sinking to the bottom during baking. It’s a simple yet highly effective trick.
Tools for Seamless Baking: Your Kitchen Arsenal
Key Bakeware and Mixing Essentials
A 9×13 inch baking pan is essential for these squares, ensuring they bake evenly and to the correct thickness. Lightly greasing it guarantees easy release.
You’ll need a medium bowl for mixing the crust and a large mixing bowl for the filling. A wire rack is crucial for cooling the baked squares completely, allowing air circulation for an even set.
Specialized Helpers: Electric Mixer & Measuring Tools
An electric mixer (handheld or stand mixer) is highly recommended for achieving the silkiest cottage cheese filling. It effortlessly breaks down the curds, ensuring a smooth texture.
Alternatively, a blender can be used for an ultra-smooth consistency, but the mixer works perfectly. Accurate measuring cups and spoons are vital for precise ingredient ratios, ensuring consistent results every time.
Your Path to Perfect Baked Cheese & Raisin Squares: A Detailed Guide
- Setting the Stage: Preheat and Prepare:
Before anything else, preheat your oven to 350°F (175°C). This ensures the oven is at the correct temperature for consistent baking from the moment your squares go in.
Lightly grease a 9×13 inch baking pan. This simple step prevents the crust from sticking and guarantees clean, effortless removal later.
- Crafting the Crunchy Crust Base:
In a medium bowl, combine the graham cracker crumbs, 1/4 cup granulated sugar, and melted butter. Mix these ingredients thoroughly until the crumbs are evenly moistened and resemble wet sand.
Press this mixture firmly and evenly into the bottom of your prepared baking pan. Use the bottom of a glass or your hand to compact it well, creating a stable foundation. Bake this crust for 8 minutes, then remove it from the oven and set it aside to cool slightly while you prepare the filling.
- Whipping Up the Silky Smooth Filling:
In a large mixing bowl, combine the small curd cottage cheese, large eggs, 1 cup granulated sugar, 3 tablespoons of the all-purpose flour, vanilla extract, and salt.
Use an electric mixer on medium speed to beat the mixture until it is smooth and well combined. Continue mixing until you no longer see large curds, which creates that desirable creamy texture. For an even silkier result, you can also use a blender.
- The Magic Step: Coating Your Raisins:
In a small, separate bowl, toss the 1 cup of raisins with the remaining 1 tablespoon of all-purpose flour until they are lightly but evenly coated. This is the crucial step that prevents them from sinking.
The flour creates a thin, starchy barrier that helps the raisins suspend throughout the creamy filling during baking, ensuring every bite gets a taste of sweet raisin.
- Gentle Folding and Final Pour:
Gently fold the flour-coated raisins into the prepared cheese mixture by hand. Use a spatula to carefully incorporate them, ensuring they are evenly distributed without overmixing.
Pour the filling evenly over the pre-baked graham cracker crust in the pan. Spread it carefully to ensure a level surface for even baking.
- Baking to Golden Perfection:
Bake the squares for 45 to 50 minutes. The filling should appear lightly golden brown on top and mostly set, with just a slight jiggle in the very center when gently shaken.
Avoid overbaking, as this can lead to a dry or rubbery texture. The slight jiggle indicates perfect doneness; it will continue to set as it cools.
- The Crucial Cool Down & Chill Time:
Once baked, remove the pan from the oven and let it cool completely on a wire rack at room temperature. This initial cooling period is vital for the squares to set properly.
For the absolute best results and clean, neat slices, chill the squares in the refrigerator for at least 2 hours. Overnight chilling is even better, allowing them to firm up perfectly before cutting and serving.
Mastering Your Baked Cheese & Raisin Squares: Pro Tips & Tricks
Ensuring Uniform Baking and Texture
To prevent overbaking, start checking for doneness at the 45-minute mark. A slight jiggle in the center is ideal, as the residual heat will finish setting the squares as they cool.
Rotate your baking pan halfway through the baking time if your oven has hot spots. This helps ensure even browning and consistent texture across all the squares.
Customizing Flavors and Add-ins
While raisins are classic, feel free to experiment with other dried fruits like chopped dried cranberries or cherries. Just remember to still toss them with a tablespoon of flour!
For an extra flavor boost, consider adding a hint of lemon zest to the cheese filling, or a pinch of cinnamon. If you enjoy other baked fruit desserts, you might also love our delicious blueberry crumble bars.
Perfect Slicing for Presentation
Always ensure your Baked Cheese & Raisin Squares are thoroughly chilled before slicing. This firmness is the secret to clean, sharp cuts.
For the cleanest slices, dip a sharp knife in hot water and wipe it clean between each cut. This creates smooth edges and a professional appearance.
Common Questions & Quick Fixes: Troubleshooting Your Squares
“My Raisins Still Sunk!”
This usually happens if the raisins weren’t thoroughly coated with flour, or if there wasn’t enough flour used. Ensure every raisin has a light dusting.
Overmixing the batter after adding the raisins can also cause them to shed their flour coating. Fold them in gently by hand.
“Why Are My Squares Dry/Crumbly?”
Dryness is almost always a sign of overbaking. The cheese filling loses too much moisture if left in the oven too long, resulting in a crumbly texture.
Stick to the visual cues: a lightly golden top and a slight jiggle. Remove them promptly; they will continue to firm up as they cool.
“My Crust is Soggy!”
A soggy crust can occur if the initial pre-bake of the graham cracker crust was too short or if the crust mixture wasn’t pressed firmly enough into the pan.
Ensure the crust is slightly golden and set before pouring in the filling. Also, ensure the filling is cooled slightly before pouring if the crust is still very warm.
Beyond the Bake: Storage, Make-Ahead, and Serving Ideas
Storing Your Baked Cheese & Raisin Squares
These Baked Cheese & Raisin Squares are best stored in an airtight container in the refrigerator. They will remain fresh and delicious for up to 4-5 days.
Allow them to come to room temperature for about 15 minutes before serving if you prefer a softer texture, though they are excellent chilled as well.
Make-Ahead Magic: Prep for Future Enjoyment
You can prepare the crust mixture and press it into the pan a day in advance, storing it covered in the refrigerator. You can also mix the cheese filling (without raisins) the day before.
Simply add the flour-coated raisins and pour over the crust just before baking. This makes entertaining a breeze!
Delightful Serving Suggestions
Serve these creamy cheese squares simply dusted with powdered sugar for an elegant touch. A dollop of fresh whipped cream or a scoop of vanilla bean ice cream also makes a delightful accompaniment.
For a burst of color and fresh flavor, consider serving them alongside a vibrant homemade fresh fruit salsa. The tartness of the fruit complements the sweet and creamy squares beautifully.
Your Baked Cheese & Raisin Squares Questions Answered
Can I Substitute Different Cheeses?
While small curd cottage cheese is recommended for its smooth melt, you can experiment. Ricotta cheese can be used for a slightly less tangy, softer result, though it might yield a slightly different texture.
Cream cheese will result in a much denser, richer square, akin to a cheesecake, rather than the light and tender consistency intended here. For the classic Baked Cheese & Raisin Squares, stick with cottage cheese.
What About Other Dried Fruits?
Absolutely! Dried cranberries, chopped dried apricots, or even finely diced dried cherries make wonderful substitutions for raisins. They all add a different flavor profile while maintaining a similar texture.
Remember, the critical flour-coating step applies to all dried fruits to prevent them from sinking. This trick ensures an even distribution, regardless of your fruit choice.
Is There a Gluten-Free Option?
Yes, this recipe can be easily adapted to be gluten-free. Simply substitute gluten-free graham cracker crumbs for the regular ones in the crust.
For the all-purpose flour in the filling and for coating the raisins, use a 1:1 gluten-free all-purpose flour blend. Ensure your chosen blend contains xanthan gum for best results.
Can I Freeze These Squares?
Yes, Baked Cheese & Raisin Squares freeze quite well. Once completely cooled and chilled, cut them into individual squares.
Wrap each square tightly in plastic wrap, then place them in an airtight freezer-safe container or bag. They can be frozen for up to 2 months. Thaw overnight in the refrigerator before serving.
Embrace the Sweetness: Your Baking Journey Continues
There’s immense satisfaction in baking a dessert that not only tastes incredible but also looks picture-perfect, with every component exactly where it should be. These Baked Cheese & Raisin Squares deliver on both fronts, making them a staple in my kitchen and, I hope, in yours too.
Give this recipe a try, and you’ll discover the simple magic behind evenly distributed mix-ins and a creamy, tender finish. I can’t wait to hear how these delightful squares become a cherished treat for you and your loved ones!
Baked Cheese & Raisin Squares
Course: DessertCuisine: American CuisineDifficulty: easy12
servings15
minutes50
minutes60
minutesAmerican Cuisine
Ingredients
For the Crust:
1 1/2 cups graham cracker crumbs
1/4 cup granulated sugar
6 tablespoons unsalted butter, melted
For the Filling:
24 ounces (3 cups) small curd cottage cheese
3 large eggs
1 cup granulated sugar
1/4 cup all purpose flour, divided
1 teaspoon vanilla extract
1/4 teaspoon salt
1 cup raisins
Directions
- Preheat your oven to 350 degrees Fahrenheit. Lightly grease a 9×13 inch baking pan.
- Prepare the crust: In a medium bowl, combine the graham cracker crumbs, 1/4 cup granulated sugar, and melted butter. Mix until the crumbs are evenly moistened. Press the mixture firmly and evenly into the bottom of the prepared baking pan. Bake for 8 minutes, then remove from the oven and set aside.
- Prepare the filling: In a large mixing bowl, combine the cottage cheese, eggs, 1 cup granulated sugar, 3 tablespoons of the all purpose flour, vanilla extract, and salt. Mix with an electric mixer on medium speed until the mixture is smooth and well combined. You can also use a blender for an even smoother consistency.
- In a small bowl, toss the raisins with the remaining 1 tablespoon of all purpose flour until they are lightly coated. This small step is the secret to preventing them from sinking!
- Gently fold the flour-coated raisins into the cheese mixture by hand, ensuring they are evenly distributed throughout the batter.
- Pour the filling evenly over the pre-baked crust in the pan.
- Bake for 45 to 50 minutes, or until the top is lightly golden brown and the center is mostly set with a slight jiggle.
- Remove the pan from the oven and let it cool completely on a wire rack. For best results, chill the squares in the refrigerator for at least 2 hours before cutting and serving. This allows them to firm up and makes for clean slices.
Notes
- Includes cooling time. For best results, chill for at least 2 hours before serving.