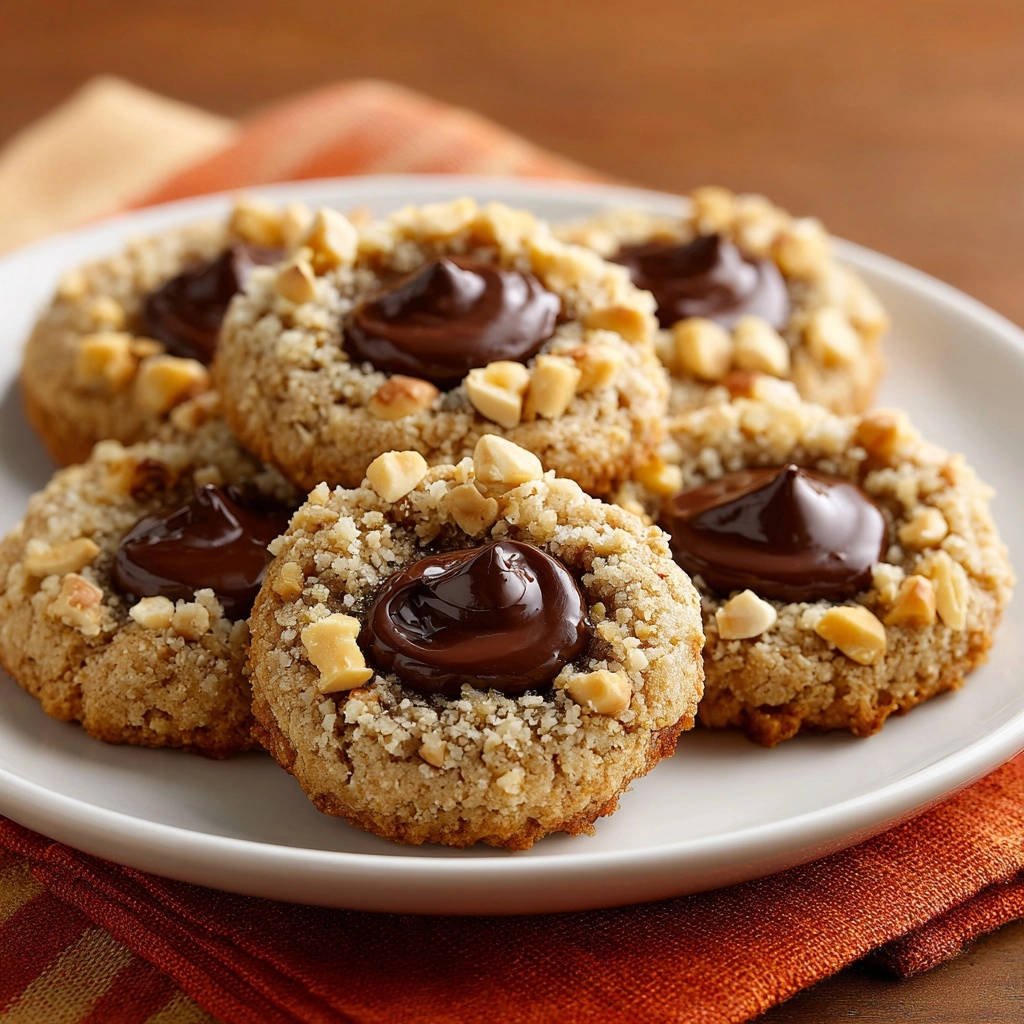
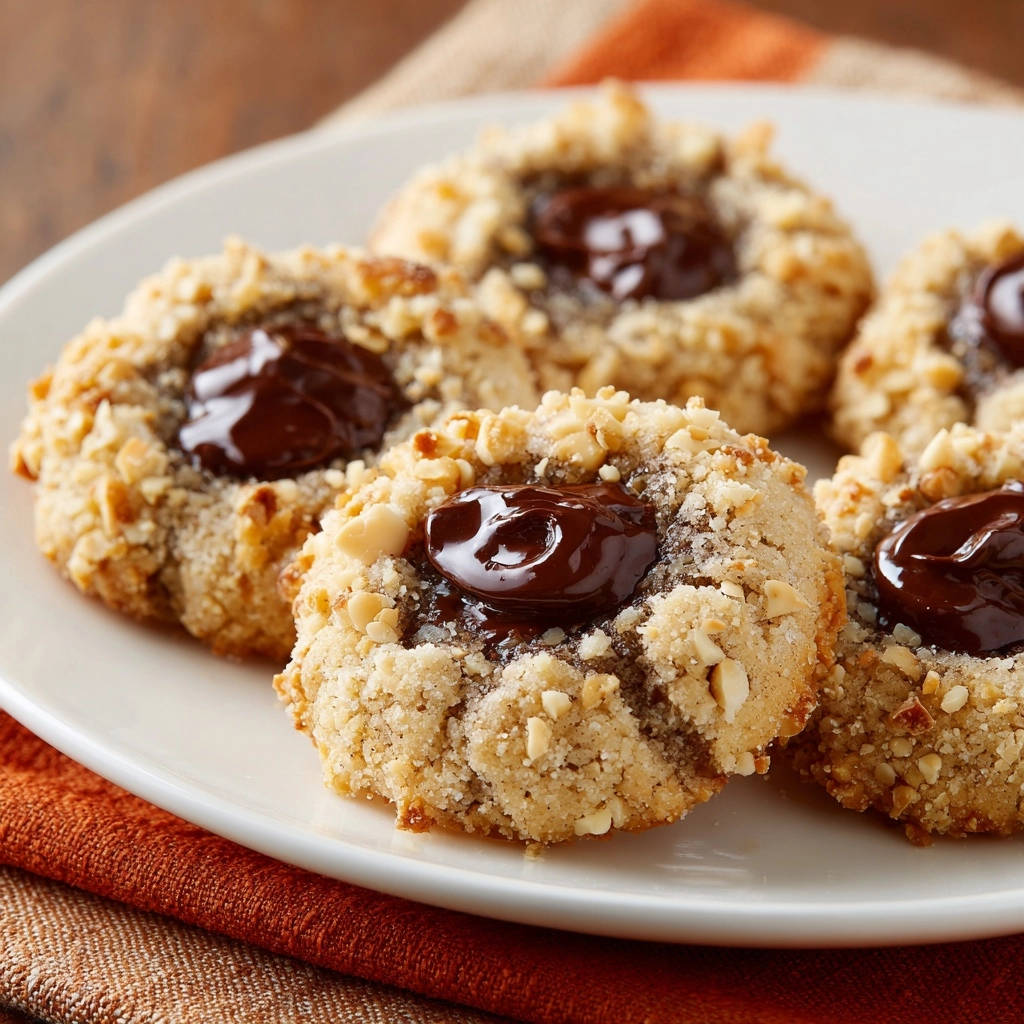
There’s nothing quite like the charm of a homemade cookie, but I know the frustration of a thumbprint cookie with a chocolate center that hardens into an unyielding disc. After years of perfecting, I’ve finally cracked the code to truly luscious, melt-in-your-mouth Chocolate Nut Thumbprint Cookies.
This recipe ensures that beautiful chocolate filling stays wonderfully soft and tender, contrasting perfectly with the delicate, nutty cookie base. Get ready to impress everyone with these truly indulgent treats that promise a delightful bite every single time.
Why This Chocolate Nut Thumbprint Cookie Recipe Shines
The “Never Hard” Chocolate Filling You’ve Dreamed Of
The standout feature of these chocolate nut thumbprint cookies is undeniably the filling. Unlike many recipes where the chocolate hardens unpleasantly, our method keeps it luxuriously soft and glossy.
This secret lies in a precise melting technique combined with the right amount of heavy cream, ensuring a chocolate center that melts in your mouth, not shatters.
A Perfect Harmony of Texture and Taste
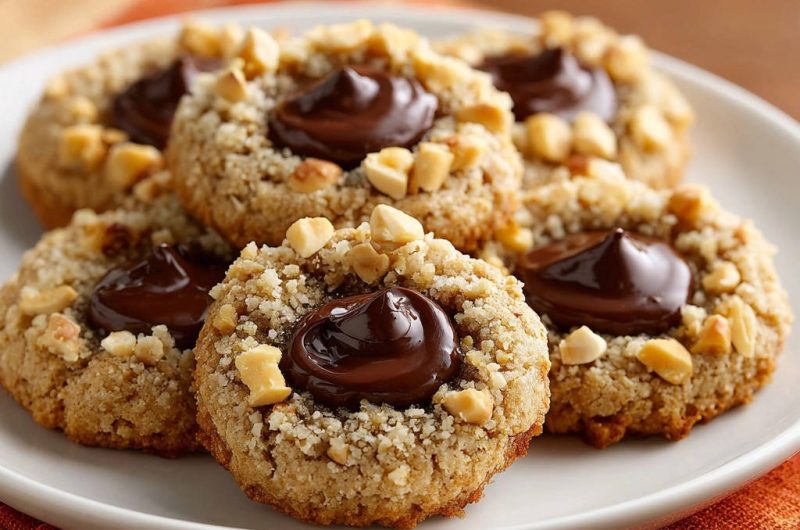
Every bite of these cookies offers a delightful interplay of textures and flavors. You get the tender, buttery crumb of the cookie, the satisfying crunch of toasted nuts, and the smooth, rich burst of soft chocolate.
It’s a symphony of sweet, nutty, and chocolatey notes that truly satisfies. The balance is simply irresistible.
Surprisingly Simple: Impress Without the Stress
Despite their sophisticated appearance and gourmet taste, these chocolate nut thumbprint cookies are remarkably straightforward to make. The steps are easy to follow, and the techniques are simple enough for any home baker.
You can create a show-stopping dessert without any complicated processes, making them perfect for busy holidays or spontaneous cravings.
Gathering Your Baking Essentials: Tools for Success
Must-Have Kitchen Basics
Before you begin, ensure you have your standard baking toolkit ready. You’ll need a large mixing bowl for the dough, as well as a separate medium bowl for dry ingredients and a small one for the egg white.
Essential measuring cups and spoons are a given for accuracy, along with a sturdy whisk for combining dry ingredients, and an electric mixer for creaming butter and sugar.
Specialized Helpers for Thumbprint Perfection
For these particular cookies, a few specific tools will make the process much smoother. Parchment paper is crucial for lining baking sheets, preventing sticking and ensuring easy cleanup.
A wire rack is indispensable for cooling the baked cookies evenly. Most importantly, a 1/2 or 1 teaspoon measuring spoon, or even just your thumb, is needed to create the perfect indentation in each cookie.
The Building Blocks of Flavor: Key Ingredients Explored
Crafting the Tender Cookie Dough Base
The foundation of these delightful chocolate nut thumbprint cookies is a buttery, tender dough.
Unsalted Butter: Softened butter is key for proper creaming, creating air pockets for a light texture.
Granulated and Powdered Sugar: The combination provides sweetness and contributes to the cookie’s delicate crumb. Powdered sugar helps achieve a finer texture.
Large Egg (separated): The yolk adds richness and helps bind the dough, while the white is reserved for the nutty coating.
Vanilla Extract: A crucial flavor enhancer, vanilla brings warmth and depth to the cookie base.
All-Purpose Flour & Salt: These provide structure and balance the sweetness. Salt enhances all the other flavors.
The Irresistible Nutty Coating
The outer layer provides a fantastic textural contrast and nutty flavor.
Egg White: Lightly beaten, it acts as a perfect adhesive, ensuring the nuts stick beautifully to the cookie dough.
Finely Chopped Peanuts or Hazelnuts: These nuts contribute a lovely crunch and a rich, toasted flavor. Finely chopping ensures an even coating and prevents the nuts from overpowering the cookie.
The Secret to a Luscious Chocolate Center
This is where the magic happens, ensuring a consistently soft and delightful filling.
Semi-Sweet Chocolate Chips: A versatile choice, semi-sweet chips offer the classic chocolate flavor without being overly bitter or sweet.
Heavy Cream: This is the game-changer! Cream prevents the chocolate from seizing and hardening, keeping it wonderfully smooth and pliable even after cooling. It provides that luxurious, soft texture we’re aiming for.
Your Step-by-Step Path to Perfect Chocolate Nut Thumbprint Cookies
Mixing the Dough: Creaming to Perfection
In a large bowl, combine your softened unsalted butter with both granulated and powdered sugars. Use an electric mixer to beat them together until the mixture becomes light and fluffy.
This creaming process incorporates air, which is essential for a tender cookie texture. It should take about 2-3 minutes until visibly lighter and well combined.
Incorporating Wet and Dry: The Gentle Touch
Next, beat in the egg yolk and vanilla extract until they are fully incorporated into the butter mixture. Be sure to reserve the egg white in a small bowl for later.
In a separate bowl, whisk together the flour and salt. Gradually add these dry ingredients to your wet mixture, mixing just until a soft dough forms. It’s crucial not to overmix, as this can develop the gluten too much, leading to tough cookies.
The Crucial Chill: Why Dough Needs a Break
Cover your soft dough and refrigerate it for at least 30 minutes. This chilling step is vital for several reasons.
It firms up the dough, making it much easier to handle and shape into balls without sticking. It also helps prevent the cookies from spreading excessively during baking, maintaining their defined shape.
Preparing for Bake: Oven & Baking Sheets
While the dough chills, preheat your oven to 350 degrees Fahrenheit (175 degrees Celsius). Line your baking sheets with parchment paper.
Parchment paper ensures even baking and easy removal, plus it makes cleanup a breeze.
Coating Magic: Egg White & Nut Adherence
Pour your finely chopped peanuts or hazelnuts into a shallow dish, ready for coating. Lightly beat the reserved egg white with a fork until just frothy.
Roll the chilled dough into 1-inch balls. Dip each dough ball first into the beaten egg white, allowing excess to drip off, then roll it evenly in the chopped nuts, pressing gently to ensure a good coating. This double-dip method guarantees ample nut coverage.
First Bake & Indentation: Shaping the Cookie
Place the coated dough balls about 2 inches apart on your prepared baking sheets. Bake them for precisely 6 minutes.
After this initial bake, remove the sheets from the oven. Immediately use the back of a 1/2 or 1 teaspoon measuring spoon, or your thumb, to gently make an indentation in the center of each cookie. Work quickly and be gentle to avoid cracking the edges of the partially baked cookie.
Second Bake: Achieving Golden Edges
Return the cookies to the oven and continue baking for another 6 to 8 minutes. Keep a close eye on them during this second bake.
They are done when the edges are lightly golden brown, indicating they are perfectly baked and tender.
Creating the Soft Chocolate Filling: A Game-Changer Method
While your cookies cool slightly on the baking sheets, prepare the star of the show: the soft chocolate filling. In a microwave-safe bowl, combine the semi-sweet chocolate chips and heavy cream.
Microwave on high for 30 seconds, then stir well. Continue microwaving in short 15-second intervals, stirring thoroughly after each, until the chocolate is completely melted and beautifully smooth. This gentle, incremental melting process, combined with the cream, is the crucial step that prevents the chocolate from seizing or hardening, ensuring it stays wonderfully soft and glossy.
For another delicious chocolate dessert, try our Easy Chocolate Lava Cake.
Filling and Setting: The Grand Finale
Once the cookies have cooled completely on a wire rack, spoon or carefully pipe the warm, smooth chocolate filling into the indentations of each cookie. Don’t overfill, but ensure each gets a generous dollop.
Allow the chocolate to set at room temperature. It will firm up enough to handle, but thanks to our special method, the center will remain delightfully soft and luscious, ready to be enjoyed.
Mastering Your Bake: Expert Tips for Next-Level Cookies
The Perfect Indentation: Tools and Technique
For consistent indentations, a rounded measuring spoon (like a 1/2 or 1 teaspoon) works beautifully. Press down gently but firmly after the initial bake while the cookies are still warm and pliable.
If you prefer using your thumb, ensure it’s clean and apply even pressure. This timing and technique prevent cracking.
Chilling Dough: Don’t Skip This Step!
Resist the urge to skip or shorten the chilling time for the dough. This step isn’t just about ease of handling; it’s fundamental to the cookie’s final texture and shape.
Chilled dough spreads less in the oven, ensuring your thumbprint cookies hold their form perfectly and remain tender.
Flavor Twists: Customizing Your Cookies
Feel free to experiment with the nutty coating. Instead of peanuts or hazelnuts, try finely chopped pecans or walnuts for a different flavor profile. For an extra touch, toast the nuts lightly before chopping to deepen their flavor.
You can also infuse the cookie dough with a pinch of cinnamon or nutmeg for a warmer spice note, or use a blend of dark and milk chocolate for the filling.
Optimal Storage for Freshness
To keep your chocolate nut thumbprint cookies at their peak, store them in an airtight container at room temperature for up to 3-4 days. For longer freshness, you can also store them in the refrigerator.
Ensure the chocolate has fully set before stacking them to prevent sticking. If you’re looking for another delightful nutty treat that stores well, consider our Chewy Chocolate Caramel Nut Bark.
Troubleshooting Common Thumbprint Cookie Challenges
My Cookies Are Spreading Too Much!
Excessive spreading is often due to dough that’s too warm or butter that’s too soft. Ensure your butter is softened but not melted. Always chill the dough for the recommended time to firm it up before shaping.
An oven that isn’t fully preheated can also contribute; always let your oven come to temperature fully before baking.
The Chocolate Filling Hardened After Cooling!
This is a common issue with many thumbprint cookie recipes, but our method is designed to prevent it. If it happens with another recipe, it’s usually due to overheating the chocolate or not adding enough cream.
The heavy cream is essential here; it provides fat and moisture, preventing the chocolate from becoming brittle when it cools. Always melt chocolate gently and with patience, stirring frequently.
My Cookie Edges Are Cracking When I Indent!
Cracking usually occurs if the cookies are too cool or baked too long before indenting, making them brittle. Make your indentations immediately after the initial 6-minute bake while the cookies are still warm and pliable.
Apply gentle, even pressure with your chosen tool or thumb. If the dough seems a little crumbly, ensure your butter was softened properly for the initial creaming.
The Dough Is Too Sticky/Crumbly!
If your dough is too sticky, it might need a bit more flour, added gradually, or more chilling time. If it’s too crumbly, your butter might not have been soft enough, or you might need a tiny splash of milk (1/2 teaspoon at a time) to bring it together.
Remember, a soft dough is desired, but it should still be manageable and not overly sticky.
Frequently Asked Questions About Chocolate Nut Thumbprint Cookies
Can I Use Different Kinds of Nuts?
Absolutely! While peanuts and hazelnuts are classic choices for these chocolate nut thumbprint cookies, feel free to experiment. Almonds, pecans, or walnuts, finely chopped, would all make delicious substitutions.
For a unique twist, you could even try shredded coconut for a tropical flair, just be sure to toast it lightly first.
How Long Do These Cookies Stay Fresh?
These cookies are best enjoyed within 3-4 days when stored in an airtight container at room temperature. The soft chocolate filling will maintain its texture beautifully for this period.
For slightly longer storage, you can refrigerate them, which might extend their freshness up to a week.
Can I Prepare the Dough Ahead of Time?
Yes, the cookie dough is excellent for make-ahead convenience! You can prepare the dough and refrigerate it for up to 2-3 days before baking. This makes holiday baking or entertaining much easier.
Just allow the dough to sit at room temperature for about 10-15 minutes before rolling if it’s become very firm.
Is There a Gluten-Free Option for This Recipe?
While this recipe uses all-purpose flour, you can often substitute a 1:1 gluten-free baking flour blend. Look for blends that contain xanthan gum, which helps with structure.
Results may vary slightly in texture, but many bakers have success with this substitution. For general baking tips, our article on Perfect Sugar Cookies offers insights into dough consistency.
Can I Freeze Chocolate Nut Thumbprint Cookies?
Yes, both the unbaked dough and baked cookies freeze well. To freeze the dough, form balls, coat with nuts, and arrange on a baking sheet to freeze solid, then transfer to an airtight freezer bag for up to 3 months.
To freeze baked cookies, ensure the chocolate filling is completely set, then arrange in a single layer in an airtight container, separating layers with parchment paper. They can be frozen for up to 1 month. Thaw at room temperature before serving.
Your Cookie Journey Continues: Share & Enjoy!
Serving Suggestions for Every Occasion
These Chocolate Nut Thumbprint Cookies are versatile delights, perfect for any occasion. Serve them as an elegant addition to a dessert platter at your next gathering, or simply enjoy them with a cup of coffee or tea for a comforting treat.
They also make wonderful homemade gifts, beautifully packaged for friends, family, or neighbors. Their rich flavor and appealing look are always a hit.
Join Our Community: Share Your Baking Triumphs!
I’d love to see your beautiful Chocolate Nut Thumbprint Cookies! Share your creations on social media and tag us. Let me know if you tried any delicious flavor variations or unique decorating ideas.
Happy baking, and enjoy these remarkably soft-centered beauties!
Chocolate Nut Thumbprint Cookies
Course: DessertCuisine: American CuisineDifficulty: easy24
cookies25
minutes12
minutes37
minutesAmerican Cuisine
Ingredients
1 cup unsalted butter, softened
1/2 cup granulated sugar
1/4 cup powdered sugar
1 large egg, separated
1 teaspoon vanilla extract
1 3/4 cups all purpose flour
1/4 teaspoon salt
1 cup finely chopped peanuts or hazelnuts
1 cup semi sweet chocolate chips
2 tablespoons heavy cream
Directions
- In a large bowl, cream together the softened butter, granulated sugar, and powdered sugar until light and fluffy.
- Beat in the egg yolk and vanilla extract until well combined. Reserve the egg white in a small bowl.
- In a separate bowl, whisk together the flour and salt. Gradually add the dry ingredients to the wet ingredients, mixing until just combined and a soft dough forms. Do not overmix.
- Cover the dough and refrigerate for 30 minutes. This chilling step helps the dough firm up, making it easier to handle and preventing excessive spreading during baking.
- Preheat your oven to 350 degrees Fahrenheit. Line baking sheets with parchment paper.
- Place the chopped nuts in a shallow dish. Lightly beat the reserved egg white with a fork.
- Roll the chilled dough into 1-inch balls. Dip each dough ball first into the beaten egg white, then roll it in the chopped nuts, pressing gently to coat evenly.
- Place the coated dough balls about 2 inches apart on the prepared baking sheets.
- Bake for 6 minutes. Remove the baking sheets from the oven. Using the back of a measuring spoon (like a 1/2 teaspoon or 1 teaspoon) or your thumb, gently make an indentation in the center of each cookie. Be gentle to avoid cracking the edges.
- Return the cookies to the oven and bake for another 6 to 8 minutes, or until the edges are lightly golden.
- While the cookies cool on the baking sheets for a few minutes, prepare the chocolate filling. In a microwave safe bowl, combine the chocolate chips and heavy cream. Microwave on high for 30 seconds, then stir. Continue microwaving in 15 second intervals, stirring well after each, until the chocolate is completely melted and smooth. This gentle melting process, combined with the cream, ensures the chocolate stays wonderfully soft and glossy, never seizing or hardening into a brittle texture.
- Once the cookies have cooled completely on a wire rack, spoon or pipe the warm, soft chocolate filling into the indentations of each cookie. Let the chocolate set at room temperature until firm enough to handle, but still delightfully soft inside.
Notes
- Ensure cookies are fully cooled before adding chocolate filling. The special technique keeps chocolate centers wonderfully soft.