Ever struggled to achieve perfectly neat slices from a rich, layered bar dessert? I’ve been there – the frustration of a beautiful creation crumbling at the last minute is real! But through countless experiments, I discovered the simple yet critical techniques that guarantee stunning, picture-perfect portions of this incredible Peanut Butter Chocolate Decadence every single time.
Unlock the Magic: Why This Peanut Butter Chocolate Decadence Shines
This isn’t just another dessert recipe. It’s a carefully crafted guide designed to eliminate common baking frustrations, ensuring your chocolate peanut butter bars are not only incredibly delicious but also beautifully presented.
The Clean Slice Promise: Picture-Perfect Portions Every Time
The core of this recipe lies in its emphasis on proper chilling and the “hot knife” technique. These steps transform what can be a crumbly mess into impeccably sharp, clean slices, ready to impress.
Layers of Bliss: A Symphony of Peanut Butter and Chocolate
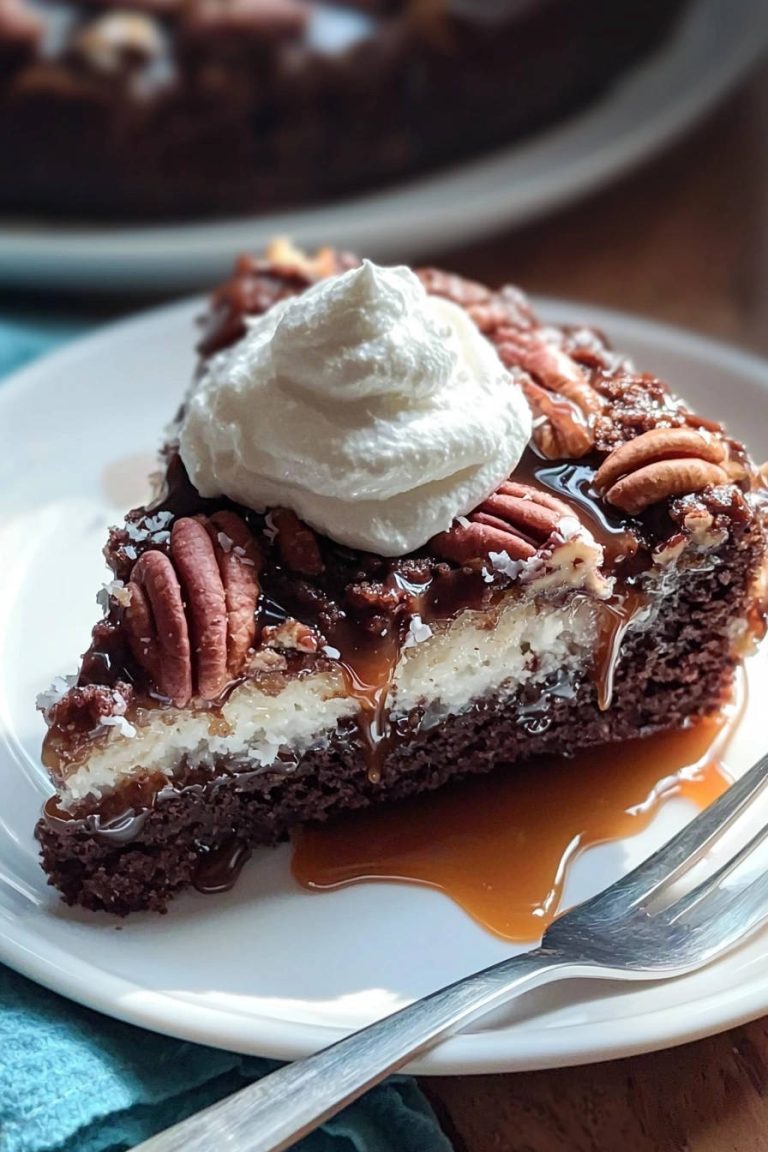
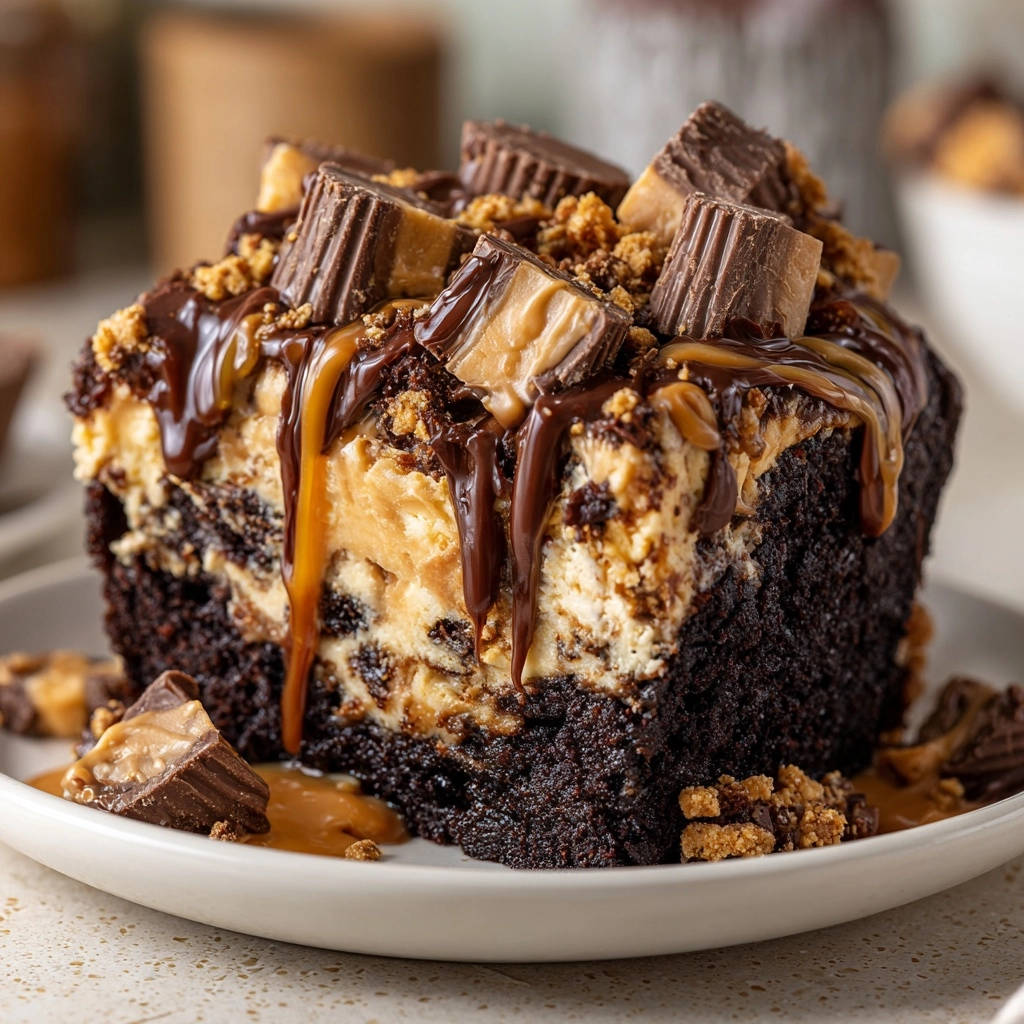
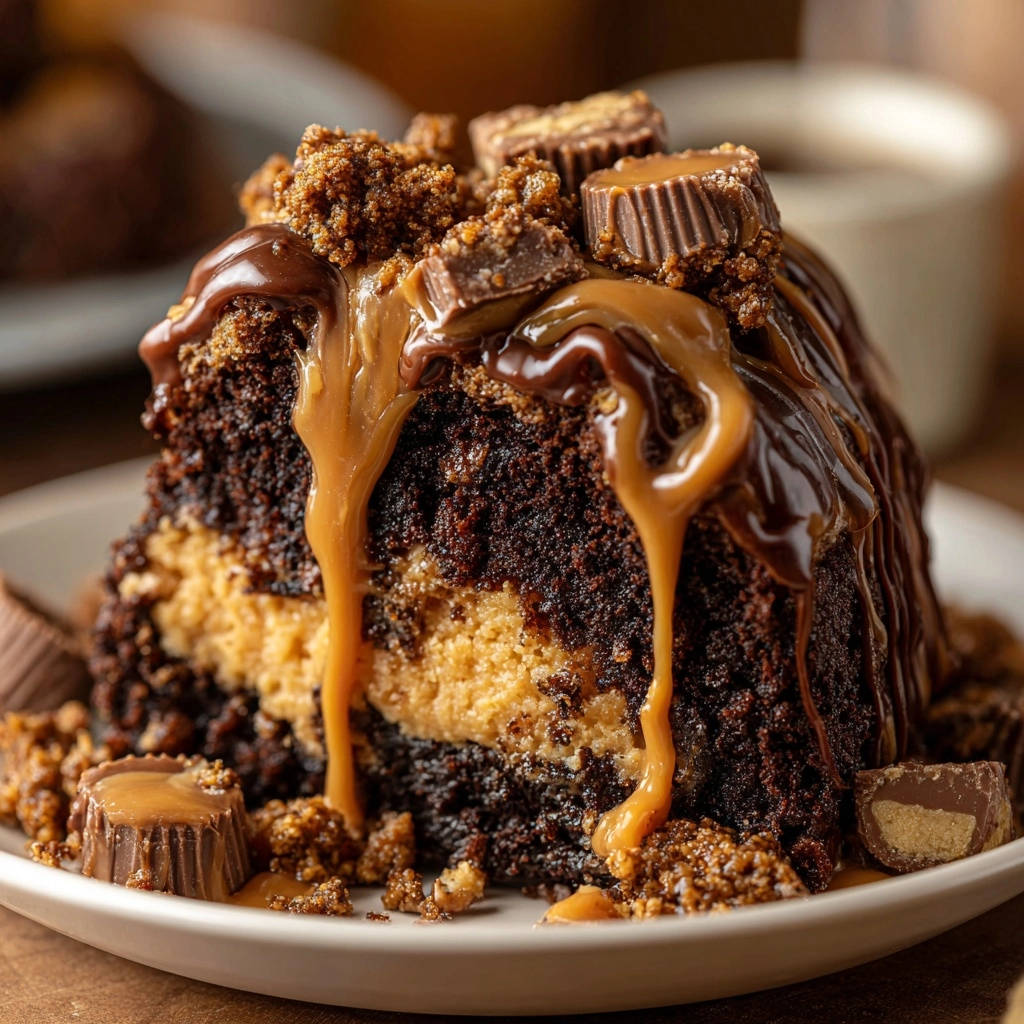
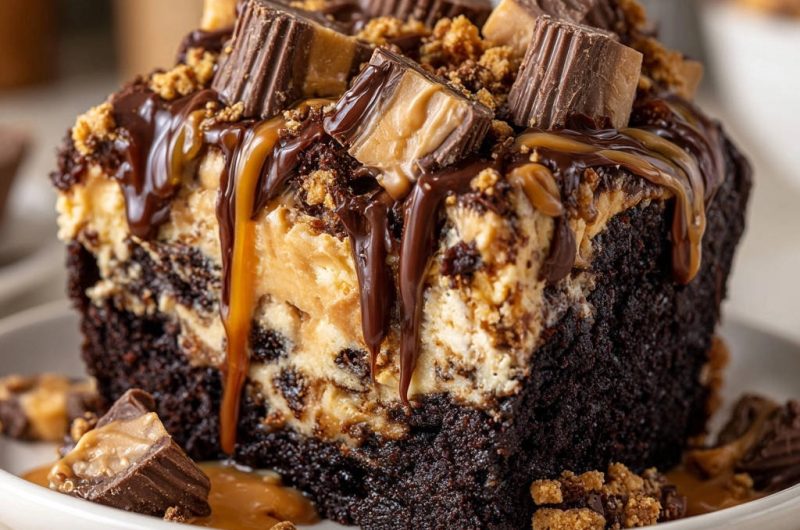
Experience the perfect harmony of textures and flavors. A rich, fudgy brownie base supports a light, creamy peanut butter swirl, all crowned with luscious chocolate and caramel, plus delightful mini peanut butter cups for extra texture.
Beginner-Friendly with Expert Results
Despite its impressive appearance, this recipe is surprisingly straightforward. Clear, detailed instructions and expert tips ensure that even novice bakers can achieve a truly decadent treat that tastes like it came from a professional bakery.
Gather Your Goodies: Crafting Layers of Peanut Butter Chocolate Decadence
Quality ingredients are the foundation of any exceptional dessert. Here’s what you’ll need to create these irresistible layered dessert bars.
For the Fudgy Foundation: The Chocolate Brownie Layer
Unsalted Butter: Melting the butter creates a dense, fudgy brownie, far from cakey.
Granulated Sugar & Large Eggs: These combine to give the brownie its signature moist texture and rich sweetness.
Vanilla Extract: Enhances the chocolate flavor and adds aromatic depth to the brownie.
All-Purpose Flour: Provides structure without making the brownie tough.
Unsweetened Cocoa Powder: Choose a good quality cocoa for deep, intense chocolate flavor.
Baking Powder & Salt: These balance the richness and provide a slight lift to the brownie.
The Creamy Core: Crafting the Peanut Butter Swirl
Cream Cheese, Softened: Essential for the creamy, tangy foundation of the swirl. Ensure it’s truly at room temperature for a smooth mixture.
Creamy Peanut Butter: The star of this layer, providing the classic flavor. Avoid natural peanut butter as its oil separation can affect consistency.
Powdered Sugar: Sweetens the swirl while keeping it light and smooth, preventing graininess.
Milk or Cream: Adjusts the consistency of the swirl, ensuring it’s spreadable but still holds its shape.
Vanilla Extract: A crucial enhancer for the rich peanut butter flavor.
Crushed Chocolate Sandwich Cookies (Optional): Adds a delightful crunch and extra chocolatey depth to the creamy swirl.
The Finishing Flourish: Decadent Toppings
Semi-Sweet Chocolate Chips: For a smooth, glossy chocolate drizzle. Use high-quality chips for the best flavor.
Unsalted Butter or Vegetable Oil: Helps create a pourable, shiny chocolate glaze that sets beautifully.
Caramel Sauce: Adds another layer of sweet, sticky decadence. Homemade or good quality store-bought works well.
Mini Peanut Butter Cups: A delightful visual and textural garnish, reinforcing the primary flavor profile of these irresistible treats.
Extra Crushed Crumbs: Perfect for a final decorative touch and a hint of crunch.
Essential Tools for Peanut Butter Chocolate Decadence Success
Having the right tools makes the baking process smoother and ensures the best outcome for your chocolate peanut butter decadence.
Your Go-To Baking Pan: The 9×13 Inch Workhorse
A standard 9×13 inch baking pan is ideal for this recipe, yielding perfectly sized bars. Lining it generously with parchment paper is critical for lifting the entire chilled slab out of the pan effortlessly, preventing breakage and mess.
Mixing Bowls and Whisks: Effortless Blending
You’ll need separate bowls for your wet and dry brownie ingredients, as well as a dedicated bowl for the peanut butter swirl. A sturdy whisk and an electric mixer (handheld or stand) will ensure all components are perfectly smooth and combined.
The Slicing Secret Weapon: A Sharp Knife
A large, sharp chef’s knife is indispensable for achieving clean, precise cuts. A dull knife will drag through the layers, causing them to crumble or smear. This is where the hot knife trick truly shines!
Your Step-by-Step Guide to Peanut Butter Chocolate Decadence Perfection
- Prepare Your Pan and Oven:
Preheat your oven to 350°F (175°C) to ensure it’s at the correct temperature from the start, promoting an even bake. Lining a 9×13 inch pan with parchment paper, leaving a generous overhang, is crucial. This overhang acts as “handles” for easy removal of the chilled bars later, preventing any sticking or tearing.
- Mastering the Brownie Batter:
In a large bowl, whisk melted butter and sugar until well combined, then incorporate eggs one at a time, followed by vanilla. In a separate bowl, whisk together flour, cocoa, baking powder, and salt. Gradually add the dry mixture to the wet, mixing just until combined. Avoid overmixing; this is key to a tender, fudgy brownie. Spread the batter evenly into your prepared pan.
- Crafting the Fluffy Peanut Butter Swirl:
In a clean bowl, beat the softened cream cheese with an electric mixer until it’s completely smooth and light. This prevents any lumps. Add the creamy peanut butter, powdered sugar, milk (or cream), and vanilla extract, beating until the mixture is light and fluffy. If using, gently fold in the crushed chocolate sandwich cookies for added texture and flavor without deflating the mixture.
- The Art of Assembly: Swirling for Visual Appeal:
Drop spoonfuls of the fluffy peanut butter mixture strategically over the brownie batter in the pan. Using a butter knife or skewer, gently swirl the peanut butter through the brownie. Be careful not to fully incorporate the layers; the goal is distinct, eye-catching swirls.
- Baking to Perfection: Don’t Overbake!
Bake for 35-40 minutes. The brownie layer is done when a toothpick inserted into its center comes out with moist crumbs, not wet batter. The peanut butter layer may still appear slightly soft, but it will firm up considerably as the bars cool and chill.
- The Chilling Imperative: Your Secret to Clean Slices:
Once baked, remove the pan from the oven and let it cool completely on a wire rack at room temperature. This initial cooling helps stabilize the layers. Then, transfer the pan to the refrigerator and chill for at least 2-3 hours, or preferably 4 hours to overnight. This thorough chilling is absolutely essential for achieving those clean, professional-looking slices without crumbling or smearing.
- Prepare Your Decadent Toppings:
Once the bars are thoroughly chilled and firm, prepare the chocolate drizzle. Combine chocolate chips and butter (or oil) in a microwave-safe bowl. Microwave in 30-second intervals, stirring well after each, until the mixture is completely smooth and melted. Warm your caramel sauce slightly if it’s too thick for drizzling.
- The Hot Knife Trick: For Ultimate Precision Slicing:
Using the parchment paper overhang, carefully lift the chilled slab of Peanut Butter Chocolate Decadence out of the pan and place it on a cutting board. For perfectly clean slices, use a large, sharp knife. Dip the knife in very hot water, wipe it completely dry, and then make your cut. Repeat this hot water and wipe technique before every single cut. This warmth helps the blade glide effortlessly through the firm layers, preventing sticking and ensuring pristine edges.
- Decorate and Delight:
Generously drizzle the melted chocolate and caramel sauce over the freshly sliced bars. Finish by scattering halved or quartered mini peanut butter cups and extra crushed chocolate crumbs over the top for an ultimate visual and textural appeal. Serve immediately, or store in an airtight container in the refrigerator.
Chef’s Secrets: Elevating Your Peanut Butter Chocolate Decadence
Unlock even more perfection with these expert tips, transforming a great recipe into an extraordinary one.
Optimize Your Parchment Paper Overhang: Ensure you leave enough overhang on all sides of the pan. This provides crucial “handles” for effortlessly lifting the entire block of bars out of the pan once chilled, preventing any breakage and making cleanup a breeze.
The Cream Cheese Temperature Matters: For the peanut butter swirl, ensure your cream cheese is truly softened to room temperature. This prevents lumps and ensures a smooth, airy texture when beaten with the other ingredients, leading to a perfectly creamy swirl.
Don’t Overmix the Brownie Batter: Once you add the dry ingredients to the wet, mix just until combined. Overmixing develops gluten, which can lead to a tougher, less fudgy brownie texture. A few streaks of flour are better than an overmixed batter.
Chill Time is Non-Negotiable: We cannot stress this enough. Rushing the chilling process (minimum 2-3 hours, preferably 4+ or overnight) is the primary reason for messy slices. Allow ample time for the layers to firm up completely; patience here pays off in presentation.
The Hot Knife: Your Best Friend for Slicing: Dipping your sharp knife in hot water and wiping it dry before each cut truly makes a difference. The warmth helps the blade glide through the firm layers without dragging or sticking, resulting in perfectly clean, professional-looking edges every time you slice these decadent treats.
Troubleshooting Your Decadent Bars: Common Challenges & Solutions
Even expert bakers encounter hiccups. Here are solutions to common issues when making these glorious chocolate peanut butter bars.
Problem: My Bars Are Crumbly and Hard to Slice Neatly.
Solution: The most common culprit is insufficient chilling time. Ensure the bars are thoroughly chilled for at least 3-4 hours, or even overnight, before attempting to slice. Also, make sure your knife is sharp and try the hot water trick before each cut. A very cold, firm bar coupled with a hot, clean knife is the ultimate combination for success.
Problem: The Brownie Layer Seems Dry or Cakey.
Solution: This usually indicates overbaking. Keep a close eye on the bake time and look for moist crumbs on a toothpick, not wet batter. Oven temperatures can vary, so adjust accordingly, potentially using an oven thermometer. Overmixing the brownie batter can also contribute to a tougher, less fudgy texture, so mix until just combined.
Problem: My Peanut Butter Swirl Isn’t Smooth and Fluffy.
Solution: Ensure your cream cheese is fully softened to room temperature before beating. If it’s too cold, it will remain lumpy and won’t incorporate smoothly. Also, make sure you beat the cream cheese thoroughly on its own before adding the other ingredients to achieve that desired airy texture.
Beyond the Recipe: Creative Variations and Customizations
This Peanut Butter Chocolate Decadence recipe is wonderfully adaptable. Feel free to experiment and make it your own!
Gluten-Free Peanut Butter Chocolate Decadence
For a gluten-free version, simply substitute the all-purpose flour in the brownie layer with a 1:1 gluten-free baking flour blend that contains xanthan gum. Ensure your chocolate sandwich cookies (if using) are also gluten-free.
Nut-Free Alternatives for Swirl and Toppings
If you need a nut-free option, replace the peanut butter with a sunflower seed butter (like SunButter) in the swirl layer. For toppings, skip the mini peanut butter cups and opt for extra chocolate chips, chopped pretzels, or a different candy.
Explore New Topping Combinations
Get creative with your final flourishes! Consider a sprinkle of sea salt flakes for a salty-sweet contrast, chopped roasted peanuts for extra crunch, or even a different type of melted chocolate (white or milk) for a varied drizzle. To add another layer of flavor, consider making some gooey chocolate clusters as an additional topping.
Vegan-Friendly Adaptations
Creating a fully vegan version of these bars is possible but requires a few specific substitutions. Use plant-based butter, egg replacers for the brownie, and a vegan cream cheese alternative and plant-based milk for the swirl. Ensure all chocolates and toppings are dairy-free. For a truly decadent vegan dessert, you might also enjoy our easy vegan chocolate lava cake.
Preserving Perfection: Storage and Serving Suggestions
Keep your Peanut Butter Chocolate Decadence fresh and ready for enjoyment with these storage and serving tips.
Storing Your Decadent Bars for Freshness
Due to the cream cheese in the peanut butter swirl, these bars must be stored in the refrigerator. Place them in an airtight container to prevent them from drying out or absorbing other odors. They will remain fresh and delicious for up to 5-7 days.
Make-Ahead Magic: Freezing for Future Indulgence
These bars freeze beautifully, making them perfect for meal prep or unexpected guests. Wrap individual slices tightly in plastic wrap, then place them in an airtight freezer-safe container. They can be stored in the freezer for up to 2-3 months. Thaw frozen bars in the refrigerator overnight, or at room temperature for about 30 minutes before serving.
Serving Ideas to Impress Any Crowd
Serve these bars as a standalone dessert, perhaps with a dusting of cocoa powder or a dollop of whipped cream. They also make a fantastic addition to a dessert platter. For an extra special treat, warm them slightly and serve with a scoop of vanilla ice cream, letting the chocolate and caramel become delightfully gooey.
Your Peanut Butter Chocolate Decadence Questions Answered
Can I use natural peanut butter for the swirl layer?
While natural peanut butter can be used, its thinner consistency and tendency to separate oil might alter the texture of the swirl, making it slightly less firm and potentially challenging for clean slices. For the best, most consistent results, creamy, processed peanut butter is highly recommended for this particular recipe.
How long do these Peanut Butter Chocolate Decadence bars last?
When stored properly in an airtight container in the refrigerator, these chocolate peanut butter bars will stay fresh, fudgy, and delicious for up to 5-7 days. For optimal taste and texture, consume them within this timeframe.
Can I freeze Peanut Butter Chocolate Decadence?
Yes, absolutely! These bars freeze beautifully. To freeze, wrap individual slices tightly in plastic wrap, then place them in an airtight, freezer-safe container. They will keep well for up to 2-3 months. To enjoy, simply thaw them in the refrigerator overnight or at room temperature for about 30 minutes before serving.
What if I don’t have parchment paper?
While parchment paper is strongly recommended for effortless removal and guaranteed clean slicing, you can still make these bars without it. As an alternative, thoroughly grease and flour your baking pan. However, be aware that removing the bars might be more challenging, and there’s a higher risk of them sticking or breaking compared to using parchment paper.
Ready to Create Your Own Peanut Butter Chocolate Decadence Masterpiece?
Now that you’re armed with the secrets to perfectly neat and utterly delicious Peanut Butter Chocolate Decadence bars, it’s time to get baking! Don’t be intimidated by the chilling time-it’s truly the key to a stress-free dessert experience and a spectacular outcome.
We encourage you to share your creations and experiences in the comments below. We love hearing about your baking adventures and seeing your beautiful peanut butter chocolate masterpieces!
Looking for more show-stopping dessert recipes? Explore our collection of decadent dessert ideas to inspire your next culinary project, or try our fan-favorite Chocolate Peanut Butter Cookie Cake for another irresistible combination.
Peanut Butter Chocolate Decadence
Course: DessertCuisine: American CuisineDifficulty: easy12
servings30
minutes35
minutes180
minutesAmerican Cuisine
Ingredients
For the Chocolate Brownie Layer:
1 cup unsalted butter, melted
2 cups granulated sugar
4 large eggs
1 teaspoon vanilla extract
1 cup all-purpose flour
3/4 cup unsweetened cocoa powder
1/2 teaspoon baking powder
1/4 teaspoon salt
For the Peanut Butter Swirl Layer:
8 ounces cream cheese, softened
1 cup creamy peanut butter
1/2 cup powdered sugar
1/4 cup milk or cream
1 teaspoon vanilla extract
1 cup crushed chocolate sandwich cookies or similar chocolate crumbs (optional, for texture)
For the Topping:
1/2 cup semi-sweet chocolate chips or chopped chocolate
2 tablespoons unsalted butter or 1 tablespoon vegetable oil (for chocolate drizzle)
1/2 cup caramel sauce
12-15 mini peanut butter cups, halved or quartered
1/4 cup extra crushed chocolate crumbs or peanut butter cup crumbs
Directions
- Preheat your oven to 350°F (175°C). Line a 9×13 inch baking pan with parchment paper, leaving an overhang on the sides for easy removal later. This is crucial for effortlessly lifting the bars out later.
- Prepare the Brownie Layer: In a large bowl, whisk together the melted butter and granulated sugar until well combined. Stir in the eggs one at a time, then add the vanilla extract. In a separate bowl, whisk together the flour, cocoa powder, baking powder, and salt. Gradually add the dry ingredients to the wet ingredients, mixing until just combined. Do not overmix. Spread the brownie batter evenly into the prepared baking pan.
- Prepare the Peanut Butter Swirl Layer: In a clean bowl, beat the softened cream cheese until smooth. Add the creamy peanut butter, powdered sugar, milk or cream, and vanilla extract. Beat until light and fluffy. If using, gently fold in the crushed chocolate sandwich cookies or crumbs.
- Assemble the Bars: Drop spoonfuls of the peanut butter mixture over the brownie batter in the pan. Use a butter knife or skewer to gently swirl the peanut butter mixture into the brownie batter. Be careful not to overmix, you want distinct swirls.
- Bake: Bake for 35-40 minutes, or until a toothpick inserted into the center of the brownie portion comes out with moist crumbs, not wet batter. The peanut butter layer may still look a little soft.
- Cool and Chill Completely (The Secret to Clean Slices!): Remove the pan from the oven and let it cool completely on a wire rack at room temperature. Once cooled, transfer the pan to the refrigerator and chill for at least 2-3 hours, or preferably 4 hours to overnight, until the bars are very firm. This step is essential for achieving clean, neat slices.
- Prepare Toppings: Once the bars are thoroughly chilled, prepare your chocolate drizzle. In a microwave-safe bowl, combine chocolate chips and butter (or oil). Microwave in 30-second intervals, stirring in between, until smooth and melted.
- Slice and Serve: Using the parchment paper overhang, carefully lift the chilled bars out of the pan and place them on a cutting board. For perfectly clean slices, use a large, sharp knife. Dip the knife in hot water and wipe it clean and dry before each cut. This warmth helps the blade glide through the chilled, dense layers without sticking or dragging. Cut into squares or rectangles.
- Decorate: Drizzle the melted chocolate and caramel sauce over the sliced bars. Top with halved or quartered mini peanut butter cups and extra crushed crumbs. Serve immediately or store in an airtight container in the refrigerator.
Notes
- Chilling for 2-4 hours or overnight is crucial for clean, neat slices. Use a hot, clean knife for perfect cuts.