I used to dread melting cheese on chicken-it always ended up dry and tough, ruining an otherwise delicious meal. After perfecting this simple two-step moisture lock technique, I can now guarantee perfectly juicy chicken every time, making this Oven-Finished Pesto Chicken Pasta the most reliable weeknight dish you’ll ever make.
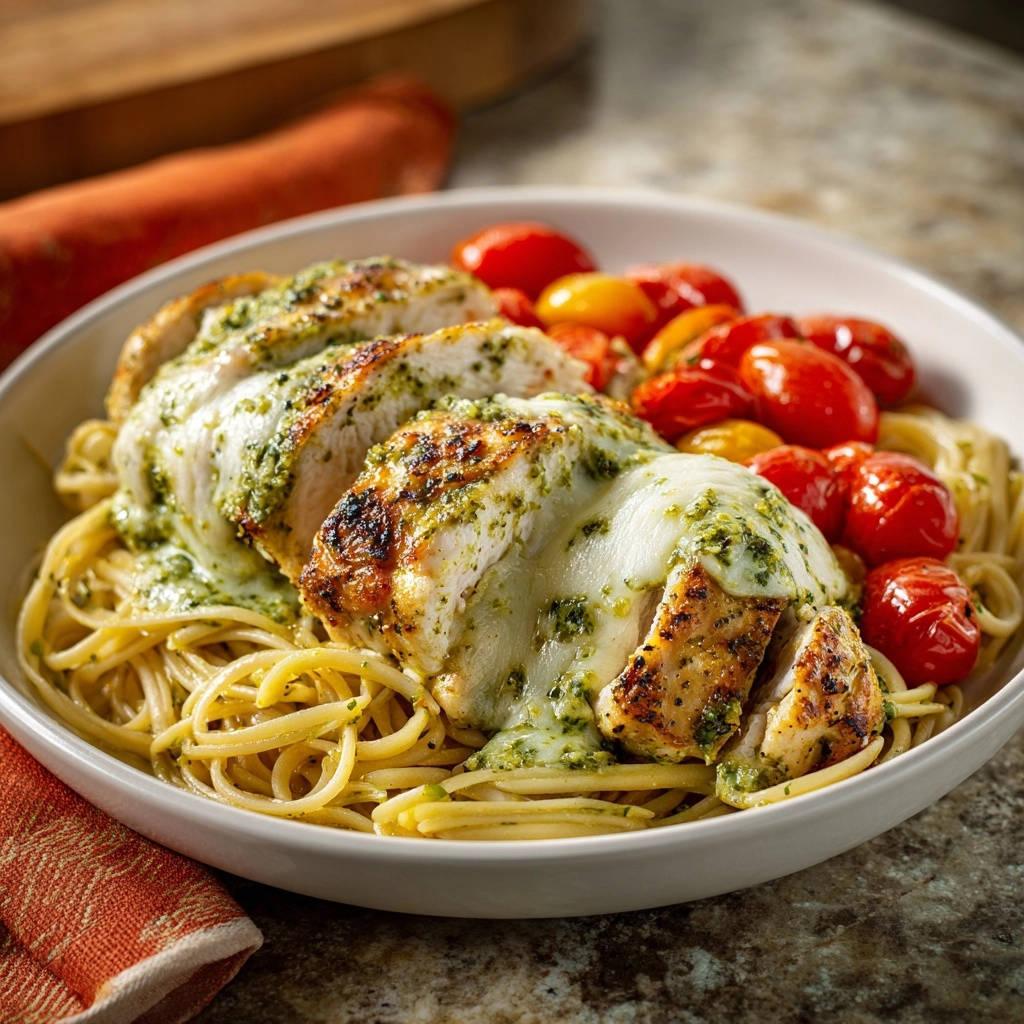
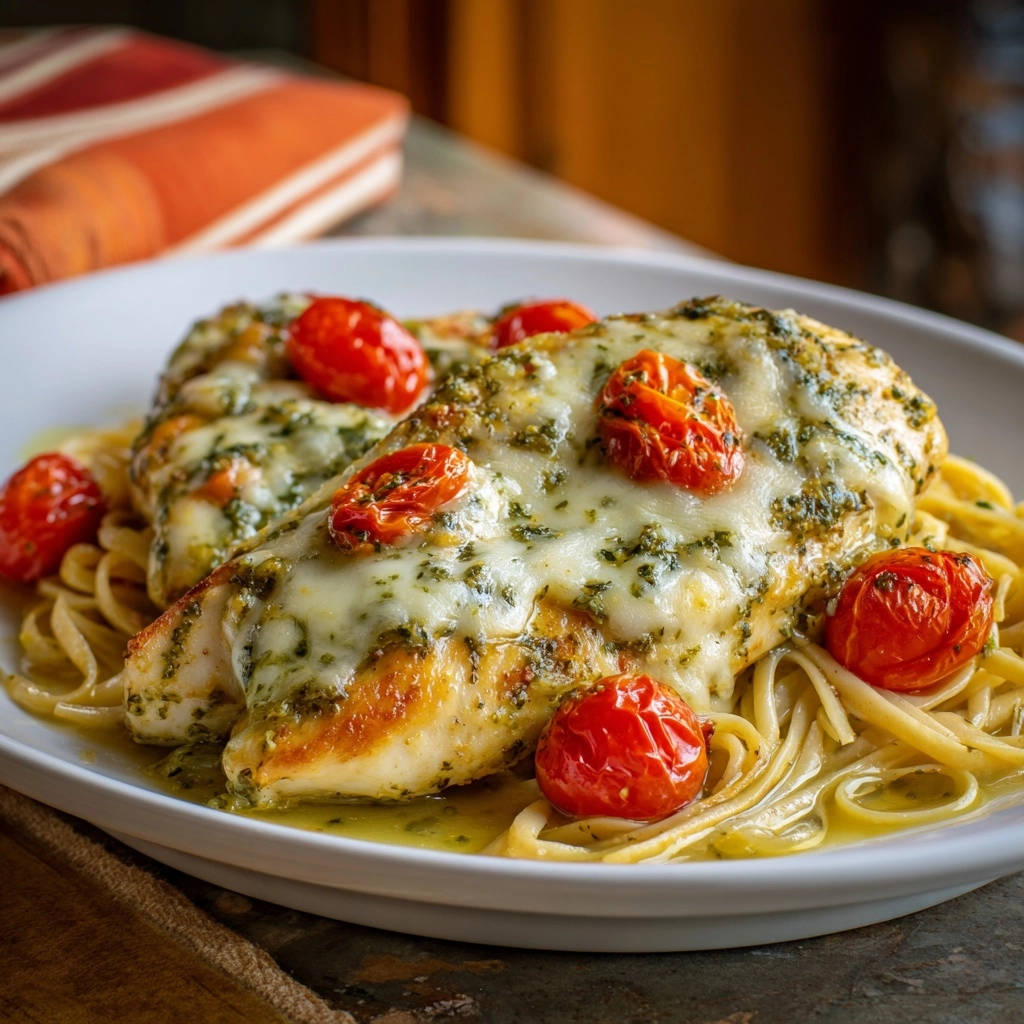
This method solves the classic dry chicken dilemma by sealing in moisture quickly before a gentle oven finish. The result is exceptionally tender chicken smothered in bubbly mozzarella, all served over perfectly coated, flavorful pesto spaghetti.
Solving the Dry Chicken Dilemma: Why This Recipe Works
The secret to keeping large chicken breasts juicy, even when topped with melting cheese, lies in temperature control and surface sealing. We are using the high heat of the stovetop to build flavor and a gentle oven finish to cook the interior without evaporating the natural moisture.
This technique turns what is often a disappointing experience into a foolproof method for achieving deeply savory, moist chicken breasts every single time.
The Two-Step Moisture Lock Technique Explained
The first step, the high-heat sear, is critical for rapid crust development. This intense, quick heat effectively seals the surface of the chicken, locking the interior moisture inside the fibers.
Once the surface is sealed, finishing the cooking process in the oven allows the internal temperature to rise slowly and evenly. This gentle, indirect heat minimizes muscle fiber contraction, which is the primary cause of dry, tough chicken.
Achieving Perfect Melted Mozzarella Without Toughness
Applying cheese and then leaving the chicken on high heat, whether on the stovetop or in the oven for too long, inevitably leads to overcooked protein underneath. The high-fat content of the cheese insulates the breast, causing the cook time to stretch past the point of tenderness.
By partially cooking the chicken first, we ensure the cheese only needs 8-12 minutes in the oven to melt completely. This rapid, hot finish achieves the bubbly mozzarella texture without subjecting the chicken to excessive, drying heat.
No More Gummy Pasta: The Starch Water Secret
Pesto, especially straight from a jar, tends to be thick and reluctant to coat pasta evenly, often resulting in clumped strands. The solution lies in the reserved pasta cooking water.
This starchy water acts as a natural emulsifier, binding the oil in the pesto sauce to create a glossy, creamy coating that perfectly clings to every strand of spaghetti. This step is essential for achieving true Oven-Finished Pesto Chicken Pasta perfection.
The Building Blocks of Flavor: Essential Ingredients Breakdown
The Star Protein: Selecting and Prepping Chicken Breasts
Always start by patting the chicken breasts extremely dry using paper towels; moisture inhibits the essential searing and crust formation.
Seasoning heavily with salt, pepper, and garlic powder before searing allows the flavors to penetrate the surface and creates a more robust outer crust.
Choosing Your Pesto: Jarred Convenience vs. Homemade Freshness
Prepared basil pesto offers fantastic weeknight convenience and still delivers great flavor; choose a high-quality brand with bright color and minimal fillers.
If you opt for fresh, homemade pesto, you will notice a richer, more vibrant flavor profile, particularly from the fresh basil and pine nuts.
Pasta Perfection: Spaghetti, Linguine, and Beyond
Spaghetti and linguine are recommended because their long, narrow shape provides an excellent surface area for the thick pesto sauce to coat and adhere.
If you prefer a short cut, sturdy pastas like penne or fusilli work well, catching the bits of roasted tomato and melted mozzarella beautifully.
The Roasted Element: Why Cherry and Grape Tomatoes are Essential
Simply tossing raw tomatoes into the dish diminishes their impact; roasting them concentrates their natural sugars and acidity.
This intensity of flavor provides a necessary counterpoint to the richness of the pesto and the melted mozzarella, balancing the entire dish.
Crucial Kitchen Tools for Seamless Assembly and Cooking
Oven-Safe Skillet (Cast Iron Recommended)
Accurate Digital Meat Thermometer
Small Baking Sheet and Resting Board
Cast iron is superior for this recipe because its exceptional heat retention ensures a quick, deep golden sear on the chicken.
The even heat distribution also promotes more uniform cooking once the skillet is transferred to the oven.
This tool is non-negotiable for safety and achieving the precise internal temperature of 160°F before resting.
Guessing the temperature is the quickest route to dry chicken, regardless of the technique used.
A separate sheet pan is necessary for roasting the tomatoes simultaneously to ensure they caramelize properly.
A clean cutting board is crucial for the mandatory five-minute rest, which must happen immediately after the chicken leaves the oven.
Mastering the Moisture Lock: A Step-by-Step Cooking Guide
Stage 1: Prep, Seasoning, and Oven Ready
Stage 2: The High-Heat Sear Technique
Stage 3: Cooking Pasta and Reserving Water
Stage 4: Finishing with Pesto and Mozzarella
Stage 5: The Crucial 5-Minute Resting Period
Stage 6: Achieving the Creamiest Pesto Sauce and Assembly
Preheat your oven to 400°F (200°C) and prepare the tomatoes first by drizzling them with olive oil, salt, and pepper on a small baking sheet.
Ensure the chicken breasts are patted thoroughly dry, then season them heavily on both sides with salt, pepper, and garlic powder to build the flavor base.
Heat a large, oven-safe skillet over medium-high heat until the olive oil shimmers-this indicates it is hot enough to sear, not soak, the protein.
Sear the dry chicken breasts undisturbed for 4 minutes to establish a deep, golden crust, then flip and cook for an additional 3 minutes. The goal here is solely to build surface flavor and seal the moisture.
While the chicken is searing, cook your spaghetti or linguine until it is just shy of al dente-it will finish cooking slightly when tossed with the hot sauce.
Crucially, reserve at least 1/4 cup of the starchy pasta cooking water before draining the noodles; this is the key to achieving the perfect emulsified pesto coating.
Reduce the heat on the stovetop to low, then spread 2 tablespoons of basil pesto evenly over the top of each partially cooked breast.
Top each piece with fresh mozzarella slices or shredded cheese, then immediately transfer the skillet and the separate tomato sheet pan to the preheated 400°F oven.
Bake for 8 to 12 minutes until the cheese is melted and bubbly, pulling the chicken exactly when it registers 160°F on a meat thermometer.
Immediately transfer the chicken breasts to a cutting board once they hit 160°F; the internal temperature will safely rise to 165°F during the rest.
Skipping this mandatory five-minute rest causes the internal juices, which are rushing to the surface, to pour out when you slice the chicken, resulting in a dry breast.
While the chicken rests, toss the drained pasta with the remaining pesto and the reserved starchy water in a large bowl.
The starchy water emulsifies the pesto, creating a smooth sauce that clings beautifully to the spaghetti, eliminating any gummy texture.
Slice the rested chicken breasts across the grain, arrange them over the coated pasta, and spoon any delicious melted cheese/pesto sauce remaining in the skillet over the top. Serve immediately with the roasted tomatoes.
Chef’s Secrets and Expert Tips for Oven-Finished Pesto Chicken Pasta
Understanding the 160°F Carryover Cooking Rule
Never Crowd the Skillet When Searing
Flavor Boost: Marinating the Chicken (Optional Step)
Ingredient Swaps for Dietary Needs (Gluten-Free/Dairy-Free)
Pulling the chicken at 160°F accounts for carryover cooking, where the external heat continues to penetrate the interior even after removal from the oven.
This technique guarantees the meat reaches the safe internal temperature of 165°F without ever experiencing the drying temperatures associated with overcooking.
If you are cooking for a large group, sear the chicken in batches of two breasts rather than trying to fit all four simultaneously.
Overcrowding drastically drops the pan temperature, which causes the chicken to steam in its own moisture instead of forming a beautiful, deeply flavorful crust.
For an extra layer of flavor, you can marinate the chicken for 30 minutes in a light mixture of lemon juice, dried herbs, and olive oil.
Be sure to wipe off any excess liquid before seasoning and searing, as too much moisture will prevent the crust from forming properly.
Most gluten-free pastas, especially those made from brown rice or corn, work perfectly well; just be mindful of their shorter, precise cooking times.
For dairy-free versions, swap the mozzarella for a high-quality cashew-based substitute and ensure your prepared pesto is cheese-free (many jarred options are already dairy-free).
Troubleshooting Common Pesto Pasta Challenges
Problem: My Chicken is Still Dry After Following the Method
The most common culprit is skipping or shortening the mandatory five-minute resting period, which results in all the internal juices spilling out when sliced.
Alternatively, your oven may run hot; always confirm your chicken is pulled precisely at 160°F-if you overshoot 165°F before resting, the meat will certainly be dry.
Problem: The Pesto Sauce is Too Thin or Too Gummy
If the sauce is too thin, you likely added too much reserved pasta water, or the water wasn’t starchy enough (due to using an excessively large pot).
If the sauce is gummy, you didn’t add enough starchy water to fully emulsify the pesto, leaving the oil and basil clumped and unable to coat the spaghetti.
Problem: The Mozzarella Didn’t Melt Properly
If using fresh mozzarella, ensure the slices aren’t too thick, which hinders quick melting; aim for about 1/4 inch thickness.
Low-moisture shredded mozzarella melts more predictably than the fresh variety; if using fresh, make sure your oven is fully preheated to 400°F.
Serving Suggestions, Storage, and Make-Ahead Strategies
Best Sides to Complement the Oven-Finished Pesto Chicken Pasta
Pair this rich dish with a simple, refreshing salad, such as arugula tossed lightly with lemon vinaigrette, to cut through the richness of the pesto.
A piece of crusty Italian bread is perfect for soaking up the residual melted pesto sauce from the skillet or the bottom of the serving bowl.
Reheating Without Losing That Juicy Texture
Avoid the microwave, as its intense spot heating will turn the chicken rubbery and dry out the pasta.
The best method is reheating the assembled dish in a covered oven-safe dish at 300°F (150°C) for about 15-20 minutes, or gently on the stovetop with a splash of chicken broth or water.
Can I Prep This Dish Ahead of Time?
You can certainly prep the components up to one day in advance to save time; fully season the chicken and store it in the refrigerator until ready to sear.
The tomatoes can be roasted ahead of time and reheated quickly just before serving; however, the pasta and the final chicken cooking step must be done fresh.
Frequently Asked Questions About Pesto Chicken Pasta
How do I know when the sear is perfect?
The sear is perfect when the chicken breast naturally releases easily from the pan-if it sticks, it needs more time to develop the crust.
Visually, look for a deep, opaque golden-brown crust, indicating optimal flavor development and moisture sealing.
Can I use boneless, skinless chicken thighs instead?
Yes, boneless, skinless chicken thighs work beautifully in this recipe and are often even more forgiving due to their higher fat content.
Note that the internal temperature target for thighs is higher; cook them until they register 175°F (80°C) for the best texture.
What is the benefit of using fresh mozzarella vs. shredded?
Fresh mozzarella, packed in water, has a higher moisture content and melts into a creamier, softer, and more luxurious puddle over the chicken.
Shredded, low-moisture mozzarella is quicker and more reliable but delivers a slightly denser, oilier melt.
Is there a substitute for pasta cooking water?
Low-sodium chicken broth can be substituted for general moisture, but it lacks the essential starch found in the reserved pasta water.
If using broth, you may need to add a small pinch of cornstarch or flour mixed with cold water to help the pesto truly emulsify and cling.
Ready to Impress? Share Your Oven-Finished Pesto Chicken Pasta Masterpiece!
The combination of a moisture-locked protein, intensely flavored roasted tomatoes, and perfectly coated pesto spaghetti makes this dish truly worthy of your dinner table.
Now that you know the secrets of the sear-and-bake method, I encourage you to try this ultimate Oven-Finished Pesto Chicken Pasta and see the difference a few expert techniques can make!

Oven-Finished Pesto Chicken Pasta
Course: Main CourseCuisine: Italian-American cuisineDifficulty: easy4
servings15
minutes25
minutes40
minutesItalian-American cuisine
Ingredients
4 Boneless, skinless chicken breasts (about 6 oz each)
1 Pound spaghetti or linguine
2 Cups fresh cherry and grape tomatoes
4 Tablespoons olive oil, divided
1 Teaspoon salt
1 Teaspoon black pepper
1 Teaspoon garlic powder
1 Cup prepared basil pesto (use your favorite jarred or fresh)
8 Slices fresh mozzarella cheese (or 4 ounces shredded low-moisture mozzarella)
1/4 Cup reserved pasta cooking water
Directions
- Prepare the chicken and vegetables: Preheat your oven to 400 degrees F. Place the tomatoes on a small baking sheet, drizzle with 1 tablespoon of olive oil, and season lightly with salt and pepper. Set aside. Pat the chicken breasts extremely dry with paper towels. Season both sides heavily with salt, pepper, and garlic powder.
- The Moisture Lock Technique: Heat a large, oven-safe skillet (cast iron works best) over medium-high heat. Add the remaining 3 tablespoons of olive oil. Once the oil shimmers and is hot (but not smoking), place the chicken breasts into the pan. Do not overcrowd the pan. Sear the chicken for 4 minutes undisturbed until a deep golden crust forms. Flip the chicken and cook for an additional 3 minutes. The goal here is to build a crust and start the cooking process quickly to seal the surface.
- Start the pasta: While the chicken is searing, cook the spaghetti according to package directions until just shy of al dente. Reserve at least 1/4 cup of the pasta cooking water before draining.
- Finishing the Chicken (The Tenderizer): Reduce the heat on the stovetop to low. Spoon 2 tablespoons of pesto over the top of each partially cooked chicken breast. Top each breast with two slices of fresh mozzarella (or one-quarter of the shredded cheese).
- Transfer to the oven: Carefully transfer the skillet with the chicken (and the separate sheet pan of tomatoes) into the preheated 400 degree F oven. Bake for 8 to 12 minutes, or until the chicken registers an internal temperature of 160 degrees F. The residual heat will carry it to the safe temperature of 165 degrees F. The cheese should be fully melted and bubbly.
- The Final Rest: Crucially, remove the chicken from the oven immediately and let it rest on a cutting board for 5 minutes before slicing. This resting period allows the juices to redistribute, guaranteeing maximum tenderness and moisture retention.
- Assemble the dish: While the chicken rests, toss the drained pasta with the remaining pesto and the reserved pasta water. The starchy water helps the pesto emulsify and coat the spaghetti perfectly (No More Gummy Pasta!). Place the coated pasta into serving bowls. Slice the rested chicken breasts across the grain and place them on top of the pasta, spooning any melted cheese/pesto sauce from the skillet over the top. Add the roasted tomatoes to the side and serve immediately.
Notes
- Crucially, allow the chicken to rest for 5 minutes after baking to lock in juices.