I spent years battling soggy-bottomed crumbles until I cracked the code on reliable fruit moisture control.
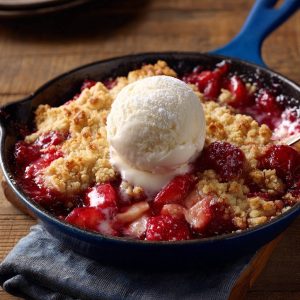
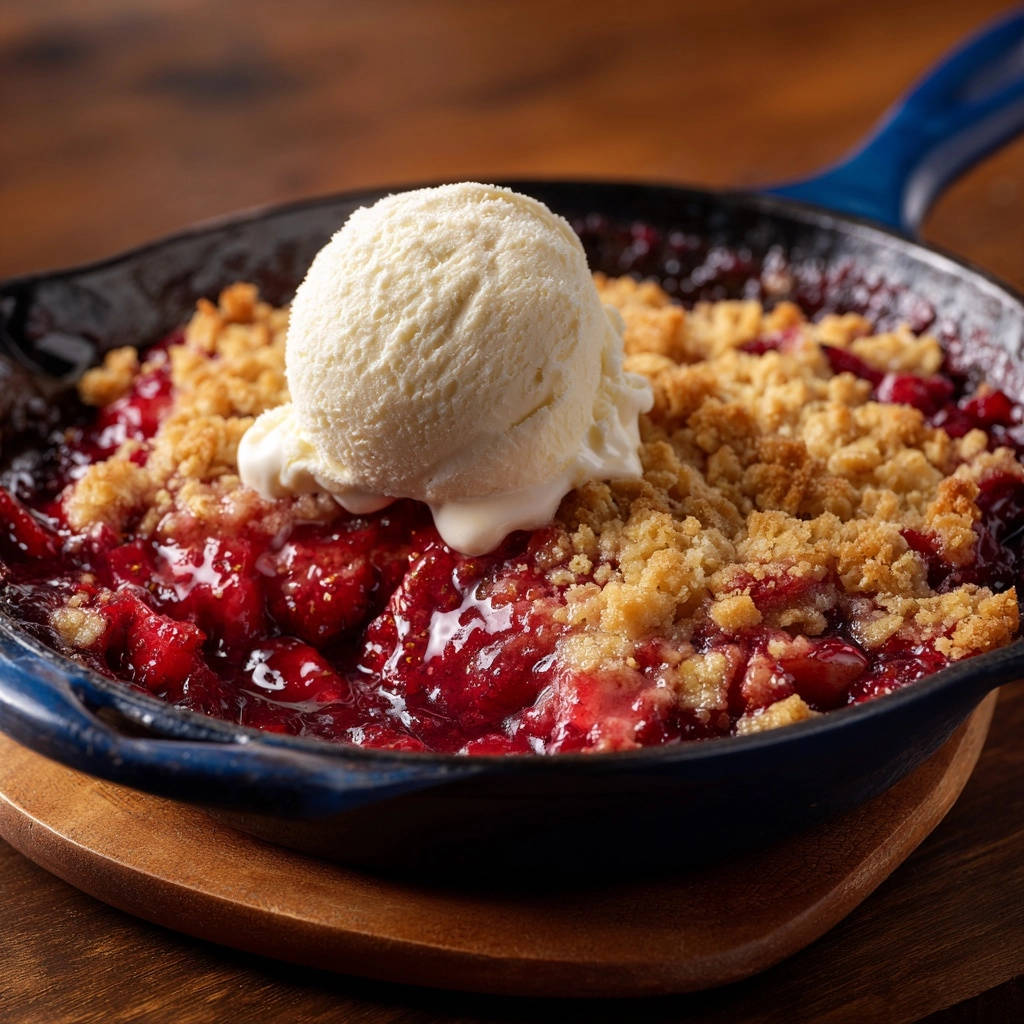
This technique guarantees the crunchy topping on our Easy Strawberry Skillet Crumble stays perfectly crisp, while the strawberries underneath cook down into a syrupy hug.
It’s the ideal, reliable dessert solution for home cooks seeking rustic perfection with zero fuss.
The Secret to a Perfect Crumble: Why This Recipe is Reliable
The Power of Cornstarch: Our Moisture Lock-In Guarantee
Cornstarch acts as a thickening agent, ensuring the fruit juices transform into a glossy, thick syrup.
By pre-treating the strawberries, we guarantee that excess moisture will not oversaturate the crunchy topping during baking.
The Essential Role of Cold Butter for Crumb Texture
Very cold butter is non-negotiable for achieving that signature crumb texture.
When cold butter hits the hot oven, it releases steam, creating tiny pockets of air that result in a light, crispy topping rather than a dense cookie layer.
Quick Prep for an Impressive Weeknight Dessert
Thanks to the use of a skillet, prep time is reduced, making this a perfect dessert for busy weeknights.
The rustic nature of a skillet dessert means less fuss and cleanup, prioritizing flavor and speed.
Building the Flavor Base: Key Ingredients Deep Dive
Achieving Syrupy Perfection: The Strawberry Filling Components
Strawberries: Fresh, ripe berries are best for maximizing sweetness and flavor.
Lemon Juice: Essential for balancing the sweetness and brightening the overall fruit flavor profile.
Vanilla Extract: Adds depth and warmth that complements the summer fruit.
Crafting the Ultimate Crunch: The Topping Staples
Rolled Oats: Provide necessary structure and chewy texture, giving the crumble definition.
Brown Sugar vs. Granulated Sugar: The blend ensures both sweetness and a slight molasses note for richness, improving caramelization.
Cinnamon: Adds a hint of spice that ties the rustic topping to the sweet fruit base.
Essential Tools for Your Easy Strawberry Skillet Crumble Adventure
Choosing the Right Skillet Size (6-inch vs. 8-inch)
A smaller skillet (6-inch) yields a deeper fruit layer and thicker slice, while an 8-inch skillet offers a slightly thinner profile and faster bake time.
Ensure your skillet is oven-safe (cast iron is ideal) and seasoned to prevent sticking and promote even heat distribution.
Beyond the Skillet: Achieving the Perfect Crumb Consistency
While fingertips work, a pastry blender or two cold forks are the most efficient tools for achieving the perfect ‘coarse pea’ texture.
Using these tools minimizes heat transfer from your hands, ensuring the butter remains firm during the mixing process.
Detailed Step-by-Step Guide for Flawless Execution
- Preheating and Preparation:
Preheat the oven to 375°F. Proper preheating is essential for immediately activating the cold butter in the topping.
- The Critical Moisture Control Step:
Combine strawberries, sugar, lemon juice, and vanilla. Then, sprinkle the cornstarch evenly and gently toss until completely dissolved and the fruit is lightly coated.
This light coating ensures every strawberry slice is protected against releasing excess liquid during baking.
- Mixing the Dry Topping:
In a separate bowl, whisk together all dry topping ingredients (flour, sugars, oats, cinnamon, salt).
Whisking ensures all leavening and seasoning agents are evenly distributed before introducing the fat.
- Mastering the Coarse Pea Texture:
Quickly cut the cold, cubed butter into the dry ingredients using your preferred method until the mixture resembles coarse peas or large crumbs.
Do not overwork the mixture. If it becomes sticky or paste-like, the butter has melted, and the topping will be dense.
- Assembly and Light Touch:
Pour the fruit filling into the skillet and sprinkle the topping evenly over the fruit.
Crucially: Do not press the topping down! A loose topping promotes better air circulation for maximum crunch.
- Baking and Visual Cues:
Bake for 30 to 35 minutes, or until the topping is deeply golden brown and the fruit juices are vigorously bubbling through the edges.
The strong, visible bubbling is your guarantee that the cornstarch has fully activated and the sauce is perfectly thickened.
- Cooling for Maximum Set:
Remove the skillet and allow it to cool for a mandatory 10 minutes before serving.
This cooling time allows the newly formed strawberry syrup to set fully, preventing a messy, liquid base.
Chef’s Notes: Tips to Elevate Your Easy Strawberry Skillet Crumble
Use Quality Butter: Since butter is a primary flavor component, use a high-quality, high-fat unsalted butter for the best crumb flavor.
Chill Your Tools: If your kitchen is warm, chill your mixing bowl and pastry blender briefly before making the topping. This helps maintain the cold temperature of the butter.
Check for Doneness by Sound: When nearing the end of the bake, listen closely. A vigorous, steady bubbling sound indicates the fruit sauce is properly thick and ready to come out.
Customize the Spices: While cinnamon is classic, adding a pinch of nutmeg or cardamom can introduce a warm, complex layer of flavor to the topping.
Troubleshooting Your Bake: Common Crumble Challenges Solved
Why Is My Topping Too Dense?
The primary culprit is often warm butter, which melted into the flour before baking. Ensure the butter is rock-hard cold and work quickly when cutting it in.
The second cause is over-mixing. Stop blending as soon as you hit the coarse pea texture; blending further develops gluten, making the topping tough.
My Fruit Filling is Still Runny After Baking
This is usually due to insufficient cornstarch (or uneven distribution) or underbaking. You must see aggressive bubbling throughout the fruit filling to ensure the cornstarch has activated completely.
If the topping looks done but the filling is runny, cover the top lightly with foil to prevent burning and bake for another 5 to 10 minutes.
Dealing with Burning Edges
Skillets, especially cast iron, retain heat intensely around the edges. If the edges are browning too fast, try placing a baking sheet on the rack below the skillet to deflect some direct heat from the bottom element.
Beyond the Scoop: Perfect Pairings and Storage
Ideal Serving Suggestions for This Easy Strawberry Skillet Crumble
While vanilla ice cream is traditional, try topping the warm crumble with freshly whipped cream infused with a little almond extract for an elegant twist.
For breakfast or brunch, serve smaller portions topped with plain Greek yogurt for a satisfying, tangy contrast to the sweetness.
Make-Ahead Strategies and Storage Life
You can prepare the filling and the topping separately up to 24 hours in advance. Store the fruit filling covered in the fridge and the dry topping mix in a sealed bag in the freezer.
Leftovers should be cooled completely, covered tightly, and stored in the refrigerator for up to 3 days. Reheat portions in a toaster oven for maximum crispness.
Frequently Asked Questions About Skillet Crumbles
Can I Use Frozen Strawberries for This Recipe?
Yes, but you must account for the extra moisture. Do not thaw them first; use them straight from the freezer. You may need to increase the cornstarch by half a teaspoon to manage the additional liquid released during cooking.
Can I Make This Gluten-Free?
Absolutely. You can substitute the all-purpose flour in the topping 1:1 with a high-quality gluten-free all-purpose baking blend (one that contains xanthan gum). The texture will remain crisp and delightful.
What’s the Difference Between a Crumble and a Crisp?
Historically, a crumble topping is made primarily of flour, sugar, and butter, creating a cohesive, rocky topping. A crisp always includes oats, which promote extra crunch and texture. Our recipe uses oats, making it technically closer to a crisp, but the texture is still rich enough to fit the “crumble” moniker used widely today.
Ready to Impress? Share Your Easy Strawberry Skillet Crumble Masterpiece!
The journey to the perfect homemade fruit dessert ends here. Armed with the moisture-control secret and the cold butter technique, you are ready to create a truly irresistible dessert.
Bake this Easy Strawberry Skillet Crumble today and watch it disappear. Don’t forget to share your success and your favorite ice cream pairing with us!
Happy baking!

Easy Strawberry Skillet Crumble
Course: DessertCuisine: American CuisineDifficulty: easy4
servings15
minutes30
minutes45
minutesAmerican Cuisine
Ingredients
For the Fruit Filling:
4 cups fresh strawberries, sliced or halved
1/4 cup granulated sugar
1 Tablespoon lemon juice
2 Tablespoons cornstarch (The moisture lock-in secret)
1 teaspoon vanilla extract
For the Crunchy Topping:
1 cup all purpose flour
1/2 cup brown sugar, packed
1/4 cup granulated sugar
1/2 cup rolled oats
1/2 teaspoon ground cinnamon
1/4 teaspoon salt
1/2 cup unsalted butter, very cold and cut into 1/2 inch cubes
Optional: Vanilla Ice Cream, for serving
Directions
- Preheat the oven to 375 degrees F. If using a cast iron skillet (6 inch or 8 inch is ideal), make sure it is ready for oven use.
- Prepare the Fruit Filling and Lock in Moisture: In a large bowl, combine the sliced strawberries, granulated sugar, lemon juice, and vanilla extract. This is the critical step to prevent sogginess: Sprinkle the 2 Tablespoons of cornstarch evenly over the fruit. Gently toss until the cornstarch is completely dissolved and the fruit is lightly coated. The cornstarch will activate with the heat, transforming the watery strawberry juices into a thick, glossy syrup that cannot oversaturate the topping. Pour the fruit mixture into the bottom of your prepared skillet.
- Prepare the Topping: In a separate medium bowl, whisk together the flour, brown sugar, granulated sugar, rolled oats, cinnamon, and salt.
- Achieve the Perfect Crumb Texture: Add the very cold, cubed butter to the dry ingredients. Using your fingertips, two forks, or a pastry blender, quickly cut the butter into the flour mixture until the mixture resembles coarse peas or crumbs. It is vital that the butter remains cold; this ensures the topping bakes up rather than melting into a dense layer.
- Assemble and Bake: Sprinkle the prepared topping evenly over the fruit filling in the skillet. Do not press the topping down; a light touch allows for better air circulation and crispiness.
- Baking for Crunch: Bake for 30 to 35 minutes, or until the topping is golden brown and the fruit juices are visibly bubbling vigorously around the edges and through the crumbs. The strong bubbling is your guarantee that the cornstarch has activated and the sauce is thick.
- Cool and Serve: Remove the skillet carefully from the oven. Let it cool for 10 minutes to allow the fruit sauce to fully set. Serve warm, topped with a generous scoop of vanilla ice cream.
Notes
- Ensure butter is very cold for the topping, and do not press the topping down before baking to maximize crispiness.