
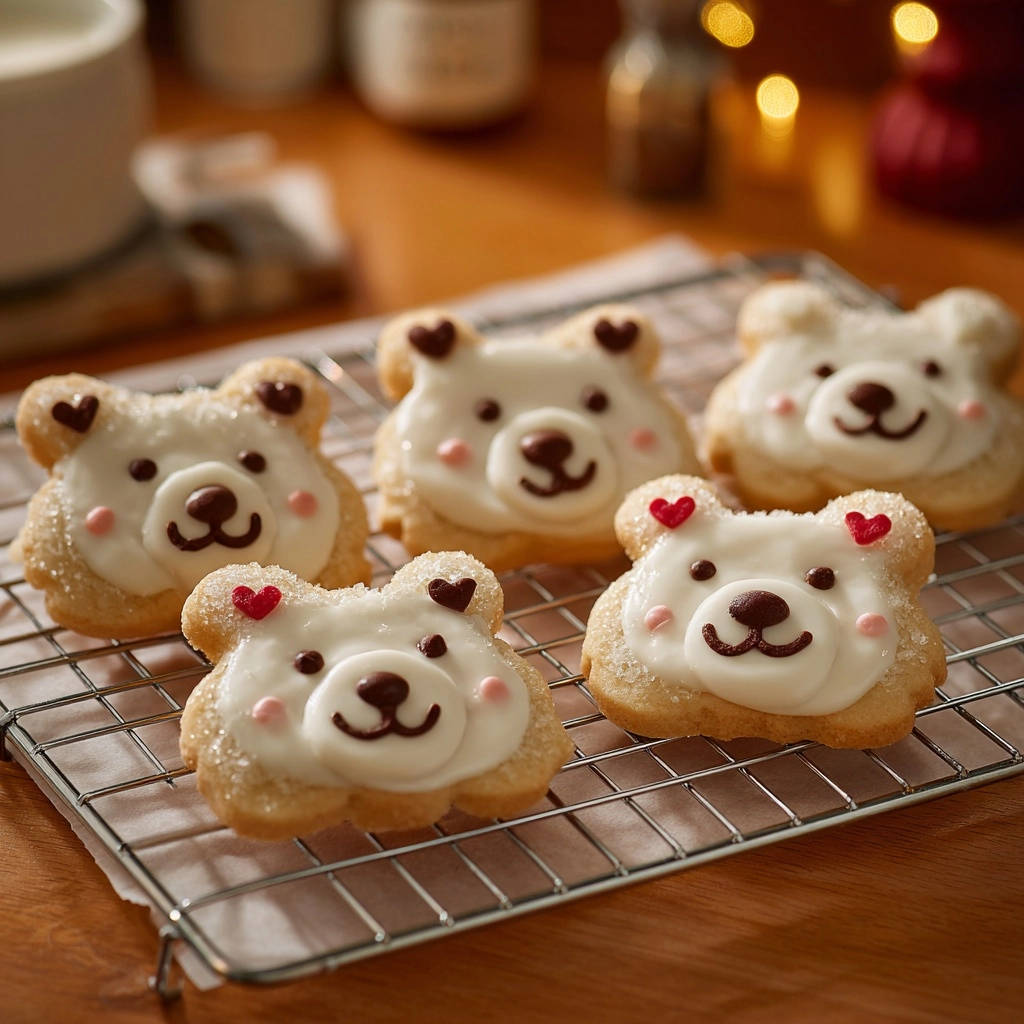
The joy of decorating sugar cookies can quickly turn to frustration when icing runs or refuses to hold its shape. With our recipe for Adorable Bear Sugar Cookies, those worries disappear, thanks to a simple secret for perfectly consistent icing. Get ready to create charming, picture-perfect homemade treats that are as delightful to make as they are to eat.
Adorable Bear Sugar Cookies: Why This Recipe Is Your New Favorite
Forget the stress of runny icing! Our recipe reveals the ultimate secret to perfectly piped, consistent icing that holds its shape, making decorating a joy.
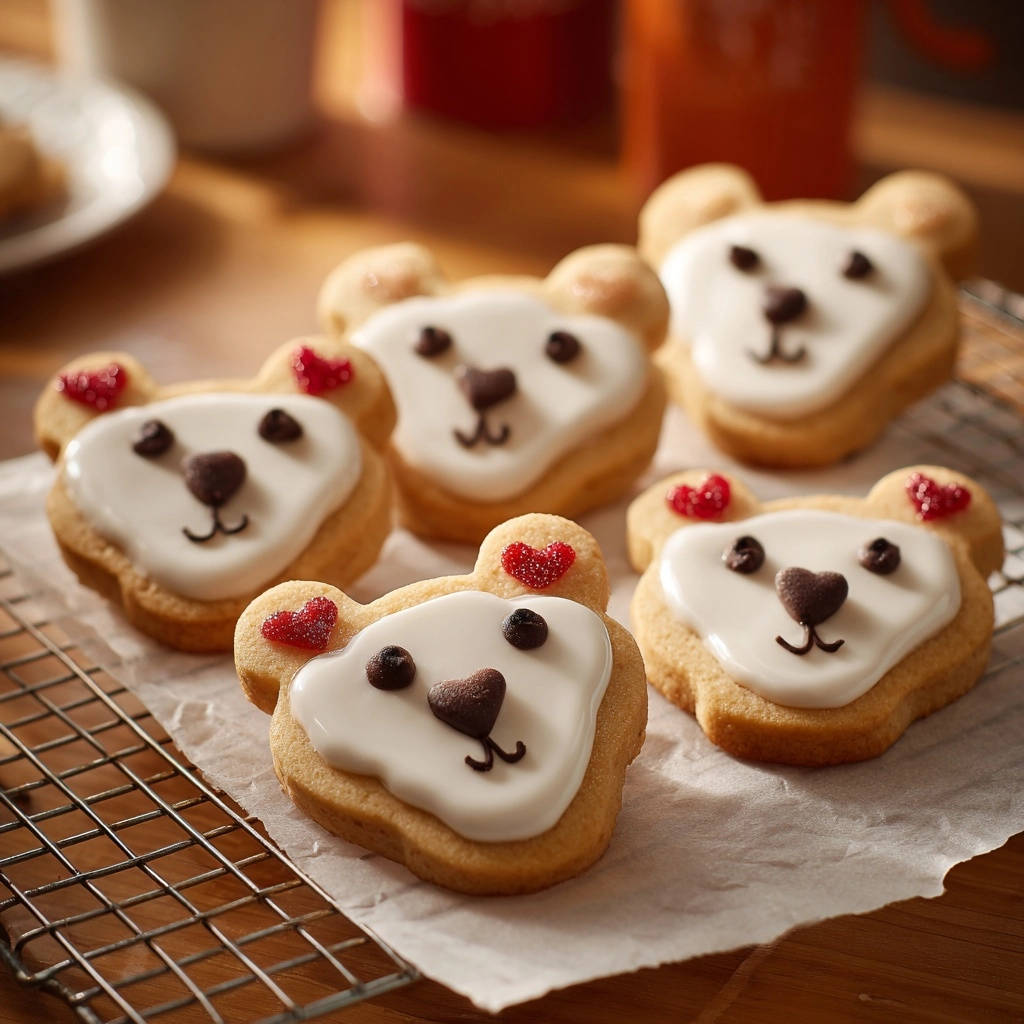
These Adorable Bear Sugar Cookies are designed to hold their charming shape perfectly during baking, building on our best techniques for achieving perfect sugar cookies that never spread.
Beyond their cuteness, these cookies boast a tender, buttery crumb that melts in your mouth, making them as delicious as they are delightful to look at.
Ideal for beginners and seasoned bakers alike, this guide breaks down every step, ensuring a successful and fun baking experience.
Essential Tools for Baking Bear-y Cute Cookies
Electric Mixer: Essential for creaming butter and sugar until light and fluffy, ensuring a tender cookie.
Bear-Shaped Cookie Cutters: The star of the show! Choose various sizes for different bear expressions.
Piping Bags and Small Round Tips: Crucial for the precise outline and delicate details of your bear faces. Ziploc bags with snipped corners are a great alternative.
Parchment Paper: Prevents sticking and ensures even baking, making cleanup a breeze.
Wire Cooling Rack: Allows air circulation for perfectly cooled cookies, preventing sogginess before decorating.
Rolling Pin: For evenly rolled dough, which contributes to uniform baking and consistent cookie thickness.
Gather Your Ingredients: The Foundation of Flavor
For the Tender Bear Sugar Cookies
All-Purpose Flour: The structural backbone of our cookies. Sifting isn’t strictly necessary but can contribute to a lighter crumb.
Baking Powder & Salt: These leavening agents and flavor enhancers ensure a slight lift and balance the sweetness without puffing up too much.
Unsalted Butter (Softened): Crucial for creaming with sugar, adding richness and contributing to the tender texture. Ensure it’s truly softened, not melted.
Granulated Sugar: Provides sweetness and helps create that delightful crisp edge while keeping the interior soft.
Large Egg: Binds the ingredients together and adds moisture, contributing to the cookie’s structure and richness.
Vanilla Extract: A fundamental flavor enhancer that brings warmth and depth to the cookies.
Granulated Sugar, for Sprinkling (Optional): Adds a beautiful sparkle and a touch of extra sweetness to the cookie edges.
For the Perfect Decorative Icing
Powdered Sugar (Sifted): The base of our smooth, non-runny icing. Sifting is non-negotiable for a lump-free finish.
Milk (or Water): The liquid component for controlling icing consistency. Start with the minimum and add gradually.
Vanilla Extract: Flavors the icing, complementing the cookie’s taste.
Gel Food Coloring (Brown, Pink): Gel colors provide vibrant hues without thinning the icing, essential for delicate details.
Red Heart Sprinkles: For those adorable ear accents, adding a playful touch to your bear cookies.
Baking Brilliance: Your Step-by-Step Guide to Adorable Bear Cookies
- Prepare the Cookie Dough:
In a medium bowl, whisk together the flour, baking powder, and salt. This ensures these dry ingredients are evenly distributed, which is crucial for consistent cookie texture.
In a large bowl, using an electric mixer, cream together the softened butter and granulated sugar until light and fluffy. This step incorporates air, contributing to a tender crumb.
Beat in the egg and vanilla extract until well combined, scraping down the sides of the bowl as needed.
Gradually add the dry ingredients to the wet ingredients, mixing on low speed until just combined and a soft dough forms. It’s critical not to overmix, as this can develop too much gluten and result in tough cookies.
- Chill and Roll:
Divide the dough in half, flatten each half into a disk, and wrap tightly in plastic wrap. Chilling is a vital step!
Refrigerate the dough for at least 30 minutes, or up to 2 days. This chilling period firms up the butter, preventing the cookies from spreading too much in the oven and helping your bears maintain their adorable shapes.
- Cut and Bake:
Preheat your oven to 375°F (190°C) and line baking sheets with parchment paper. This preparation ensures your cookies bake evenly and release easily.
On a lightly floured surface, roll out one disk of chilled dough to an even 1/4-inch thickness. Uniform thickness is key for consistent baking.
Use a bear-shaped cookie cutter to cut out shapes. Re-roll scraps gently, chilling if they become too warm, to cut more cookies.
Carefully transfer the cutouts to the prepared baking sheets, leaving a little space between each.
If desired, lightly sprinkle the edges with granulated sugar before baking for an extra touch of sparkle and sweetness.
- Bake to Perfection:
Bake for 10-12 minutes, or until the edges are lightly golden. Watch carefully, as oven temperatures can vary.
Let the cookies cool on the baking sheets for 5 minutes before carefully transferring them to a wire rack to cool completely. They are delicate when warm, so this resting period helps them firm up.
The Secret Weapon: Achieving Flawless Icing Consistency
The biggest frustration in cookie decorating often stems from inconsistent icing. This simple technique ensures your icing holds its shape for outlines and flows beautifully for filling, giving you professional-looking Adorable Bear Sugar Cookies every time.
Mastering Outline Consistency (The No-Runny-Icing Trick!)
In a medium bowl, combine the sifted powdered sugar and vanilla extract. Begin by adding 2 tablespoons of milk and mix thoroughly with a spoon or whisk until smooth. This forms your initial thick icing.
For the perfect outline consistency, the icing should be thick enough to hold a distinct line without spreading excessively. When you drag a spoon through it, the line should slowly melt back into itself in approximately 10-15 seconds.
If the icing is too thick, add more milk 1/4 teaspoon at a time, mixing well after each addition, until this ideal consistency is reached. Patience here is key!
Achieving Smooth Flood Consistency
Once you’ve reached the outline consistency, remove about 1/4 cup of this thicker icing and set it aside; this will be used for outlining the bear faces later.
To the remaining larger batch of icing, add milk 1/4 teaspoon at a time, stirring well after each addition, until the icing is slightly thinner. This is your flood consistency, designed to spread and fill shapes evenly.
A reliable test for flood consistency: drag a spoon through the icing. The line should disappear and smooth out in about 5-7 seconds. This thinner consistency will beautifully fill your outlined shapes without being watery.
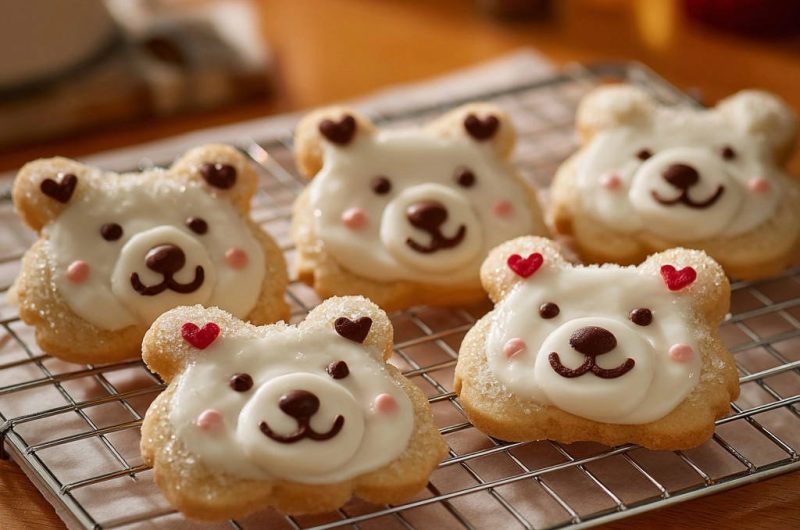
Decorating Magic: Bringing Your Bear Sugar Cookies to Life
- Outline the Bears:
Transfer the thicker outline icing to a small piping bag fitted with a small round tip (or use a Ziploc bag with a tiny corner snipped off).
Carefully outline the entire face and ears of each completely cooled bear cookie with this thicker icing. This creates a crucial barrier.
Let this outline dry for 10-15 minutes. This step is absolutely critical to prevent your flood icing from running off the edges, ensuring clean, defined bear faces.
- Flood the Faces:
Once the outline is set and firm, use the thinner flood icing to fill in the outlined areas of the bear faces.
Use a small spoon or a clean toothpick to gently spread the icing to the edges and carefully pop any air bubbles for a smooth finish.
Let the white flood icing dry completely. Ideally, this means several hours or even overnight. This ensures the base is firm and won’t smudge when you add details.
- Add Adorable Details:
Once the white flood icing is dry and firm to the touch, it’s time to add the cute features that bring your bears to life.
Take a small amount of the remaining white icing and mix it with brown gel food coloring to create a deep brown. Transfer this to a very small piping bag or a Ziploc bag with a tiny snip.
Pipe small oval noses and smiling mouths onto each bear face. Use the same brown icing to pipe two tiny dots for expressive eyes.
Mix a tiny drop of pink gel food coloring with a small amount of white icing. Pipe two tiny pink dots on the cheeks for a blush effect.
Gently place red heart sprinkles on the ears. If your flood icing is already completely dry, secure them with a tiny dot of brown or white icing to make sure they stick.
Chef’s Secrets: Elevate Your Adorable Bear Sugar Cookie Game
Don’t Rush the Chill: Resist the urge to skip or shorten the chilling time for your cookie dough. It’s the ultimate secret to crisp edges and cookies that hold their intricate bear shape without spreading.
Sift Powdered Sugar Reliably: For the smoothest icing possible, sifting powdered sugar is non-negotiable. Even if it looks fine, tiny clumps can clog your piping tips or create a bumpy finish.
Practice Your Piping: If you’re new to piping, do a quick practice run on a piece of parchment paper before tackling your cookies. This helps you get a feel for the pressure and flow.
Use Gel Food Coloring: Always opt for gel food coloring over liquid. Gel provides vibrant colors without adding excess moisture, which can thin your carefully calibrated icing consistency.
Patience is a Virtue: Allow ample drying time for both the outline and flood icing. Rushing this step is the fastest way to get smudged details or colors bleeding into one another.
Troubleshooting Common Adorable Bear Sugar Cookie Challenges
Why Are My Bear Cookies Spreading Too Much?
This is often due to insufficient chilling time for the dough or butter that’s too soft. Ensure your dough is properly chilled for at least 30 minutes, and avoid overworking it, which can warm the butter.
My Icing Is Too Runny or Too Thick. What Went Wrong?
Icing consistency is a delicate balance. If too runny, add more sifted powdered sugar, a tablespoon at a time. If too thick, gradually add more milk (1/4 teaspoon at a time) until the desired consistency is reached. Always mix thoroughly after each addition.
Why Is My Icing Bumpy or Lumpy?
This almost always points to unsifted powdered sugar. Always sift your powdered sugar, even if it appears smooth, to ensure a silky-smooth icing texture.
My Decorated Details Are Smudging!
You likely didn’t allow enough drying time for the base flood layer. Ensure the base white icing is completely dry and firm to the touch (ideally several hours or overnight) before adding any further details.
Your Top Questions Answered: Adorable Bear Sugar Cookies FAQ
Can I make the cookie dough ahead of time?
Absolutely! The cookie dough can be made up to 2 days in advance and stored tightly wrapped in plastic wrap in the refrigerator. This is a great way to break up your baking process.
How long do these Adorable Bear Sugar Cookies last?
Once decorated, these cookies will stay fresh in an airtight container at room temperature for up to 5-7 days. For optimal freshness, consider freezing undecorated cookies.
Can I freeze decorated sugar cookies?
Yes, you can freeze fully decorated cookies, but be cautious. Place them in a single layer in an airtight container, separating layers with parchment paper. Thaw at room temperature without opening the container to prevent condensation from affecting the icing.
What if I don’t have gel food coloring?
While liquid food coloring can be used, it may slightly thin your icing consistency. Use it sparingly, or ideally, invest in gel colors for the best results and vibrant hues without compromising texture. For more on food coloring options, check out our comprehensive guide to food colorings.
Can I make these cookies gluten-free?
Yes, you can substitute the all-purpose flour with a 1:1 gluten-free baking flour blend. Note that the texture might be slightly different, but the bear shape should still hold well. Ensure your blend contains xanthan gum.
Storing, Serving, and Savoring Your Sweet Bears
Once your Adorable Bear Sugar Cookies are fully decorated and the icing is completely dry, store them in an airtight container at room temperature. Layer them carefully with parchment paper in between to protect the delicate icing details. They will remain fresh and delightful for up to a week.
These charming cookies are perfect for any occasion! Serve them at birthday parties, baby showers, or as a delightful treat for school lunchboxes, perhaps alongside some easy chocolate lava cake for a varied dessert spread. They also make wonderful homemade gifts for friends and family, sure to bring a smile to anyone’s face.
For an extra special touch, arrange your bear cookies on a decorative platter alongside a glass of milk or a warm cup of cocoa. Enjoy the fruits of your creative labor!
Ready to Share? Show Off Your Adorable Bear Sugar Cookies!
You’ve successfully mastered the art of creating these irresistibly cute Adorable Bear Sugar Cookies! From the tender crumb to the perfectly piped, non-runny icing, every bite is a testament to your newfound baking and decorating skills. They are not just cookies; they are edible little masterpieces that tell a story of joy and creativity.
We absolutely love seeing your culinary creations! Share your adorable bear cookie photos on social media and tag us, or leave a comment below with your favorite part of making this recipe. Happy baking!
Adorable Bear Sugar Cookies
Course: DessertCuisine: American CuisineDifficulty: easy12
cookies45
minutes10
minutes60
minutesAmerican Cuisine
Ingredients
For the Cookies:
2 1/4 cups all-purpose flour
1/2 teaspoon baking powder
1/4 teaspoon salt
1 cup (2 sticks) unsalted butter, softened
3/4 cup granulated sugar
1 large egg
1 teaspoon vanilla extract
Granulated sugar, for sprinkling (optional)
For the Icing:
2 cups powdered sugar, sifted
2-4 tablespoons milk (or water), starting with 2 tablespoons
1/2 teaspoon vanilla extract
Brown gel food coloring
Pink gel food coloring
Red heart sprinkles
Directions
- Prepare the Cookie Dough: In a medium bowl, whisk together the flour, baking powder, and salt. Set aside. In a large bowl, using an electric mixer, cream together the softened butter and granulated sugar until light and fluffy. Beat in the egg and vanilla extract until well combined. Gradually add the dry ingredients to the wet ingredients, mixing on low speed until just combined and a soft dough forms. Do not overmix.
- Chill and Roll: Divide the dough in half, flatten each half into a disk, wrap in plastic wrap, and chill in the refrigerator for at least 30 minutes (or up to 2 days). This helps prevent spreading and ensures your bears keep their shape.
- Cut and Bake: Preheat your oven to 375°F (190°C). Line baking sheets with parchment paper. On a lightly floured surface, roll out one disk of chilled dough to about 1/4-inch thickness. Use a bear-shaped cookie cutter to cut out shapes. Carefully transfer the cutouts to the prepared baking sheets. If desired, sprinkle the edges lightly with granulated sugar before baking.
- Bake: Bake for 10-12 minutes, or until the edges are lightly golden. Let cool on the baking sheets for 5 minutes before transferring to a wire rack to cool completely.
- Master the Icing Consistency (The Secret to No More Runny Icing!): In a medium bowl, combine the sifted powdered sugar and vanilla extract. Start by adding 2 tablespoons of milk. Mix thoroughly with a spoon or whisk until smooth. This is your initial thick icing.
- For Outline Consistency: This should be thick enough to hold a distinct line without spreading too much. If you drag a spoon through it, the line should slowly melt back into itself in about 10-15 seconds. If it’s too thick, add more milk 1/4 teaspoon at a time, mixing well after each addition, until you reach this ideal consistency.
- For Flood Consistency: Once you have your outline consistency, remove about 1/4 cup of the icing and set it aside (this will be for outlining the bear faces). To the remaining larger batch of icing, add milk 1/4 teaspoon at a time, stirring well after each addition, until the icing is slightly thinner. This is your flood consistency. A good test is to drag a spoon through it; the line should disappear and smooth out in about 5-7 seconds. This thinner consistency will spread to fill the outlined shape evenly without being too watery.
- Decorate the Bears:
- Outline: Transfer the thicker outline icing to a small piping bag fitted with a small round tip (or a Ziploc bag with a tiny corner snipped off). Carefully outline the entire face and ears of each cooled bear cookie with this thicker icing. Let this outline dry for 10-15 minutes to create a barrier. This is critical to prevent your flood icing from running off the edges!
- Flood: Once the outline is set, use the thinner flood icing to fill in the outlined areas. Use a small spoon or a clean toothpick to gently spread the icing to the edges and pop any air bubbles. Let the white flood icing dry completely, ideally for several hours or overnight, before adding fine details. This ensures the base is firm and won’t smudge.
- Add Details: Once the white icing is dry and firm to the touch, you can add the cute features. Take a small amount of the remaining white icing and mix it with brown gel food coloring to create a deep brown. Transfer to a very small piping bag or a Ziploc bag with a tiny snip. Pipe small oval noses and smiling mouths. Using the same brown icing, pipe two tiny dots for eyes. Mix a tiny drop of pink gel food coloring with a small amount of white icing. Pipe two tiny pink dots on the cheeks. Gently place red heart sprinkles on the ears, securing them with a tiny dot of brown or white icing if the flood icing is already completely dry.
Notes
- Features a detailed guide for achieving perfect outline and flood icing consistency to prevent runny designs.


