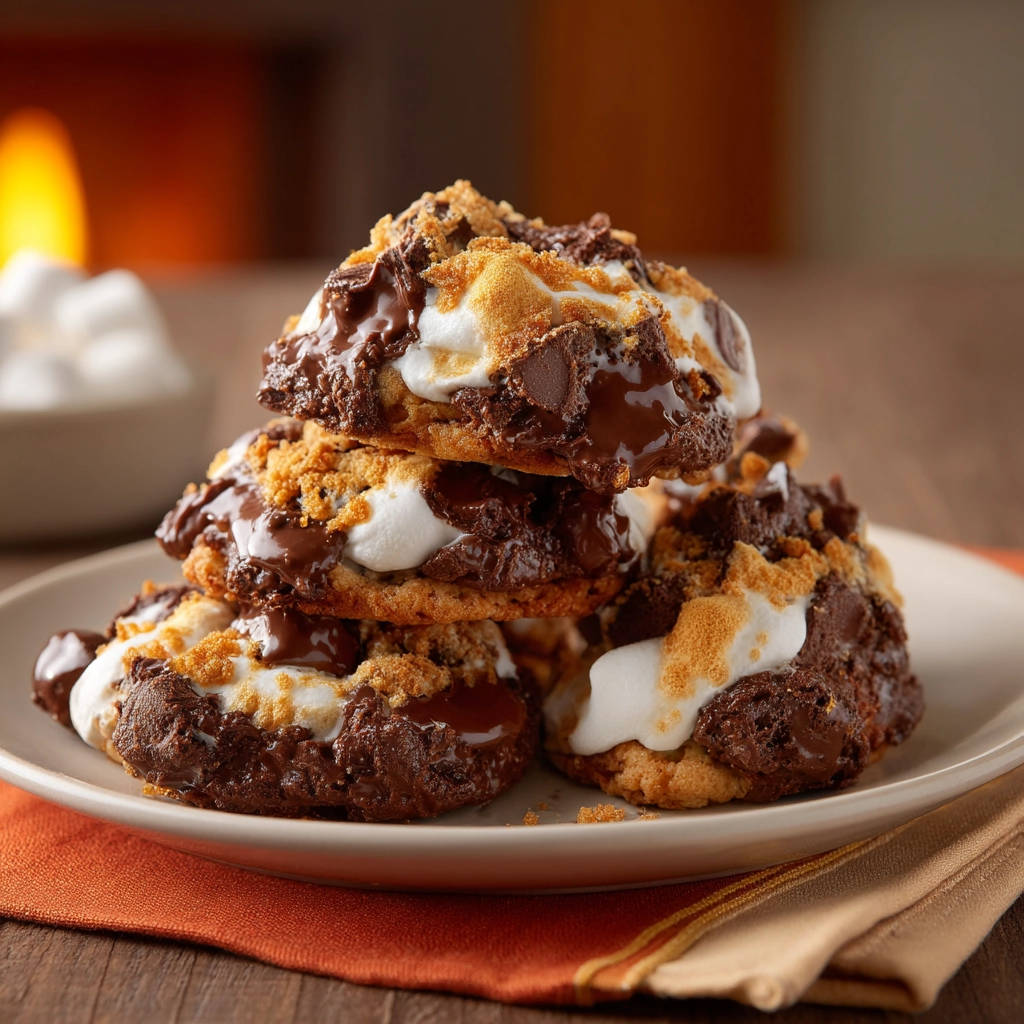
Ah, s’mores! The quintessential taste of bonfires, summer nights, and sticky fingers. There’s something undeniably magical about that combination of toasted marshmallow, melted chocolate, and crisp graham cracker. But let’s be real, replicating that magic indoors without setting off smoke alarms or ending up with a sticky, burnt mess can feel like a culinary quest.
Especially when it comes to getting that marshmallow just right in a cookie – often it disappears or turns into a rock-hard disappointment. Well, friends, I’m here to tell you that you absolutely can capture that campfire charm in a cookie, and I’ve discovered a simple, foolproof trick for achieving that perfect, irresistible gooey marshmallow center every single time with these amazing S’mores Cookies!
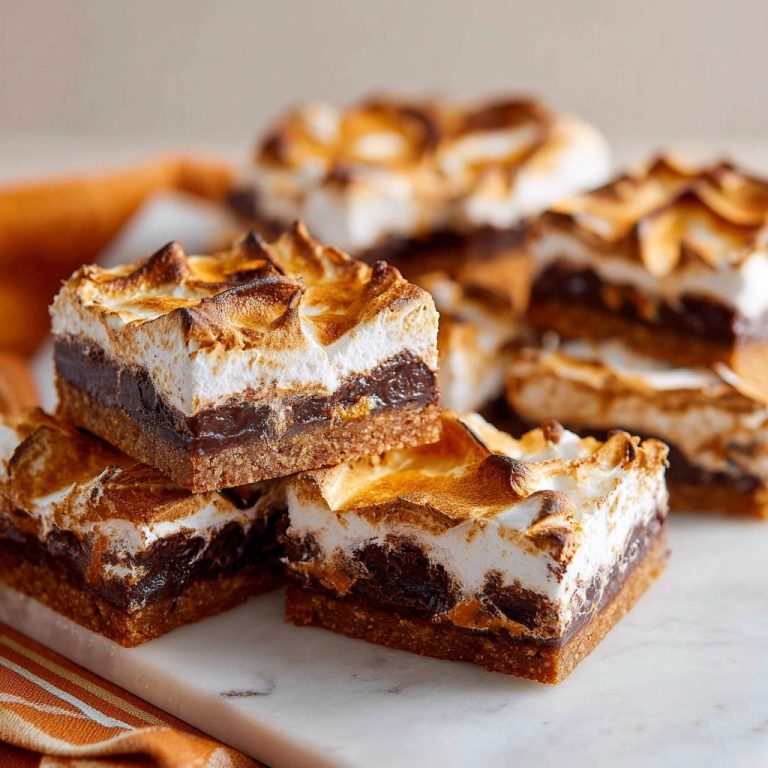
If you’re a fan of everything s’mores, you might also love trying our S’mores Brownie Squares for another delightful twist on the classic treat.
Why You’ll Adore These S’mores Cookies
These aren’t just any chocolate chip cookies with stuff added. These S’mores Cookies are a carefully crafted bite of nostalgia. Here’s why they’re bound to become your new favorite way to enjoy the s’mores experience:
- Effortless Indoors: Get all the flavor of s’mores without the need for a campfire or outdoor grill. Perfect for any time of year!
- The Ultimate Gooey Marshmallow: Thanks to a simple technique I’ll share, the marshmallows puff up, get lightly toasted, and then set into that dreamy, stretchy consistency we all crave. No sad, melted-away ghosts of marshmallows here!
- Classic Flavor Combination: All the essential elements – rich chocolate, sweet marshmallow, and buttery graham cracker crumbs – are present and accounted for, creating a harmonious bite.
- Relatively Quick: With minimal prep and a short bake time, you can be enjoying these warm, gooey delights in under 30 minutes.
- Crowd-Pleaser: Seriously, who doesn’t love s’mores? These cookies disappear fast at parties, potlucks, or just a quiet night in.
Gathering Your Ingredients for Gooey S’mores Cookies
Creating these delightful cookies starts with rounding up the right components. We’re building a classic cookie base that serves as the perfect vehicle for our s’mores toppings.
We begin with the fats and sugars that form the cookie’s structure and sweetness. Softened unsalted butter is key for achieving a light, fluffy texture when creamed with the sugars. We use a combination of granulated sugar for crispness on the edges and packed light brown sugar, which adds moisture, chewiness, and a subtle caramel-like depth thanks to the molasses content. This blend gives the cookies a lovely balance of texture and flavor.
Binding it all together is a large egg, which adds structure and richness. A touch of vanilla extract enhances all the sweet flavors and provides that classic cookie aroma.
For the dry foundation, we need all-purpose flour. It’s important to measure this correctly – spoon it into your measuring cup and level off with a knife rather than scooping directly from the bag, which can lead to too much flour and dry cookies. Baking soda provides leavening, helping the cookies spread just right and contributing to a tender interior. A pinch of salt is vital for balancing the sweetness and bringing out all the other flavors.
Now for the stars of the show – the s’mores elements! You’ll need chocolate chips or chunks; semi-sweet is a classic choice, but milk chocolate or a mix works wonderfully too. Mini marshmallows are essential for that characteristic s’mores texture and that all-important “gooey marshmallow secret” we’ll unveil. Finally, graham cracker crumbs are sprinkled over the top, adding that unmistakable Honeymaid crunch and flavor.
Here’s a quick list of everything you’ll need handy in your kitchen:
- 1/2 cup unsalted butter, softened
- 1/4 cup granulated sugar
- 1/2 cup packed light brown sugar
- 1 large egg
- 1 teaspoon vanilla extract
- 1 1/4 cups all purpose flour
- 1/2 teaspoon baking soda
- 1/4 teaspoon salt
- 1 cup chocolate chips or chunks
- 1 cup mini marshmallows
- 1/2 cup graham cracker crumbs
Crafting Your S’mores Cookies: Step-by-Step
Ready to bake up some s’mores magic? Follow these steps closely, and you’ll be sinking your teeth into warm, gooey perfection in no time. Pay special attention to the marshmallow step – that’s where the secret lies!
- Get Prepped and Preheat: First things first, let’s get the oven ready. Preheat your oven to a precise 375 degrees Fahrenheit (190 degrees Celsius). While it’s heating up, line your baking sheets with parchment paper. This step is non-negotiable! Parchment paper prevents sticking (especially with those melting marshmallows) and makes cleanup a breeze.
- Cream the Wet Base: In a large mixing bowl, take your softened unsalted butter, granulated sugar, and packed light brown sugar. Cream these together using an electric mixer (handheld or stand mixer) on medium speed until the mixture is light in color and fluffy in texture. This creaming incorporates air, which is crucial for the cookie’s structure and tenderness. Scrape down the sides of the bowl as needed to ensure everything is evenly combined.
- Introduce the Egg and Vanilla: Add the single large egg to the creamed sugar mixture. Beat it in until it is fully incorporated and the mixture looks smooth. Then, stir in the vanilla extract. Vanilla enhances all the sweet notes in the cookie dough, making it even more delicious.
- Combine the Dry Ingredients Separately: In a separate, smaller bowl, whisk together your all-purpose flour, baking soda, and salt. Whisking them together ensures that the leavening and salt are evenly distributed throughout the flour. This prevents pockets of baking soda or salt in your finished cookies.
- Mix Wet and Dry (Gently!): Now, gradually add the whisked dry ingredients to your wet ingredients. Mix on low speed or by hand with a spatula until the flour is just combined. You’ll see streaks of flour, but that’s okay. The key here is to not overmix. Overmixing develops the gluten in the flour too much, which can result in tough cookies instead of tender ones.
- Fold in the Chocolate: Once the dry and wet ingredients are mostly combined, fold in your cup of chocolate chips or chunks. Stir gently until they are evenly distributed throughout the dough.
- Scoop the Dough: Using a tablespoon measure or a small cookie scoop, drop rounded tablespoons of dough onto your prepared baking sheets. Leave about 2 inches (5 cm) of space between each cookie dough ball. They will spread as they bake, and you don’t want them running into each other.
- Initial Bake: Place the baking sheets in the preheated oven and bake for 8 to 10 minutes. You’re looking for the edges to be set and lightly golden, but the centers should still appear slightly soft and underbaked. This is crucial for achieving a chewy cookie base that can handle the marshmallow topping.
- THE GOOEY MARSHMALLOW SECRET STEP!: This is where the magic happens! Carefully remove the baking sheets from the oven after the initial bake (8-10 minutes). Working quickly while the cookies are hot, pile a generous amount of mini marshmallows onto the center of each cookie. Don’t be shy! Then, sprinkle graham cracker crumbs over the marshmallows and around the edges of the cookie. The residual heat from the cookies will help the marshmallows adhere slightly.
- Final Marshmallow Toast: Return the baking sheets to the oven for just another 2 to 3 minutes. Keep a close eye on them! The marshmallows will puff up and start to turn a lovely, light golden brown color. This short, hot burst of heat is key to getting that toasted exterior and super gooey interior without the marshmallows melting away completely or burning. Watch like a hawk, as marshmallows can go from perfect to burnt very quickly.
- Cool and Set: Once the marshmallows are perfectly toasted, carefully remove the sheets from the oven. Let the cookies cool on the baking sheets for a few minutes. This allows the marshmallows to start setting up into that wonderful gooey, stretchy texture. After a few minutes, you can transfer them to a wire rack to cool completely. The marshmallows will become even gooier and set slightly as they cool.
Tips for Perfect S’mores Cookies Every Time
Achieving s’mores cookie perfection is easy, but a few expert tips can make all the difference:
- Room Temperature is Your Friend: Ensure your butter and egg are at room temperature. This helps them cream together properly with the sugars, creating a smoother, more uniform dough and contributing to better cookie texture.
- Measure Flour Accurately: As mentioned, spoon and level! Too much flour is the most common cause of dry or tough cookies.
- Don’t Overbake Initially: That first bake is just about setting the edges. The center should still look soft. This is what keeps the cookie chewy after the second bake.
- Mini Marshmallows are Best: While you can try cutting up larger marshmallows, mini marshmallows distribute more evenly and melt into that perfect gooey layer better.
- Act Fast on Step 8: The cookies need to be hot when you add the marshmallows and graham crumbs so they stick and the marshmallows start softening right away.
- Watch Marshmallows Closely: Those last 2-3 minutes are critical. Marshmallows can go from golden to charred in seconds. Stay by the oven!
- Use Quality Chocolate: Chocolate chips work, but chocolate chunks or even chopped chocolate bars can give you bigger pockets of melted chocolate goodness.
- Try Different Chocolate Types: While semi-sweet is traditional, milk chocolate or even a mix of milk and dark chocolate can offer fun variations on the classic s’mores flavor profile.
- Storage: Store cooled S’mores Cookies in an airtight container at room temperature for 2-3 days. The marshmallows will firm up a bit, but warming them gently in the microwave for a few seconds will bring back some of that gooeyness.
Serving Suggestions for S’mores Cookies
These S’mores Cookies are undeniably delicious on their own, but they’re also perfect for pairing!
Naturally, a tall glass of cold milk is the classic companion to any warm cookie. For an extra indulgent treat, consider serving them alongside a scoop of vanilla or even chocolate ice cream – the contrast of warm cookie and cold ice cream is divine! If you’re hosting a dessert spread, these cookies are a fantastic addition alongside other favorites like Fudgy Brownies or perhaps a creamy Classic Chocolate Cream Pie.
Your S’mores Cookie Questions Answered (FAQ)
Got questions about making the best S’mores Cookies? Here are some common queries:
Will the marshmallows melt away completely?
No! That’s the beauty of the “gooey marshmallow secret” technique (step 8). By adding them towards the end of the baking time, they puff up and get toasted without dissolving into the cookie entirely. They retain their shape and texture, becoming wonderfully gooey in the center.
Can I use large marshmallows instead of mini?
Mini marshmallows work best because they cover the surface of the cookie more evenly and melt into that nice, cohesive gooey layer. While you could technically snip larger marshmallows, it’s much trickier to get them to melt and toast correctly on a cookie.
My graham cracker crumbs aren’t sticking well. What can I do?
Make sure you’re adding the graham cracker crumbs immediately after removing the cookies from the first bake (along with the marshmallows). The residual heat helps them stick. You can also gently press them onto the marshmallows and dough edges.
How should I store these cookies?
Once completely cooled, store them in an airtight container at room temperature. To regain maximum gooeyness, pop one in the microwave for 5-10 seconds before enjoying.
Can I make the dough ahead of time?
Yes! You can prepare the cookie dough (steps 1-6) and store it covered in the refrigerator for up to 2 days. Allow it to come closer to room temperature for easier scooping. Alternatively, you can scoop the dough balls onto a parchment-lined plate or tray and freeze them until solid, then transfer to a freezer bag. Bake from frozen, adding an extra minute or two to the initial bake time before adding marshmallows.
Can I freeze baked S’mores Cookies?
You can freeze baked cookies, but the marshmallow texture may change slightly upon thawing. Freeze them in a single layer on a baking sheet until solid, then transfer to an airtight freezer container or bag. Thaw at room temperature, and consider a quick microwave warm-up for best results.
What kind of chocolate is best?
Semi-sweet chocolate chips or chunks are traditional for s’mores. However, feel free to experiment with milk chocolate or even a mix of semi-sweet and dark chocolate based on your preference.
Enjoy Your Homemade S’mores Cookies!
There you have it – the secret to baking truly spectacular S’mores Cookies with that sought-after gooey marshmallow center. Forget the sticky mess of campfire s’mores (unless you’re into that!). These cookies bring all the flavor and fun right into your kitchen.
Whip up a batch for your next gathering, a cozy movie night, or just because you deserve a little bit of gooey, chocolatey, graham-cracker goodness. Don’t forget to leave a comment below and let me know how your S’mores Cookies turned out!
S’mores Cookies

Ingredients
- 1/2 cup unsalted butter, softened
- 1/4 cup granulated sugar
- 1/2 cup packed light brown sugar
- 1 large egg
- 1 teaspoon vanilla extract
- 1 1/4 cups all purpose flour
- 1/2 teaspoon baking soda
- 1/4 teaspoon salt
- 1 cup chocolate chips or chunks
- 1 cup mini marshmallows
- 1/2 cup graham cracker crumbs
Directions
- Preheat your oven to 375 degrees Fahrenheit. Line baking sheets with parchment paper.
- In a large bowl, cream together the softened butter, granulated sugar, and brown sugar until light and fluffy.
- Beat in the egg and vanilla extract until well combined.
- In a separate small bowl, whisk together the all purpose flour, baking soda, and salt. Gradually add the dry ingredients to the wet ingredients, mixing until just combined. Do not overmix.
- Fold in the chocolate chips or chunks.
- Drop rounded tablespoons of dough onto the prepared baking sheets, leaving about 2 inches between cookies.
- Bake for 8 to 10 minutes, or until the edges are set but the centers are still slightly soft.
- This is the secret: Remove the baking sheets from the oven. Quickly top each cookie with a generous pile of mini marshmallows and sprinkle graham cracker crumbs over the marshmallows and edges of the cookie.
- Return the baking sheets to the oven and bake for another 2 to 3 minutes, or until the marshmallows are puffed and lightly golden brown. Watch carefully as marshmallows brown quickly.
- Let the cookies cool on the baking sheets for a few minutes before transferring to a wire rack to cool completely. The marshmallows will set as they cool, giving you that perfect gooey center.