
Forget those watery, gray onions that usually hide at the bottom of a vegetable medley. Most people struggle with pearl onions because they boil them into oblivion, resulting in a mushy texture that lacks any real character. This recipe changes the game by focusing on a hard sear and a glossy reduction that keeps the onions plump and snappy.
The secret to this side dish lies in the contrast between the sharp, acidic bite of balsamic vinegar and the smoky, salty depth of thick-cut bacon. By searing the onions in rendered bacon fat before adding any liquid, you create a caramelized crust that seals in the natural sweetness. It’s a sophisticated balance of flavors that feels high-end but uses simple, honest techniques.
I’ve found that the absolute key to success is the “undisturbed sear.” You might feel the urge to shake the pan constantly, but leaving the onions alone for those first five minutes is what builds that structural barrier. This prevents the cell walls from collapsing, ensuring your onions stay firm and juicy rather than turning into a pile of jam.
The Anatomy of a Perfect Pearl Onion
Pearl onions are much more than just tiny versions of the standard yellow onion. They possess a mild, almost nutty sweetness that intensifies when you subject them to high heat. Unlike shallots, which melt into a sauce, or cipollini onions, which are flat and broad, pearl onions offer a unique “pop” when you bite into them.
That signature snap is the hallmark of a well-executed dish. When you combine the natural sugars found in the onion with a touch of brown sugar, a complex chemical reaction occurs. This isn’t just about sweetness; it’s about creating a savory-sweet glaze that clings to the rounded surface of the onion without sliding off.
The balsamic vinegar provides the necessary acidity to cut through the richness of the bacon fat. As the vinegar reduces, its sharp edges soften, leaving behind a deep, fruity essence. This transformation turns a humble root vegetable into a glossy, jewel-like accompaniment that can hold its own against any main course.
Selecting Fresh vs. Frozen Onions
While the freezer aisle offers convenience, fresh pearl onions are mandatory for this specific technique. Frozen onions have already been blanched and frozen, which breaks down their internal cell structure and introduces excess moisture. If you try to sear frozen onions, they’ll release water immediately, steaming themselves instead of browning.
Fresh onions provide the structural integrity needed to withstand the high-heat searing process. You want that firm, tight skin and a heavy feel in your hand. This ensures that after the blanching and peeling process, the onion remains resilient enough to develop a deep golden-brown crust in the skillet.
Essential Components for the Balsamic Glaze
The quality of your balsamic vinegar will dictate the final flavor of the glaze. Avoid the thin, watery vinegars often found on the bottom shelf, as they contain too much acetic acid and not enough grape must. A high-quality Aceto Balsamico will be slightly viscous and have a natural sweetness that reduces into a velvety syrup.
Bacon isn’t just a garnish here; it’s the foundation of the cooking medium. I always recommend thick-cut bacon because it renders a significant amount of fat while maintaining its chewy-crispy texture. This rendered fat has a higher smoke point than butter, allowing you to get that crucial sear on the onions without the fat breaking down or burning.
The addition of a single tablespoon of unsalted butter at the very end is a classic chef’s trick. This process, known as mounting with butter, emulsifies the balsamic reduction. It transforms a simple liquid into a jammy, glossy coating that looks beautiful on the plate and feels luxurious on the tongue.
The Role of Thyme and Aromatics
Fresh thyme is the unsung hero of this dish, providing an earthy, lemony backbone that bridges the gap between the sweet glaze and the salty bacon. Dried thyme simply won’t work here, as it lacks the volatile oils that infuse into the hot bacon fat. As the thyme leaves hit the pan, they release an aroma that permeates the entire dish.
The Blanch and Shock Prepping Technique
Peeling a pound of tiny onions can feel like a chore, but the blanch and shock method makes it effortless. By dropping the onions into boiling water for exactly 30 seconds, you loosen the bond between the papery skin and the flesh. It’s a quick heat shock that doesn’t actually cook the onion’s interior.
Immediately plunging them into an ice bath is the most critical part of the prep. This stops the residual heat from softening the onion. Once cooled, you simply trim the root end and squeeze from the stem side; the onion will slide out of its skin perfectly intact and ready for the pan.
Ensuring Total Dryness Before Searing
Moisture is the absolute enemy of a good sear. If your onions are even slightly damp when they hit the hot bacon fat, they will create a layer of steam. This steam prevents the Maillard reaction, which is the browning process that creates all that wonderful flavor.
After peeling, spread the onions out on a clean kitchen towel or several layers of paper towels. Pat them firmly and let them air dry for a few minutes. You want the surface of the onion to be bone-dry so that the fat can immediately begin to caramelize the sugars upon contact.
Step-by-Step: Rendering Bacon and Searing Onions
Start with a cold skillet and your chopped bacon. Heating them together allows the fat to render out slowly, ensuring the bacon bits become perfectly crispy without scorching. Once the bacon is golden, remove it with a slotted spoon, but keep every drop of that liquid gold in the pan.
Turn the heat up to medium-high until the fat begins to shimmer. Add your dry pearl onions in a single layer. If you hear a loud sizzle, you’re on the right track. Now, the hardest part: don’t touch them. Let them sit undisturbed for five minutes to develop a dark, caramelized base.
After that initial sear, give the pan a toss. You’re looking for a bronzed, patchy appearance across the onions. This uneven browning adds layers of flavor and texture. Continue searing for another few minutes until the onions look toasted and smell incredibly sweet and savory.
Managing Heat for Maximum Caramelization
As you transition from searing to glazing, you must turn the heat down to medium. The high heat needed for the sear will burn the balsamic vinegar and brown sugar instantly. You want a controlled bubble, not a violent boil, once the liquids are added to the skillet.
Watch the fat in the pan; it should be shimmering but not smoking. If the pan seems too hot, pull it off the burner for thirty seconds before adding the vinegar. This prevents the liquid from evaporating too quickly before it has a chance to coat the onions properly.
The Reduction: Achieving a Jammy Glaze
When you pour in the balsamic vinegar and sprinkle the brown sugar, the mixture will bubble vigorously. This is the reduction phase. Use a wooden spoon to stir constantly, ensuring the sugar dissolves and the vinegar begins to thicken into a syrup that coats the onions evenly.
The visual cue you’re looking for is a “nappe” consistency. This means the glaze should be thick enough to coat the back of a spoon without immediately running off. When you add the butter and the crispy bacon back in, the glaze will take on a brilliant shine and a jammy texture.
Continue tossing the onions until the liquid has almost entirely disappeared, leaving only a sticky, dark coating. The onions should look like dark garnets nestled among the crispy bacon bits. If the glaze gets too thick or tacky, a tiny splash of water can loosen it back to perfection.
Troubleshooting Common Texture Issues
If your onions start releasing a lot of liquid and the pan looks “soupy,” your heat was likely too low during the searing phase. To fix this, remove the onions and boil the liquid down on high heat until it thickens, then toss the onions back in just to coat them.
Sometimes a glaze can “break,” meaning the fat separates from the vinegar and looks greasy. This usually happens if the heat is too high when you add the butter. To fix a broken sauce, add a teaspoon of water and whisk briskly over low heat to bring the emulsion back together.
Pairing Balsamic Glazed Pearl Onions with Bacon
These onions are a powerhouse side dish that pairs beautifully with rich, roasted meats. The acidity in the balsamic glaze acts as a palate cleanser for heavy proteins like beef tenderloin or roasted lamb chops. It cuts through the fat and adds a bright, punchy note to the plate.
I also love serving these alongside a simple roasted chicken. The glaze from the onions often mingles with the chicken juices on the plate, creating an accidental pan sauce that is out of this world. They also hold their own on a holiday table next to mashed potatoes or creamy gratins.
Make-Ahead Strategies and Storage
You can easily prep the onions 24 hours in advance by blanching and peeling them. Store them in an airtight container in the fridge so they are ready to hit the pan when you start dinner. However, I don’t recommend cooking the entire dish ahead of time if you want that perfect texture.
If you do have leftovers, store them in the refrigerator for up to three days. To reheat, avoid the microwave, which will make the onions rubbery. Instead, toss them back into a skillet over medium-low heat with a tiny splash of water to loosen the glaze and restore its original shine.
Expert Tips for the Home Chef
Can I use white balsamic for a lighter color profile?
You certainly can, though the flavor will be slightly less complex. White balsamic is usually more tart and less syrupy than the dark variety. If you go this route, you might need to simmer the glaze for an extra minute or two to achieve that same jammy consistency.
How do I prevent the brown sugar from scorching?
The key is to ensure your heat is at a steady medium before the sugar hits the pan. If the sugar smells like it’s burning or turns black instantly, your pan is too hot. Always have your balsamic vinegar measured and ready to pour; the liquid will immediately drop the temperature of the pan and prevent the sugar from burning.
What is the best substitute for bacon fat if I run low?
If your bacon didn’t render enough fat, supplement it with a high-quality olive oil or even duck fat if you have it. Avoid using only butter for the searing phase, as the milk solids will burn at the temperatures required to get a good crust on the onions.
Can I add nuts like walnuts or pecans for extra crunch?
Absolutely! Toasted walnuts or pecans are a fantastic addition. Add them at the very end when you toss the bacon back into the pan. The nuts will pick up the balsamic glaze and provide a wonderful textural contrast to the soft, snappy onions.
Why did my glaze turn out thin and watery?
This usually happens if the vinegar wasn’t allowed to reduce long enough or if the onions weren’t dried properly before cooking. If your glaze is thin, simply keep simmering it over medium heat. It will eventually reach that syrupy stage as the water evaporates and the sugars concentrate.

Balsamic Glazed Pearl Onions with Bacon
Course: Side DishCuisine: AmericanDifficulty: easy4
servings15
minutes25
minutes40
MinutesAmerican
Ingredients
1 pound fresh pearl onions, peeled (see tip below)
6 slices thick-cut bacon, finely chopped
1 tablespoon olive oil
1/4 cup high-quality balsamic vinegar
2 tablespoons brown sugar
1 tablespoon unsalted butter
4-5 sprigs fresh thyme (leaves stripped, plus extra for garnish)
1/2 teaspoon sea salt
1/4 teaspoon cracked black pepper
Directions
- The Prep Tip: To peel pearl onions easily without making them mushy, blanch them in boiling water for exactly 30 seconds, then shock in ice water. Trim the root end and squeeze; the skins will slip right off. Pat them completely dry before cooking.
- In a large heavy-bottomed skillet or cast iron pan, add the chopped bacon. Cook over medium heat until the fat has rendered and the bacon is crispy. Use a slotted spoon to remove the bacon bits and set aside, leaving the rendered fat in the pan.
- Increase the heat to medium-high and add the olive oil to the bacon fat. Once shimmering, add the pearl onions in a single layer. Do not crowd the pan.
- The Sear: Let the onions sear undisturbed for 4 to 5 minutes until a deep golden-brown crust forms on the bottom. This creates a structural barrier that prevents the onion from collapsing. Toss and continue searing for another 3 minutes until the onions are bronzed all over.
- Reduce the heat to medium. Add the balsamic vinegar, brown sugar, and fresh thyme leaves. The sugar and vinegar will immediately begin to bubble.
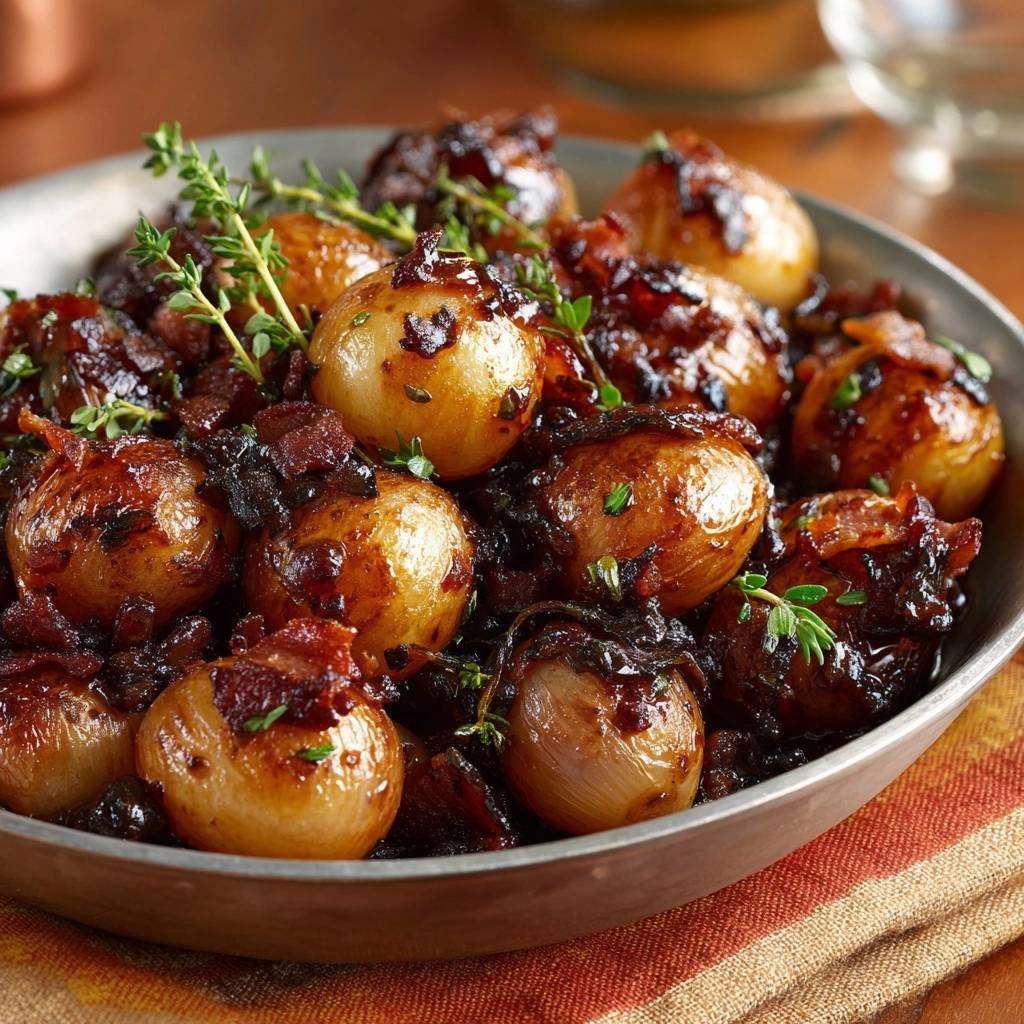
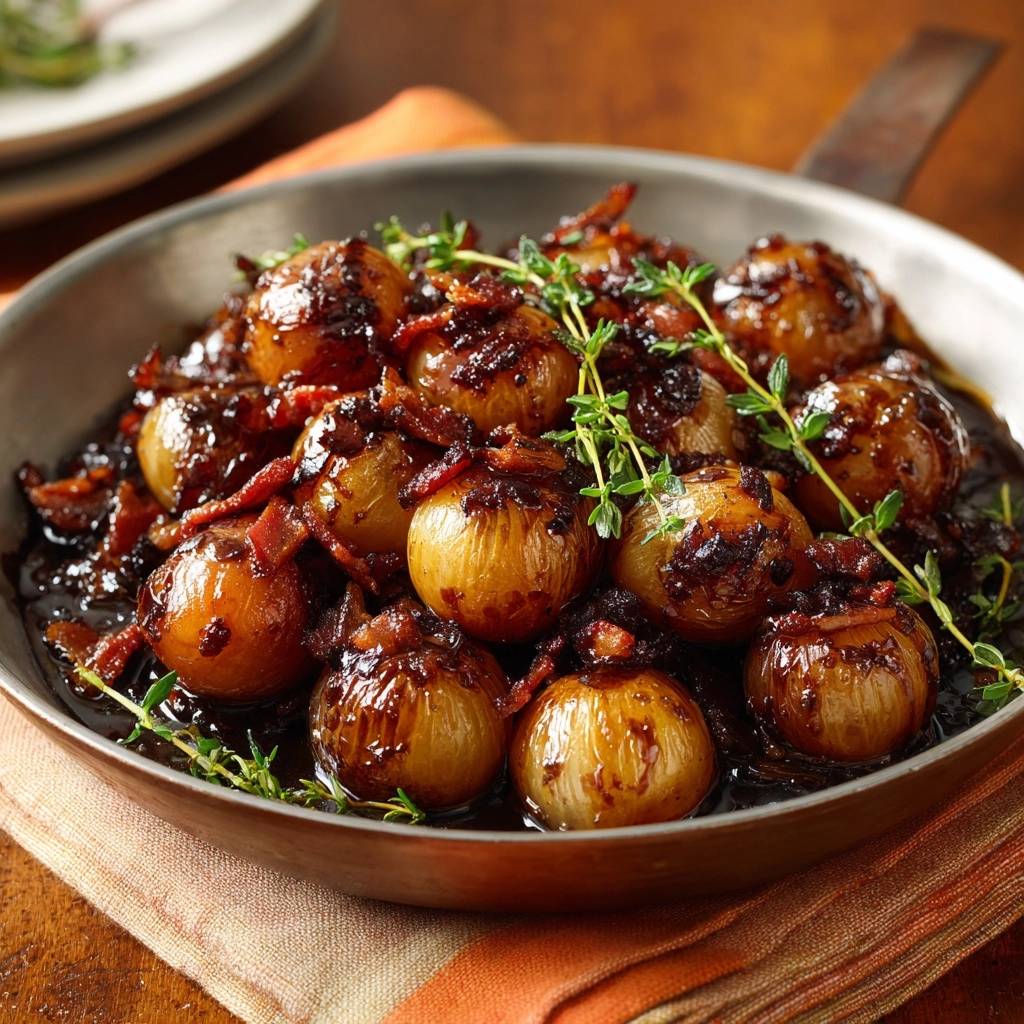
- The Glaze: Stir constantly for 4 to 6 minutes. As the liquid reduces, it will transform into a thick, dark syrup. Add the butter and the cooked bacon bits back into the pan. The butter emulsifies the sauce, giving it the glossy, jammy finish seen in the image.
- Continue to toss the onions in the glaze until it clings tightly to them and the liquid has almost entirely evaporated into a sticky coating.
- Season with sea salt and cracked black pepper. Remove from heat and garnish with fresh thyme sprigs. Serve immediately while the glaze is hot and the onions maintain their signature snap.
Notes
- To prevent mushiness, ensure onions are patted completely dry after peeling and before searing. The high-heat sear creates a structural barrier that keeps the onions plump.


