For years, my quest for the ultimate cookie often ended in disappointment: dry, crumbly disasters that promised much but delivered little. I longed for that truly melt-in-your-mouth texture, a cookie that felt like a decadent embrace. After countless trials, I finally perfected these irresistible Caramel Chocolate Dream Cookies, a recipe designed for consistent, dreamy softness every single time.
This recipe isn’t just about combining ingredients; it’s about specific techniques that guarantee an exceptional result, transforming simple components into a truly unforgettable treat.
Why These Caramel Chocolate Dream Cookies Belong in Your Recipe Box
The Melt-in-Your-Mouth Difference: Our Signature Softness
Unlike many cookie recipes that yield hard or dry results, this one is engineered for supreme tenderness. The secret lies in precise creaming, minimal mixing, and careful chilling, creating a cookie that’s chewy on the edges and incredibly soft in the center.
Each bite melts effortlessly, delivering a comforting texture that satisfies without being overly dense. It’s the kind of cookie you’ll reach for again and again.
Effortless Elegance: Achieving Swirls That Wow
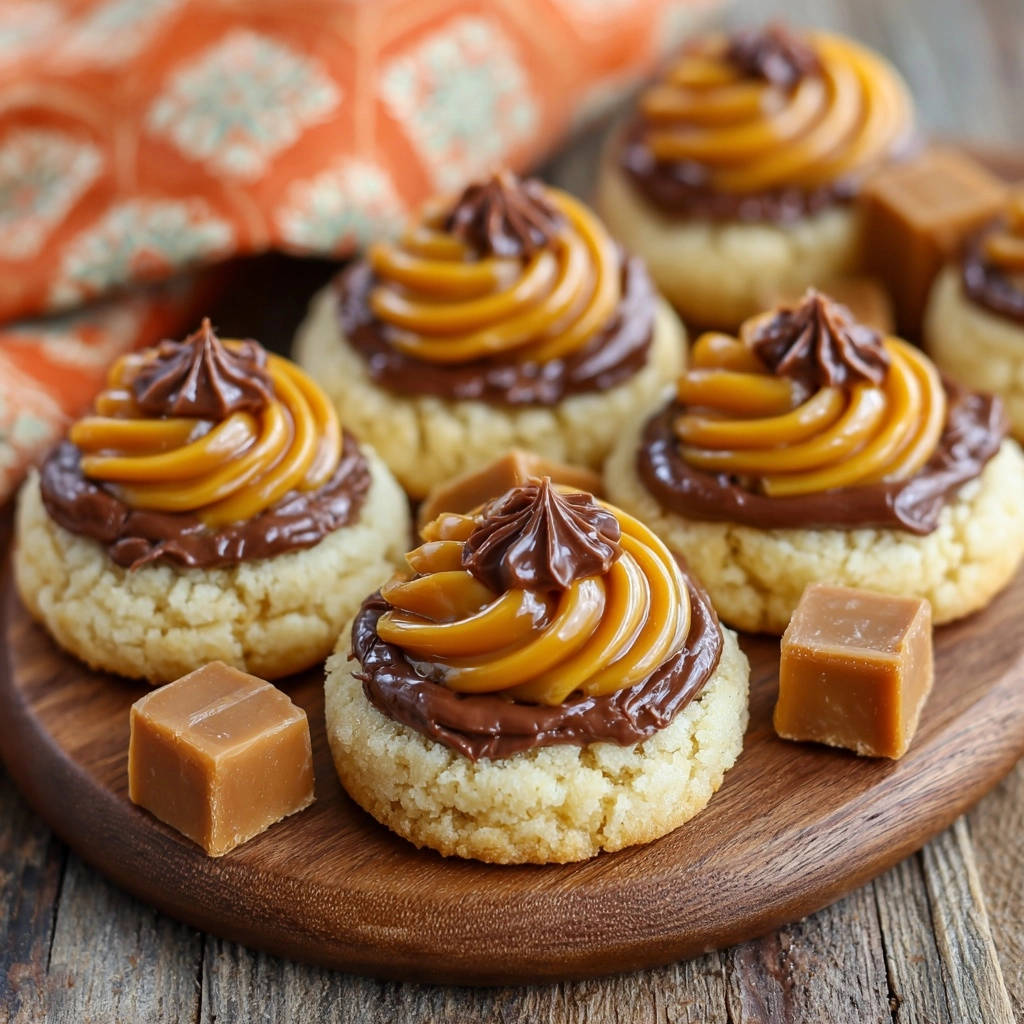
Don’t let the stunning appearance intimidate you; crafting the beautiful chocolate and caramel swirls is surprisingly simple. With just a few clear steps, you’ll create a visually impressive cookie that looks straight out of a professional bakery.
The layers add an artistic touch, making these cookies perfect for gifting or special presentations. They prove that impressive results can be achieved with ease.
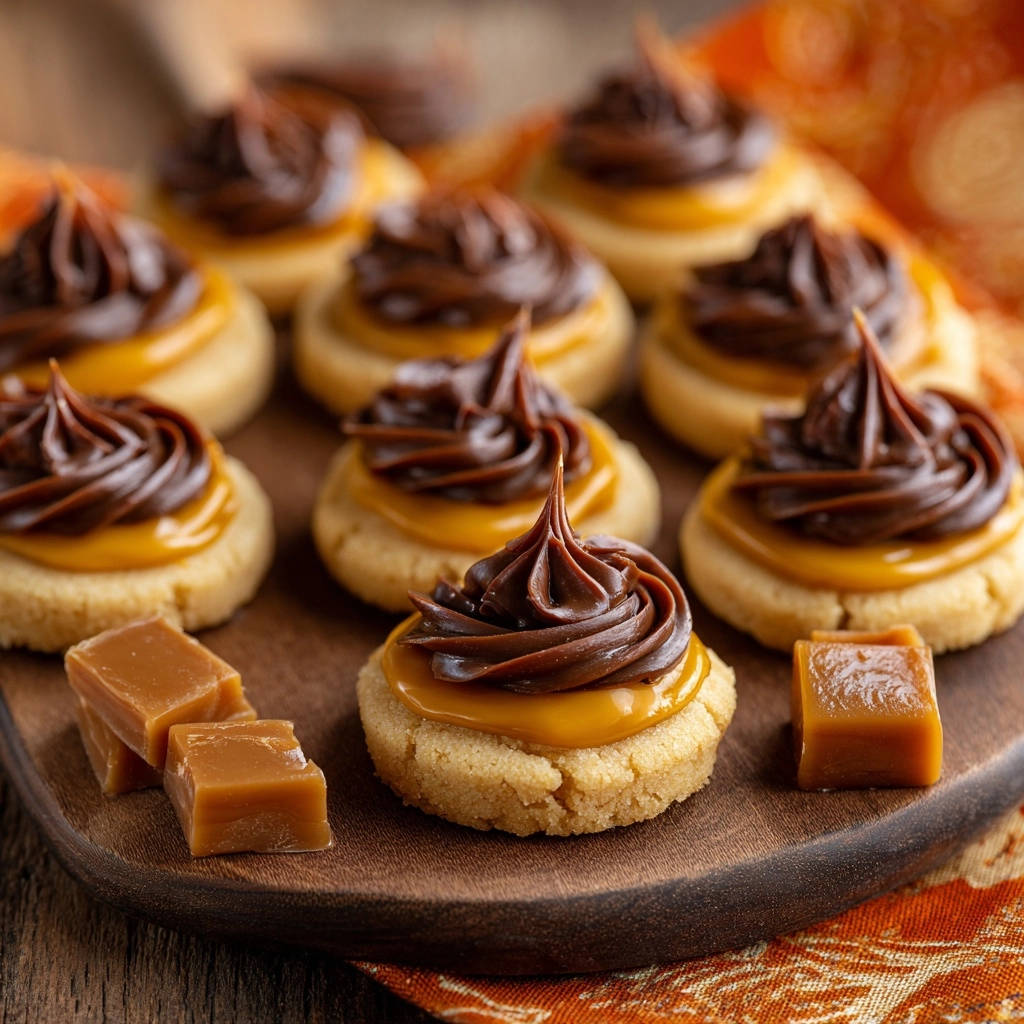
A Symphony of Flavors: Sweet Caramel Meets Rich Chocolate
These Caramel Chocolate Dream Cookies offer an exquisite balance of sweet and rich. The deep notes of semi-sweet chocolate perfectly complement the buttery, luscious caramel.
Each component shines, creating a harmonious flavor profile that’s utterly addictive. It’s a classic combination elevated to a new level of deliciousness.
Beyond Dessert: Perfect for Every Occasion
While undoubtedly a decadent dessert, these versatile cookies fit any occasion. They’re perfect for a cozy night in, a festive holiday gathering, or a delightful addition to a bake sale.
Their universally appealing taste and appealing presentation make them a crowd-pleaser for all ages and events.
The Heart of the Batter: Essential Ingredients for Your Dream Cookies
Building the Base: Flour, Butter & Sugar for Softness
All-purpose flour provides the essential structure without making the cookies tough. It’s a reliable base for consistent results.
Softened unsalted butter is critical for creating a light and airy dough when creamed with sugar. Its temperature directly impacts the cookie’s final texture and spread.
Granulated sugar not only sweetens but also contributes to the soft, chewy texture. It helps create those slightly crispy edges and perfectly tender centers.
The Dynamic Duo: Chocolate and Caramel Layers
Semi-sweet chocolate chips melt into a smooth, rich layer, providing a delightful foundation for the caramel. Their quality directly influences the depth of flavor.
Unwrapped caramel candies, combined with a touch of milk or cream, transform into a luscious, pipeable swirl. This ensures a consistent, gooey caramel experience.
A small amount of milk or cream helps both the chocolate and caramel achieve the perfect pourable consistency. It’s key for smooth, even layers.
Optional Touches: Elevating Your Cookie’s Finish
An extra dollop of melted chocolate serves as a beautiful decorative element. It adds visual appeal and reinforces the chocolate flavor.
This simple addition transforms your cookies into true masterpieces, demonstrating attention to detail and care.
Your Baking Arsenal: Essential Tools for Cookie Success
Mixing & Prepping: The Foundation for Fluffy Dough
Medium and Large Mixing Bowls: These are essential for separating dry and wet ingredients and then combining them efficiently. Having both sizes simplifies your workflow.
Electric Mixer (Stand or Hand-Held): Crucial for creaming butter and sugar effectively, incorporating air for that signature soft texture. A powerful mixer ensures a uniform, fluffy base.
Whisk: Used for thoroughly combining dry ingredients, preventing clumps and ensuring an even distribution of leavening agents.
Baking Essentials: From Sheets to Cooling Racks
Baking Sheets: Provide the surface for baking. Flat, heavy-gauge sheets promote even heat distribution and prevent scorching.
Parchment Paper: Liners for your baking sheets, preventing sticking and making cleanup a breeze. It also helps with even heat transfer.
Wire Racks: Allow air circulation around the cookies for proper cooling. This prevents the bottoms from becoming soggy and helps them firm up correctly.
Precision & Presentation: Mastering the Swirl
Microwave-Safe Bowls: Ideal for safely melting chocolate and caramel in controlled intervals. Their heat-retaining properties are a bonus.
Piping Bags (or Zip-Top Bags with Snipped Corners): Essential for precise application of the melted caramel and the optional chocolate dollop. They give you control over your design.
Small Round Piping Tip (Optional): Provides a clean, professional line for your caramel swirl. If you don’t have one, snipping a small corner off a sturdy zip-top bag works well.
Toothpick or Tiny Spoon: Perfect for carefully placing and swirling the small decorative chocolate dollops, adding that final, elegant touch.
Your Journey to Deliciousness: Crafting Caramel Chocolate Dream Cookies
Phase 1: Building the Irresistibly Soft Cookie Base
- Prepare Dry Ingredients:
In a medium bowl, whisk together the flour, baking powder, and salt. This ensures uniform distribution for consistent rise and flavor throughout the cookie.
- Cream Butter and Sugar:
In a large bowl, use an electric mixer to cream together softened butter and granulated sugar until light and fluffy (2-3 minutes). This crucial step incorporates air, contributing significantly to the cookie’s ultimate tenderness and texture.
- Incorporate Egg and Vanilla:
Beat in the large egg and vanilla extract until just combined. Avoid overmixing at this stage to prevent developing too much gluten.
- Combine Wet and Dry (Crucial for Softness):
Gradually add the whisked dry ingredients to the wet mixture on low speed. Mix just until no streaks of flour remain. Overmixing develops gluten, which leads to tough cookies, so stop immediately as soon as the flour is incorporated.
- Chill the Dough:
Cover the dough and refrigerate for at least 30 minutes. Chilling helps the cookies maintain their shape during baking, preventing excessive spreading, and also contributes to a chewier, more desirable texture.
- Preheat Oven & Prepare Sheets:
Preheat your oven to 375°F (190°C). Line baking sheets with parchment paper for easy release and quick cleanup, ensuring your cookies don’t stick.
- Scoop and Space Dough:
Scoop 1 ½-inch dough balls and place them about 2 inches apart on the prepared baking sheets. This generous spacing allows for even air circulation around each cookie and prevents them from melding together as they spread slightly.
- Bake to Perfection (Don’t Overbake!):
Bake for 8-10 minutes, or until the edges are lightly golden but the centers still appear soft. Remember, the cookies will continue to set as they cool on the hot baking sheet, so pulling them out when they look slightly underdone in the center is key for ultimate softness.
- Cool Cookies:
Allow cookies to cool on the baking sheets for 5 minutes before carefully transferring them to a wire rack to cool completely. This initial cooling on the sheet prevents breakage and allows them to firm up properly for handling.
Phase 2: Melting & Mixing Your Chocolate and Caramel Layers
- Prepare Chocolate Layer:
In a microwave-safe bowl, combine ½ cup semi-sweet chocolate chips and 2 tablespoons unsalted butter. Microwave in 30-second intervals, stirring thoroughly after each, until melted and smooth. Stir in ¼ cup powdered sugar and 1 tablespoon milk or cream until well combined and smooth. Add a tiny bit more milk or cream if the mixture feels too thick for spreading.
- Apply Chocolate Layer:
Once cookies are completely cool, spread a thin, even layer of the chocolate mixture on top of each one. An even coating provides a smooth canvas for your caramel swirl and ensures consistent flavor.
- Prepare Caramel Swirl:
In a small microwave-safe bowl, combine 12-15 unwrapped caramel candies and 2 tablespoons milk or cream. Microwave in 20-second intervals, stirring vigorously after each, until the caramels are fully melted and smooth. Stir well to ensure a uniform, pourable consistency, adding a tiny splash more milk if necessary.
- Pipe Caramel Swirls:
Transfer the melted caramel to a piping bag with a small round tip, or use a sturdy zip-top bag with a corner snipped off. Pipe a beautiful swirl of caramel on top of the chocolate layer on each cookie, creating an appealing visual contrast.
Phase 3: The Grand Finale & Setting
- Add Optional Chocolate Dollop:
For an extra decorative touch, combine 1 tablespoon semi-sweet chocolate chips and ½ teaspoon milk or cream in a very small microwave-safe bowl. Microwave for 10-15 seconds until just melted, then stir until smooth. Use a toothpick or tiny spoon to carefully place a small dollop or swirl on top of the caramel layer, adding an elegant finishing touch.
- Allow Layers to Set:
Let the cookies set at room temperature until the frosting is firm to the touch. For faster setting, especially if you’re in a hurry, you can briefly chill them in the refrigerator for 10-15 minutes.
Mastering the Art: Pro Tips for Unforgettable Dream Cookies
The Chill Factor: Why Dough Needs a Break
While the recipe suggests 30 minutes, chilling the dough for an hour or even overnight can significantly improve texture, prevent spreading, and deepen the flavor. Don’t skip this step for truly professional results; it’s a game-changer for these Caramel Chocolate Dream Cookies.
Don’t Overmix! The Golden Rule for Tenderness
Once you add the dry ingredients, mix just until no streaks of flour are visible. Overmixing develops gluten, making your cookies tough instead of exquisitely soft and tender. A gentle hand here ensures perfect chewiness.
Spotting Perfection: How to Tell When Cookies Are Done
The key to soft cookies is pulling them out of the oven when the edges are set and lightly golden, but the centers still look slightly undercooked or soft. They will continue to bake on the hot sheet as they cool, achieving that perfect internal texture.
Temperature Control: Smooth Layers Every Time
When melting the chocolate and caramel, use short microwave bursts and stir well between each. Overheating can cause them to seize or become grainy. If your caramel becomes too thick, a tiny splash more milk, stirred in slowly, can loosen it beautifully.
Swirl Savvy: Techniques for Beautiful Designs
For a beautiful caramel swirl, apply even, consistent pressure to your piping bag or snipped corner. Experiment with different patterns, such as concentric circles or zig-zags, before the chocolate layer fully sets, to find your signature look.
Oh No! Troubleshooting Common Cookie Conundrums
Cookies Spreading Too Much?
This often happens if your butter was too soft initially, the dough wasn’t chilled enough, or your oven temperature is too low. Ensure your butter is softened but still cool to the touch, and always chill the dough adequately for at least 30 minutes.
Double-check your oven temperature with an oven thermometer to ensure accuracy. If your oven runs cool, it can cause the butter to melt and spread before the cookie sets.
My Cookies Are Hard or Dry!
Overbaking is the most common culprit for hard cookies. Remember to pull them from the oven when the centers still look slightly soft; they will continue to firm up as they cool.
Overmixing the dough after adding flour can also lead to tough cookies by developing too much gluten. Additionally, accurately measuring your flour, preferably by weight, helps avoid adding too much, which can dry out the dough.
Caramel or Chocolate Layer Not Smooth?
This usually occurs if the chocolate or caramel was overheated, causing it to seize, or if not enough liquid (milk or cream) was added. Always microwave in short bursts, stirring frequently, and ensure you add the specified amount of milk/cream.
If either mixture does seize, you can sometimes rescue it by stirring in a bit more warm milk or cream, very slowly, until it becomes smooth again. Patience and gentle heating are key.
Sweet Swaps & Creative Twists: Customizing Your Cookies
Dietary Adjustments: Gluten-Free & Dairy-Free Options
Gluten-Free Flour: You can substitute an all-purpose gluten-free flour blend (ensure it contains xanthan gum) for the regular flour. Be aware that results may vary slightly in texture and spread, so a little experimentation might be needed.
Dairy-Free Butter & Milk: Use a high-quality plant-based butter alternative that bakes well for the cookie base. For the chocolate and caramel layers, opt for dairy-free chocolate chips and a plant-based milk or cream substitute to ensure they remain dairy-free throughout.
Flavor Explorations: Beyond the Classic Duo
Different Chocolates: Experiment with dark chocolate for a more intense flavor, milk chocolate for a sweeter profile, or even white chocolate for a lovely contrast with the caramel. Each offers a unique experience, much like exploring varieties in a decadent chocolate cake.
Nutty Additions: Fold in ½ cup of finely chopped pecans or walnuts into the cookie dough for an added crunch and earthy flavor dimension. Toasting the nuts lightly beforehand enhances their aroma.
Salted Caramel: For a gourmet touch, sprinkle a tiny pinch of flaky sea salt on top of the caramel layer immediately after piping. This elevates the flavor, creating a delightful sweet-and-salty combination.
Add-Ins & Toppings: Personalize Your Batch
Mini Marshmallows: Lightly press a few mini marshmallows onto the cookie dough before baking for a gooey, melted surprise. This adds a delightful chewiness reminiscent of s’mores.
Sprinkles: Add festive sprinkles to the still-wet chocolate layer for holidays or celebrations. Choose colors that match your event for a personalized touch.
Enjoying Your Caramel Chocolate Dream Cookies: Beyond the Bake
Serving Suggestions: The Perfect Pairings
These Caramel Chocolate Dream Cookies are wonderful on their own as a satisfying sweet treat. However, they also pair beautifully with a tall, cold glass of milk, a warm cup of coffee, or a steaming mug of hot cocoa.
For an ultimate dessert experience, serve them alongside a scoop of vanilla bean ice cream, allowing the warm cookie to slightly melt the ice cream into a luscious pool.
Storage Solutions: Keeping Them Fresh & Delicious
Store your cooled Caramel Chocolate Dream Cookies in an airtight container at room temperature for up to 3-4 days to maintain their optimal softness. Proper storage is key to preserving their delicious texture.
To extend their life slightly, especially in humid or warmer climates, refrigeration can help, though it might cause the cookie base to firm up slightly. Always bring them back to room temperature before serving for the best experience.
Make-Ahead Magic: Prepare for Future Cravings
Dough: The unbaked cookie dough can be made ahead and stored, tightly wrapped in plastic wrap, in the refrigerator for up to 3 days. For longer storage, freeze the dough balls on a baking sheet until firm, then transfer to a freezer-safe bag for up to 1 month. Thaw in the refrigerator before baking.
Baked Cookies: Baked and completely cooled Caramel Chocolate Dream Cookies can be frozen in an airtight container for up to 2 months. Thaw them at room temperature, or for a fresh-baked feel, gently warm them in a low oven (around 250°F / 120°C) for 5-7 minutes.
Your Caramel Chocolate Dream Cookies Questions Answered
Can I use a different type of chocolate for the layers?
Absolutely! While semi-sweet is specified, you can use milk chocolate for a sweeter profile or dark chocolate for a richer, more intense flavor. White chocolate would also create a lovely contrast, offering a different visual and taste experience.
How long do these cookies stay fresh?
When stored in an airtight container at room temperature, these Caramel Chocolate Dream Cookies will maintain their soft texture and delicious flavor for 3-4 days. After that, they might start to dry out slightly, so enjoy them while they’re at their best!
Can I freeze the cookie dough or baked cookies?
Yes, both are possible! You can freeze the prepared dough balls on a baking sheet until firm, then transfer to a freezer-safe bag for up to a month. Bake from frozen, adding a couple of minutes to the baking time. Baked and cooled cookies can also be frozen in an airtight container for up to two months, ready for a quick treat, much like storing components for a perfect soft and chewy chocolate chip cookie cake.
What’s the best way to get perfect swirls?
Practice makes perfect! Ensure both your chocolate and caramel layers are smooth and of a good, pourable consistency. Using a piping bag with a small round tip provides the most control for intricate swirls. Consistent, steady pressure is key for beautiful, even lines. For inspiration on beautiful caramel applications, you might also look at techniques used in salted caramel swirl brownies.
Is chilling the dough really necessary?
Yes, chilling the dough is highly recommended for these Caramel Chocolate Dream Cookies! It helps the butter solidify, preventing the cookies from spreading too much in the oven, and contributes to that desirable chewy texture that makes them so special. Even 30 minutes makes a noticeable difference in the final product’s shape and softness.
Ready to Impress? Share Your Caramel Chocolate Dream Cookies Masterpiece!
Now that you’re armed with the secrets to consistently soft, tender, and utterly decadent Caramel Chocolate Dream Cookies, it’s time to create your own batch of bliss. These cookies are more than just a treat; they’re a testament to joyful baking and the magic that happens when simple ingredients come together perfectly, leaving everyone wanting another bite.
We’d love to see your creations! Share your beautiful cookies on social media and tag us. And don’t forget to explore our other collection of irresistible dessert recipes for more sweet inspiration, ensuring your baking adventures are always a success!
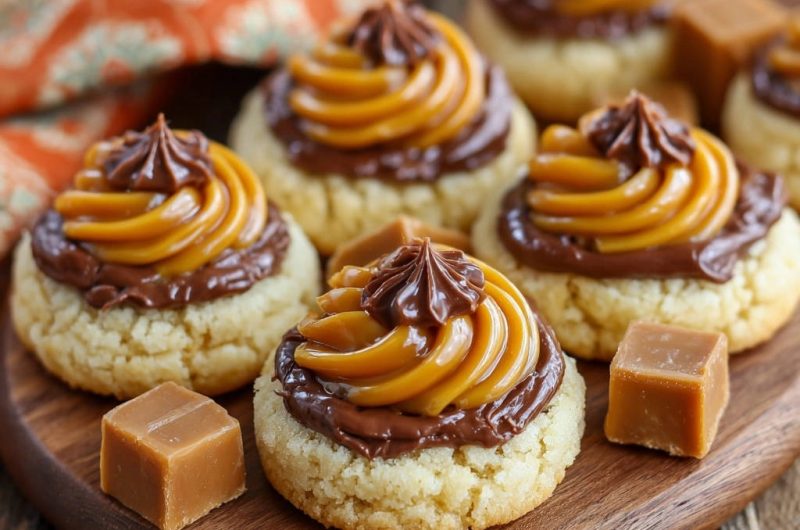
Caramel Chocolate Dream Cookies
Course: DessertCuisine: American CuisineDifficulty: easy12
cookies25
minutes10
minutes35
minutesAmerican Cuisine
Ingredients
For the Soft Cookie Base:
2 1/4 cups all-purpose flour
1 teaspoon baking powder
1/4 teaspoon salt
1 cup (2 sticks) unsalted butter, softened
1 1/2 cups granulated sugar
1 large egg
1 teaspoon vanilla extract
For the Chocolate Layer:
1/2 cup (about 4 ounces) semi-sweet chocolate chips
2 tablespoons unsalted butter
1/4 cup powdered sugar
1 tablespoon milk or cream
For the Caramel Swirl:
12-15 unwrapped caramel candies
2 tablespoons milk or cream
For the Chocolate Dollop (Optional):
1 tablespoon semi-sweet chocolate chips
1/2 teaspoon milk or cream
Directions
- For the Soft Cookie Base: In a medium bowl, whisk together the flour, baking powder, and salt. Set aside.
- In a large bowl, using an electric mixer, cream together the softened butter and granulated sugar until light and fluffy, about 2-3 minutes. This step is important for air incorporation and softness.
- Beat in the egg and vanilla extract until just combined.
- Here’s the key for soft cookies: Gradually add the dry ingredients to the wet ingredients, mixing on low speed just until no streaks of flour remain. Do not overmix the dough, as this develops gluten and can make cookies tough.
- Cover the dough and chill in the refrigerator for at least 30 minutes. This helps the cookies hold their shape and contributes to a chewier texture.
- Preheat your oven to 375 degrees Fahrenheit (190 degrees Celsius). Line baking sheets with parchment paper.
- Scoop out dough into 1 1/2 inch balls and place them about 2 inches apart on the prepared baking sheets.
- For that perfect soft bake: Bake for 8-10 minutes, or until the edges are lightly golden but the centers still look soft. Do not overbake. The cookies will continue to set as they cool on the baking sheet.
- Let the cookies cool on the baking sheets for 5 minutes before transferring them to a wire rack to cool completely.
- For the Chocolate Layer: In a microwave-safe bowl, combine chocolate chips and butter. Microwave in 30-second intervals, stirring after each, until melted and smooth. Stir in powdered sugar and milk/cream until well combined and smooth. If too thick, add a tiny bit more milk or cream.
- Spread a thin layer of the chocolate mixture on top of each cooled cookie.
- For the Caramel Swirl: In a small microwave-safe bowl, combine unwrapped caramel candies and milk/cream. Microwave in 20-second intervals, stirring after each, until the caramels are melted and smooth. If needed, stir vigorously to combine.
- Transfer the melted caramel to a piping bag with a small round tip or a sturdy zip-top bag with a corner snipped off. Pipe a swirl of caramel on top of the chocolate layer on each cookie.
- For the Chocolate Dollop (Optional): In a very small microwave-safe bowl, combine chocolate chips and milk/cream. Microwave for 10-15 seconds, just until melted. Stir until smooth. Using a toothpick or a tiny spoon, carefully place a small dollop or swirl of this melted chocolate on top of the caramel swirl for decoration.
- Let the cookies set at room temperature until the frosting is firm, or chill briefly to speed up setting.
Notes
- Avoid overmixing dough and overbaking cookies for guaranteed softness.