Oh, friends, let’s talk about cheesy garlic breadsticks. Is there anything more comforting, more universally loved, than a warm, soft, gooey breadstick fresh from the oven? I think not! They’re the perfect companion to a bowl of soup, a hearty pasta dish, or honestly, just enjoyed all on their own as a delightful snack.
But if you’ve ever tried making them at home, you might have run into a common problem: breadsticks that are disappointingly tough, dense, or heavy instead of that dreamy, cloud-like fluffiness you crave. I’ve definitely been there! For years, my homemade versions just weren’t quite right.
It took some experimenting, but I finally discovered the simple secrets to achieving guaranteed fluffy, tender cheesy garlic breadsticks every single time. And the best part? It’s way easier than you might think. Get ready to bake up a batch of pure comfort!
Why You’ll Absolutely Adore This Recipe
This recipe isn’t just another breadstick tutorial. It’s a game-changer! Here’s why these cheesy garlic breadsticks will become your new go-to:
- They are truly fluffy, with a tender interior and a slightly crisp bottom crust.
- Packed with irresistible garlic and herb flavor.
- Loaded with not one, not two, but three types of cheese for maximum cheesy pull and taste.
- Surprisingly simple to make, even for beginner bakers.
- Perfect for pairing with countless meals or devouring as a standalone treat.
- The aroma filling your kitchen while they bake is absolutely divine.
Say goodbye to tough, dry breadsticks and hello to your new favorite fluffy, cheesy delight!
Gathering Your Ingredients for Fluffy Cheesy Garlic Breadsticks
Creating that perfect balance of fluffy dough, potent garlic butter, and a melty cheese blend starts with understanding the role each ingredient plays. We’re using basic pantry staples, but selecting and handling them correctly is key to success.
For the Dough Base:
- Warm Water: Not hot, not cold! The ideal temperature range (105-115°F) is crucial for waking up the active dry yeast. Water that’s too hot can kill it, while water that’s too cold won’t activate it properly, leading to dense breadsticks.
- Sugar: Just a teaspoon acts as food for the yeast, helping it become active and bubbly quickly. It also contributes to the lovely golden-brown color of the crust.
- Active Dry Yeast: One packet (about 2 and 1/4 teaspoons) is all you need. Make sure it’s fresh! The frothing step confirms its vitality.
- All-Purpose Flour: This is the main structure provider. Starting with 3 and a half cups gives you a base, and having up to 4 cups total allows you to adjust for stickiness. The goal is a dough that’s slightly tacky but manageable, not overly dry, which is a common culprit for tough breadsticks.
- Salt: Enhances the flavor of the dough and controls the yeast activity. Don’t forget it!
- Olive Oil (for the dough and bowl): Adds a touch of richness to the dough and helps keep it tender. Using it to grease the bowl prevents sticking during the rise.
For the Flavor & Cheese Topping:
- Unsalted Butter: Melted and combined with garlic and herbs, this creates the signature flavor. Using unsalted butter gives you control over the saltiness.
- Garlic: Freshly minced garlic is non-negotiable here! It infuses the butter and breadsticks with pungent flavor. Two cloves provide a good garlic punch.
- Dried Oregano and Dried Parsley: Classic Italian-inspired herbs that complement the garlic and cheese beautifully. Using dried herbs means they are ready to go from the pantry.
- Shredded Mozzarella Cheese: Essential for that iconic cheesy pull and gooey texture. Using pre-shredded is fine, but shredding from a block often melts even better.
- Shredded Cheddar Cheese: Adds a sharper, more savory cheese dimension to the mix. A little cheddar goes a long way in boosting the overall cheese flavor.
- Grated Parmesan Cheese: Sprinkled over the top, Parmesan adds a salty, nutty, and slightly sharp finish, contributing to a golden, crispy edge.
- Olive Oil (for brushing): A little extra olive oil before the garlic butter helps get the breadsticks ready for their flavorful topping.
Having all your ingredients measured and ready before you start makes the process smooth and enjoyable.
Crafting Your Cheesy Garlic Breadsticks: Step-by-Step Mastery
Making these breadsticks is a rewarding process! Each step contributes to the final fluffy texture and incredible flavor. Follow along, and you’ll be a breadstick pro in no time.
-
Activate Your Yeast: The First Step to Fluffiness
In a generously sized bowl, combine the warm water and sugar. Remember that sweet spot for temperature? It’s critical! Sprinkle the active dry yeast evenly over the surface. Don’t stir it in yet. Let this mixture sit quietly for 5 to 10 minutes. What you’re looking for is visible proof that your yeast is alive and ready to work: it should get bubbly and foamy. If it doesn’t, your water might have been too hot or too cold, or your yeast may be old. You’ll need to start this step over with fresh yeast and correctly tempered water. This activation is the absolute cornerstone of achieving that fluffy texture.
-
Combine the Dough Ingredients (Initial Mix)
Once your yeast is happily frothing, add in the initial 3 and a half cups of all-purpose flour, the salt, and the 1/4 cup of olive oil. At this stage, you’re just bringing everything together. You can use a sturdy spoon or the paddle attachment of a stand mixer. Mix until you see a rough, shaggy dough forming. It won’t look smooth or uniform yet, and that’s exactly what you want.
-
Kneading for Strength and Elasticity
Turn the shaggy dough out onto a surface lightly dusted with flour. Now, the magic of kneading begins! Spend 6 to 8 minutes kneading the dough. This isn’t just busy work; it’s developing the gluten network, which is essential for trapping the gas produced by the yeast during rising. This gluten structure is what gives your breadsticks their characteristic chewiness and, crucially, allows them to rise high and stay light. The dough should transform from sticky and uneven to smooth, elastic, and resilient. If it feels excessively sticky and won’t pull away from your hands easily after a minute or two of kneading, add the remaining flour a tablespoon at a time, kneading after each addition, until it’s just slightly tacky but manageable. Be cautious not to add too much flour, as this can result in dense, tough breadsticks.
-
The All-Important First Rise
Lightly coat a clean bowl with olive oil – just enough to prevent sticking. Place your beautifully kneaded dough into the bowl, turning it over to make sure it’s lightly coated in oil. Cover the bowl snugly with plastic wrap. Find a warm spot in your kitchen – away from drafts – and let the dough rise for 45 to 60 minutes. The goal is for the dough to double in size. This rest period allows the yeast to ferment and produce carbon dioxide gas, which is what creates all those lovely air pockets and contributes to the fluffy texture. Patience is key here!
-
Prepare for Baking
While your dough is enjoying its final moments of rising, preheat your oven to 400 degrees F (200 degrees C). Line a large baking sheet with parchment paper. This prevents the cheesy breadsticks from sticking and makes cleanup a breeze.
-
Shape the Breadsticks (Punch Down & Divide)
Once doubled, the dough will look puffy and glorious. Gently punch it down to release the accumulated gas. Turn the dough out onto a lightly floured surface again. Divide the dough into 8 equal portions. You can eyeball it, or for precision, use a kitchen scale. Equal portions ensure consistent baking time.
-
Rolling and Resting
Take each portion and gently roll or stretch it into a log shape, aiming for about 10 to 12 inches in length. Dough has elasticity, so it might spring back a bit. If it resists stretching, just let it rest for 2-3 minutes uncovered, and then try again. It will relax and be much easier to shape. Arrange the shaped breadsticks on your prepared baking sheet, leaving a little space between them so they don’t bake into one giant breadstick blob.
-
Prepare and Apply the First Layer of Garlic Butter
In a small bowl, melt the unsalted butter. To the melted butter, add the minced garlic, dried oregano, and dried parsley. Give it a good stir. Now, using a pastry brush, generously brush about half of this fragrant garlic butter mixture over the tops of the shaped breadsticks on the baking sheet. This is the first layer of flavor!
-
Load on the Cheese!
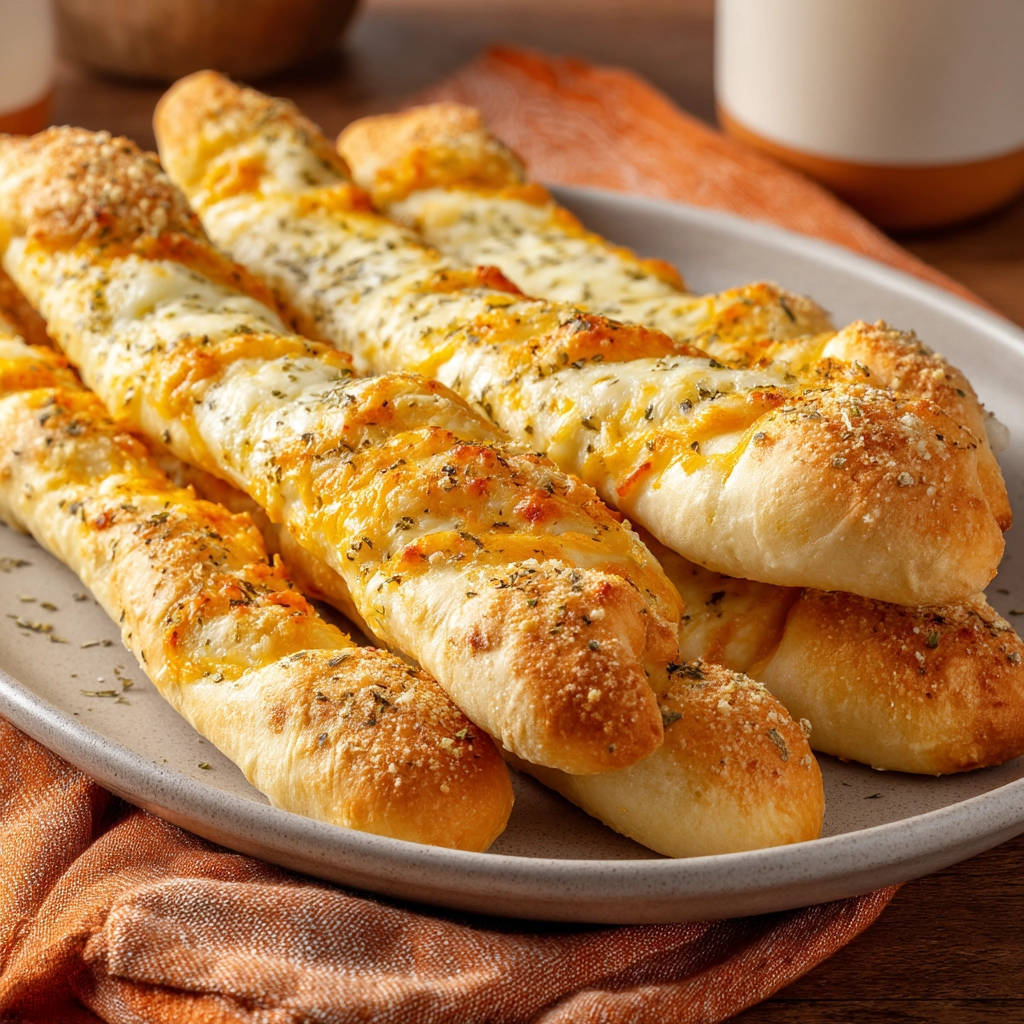
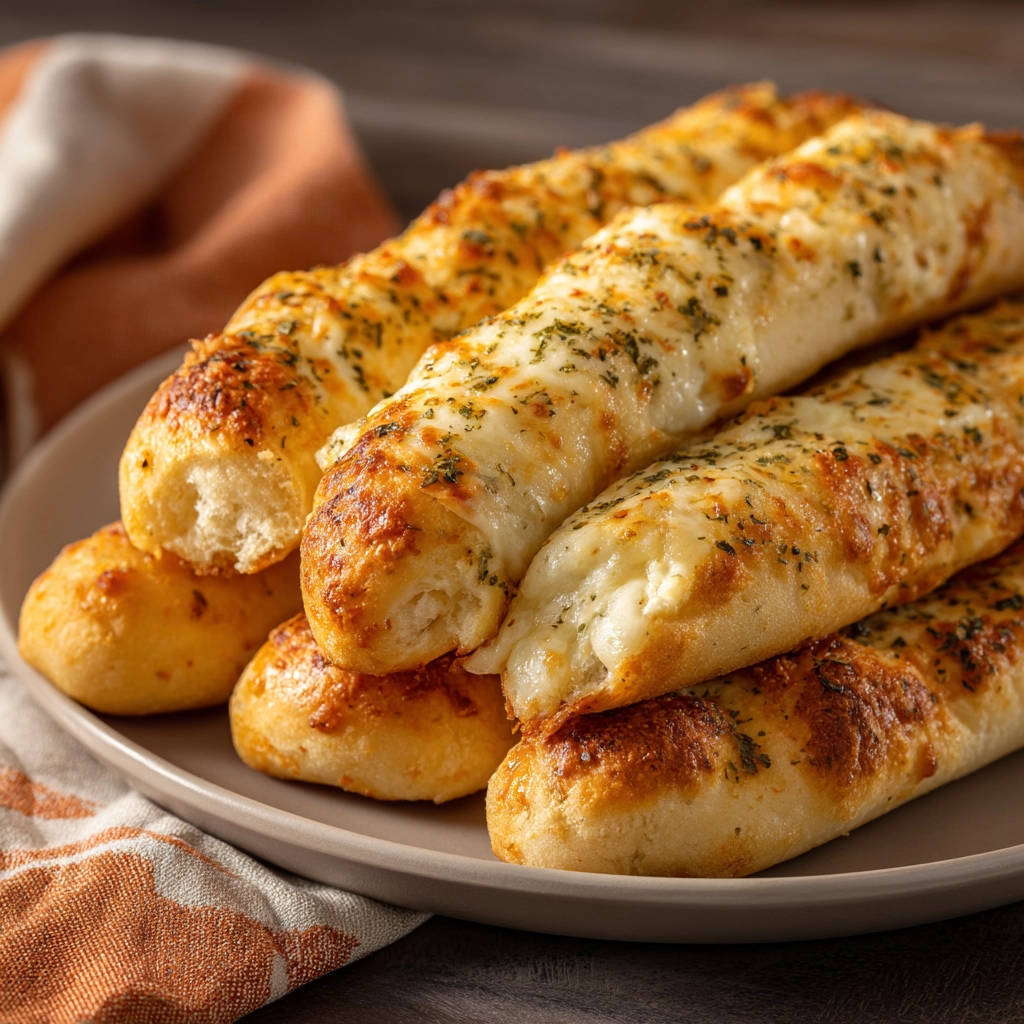
Time for the cheesy goodness! Evenly sprinkle the shredded mozzarella and cheddar cheeses over the buttered breadsticks. Be generous! If you like, sprinkle the grated Parmesan cheese over the very ends of the breadsticks for extra flavor and texture, creating a nice crusty finish on the tips.
-
Bake Until Golden and Bubbly
Place the baking sheet in the preheated oven. Bake for 15 to 20 minutes. Keep an eye on them – they are done when the cheese is completely melted, bubbly, and starting to turn golden brown in spots, and the breadsticks themselves are golden underneath and around the edges.
-
The Finishing Garlic Butter Kiss
As soon as the breadsticks come out of the oven, while they are piping hot, brush the remaining garlic butter mixture all over them. This second brush adds another layer of intense garlic flavor and helps keep the breadsticks wonderfully moist and tender. Serve them immediately while they are warm and the cheese is perfectly stretchy!
Tips for Perfect Cheesy Garlic Breadsticks Every Time
Achieving those elusive fluffy breadsticks boils down to a few key techniques. Here are my top tips to ensure your success:
- Yeast Check is a Must: Don’t skip the step of letting the yeast bloom in warm water with sugar. If it doesn’t get foamy within 10 minutes, your yeast isn’t active, and your dough won’t rise. Start over with fresh yeast.
- Measure Flour Correctly: Spoon your flour lightly into the measuring cup and level it off. Scooping directly from the bag can compact the flour, leading to too much flour and a tough dough. Use the lower amount initially (3 1/2 cups) and add more only if the dough is excessively sticky after several minutes of kneading.
- Trust the Knead: Kneading fully (6-8 minutes) is crucial for developing gluten. A well-kneaded dough will be smooth, elastic, and pass the “windowpane test” (you can gently stretch a small piece thin enough to see light through it without it tearing). This is key for a light crumb.
- Warm Place for Rising: Yeast loves warmth! A slightly warm oven (turned off, or on at the lowest setting for a minute then turned off) or even just a warm countertop can help your dough double beautifully in size.
- Gentle Shaping: Don’t manhandle the dough when shaping the breadsticks. Gentle stretching or rolling maintains the air pockets created during the rise. If it springs back, walk away for a few minutes and let the gluten relax.
- Don’t Under or Overbake: Bake until golden brown. Underbaking means a raw, doughy interior. Overbaking leads to dryness. The cheese should be bubbly and the edges of the breadsticks nicely colored.
- Double Garlic Butter Brush: Brushing half before baking allows the flavors to infuse while baking, and the second brush right out of the oven keeps them moist and boosts that fresh garlic aroma.
What to Serve With These Cheesy Garlic Breadsticks
While utterly addictive on their own, these fluffy cheesy garlic breadsticks are fantastic served alongside a variety of dishes. They are a classic partner for pasta dishes like a hearty Beef Ragu or a creamy Alfredo. Pair them with comforting soups like a Classic Comfort Chicken Soup or a Hearty Vegetable Stew. They’re also great dipped in marinara sauce or served alongside a simple salad for a lighter meal.
Your Cheesy Garlic Breadstick Questions Answered (FAQ)
Can I make the dough ahead of time?
Yes! After the first rise (Step 4), you can punch down the dough, place it in a lightly oiled bowl, cover it tightly with plastic wrap, and refrigerate it for up to 24 hours. When you’re ready to bake, let the dough sit at room temperature for about 30-60 minutes before proceeding with dividing and shaping (Step 6). The cold slows down the yeast activity, allowing for a longer fermentation which can sometimes enhance flavor.
How do I store leftover breadsticks?
Leftover cheesy garlic breadsticks are best stored in an airtight container at room temperature for 1-2 days, or in the refrigerator for up to 3-4 days. For longer storage, they can be frozen after baking. Wrap them individually or place them in a freezer-safe bag.
What’s the best way to reheat them?
To reheat, the oven or a toaster oven is best for maintaining texture. Wrap them loosely in foil and bake at 350°F (175°C) for 8-10 minutes, or until heated through and the cheese is soft again. You can also reheat them briefly in a microwave, but they may lose some of their fluffiness and become a bit chewier.
My dough didn’t rise. What went wrong?
The most common culprits are inactive yeast or incorrect water temperature. Ensure your yeast is fresh (check the expiration date!) and that your water is between 105-115°F (40-46°C). Using salt that is too coarse or adding it directly on top of the yeast before incorporating flour can also sometimes inhibit yeast activity.
Can I add other seasonings or cheeses?
Absolutely! This recipe is a great base for customization. Feel free to add a pinch of garlic powder or onion powder to the garlic butter. You could also experiment with other melty cheeses like provolone or Monterey Jack, or add a sprinkle of red pepper flakes for a little heat.
Can I use rapid rise or instant yeast?
Yes, you can typically substitute rapid-rise or instant yeast. You usually don’t need to proof it in warm water first; you can often just add it directly to the dry ingredients. However, proofing it as instructed in Step 1 is still a good way to ensure your yeast is active before you commit to making the dough.
Enjoy Your Homemade Fluffy Cheesy Garlic Breadsticks!
There you have it – the simple path to achieving incredibly fluffy, cheesy, garlicky breadsticks right in your own kitchen. These are perfect for movie nights, game days, potlucks, or just elevating a weeknight dinner. The process is forgiving, the results are spectacular, and the smell… oh, the smell is just divine!
Give this recipe a try and experience the joy of homemade breadsticks that are anything but tough. I guarantee you’ll be making them again and again.
Did you try this recipe? How did your fluffy cheesy garlic breadsticks turn out? Let me know in the comments below! Happy baking!
Cheesy Garlic Breadsticks

Ingredients
- 1 and 1/4 cups warm water (105-115 degrees F)
- 1 teaspoon sugar
- 2 and 1/4 teaspoons active dry yeast (one packet)
- 3 and 1/2 to 4 cups all-purpose flour
- 2 teaspoons salt
- 1/4 cup olive oil, plus more for brushing
- 4 tablespoons unsalted butter, melted
- 2 cloves garlic, minced
- 1/2 teaspoon dried oregano
- 1/2 teaspoon dried parsley
- 2 cups shredded mozzarella cheese
- 1/2 cup shredded cheddar cheese
- 1/4 cup grated Parmesan cheese
Directions
- In a large bowl, combine the warm water and sugar. Sprinkle the yeast over the top and let stand for 5-10 minutes, or until frothy. This confirms your yeast is active, which is key for fluffiness.
- Add 3 and 1/2 cups of the flour, salt, and 1/4 cup olive oil to the yeast mixture. Mix with a spoon or stand mixer until a shaggy dough forms.
- Turn the dough out onto a lightly floured surface. Knead for 6-8 minutes until the dough is smooth and elastic. This develops the gluten structure necessary for a light crumb. If the dough is too sticky, add the remaining flour a tablespoon at a time, but be careful not to add too much flour, as this can make the breadsticks tough. Aim for a dough that is slightly tacky but pulls away from your hands.
- Lightly grease a clean bowl with olive oil. Place the dough in the bowl, turning to coat. Cover with plastic wrap and let rise in a warm place for 45-60 minutes, or until doubled in size. This crucial first rise allows the yeast to work and creates air pockets.
- Preheat your oven to 400 degrees F (200 degrees C). Line a large baking sheet with parchment paper.
- Punch down the risen dough to release the air. Turn it out onto a lightly floured surface and divide into 8 equal portions.
- Gently roll or stretch each portion into a log about 10-12 inches long. Don’t force the shaping; if the dough springs back, let it rest for a few minutes before trying again. Place the shaped breadsticks onto the prepared baking sheet, leaving some space between them.
- In a small bowl, mix together the melted butter, minced garlic, oregano, and parsley. Brush about half of this mixture over the tops of the breadsticks.
- Sprinkle the shredded mozzarella and cheddar cheeses evenly over the buttered breadsticks. Sprinkle the grated Parmesan cheese over the ends if desired, as seen in the photo.
- Bake for 15-20 minutes, or until the cheese is melted and bubbly and the breadsticks are golden brown.
- Brush the remaining garlic butter mixture over the hot breadsticks as soon as they come out of the oven. This adds flavor and keeps them moist. Serve warm.