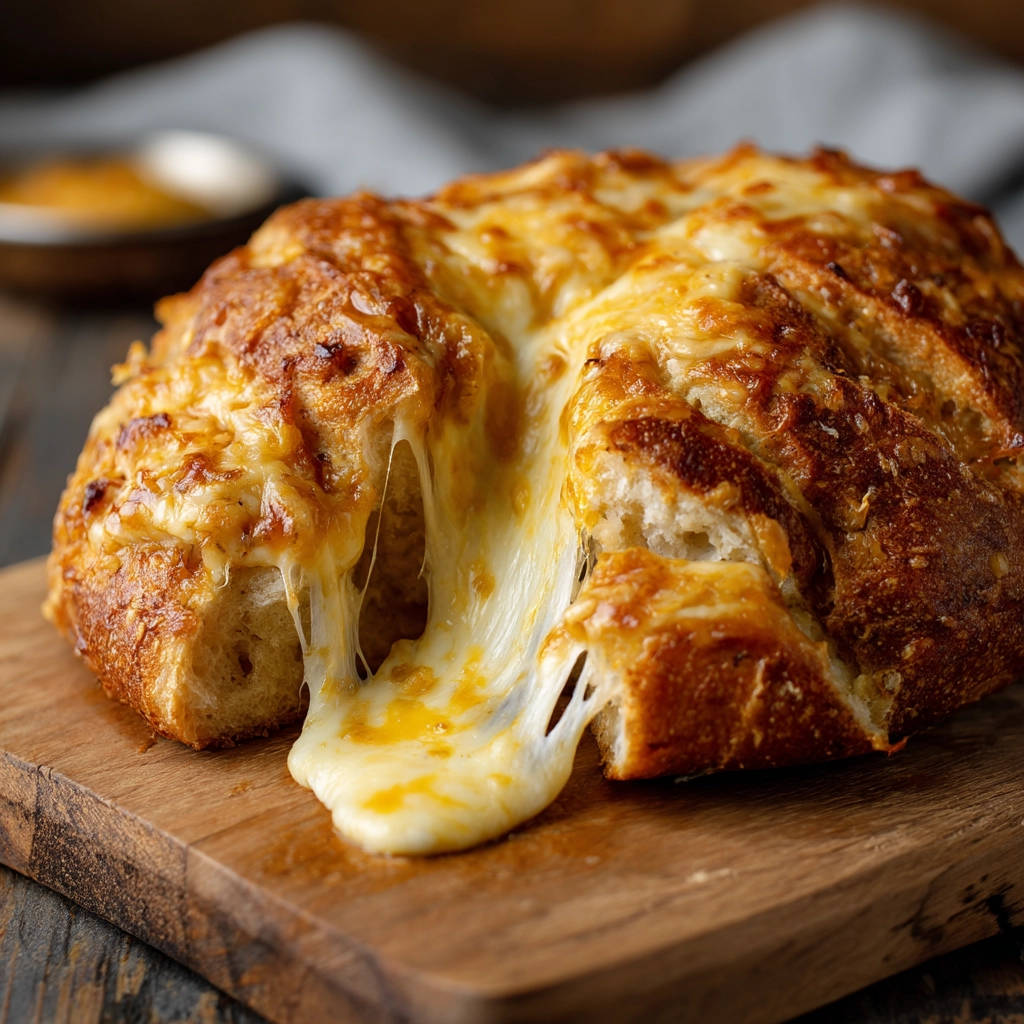
Oh, cheesy pull-apart bread! Just the words conjure up images of warm, gooey goodness, right? It’s the ultimate comfort food appetizer or snack, perfect for sharing (or, let’s be honest, sometimes just for yourself!). There’s nothing quite like pulling off a soft, cheese-laden piece and watching that incredible stringy cheese pull stretch on and on.
But if you’ve ever made it before, you might have faced the disappointment of cheese that didn’t quite melt all the way down into the cracks, leaving some bites feeling a little…empty. I’ve been there! I used to struggle with getting that consistently perfect, gooey pull throughout the entire loaf.
That’s why I’m so excited to share this recipe for Cheesy Pull-Apart Bread with you. I’ve discovered a simple method that guarantees every single crevice is stuffed with melted cheese, leading to that truly ultimate cheese pull experience every single time. Get ready for a cheesy, buttery, crowd-pleasing masterpiece!
Why You’ll Love This Cheesy Pull-Apart Bread
Why is this pull-apart bread recipe destined to become your new favorite? Let me count the ways:
- It delivers on its promise: guaranteed, epic cheese pull in every bite.
- It’s incredibly easy to make with minimal prep time.
- It’s a serious crowd-pleaser, perfect for parties, game nights, or cozy family gatherings.
- You can customize the cheese blend to your heart’s content.
- The combination of crusty bread, rich butter, savory garlic (if you choose!), and abundant melted cheese is simply irresistible.
- It smells heavenly while baking, filling your home with delicious anticipation.
Gathering Your Ingredients for Cheesy Pull-Apart Bread
Creating this cheesy masterpiece requires just a handful of simple ingredients, but selecting the right ones makes all the difference. Think of these components as the building blocks for gooey, buttery perfection.
The star of the show, of course, is the bread itself. You want a large, round loaf with a good, sturdy crust. Something like a sourdough boule or a classic country loaf works wonderfully. The crust provides structure and a delightful textural contrast to the soft, cheesy interior, while the dense crumb holds up well to being sliced and stuffed.
Butter is essential for richness and helping those flavors permeate the bread. Melted unsalted butter creates the perfect base for our savory additions. For that classic garlic bread flavor that pairs so beautifully with cheese, we’re adding fresh minced garlic. If you’re not a fan of garlic, you can certainly leave it out, but it adds an extra layer of deliciousness. Dried parsley brings a touch of color and herbaceousness, and just a pinch of salt and black pepper enhance all the flavors without overpowering the cheese.
Now, let’s talk about the cheese! You’ll need a generous three cups of shredded cheese. The key here is using cheeses that melt well and provide that glorious stretch. A blend is fantastic because it offers complexity. Mozzarella is a melting superstar, providing the ultimate stretch factor. Cheddar adds sharpness and depth of flavor. Feel free to use a pre-shredded blend designed for melting or shred your own from blocks for potentially better meltiness. Gruyere, Monterey Jack, or even some provolone could be excellent additions to your blend.
- 1 large round loaf of crusty bread (such as sourdough or boule)
- 1/2 cup unsalted butter, melted
- 2 cloves garlic, minced (optional, for garlic bread flavor)
- 1 teaspoon dried parsley (optional)
- 1/4 teaspoon salt
- 1/4 teaspoon black pepper
- 3 cups shredded cheese blend (such as mozzarella, cheddar, or a mix of your favorites)
Crafting Your Cheesy Pull-Apart Bread: Step-by-Step
Ready to transform simple ingredients into a cheesy dream? Follow these steps carefully, paying special attention to the technique that ensures that incredible pull. It’s easier than you might think!
- Start by getting your oven ready. You’ll want to preheat it to 350°F (175°C). This ensures the oven is hot and ready to melt that cheese evenly as soon as the bread goes in. While the oven heats, prepare a large piece of heavy-duty aluminum foil – you’ll need it to wrap the loaf later.
- Now, prepare your bread. Using a sharp serrated knife, carefully slice the loaf. First, make cuts crosswise across the top of the bread, almost reaching the bottom crust but stopping just short. You want to create individual segments that can be pulled apart, but keep the base intact so the loaf stays together. Then, repeat the slicing lengthwise, creating a grid pattern of squares or diamonds across the entire top of the bread. The goal is to open up plenty of channels for the butter and cheese to sink into.
- In a small bowl, whisk together the melted unsalted butter with the minced garlic (if you’re including it for that wonderful savory kick), the dried parsley (for a touch of color and herb flavor), salt, and black pepper. Stir until everything is well combined. This is your flavor infusion that will soak into the bread.
- Carefully use your fingers to gently pull apart the cuts you made in the bread. Just open them slightly, creating little gaps. Drizzle the melted butter mixture slowly over the bread, allowing it to seep down into all the cuts and crevices. Try to get the butter coating as much of the exposed bread surface as possible.
- Here is the crucial step for that guaranteed cheese pull! Take handfuls of your shredded cheese blend and generously stuff it deep into all the cuts you made. Don’t just sprinkle it on top. Use your fingers or even a small spoon to push the cheese down as far as it will go. The key is to ensure cheese is nestled throughout the inside of the bread, coating the surfaces of the cut segments, and not just sitting on the surface. Really pack it in there – this is what creates those long, satisfying cheese strings when you pull it apart!
- Place the generously stuffed loaf onto the large piece of heavy-duty aluminum foil you prepared earlier. Carefully wrap the loaf completely in the foil, sealing it tightly into a neat packet. Wrapping it securely is important for the first stage of baking.
- Bake the wrapped loaf in your preheated oven for 15 minutes. This initial covered bake is the secret weapon. It allows the heat to penetrate the loaf slowly and evenly, ensuring that all that packed-in cheese melts thoroughly throughout the inside of the bread without the crust getting too dark or hard too quickly. You’re essentially creating a little steamy, cheesy environment inside the foil.
- After the initial 15 minutes of wrapped baking, carefully remove the loaf from the oven and unwrap it. Be careful as there may be some steam. Place the unwrapped loaf back into the oven.
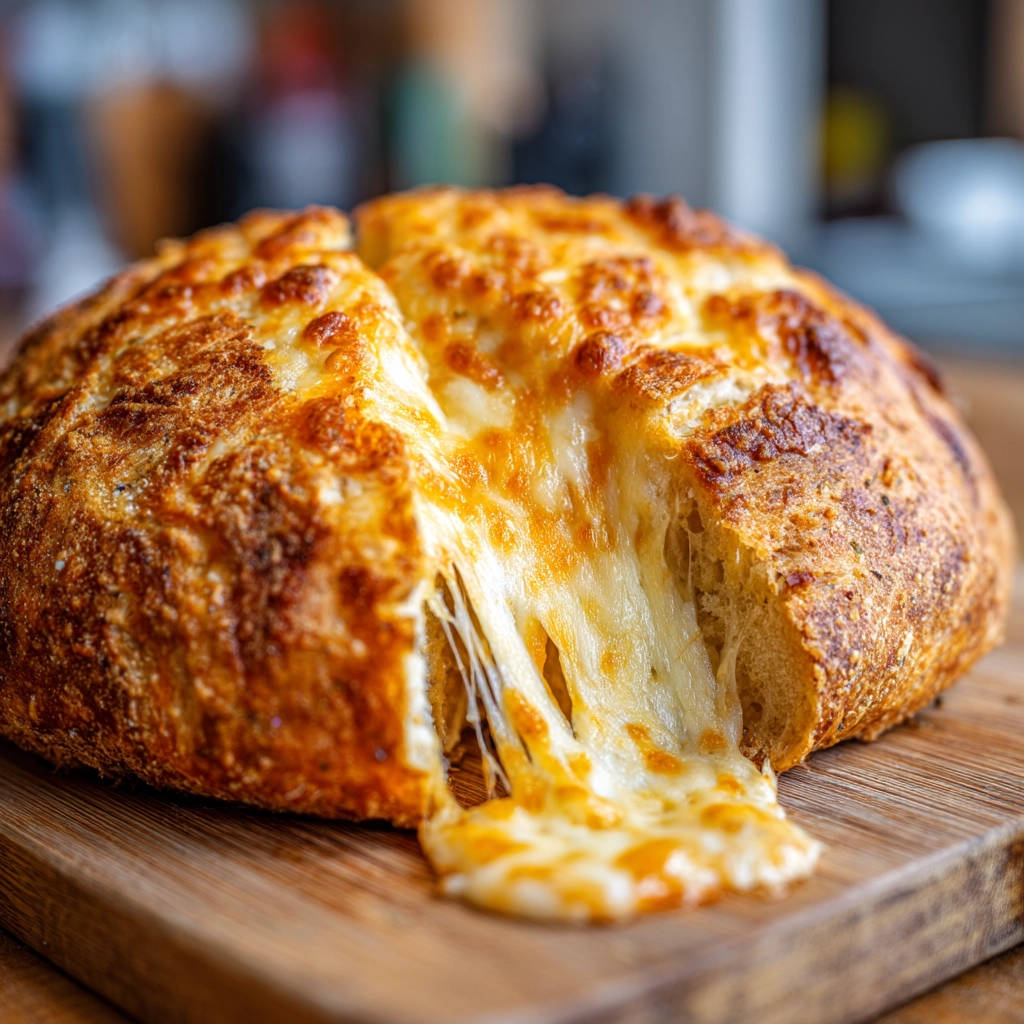
- Continue baking for another 5 to 10 minutes, or until the cheese on top is bubbling and looks gloriously melted, and the bread crust is golden brown and appears perfectly crusty. This second stage without the foil allows the exterior of the bread to crisp up and the top layer of cheese to get bubbly and slightly browned.
- Once it looks perfect, take the bread out of the oven. It will be piping hot, so let it cool on a wire rack or a cutting board for just a few minutes before serving. This brief cooling time helps the cheese set just enough to make it pullable without being dangerously hot.
- Gather everyone around! Place the warm, irresistible loaf in the center and let everyone pull the segments apart. Prepare for sighs of satisfaction as you witness that amazing cheese pull you worked so hard to achieve!
Tips for Perfect Cheesy Pull-Apart Bread Every Time
Making this cheesy loaf is straightforward, but a few pro tips can elevate it from great to absolutely legendary!
- Choose Your Bread Wisely: As mentioned, a crusty loaf like sourdough or a country boule is best. Avoid soft sandwich bread or very airy loaves, as they won’t hold up to the slicing and stuffing as well.
- Don’t Skimp on the Cuts: The more cuts you make (without going all the way through the base!), the more pockets you create for butter and cheese, which means more cheesy goodness in every pull.
- Pack That Cheese In: This is the absolute key! Use your fingers or a tool to really push the shredded cheese deep down into every single cut. Get it in there good! This ensures even melting throughout the loaf.
- Vary Your Cheese Blend: While mozzarella and cheddar are classics, don’t be afraid to experiment! Monterey Jack, provolone, fontina, or even a little smoked gouda can add wonderful complexity. Just make sure you’re using cheeses known for good meltability.
- Add Extra Flavor: Beyond garlic and parsley, consider adding a sprinkle of dried Italian seasoning, a pinch of red pepper flakes for a little heat, or even some finely chopped chives to the butter mixture. Cooked, crumbled bacon (ensure it’s fully cooked and crispy!) can also be stuffed into the cuts along with the cheese for an extra savory layer. If you’re looking for other flavorful bites, you might enjoy these Sweet and Savory Bacon Bites or Appetizer Pinwheels.
- Heavy-Duty Foil is Your Friend: Regular aluminum foil might tear when wrapping the heavy, stuffed loaf. Using heavy-duty foil ensures a tight seal for that essential first baking stage.
- Watch the Second Bake Closely: Once unwrapped, the bread can brown quickly. Keep an eye on it during the last 5-10 minutes to ensure the top cheese is bubbly and golden, but the crust doesn’t burn.
- Serve Warm: Cheesy pull-apart bread is best enjoyed warm, right after its brief cooling period. The cheese is at its peak gooeyness!
What to Serve With Cheesy Pull-Apart Bread
While this bread is absolutely fantastic on its own as a snack or appetizer, it also makes a wonderful accompaniment to various meals. It pairs beautifully with hearty soups, like a rich tomato soup or a comforting beef stew. Imagine dunking a warm, cheesy piece into a bowl of savory goodness! It’s also a great addition to a casual dinner alongside a fresh salad, perhaps a simple green salad or something more substantial like our Easy Kale Salad. For a fuller meal, it complements pasta dishes or even grilled meats.
Your Cheesy Pull-Apart Bread Questions Answered (FAQ)
Can I use a different type of bread?
Yes, absolutely! The key is a crusty, dense loaf that can handle being cut and stuffed without falling apart. Sourdough, boule, or even a round country Italian bread are excellent choices. Avoid soft sandwich loaves.
Do I have to use garlic and parsley?
Nope! The garlic and parsley add a delicious savory, herby flavor, reminiscent of garlic bread, but they are completely optional. You can omit them entirely if you prefer just buttery, cheesy bread.
Why do you wrap the bread in foil for the first part of baking?
This is the secret trick to the guaranteed cheese pull! Wrapping the bread in foil creates a steamy environment that helps the cheese melt thoroughly deep within the loaf before the crust has a chance to get too dark or crispy. It ensures all those packed-in pockets of cheese get gooey and melted from the inside out.
Can I prep this cheesy bread ahead of time?
You can prepare the loaf up to the point of stuffing the cheese. Slice the bread, make the butter mixture, and drizzle it over. Then, cover the loaf tightly with plastic wrap and store it in the refrigerator for a few hours. When you’re ready to bake, stuff the cheese in right before wrapping and baking as directed. Stuffing the cheese too far ahead can make it clumpy.
How do I reheat leftover cheesy pull-apart bread?
The best way to reheat is in the oven or an air fryer. Wrap the leftovers loosely in foil and bake at 350°F (175°C) for 10-15 minutes, or until heated through and the cheese is melted again. Avoid the microwave, as it can make the bread tough and the cheese less gooey.
What are the best cheeses for melting?
For ultimate meltiness and stretch, go for cheeses like low-moisture mozzarella, Monterey Jack, Fontina, Provolone, or Gruyere. Cheddar adds great flavor but melts slightly differently than mozzarella. A blend of a good melting cheese (like mozzarella) and a flavorful cheese (like cheddar) is often the perfect combination for this recipe.
Enjoy Your Homemade Cheesy Pull-Apart Bread!
There you have it! Your simple, step-by-step guide to making the most amazing, gooey, pull-apart cheesy bread you’ve ever experienced. It’s the perfect recipe to share with loved ones, guaranteed to bring smiles and satisfied sighs with every cheesy pull.
Give this recipe a try, and prepare yourself for the ultimate cheese pull! If you make it, I’d love to hear how it turned out. Leave a comment below and let me know what cheese blend you used or if you added any extra ingredients. Happy baking and even happier pulling!
Cheesy Pull-Apart Bread

Ingredients
- 1 large round loaf of crusty bread (like sourdough or boule)
- 1/2 cup unsalted butter, melted
- 2 cloves garlic, minced (optional, for garlic bread flavor)
- 1 teaspoon dried parsley (optional)
- 1/4 teaspoon salt
- 1/4 teaspoon black pepper
- 3 cups shredded cheese blend (such as mozzarella, cheddar, or a mix of your favorites)
Directions
- Preheat your oven to 350°F (175°C).
- Slice the bread crosswise and lengthwise, creating a grid pattern. Slice almost all the way through to the bottom crust, but do not cut through the base. This creates the squares or diamonds that you will pull apart.
- In a small bowl, whisk together the melted butter, minced garlic (if using), dried parsley (if using), salt, and pepper.
- Carefully pull apart the cuts in the bread slightly. Drizzle the butter mixture over and down into all the cuts. Try to get the butter in between the squares.
- Now for the key step to that guaranteed cheese pull: Generously stuff the shredded cheese deep into all the cuts you made. Use your fingers or a small spoon to push the cheese down as far as it will go, ensuring cheese is nestled throughout the bread and not just sitting on top. Really pack it in there.
- Place the stuffed loaf on a large piece of heavy-duty aluminum foil. Wrap the loaf completely in the foil, sealing it tightly.
- Bake the wrapped loaf for 15 minutes. Baking it wrapped first ensures that the cheese melts thoroughly throughout the inside of the loaf without the crust getting too dark too quickly.
- After 15 minutes, unwrap the loaf and bake for another 5-10 minutes, or until the cheese is bubbly and the top is golden brown and crusty.
- Let it cool for just a few minutes before serving. Pull the segments apart and enjoy that amazing cheese pull!