
Grainy chocolate mousse pots ruin the dream of that perfect, velvety bite. You’ve probably ended up with a gritty mess that no one wants to touch. But this recipe fixes it all with fine chopping and a quick strain, delivering silky smoothness in just 20 minutes of prep for 4 elegant servings.
Therefore, you get that glossy ganache folding into airy whipped cream, creating a light yet rich texture that spoons right out. No more disappointment. In addition, it sets up perfectly in the fridge, ready for whenever dessert calls.
The secret lies in that one-minute rest after pouring hot cream over finely chopped chocolate. It lets the fats emulsify gently, avoiding any seized bits. That’s why this method guarantees pro-level results every time.
Why Chocolate Mousse Pots Demand Precision Chopping
Graininess Traps in Traditional Recipes
Uneven chocolate chunks in mousse recipes lead straight to seized mixtures and that awful gritty texture. Big pieces don’t melt fully, so cocoa solids clump up. However, finely chopping to chip-size ensures even melting around 160°F, the sweet spot for tempering without scorching.
This technique dodges the common trap. You’ll see the difference immediately in the smooth ganache. Plus, it prevents those stubborn lumps that ruin the final silkiness.
Heavy Cream’s Dual Role Explained
Dividing 2 cups heavy whipping cream keeps things foolproof. One cup melts the chocolate perfectly, while the other whips into stiff peaks. The high fat content, about 36%, stabilizes everything without breaking.
Over-whipping one batch spells disaster, but this split method avoids it. Therefore, your mousse stays light and holds its shape beautifully.
Core Ingredients for Flawless Chocolate Mousse Pots
Semi-Sweet Chocolate: 8 Ounces Breakdown
Grab 8 ounces of semi-sweet chocolate with 50-60% cacao for balanced bitterness that cuts through the cream’s richness. Bars melt smoother than chips, which have stabilizers that resist breaking down. High-quality stuff emulsifies best, giving you that unbeatable silk.
Chop it fine right away. In addition, avoid milk chocolate here; it makes the set too soft. Fresh bars from a good market make all the difference.
Powdered Sugar and Vanilla Synergy
Two tablespoons powdered sugar sweetens the whipped cream without graininess, unlike granulated which can speckle the mix. It dissolves instantly for peak stability. Meanwhile, 1 teaspoon vanilla extract boosts aroma, rounding out the chocolate’s depth.
For dairy-free, try coconut cream with a pinch more sugar. However, stick to real vanilla; extracts vary wildly in strength.
Science of Seamless Chocolate Mousse Melting
Simmering Cream at Edge-of-Boil
Heat 1 cup heavy cream over medium until tiny bubbles form at the edges, hitting about 160°F ideal for melting. Full boils scorch the cocoa butter, turning it bitter and grainy. Watch closely; small bubbles mean it’s perfect.
This gentle simmer extracts flavors without damage. Therefore, your ganache stays glossy and pourable. Pro tip: use a thermometer if you’re unsure.
One-Minute Rest for Emulsification Magic
Pour hot cream over chopped chocolate and let it sit undisturbed for 1 minute. Cream’s lecithin bonds with chocolate fats, forming a stable emulsion. You’ll notice it soften and glisten.
Stir gently from the center out after. In addition, rushing this step causes lumps. It’s molecular magic that sets up silky success.
Straining Technique Secures Smooth Chocolate Mousse Pots
Fine-Mesh Sieve’s Lump-Catching Power
Strain the melted chocolate through a fine-mesh sieve right after stirring. It catches any seized particles for ultra-smooth results. Cheesecloth lets bits through, so skip it.
Press gently with a spatula. However, don’t force it; just let it flow. This step locks in perfection.
Airy Whipping in Chilled Bowl
Chill your mixing bowl first; it traps condensation and speeds whipping to stiff peaks in 2 minutes on medium-high. Warm bowls make cream flop. Listen for the whir changing pitch as it thickens.
Avoid high speed to prevent butter separation. Therefore, you’ll get airy volume that folds beautifully.
Folding Method for Light Chocolate Mousse Pots
One-Third Increments with Spatula
Fold one-third of the whipped cream into the chocolate first with slow, sweeping spatula motions. This lightens the base without deflating air. Repeat in two more additions, keeping it airy.
Overmixing kills volume, so go gentle. In addition, the mix doubles in size when done right. Scrape the bowl bottom each time.
No-Streak Test for Perfection
Stop folding when no streaks remain and it looks uniformly marbled. Volume should double, signaling perfect air incorporation. Spoon it quick before it settles.
This test ensures lightness. However, don’t hunt perfection; a few faint swirls are fine.
Setting and Portioning Chocolate Mousse Pots
Glass Jars vs. Ramekins Choice
Divide into 4 small glass jars or ramekins for even 4-hour chilling. Glass conducts cold steadily, yielding firm yet spoonable texture. Plastic warps flavors over time.
Tap gently to release bubbles. Therefore, each pot sets uniformly without cracks.
Garnish Timing with Shavings
Add extra whipped cream dollops and fresh chocolate shavings right before serving for crunch contrast. Shavings melt fast in the fridge. Oh man, that snap against silkiness is heaven.
Garnish lasts only hours. In addition, grate bars fresh for best texture.
Flavor Variations Elevate Chocolate Mousse Pots
Espresso-Infused Ganache Twist
Stir 1 teaspoon instant espresso into the hot cream for mocha depth that amps chocolate without overpowering. Start small; espresso hits hard. It blooms the flavors beautifully.
Scale to ½ teaspoon for milder kick. However, don’t skip straining after.
Spiced or Citrus Zest Swaps
Mix ¼ teaspoon cinnamon or ½ teaspoon orange zest into the chocolate base. These pair with chocolate’s earthiness without muting silkiness. Grate zest fresh for oils.
Cinnamon warms it up; citrus brightens. Therefore, pick based on your crowd.
Pairing Perfection for Chocolate Mousse Pots
Berry Compote Contrasts
Simmer 1 cup raspberries with 2 tablespoons sugar and 1 teaspoon lemon juice for 5 minutes. It thickens to tart contrast cutting the richness. Mash lightly for sauce.
Spoon over just before eating. In addition, blackberries work great too.
Nutty Crunch Toppers
Toast 2 tablespoons chopped hazelnuts or pistachios for nutty crunch elevating elegance. Use 1 teaspoon per pot to balance, not overwhelm. Fresh toast smells amazing.
Chop fine post-toasting. However, store nuts separate till serving.
Avoiding Pitfalls in Chocolate Mousse Pots
Overheating Cream Fixes
If ganache splits from overheated cream, reheat gently with 2 tablespoons extra cream, stirring till smooth. Prevention: always simmer, never boil. Check heat often.
This rescue works fast. Therefore, no tossing the batch.
Deflated Whipped Cream Recovery
Runny whipped cream? Re-chill bowl and beaters 10 minutes, then whip briefly. Clean tools prevent fat contamination. Peaks firm right up.
Cold everything is key. In addition, don’t overbeat post-rescue.
Storage Strategies for Chocolate Mousse Pots
Make-Ahead Fridge Timeline
Store covered pots in the fridge up to 3 days; silkiness peaks early. Avoid lid condensation by wrapping loosely first. Texture holds firm.
Portion before chilling for easy grabs. However, eat within 48 hours for best airiness.
Freezer Adaptation Guide
Freeze in airtight jars up to 1 month; thaw in fridge 2 hours before serving. Slow thaw retains smooth texture as fats recrystallize evenly. Avoid microwave.
Label with dates. Therefore, it’s ready for surprise guests.
Chocolate Mousse Pots FAQ
Can I Use Milk Chocolate Instead?
Yes, milk chocolate works but expect a sweeter, softer set due to lower cacao and more milk solids. Reduce sugar by 1 tablespoon to balance. For firmer texture, blend 50/50 with semi-sweet; it melts similarly but sets dreamily in 5 hours.
How to Fix Grainy Chocolate Mousse Pots?
Blend grainy mousse on low with 1-2 tablespoons warm cream till smooth, or remelt entirely over a double boiler. This recipe’s fine chop and strain prevent it upfront by ensuring even melt. Always chop small and rest fully for no lumps.
Dairy-Free Chocolate Mousse Pots Work?
Swap heavy cream for full-fat coconut cream; chill cans overnight first. Whip as directed, but set overnight for firmness. Mask coconut with extra vanilla or orange zest; aquafaba works for lighter peaks but needs stabilizers like xanthan gum.
Scaling for Larger Batches?
Double ingredients for 8 servings, but whip cream in two batches to preserve air. Melt chocolate in stages too; ganache doubles fine. Yields 8 pots; chill 6 hours as volume affects set time evenly.
Room Temperature Serving Best?
Let pots sit 15 minutes at room temp for peak silkiness; fridge-cold firms too much. In summer, 10 minutes max to avoid melt. Spoonability shines warm, releasing full chocolate aroma.
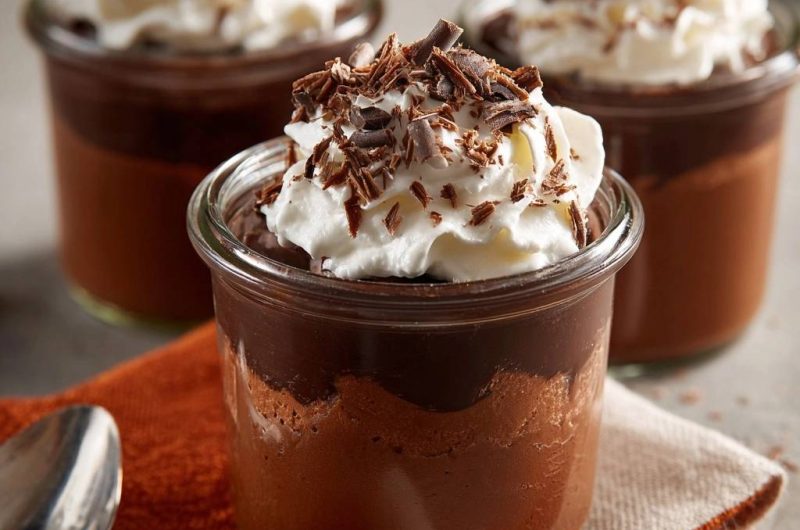
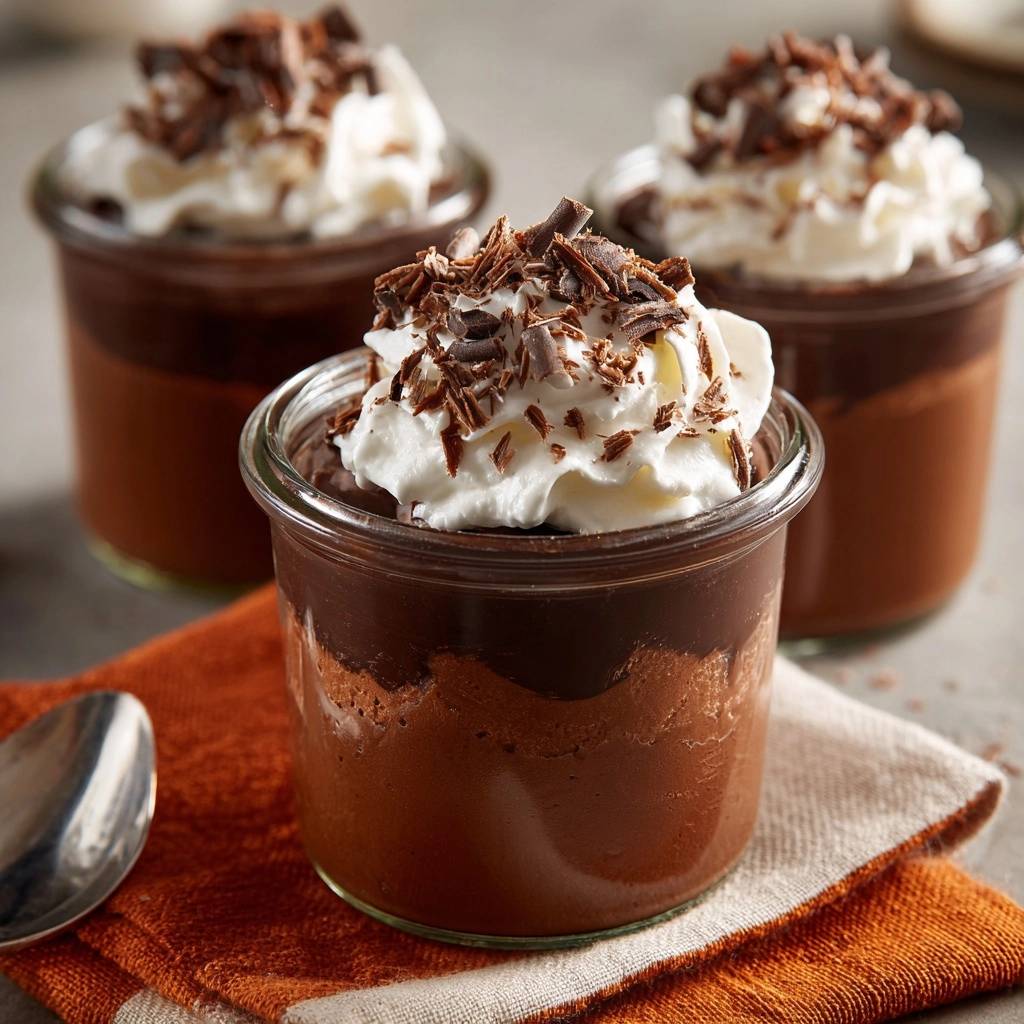
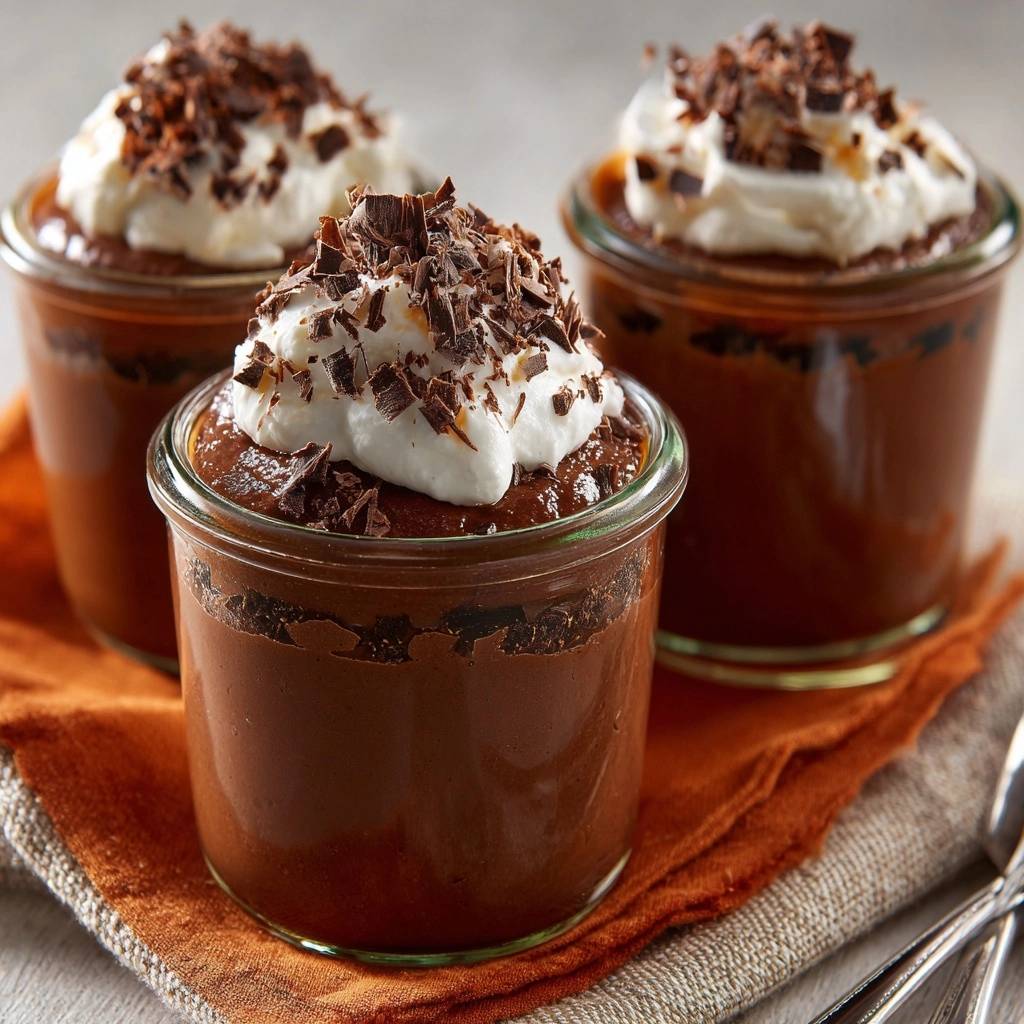
Chocolate Mousse Pots
Course: DessertCuisine: AmericanDifficulty: easy4
servings20
minutes10
minutes240
Minutes450
kcalAmerican
Ingredients
8 ounces semi-sweet chocolate
2 cups heavy whipping cream, divided
2 tablespoons powdered sugar
1 teaspoon vanilla extract
Chocolate shavings for garnish
Directions
- Finely chop the chocolate into small pieces, about the size of chocolate chips. This crucial first step ensures even melting without grainy bits.
- Heat 1 cup heavy cream in a saucepan over medium heat until just simmering, with small bubbles around the edges. Do not boil.
- Pour hot cream over chopped chocolate in a heatproof bowl. Let sit undisturbed for 1 minute to soften, then stir gently from the center outward until completely smooth and glossy.
- Strain the chocolate mixture through a fine-mesh sieve into another bowl. This locks in silky texture by catching any potential stubborn lumps, guaranteeing no graininess.
- In a chilled bowl, whip remaining 1 cup heavy cream, powdered sugar, and vanilla extract with an electric mixer on medium-high speed until stiff peaks form, about 2 minutes.
- Gently fold one-third of the whipped cream into the chocolate mixture using a spatula with slow, sweeping motions to keep it airy. Repeat with remaining whipped cream in two additions until fully combined and no streaks remain.
- Spoon mousse evenly into 4 small glass jars or ramekins. Refrigerate for at least 4 hours until set.
- Before serving, top each with a dollop of extra whipped cream and chocolate shavings.
Notes
- Use high-quality semi-sweet chocolate for best results. Ensure cream is cold when whipping for stiff peaks. Straining is key to eliminating graininess.


