
I used to dread the moment I cut into an apple crisp, only to find a sad, soggy topping instead of the promised golden crunch. Years of perfecting led me to this Classic Apple Crisp recipe, guaranteed to deliver that irresistible, buttery crumble every single time. It’s a dessert that truly sings of fall, perfect for cozy gatherings or a sweet escape.
Unlock the Secret: Why THIS Classic Apple Crisp Stays Crispy
Many apple crisp recipes fall short, delivering a mushy topping that disappoints. Our method prioritizes specific techniques and ingredient choices designed for ultimate texture and flavor. This Classic Apple Crisp is engineered for success.
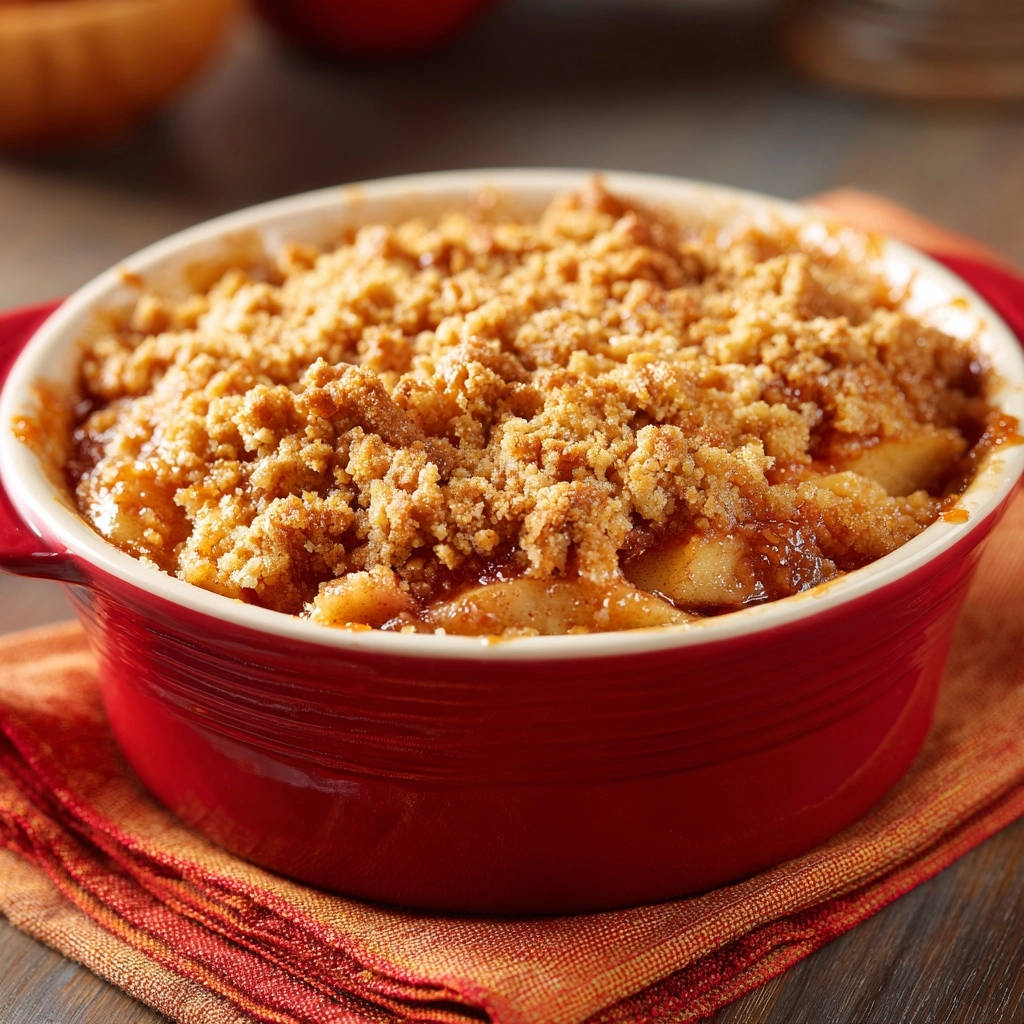
Our recipe ensures a deeply golden, remarkably crispy topping that contrasts beautifully with the tender, spiced apple filling. It’s a truly satisfying fall treat.
Here’s why this recipe consistently delivers that sought-after crunch:
Perfect Apple Choice: Selecting the right apples ensures a filling that holds its shape and doesn’t release excessive moisture.
Cold Butter is Key: Incorporating very cold butter into the topping creates pockets of steam, resulting in a flaky, crunchy crumble.
Strategic Baking Time: Baking until truly golden-brown allows moisture to evaporate, preventing sogginess and developing deep caramelization.
The “No Press” Rule: Leaving the crumble topping loose on top encourages maximum air circulation and crisping.
Gather Your Essentials: Ingredients for the Perfect Classic Apple Crisp
The foundation of an outstanding Classic Apple Crisp lies in quality ingredients. Here’s a detailed look at what you’ll need.
The Apple Filling: Sweet & Tangy Harmony
The heart of our fruit crumble, a balanced apple filling is crucial.
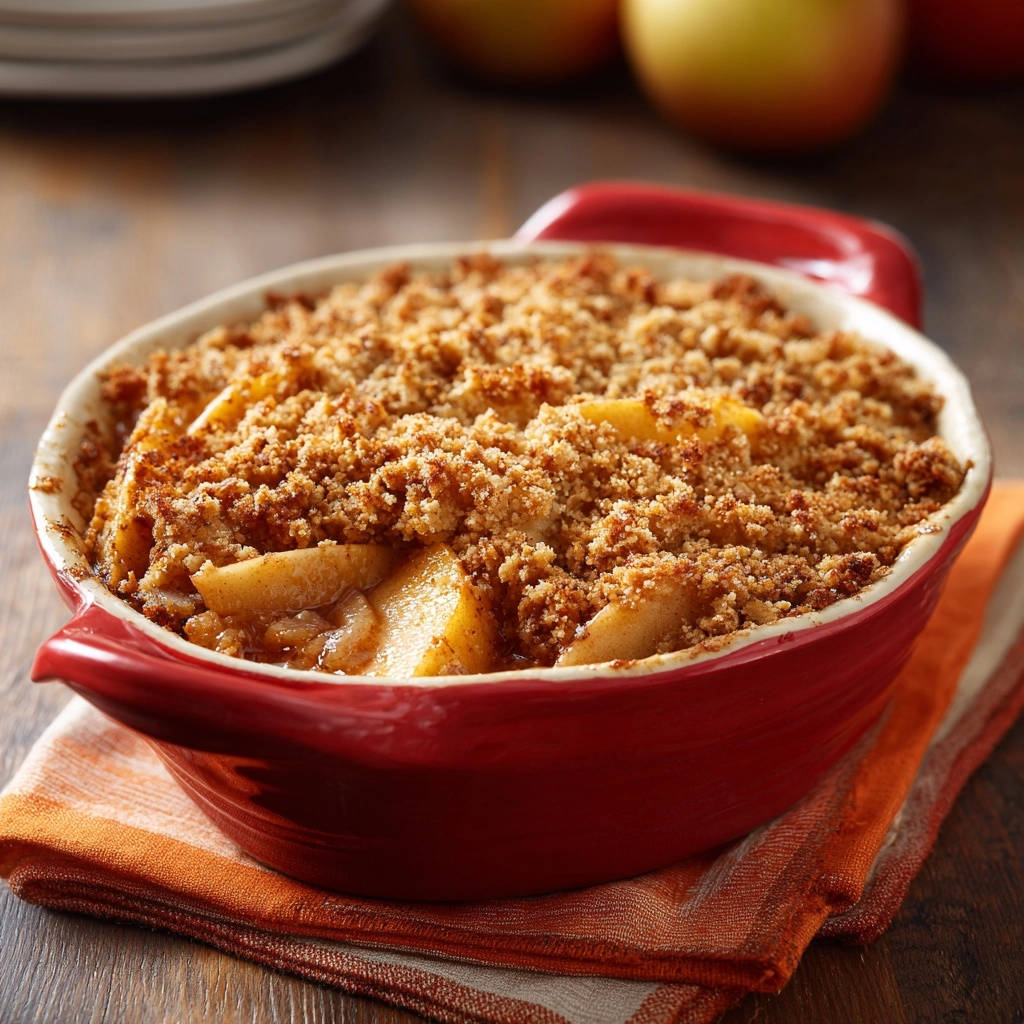
Apples: Granny Smith, Honeycrisp, or a mix, peeled, cored, and sliced 1/4 inch thick. These varieties offer a perfect balance of tartness and sweetness, holding their texture beautifully during baking.
Sweeteners: 1/4 cup granulated sugar and 1/4 cup packed light brown sugar. Granulated sugar provides clean sweetness, while brown sugar adds molasses notes and moisture, contributing to a rich, syrupy filling.
Flavor Enhancers: 1 tablespoon all-purpose flour, 1 teaspoon ground cinnamon, 1/4 teaspoon ground nutmeg, and 1 tablespoon fresh lemon juice. The flour thickens the filling slightly, preventing it from being watery. Cinnamon and nutmeg provide classic warm spice, and lemon juice brightens the flavors, preventing the crisp from tasting flat.
The Crumble Topping: Buttery, Golden Perfection
This is where the magic of “crisp” truly comes alive, delivering that signature texture.
Flour & Oats: 1 cup all-purpose flour and 1/2 cup rolled oats. The flour forms the structure of the crumble, while the oats add a delightful chewiness and textural interest, contributing to a hearty, crispy topping.
Sugars: 1/2 cup packed light brown sugar and 1/4 cup granulated sugar. Brown sugar lends deep caramel notes and helps create a tender crumb, while granulated sugar promotes crispness and golden-brown edges.
Cold Butter: 1/2 cup cold unsalted butter, cut into 1/2 inch cubes. This is the non-negotiable secret to crispiness. Cold butter pieces create steam pockets as they melt in the oven, lifting the flour and resulting in an incredibly flaky, crunchy crumble.
Seasoning: 1/2 teaspoon ground cinnamon and 1/4 teaspoon salt. Cinnamon enhances the warm, comforting profile, while salt balances the sweetness and brings out all the flavors in the buttery topping.
Tools of the Trade: Equipping Your Kitchen for Apple Crisp Success
Having the right equipment makes preparing your Classic Apple Crisp effortless and ensures the best results.
Large Mixing Bowls: Essential for comfortably combining the apple filling and the crumble topping without spillage.
9-inch Pie Plate or 8×8 Baking Dish: These dimensions are ideal for even baking, allowing the apples to cook through and the topping to crisp perfectly.
Pastry Blender or Fingertips: Crucial for efficiently cutting cold butter into the dry topping ingredients, creating the perfect crumbly texture without overworking the mixture.
Vegetable Peeler & Corer: These tools streamline the apple preparation process, making it quick and easy to get your fruit ready.
Whisk or Fork: Useful for thoroughly mixing dry ingredients for the topping, ensuring an even distribution of flavors and leavening.
Your Journey to Classic Apple Crisp Perfection: Step-by-Step
Follow these detailed steps to create a Classic Apple Crisp that will become your go-to recipe.
Prepare Your Oven & Dish: Preheat your oven to 375 degrees F (190 degrees C). Lightly butter a 9-inch pie plate or an 8×8-inch baking dish. This initial step creates a non-stick surface and prepares your stage for baking success.
Craft the Apple Filling: In a large bowl, combine the sliced apples with the granulated sugar, brown sugar, 1 tablespoon flour, 1 teaspoon cinnamon, nutmeg, and lemon juice. Toss gently but thoroughly until every apple slice is evenly coated; this ensures consistent flavor and helps thicken the filling.
Pour the seasoned apple mixture into your prepared baking dish, spreading it into an even layer.
Mix the Dry Topping Ingredients: In a separate medium bowl, whisk together the 1 cup flour, 1/2 cup brown sugar, 1/4 cup granulated sugar, oats, 1/2 teaspoon cinnamon, and salt. Thoroughly combining these dry ingredients is a critical first step for a consistent, flavorful crumble.
Incorporate the Cold Butter: Add the cold butter cubes to the dry topping mixture. Using your fingertips or a pastry blender, quickly cut the butter into the flour until it resembles coarse crumbs with some pea-sized pieces of butter still visible. Working quickly is key to keeping the butter cold and achieving that signature crispiness; avoid overmixing to prevent a tough topping.
Top & Bake: Evenly sprinkle this crumb topping over the apple filling in the baking dish. Resist the urge to press it down; keeping the topping loose is essential for maximum crispness during baking.
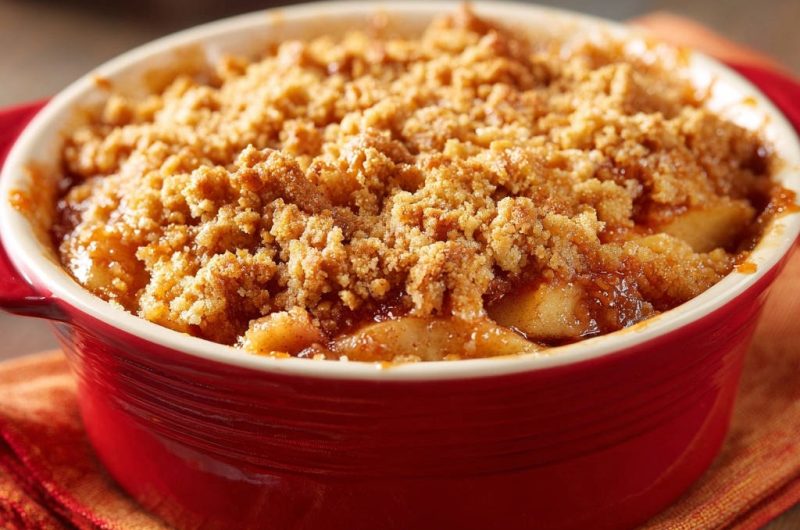
Bake for 40 to 50 minutes, or until the topping is deeply golden brown and the apple filling is visibly bubbling at the edges and tender when pierced with a fork. A golden color and bubbling filling indicate proper moisture evaporation and thoroughly cooked apples.
If the topping starts to brown too quickly, you can loosely tent the dish with foil for the last 10-15 minutes of baking to prevent burning.
Cool Before Serving: Allow the Classic Apple Crisp to cool for at least 15 minutes before serving. This crucial resting period allows the filling to set slightly and the topping to fully achieve its ultimate crispy texture.
Chef’s Secrets: Elevating Your Apple Crisp from Good to Unforgettable
Unlock the full potential of your Classic Apple Crisp with these expert tips and tricks.
The Power of Cold Butter: Always use very cold butter, cut into small cubes, for the topping. As it bakes, the cold butter releases steam, creating tiny pockets that expand and result in an incredibly flaky, crisp crumble.
Don’t Overmix the Topping: Mix just enough until coarse crumbs form with visible pea-sized butter pieces. Overworking the butter will melt it and develop gluten, leading to a tougher, less crumbly topping that lacks true crispness.
Choosing Your Apples Wisely: A mix of tart (like Granny Smith) and sweet (like Honeycrisp or Fuji) apples provides the best flavor and texture balance. This blend ensures the filling isn’t overly sweet or mushy, offering a delightful complexity.
Resist Pressing the Topping: When sprinkling the crumble over the apples, leave it loose and airy. A light application promotes better air circulation and allows the topping to crisp up more effectively, forming a perfect golden crust.
Bake Until Truly Golden: Don’t pull it out too soon! A deep golden-brown topping signifies optimal crispness and caramelization, which are crucial for flavor and texture. It also ensures the apples are thoroughly cooked and tender.
Perfect Pairings & Serving Brilliance for Your Classic Apple Crisp
While this Classic Apple Crisp is undeniably delicious on its own, a few thoughtful accompaniments can elevate the experience even further.
Classic Accompaniments
Vanilla Bean Ice Cream: The quintessential pairing, offering a delightful contrast of warm and cold, creamy and crispy. The melting ice cream creates a luscious sauce.
Fresh Whipped Cream: A lighter alternative to ice cream, adding a cloud-like richness without overwhelming the crisp’s vibrant flavors. A dollop of homemade whipped cream is heavenly.
Caramel Sauce Drizzle: A decadent addition that beautifully complements the apple and spice notes, adding an extra layer of sweet, buttery complexity to your warm dessert.
Creative Garnishes
Toasted Pecans or Walnuts: Sprinkle lightly over the top of each serving for an extra nutty crunch and depth of flavor. These nuts pair wonderfully with apples.
A Dusting of Cinnamon: A final whisper of ground cinnamon enhances the aromatic spices already present in the crisp, adding a beautiful visual and fragrant touch.
Savvy Storage & Make-Ahead Tips for Your Apple Crisp
Maximize your enjoyment of this delicious Classic Apple Crisp with smart storage and convenient make-ahead strategies.
Storing Leftovers for Lasting Freshness
To keep your Classic Apple Crisp delicious, store any leftovers in an airtight container in the refrigerator for up to 3-4 days. While the topping may soften slightly over time, the rich flavors of the apple filling will remain vibrant.
Reheating for Optimal Enjoyment
For the best results, reheat individual portions in a preheated oven (around 350°F / 175°C) for 10-15 minutes, or until warmed through and the topping crisps up again. Avoid the microwave if you want to revive the crisp texture, as it tends to make the topping soggy.
Make-Ahead Magic: Prepare in Advance
You can prepare the apple filling and the crumble topping separately up to a day in advance. Store the apple mixture covered in the refrigerator and the dry crumble in an airtight container at room temperature. Assemble just before baking for ultimate freshness and crispness, reducing your prep time significantly.
Troubleshooting Your Classic Apple Crisp: Common Pitfalls & Solutions
Even expert bakers encounter challenges. Here are solutions to common problems when making Classic Apple Crisp.
Why is my topping soggy instead of crispy?
A soggy topping is usually due to insufficient baking time, too much moisture released by the apples, or overmixing the topping ingredients. Ensure your crisp bakes until deeply golden, the filling is actively bubbling, and always use very cold butter with a light hand when making the crumble.
My apples aren’t tender enough.
This often means the apples were sliced too thick or the crisp wasn’t baked long enough. Ensure apples are sliced to about 1/4 inch thickness for even cooking. If needed, tent the crisp loosely with foil and continue baking until the apples are fork-tender without being mushy.
The topping browned too fast.
If your topping is getting too dark before the apples are cooked, your oven might be running hot, or the crisp is positioned too close to the top heating element. Loosely tent the dish with aluminum foil for the remainder of the baking time, and consider moving it to a lower rack next time for more even heat distribution.
My crisp is too sweet or not sweet enough.
Apple varieties vary widely in sweetness, so adjust sugar slightly next time based on your specific apple choice and personal preference. A squeeze of lemon juice in the filling can also brighten an overly sweet crisp, balancing the flavors beautifully.
Your Classic Apple Crisp Questions Answered
Here are answers to frequently asked questions about creating and enjoying this beloved fall dessert.
Can I use different types of apples for this Classic Apple Crisp?
Absolutely! While Granny Smith and Honeycrisp are recommended for their balanced flavor and texture, feel free to experiment with other firm, crisp apple varieties like Braeburn, Gala, or Fuji. A blend of sweet and tart apples often yields the most complex and delicious flavor profile.
Can I make this Classic Apple Crisp gluten-free?
Yes, you can! Substitute the all-purpose flour in both the filling and the topping with a high-quality 1:1 gluten-free baking flour blend. Ensure your rolled oats are certified gluten-free as well to avoid cross-contamination. The cold butter technique remains crucial for achieving a crispy gluten-free crumble.
What’s the best way to reheat apple crisp?
To restore the topping’s crispness, reheat individual servings in a preheated oven or toaster oven at 350°F (175°C) for 10-15 minutes, or until warm throughout and the topping is crunchy again. While microwaving will heat it, the topping will inevitably soften considerably.
Can I add nuts to the crumble topping?
Certainly! Toasted chopped pecans or walnuts make a fantastic addition to the crumble topping, adding an extra layer of texture and nutty flavor that complements the apples beautifully. Fold them into the dry ingredients before cutting in the butter for even distribution.
How do I know when the apple crisp is fully cooked?
Look for a deeply golden-brown topping across the entire surface. The apple filling should be visibly bubbling vigorously around the edges of the dish, indicating it’s hot and tender. You can also gently pierce an apple slice with a fork; it should be tender without being mushy.
Ready to Indulge? Your Classic Apple Crisp Awaits!
You now possess the secrets to creating a Classic Apple Crisp that will not only impress but also utterly delight everyone who tastes it. No more soggy toppings or bland fillings; just pure, unadulterated comfort in every crispy, tender bite. This recipe isn’t just about dessert; it’s about crafting warmth, joy, and delicious, lasting memories.
So, gather your ingredients, follow these proven steps, and prepare to bask in the irresistible aromas of fall and the satisfaction of a perfectly baked homemade treat. We can’t wait to hear about your incredible Classic Apple Crisp creations!
Classic Apple Crisp
Course: DessertCuisine: American CuisineDifficulty: easy6
servings20
minutes45
minutes65
minutesAmerican Cuisine
Ingredients
For the Filling:
6 medium apples, such as Granny Smith or Honeycrisp, peeled, cored, and sliced 1/4 inch thick
1/4 cup granulated sugar
1/4 cup packed light brown sugar
1 tablespoon all purpose flour
1 teaspoon ground cinnamon
1/4 teaspoon ground nutmeg
1 tablespoon fresh lemon juice
For the Topping:
1 cup all purpose flour
1/2 cup packed light brown sugar
1/4 cup granulated sugar
1/2 cup rolled oats
1/2 teaspoon ground cinnamon
1/4 teaspoon salt
1/2 cup cold unsalted butter, cut into 1/2 inch cubes
Directions
- Preheat your oven to 375 degrees F (190 degrees C). Lightly butter a 9 inch pie plate or an 8×8 inch baking dish.
- In a large bowl, combine the sliced apples, granulated sugar, brown sugar, 1 tablespoon flour, 1 teaspoon cinnamon, nutmeg, and lemon juice. Toss gently until the apples are evenly coated. Pour the apple mixture into your prepared baking dish.
- Now for the secret to that crispy topping! In a separate medium bowl, combine 1 cup flour, 1/2 cup brown sugar, 1/4 cup granulated sugar, oats, 1/2 teaspoon cinnamon, and salt. Use a fork or whisk to mix these dry ingredients thoroughly.
- Add the cold butter cubes to the dry topping mixture. Using your fingertips or a pastry blender, quickly cut the butter into the flour mixture until it resembles coarse crumbs with some pea sized pieces of butter still visible. The key here is to work quickly so the butter stays as cold as possible. Do not overmix; a slightly irregular, crumbly texture is exactly what you want for maximum crispiness.
- Evenly sprinkle this crumb topping over the apple filling in the baking dish. Do not press it down; keeping it loose helps it crisp up.
- Bake for 40 to 50 minutes, or until the topping is deeply golden brown and the apple filling is bubbling at the edges and tender when pierced with a fork. Baking until it’s truly golden and the filling is fully cooked ensures moisture evaporates, which is crucial for preventing a soggy topping. If the topping starts to brown too quickly, you can loosely tent the dish with foil for the last 10-15 minutes of baking.
- Let the apple crisp cool for at least 15 minutes before serving. This allows the filling to set slightly and the topping to fully achieve its crisp texture. Enjoy!
Notes
- Allow to cool for at least 15 minutes before serving for optimal texture and filling to set.


