
Welcome back to the blog! If you’ve been following along, you know my love for cozy, comforting desserts. And when it comes to autumnal treats (or really, any time of year!), it’s hard to beat a warm apple crumble. Those sweet, tender apples beneath a buttery, crisp topping? Pure heaven!
But let’s be honest, there’s a dark side to apple desserts, especially bars: the dreaded soggy bottom crust. It can turn a potentially perfect treat into a disappointing mush. I’ve been there, wrestling with watery fillings and crusts that just wouldn’t firm up. For years, I tested different methods, and finally, I cracked the code!
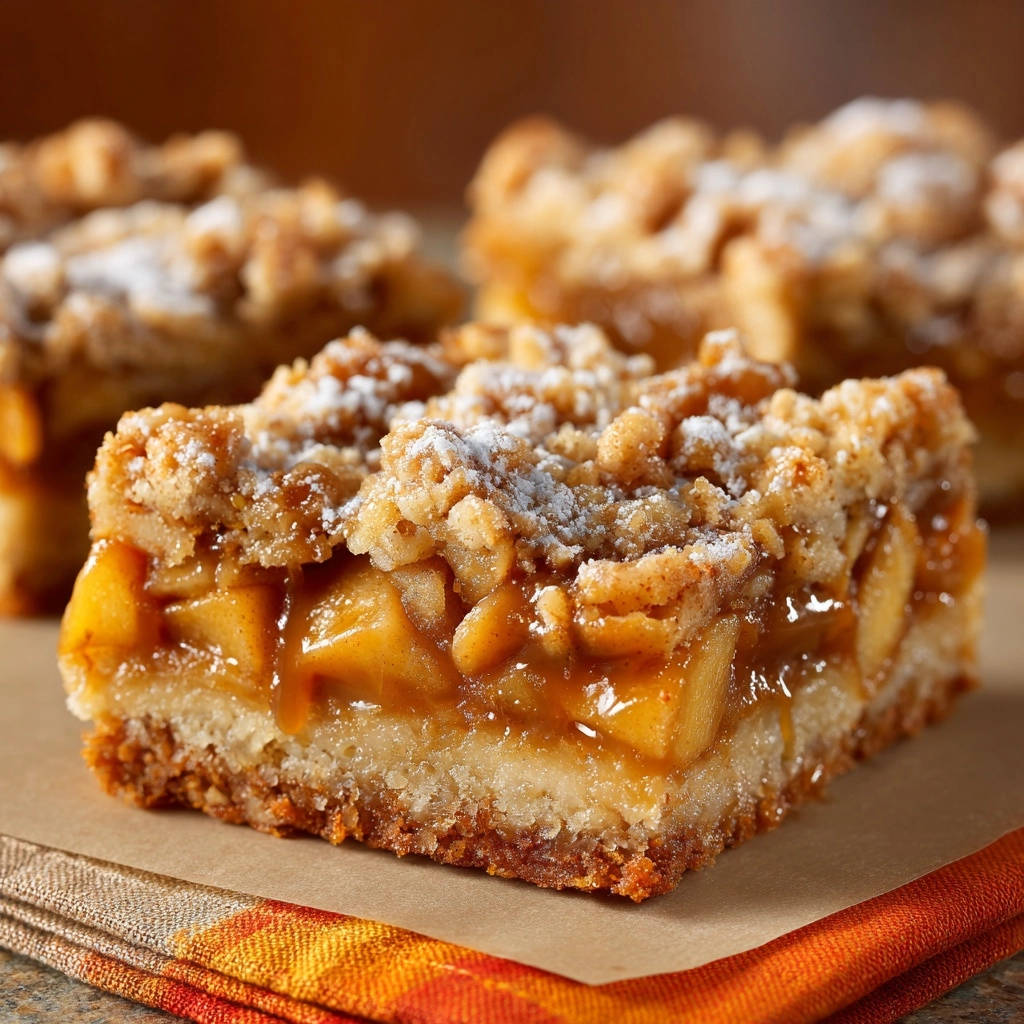
Today, I’m sharing my absolute favorite recipe for Classic Apple Crumble Bars, featuring the simple, game-changing trick that guarantees a beautifully firm, golden base every single time. Get ready for a dessert experience with that ideal contrast of textures you crave. These aren’t just any apple bars; they’re the best you’ll ever make!
For those who appreciate a good cinnamon flavor, check out these classic cinnamon snickerdoodles for a similar warm spice experience.
Why You’ll Adore These Apple Crumble Bars
Beyond solving the common soggy bottom problem, these bars offer so much to love:
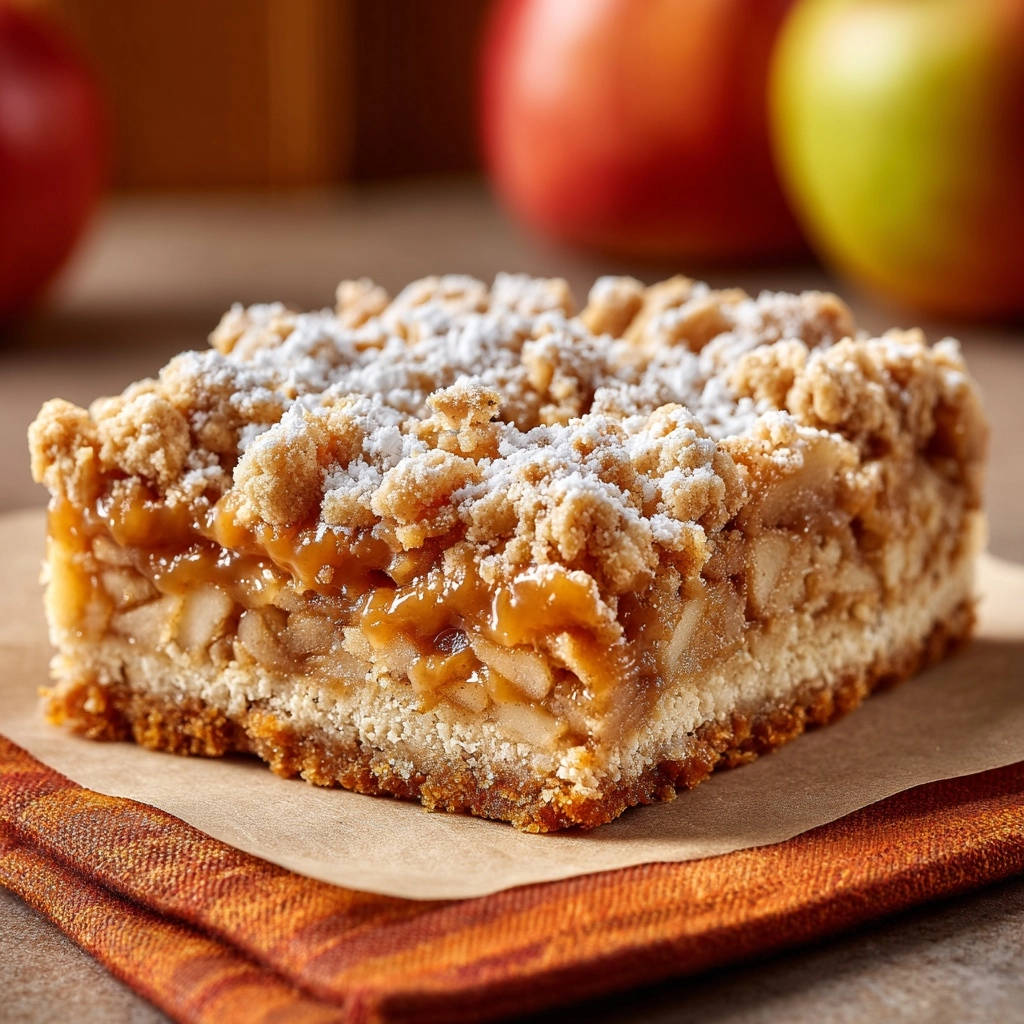
- Perfect Texture Contrast: You get a sturdy, buttery shortbread-like crust, a sweet and tender apple filling, and a gloriously crisp, crumbly topping.
- Classic Flavors: The combination of sweet apples, warm cinnamon, and a hint of nutmeg is timeless and comforting.
- Easy to Share: Baked in a 9×13 inch pan, these bars cut easily into generous squares, perfect for potlucks, parties, or just sharing with family.
- Make Ahead Friendly: You can prepare components or even bake the whole batch ahead of time (with proper storage!).
- Simple Ingredients: You likely have most of the pantry staples needed already on hand.
Gathering Your Ingredients for Perfect Apple Crumble Bars
Let’s talk about what you’ll need to create these delightful bars. The magic here comes from simple, good-quality ingredients working together harmoniously. We’ll build our bars from the bottom up, focusing on creating layers of deliciousness and, crucially, ensuring that base stays firm!
For the Sturdy Crust Base:
Our foundation needs to be strong and buttery. This simple mix creates a dough that presses beautifully into the pan and bakes up golden and firm, providing the perfect counterpoint to the soft filling.
- 1 and 1/2 cups All-Purpose Flour: The primary structure for our crust.
- 1/2 cup Granulated Sugar: Adds sweetness and contributes to the crust’s crispness.
- 1/4 teaspoon Salt: Balances the sweetness and enhances the overall flavor.
- 1 cup (2 sticks) Cold Unsalted Butter, cut into cubes: Cold butter is key! When cut into the dry ingredients, it creates pockets that melt and steam as the crust bakes, resulting in that desirable tender-crisp texture. Using unsalted butter allows you to control the salt level.
For the Flavorful Apple Filling:
The heart of our crumble bars! Choosing the right apples and preparing them properly is essential for flavor and preventing excess moisture.
- 6 medium Apples, peeled, cored, and diced: A mix of apple varieties works wonderfully. Granny Smith offers tartness that balances the sweetness, while Honeycrisp, Fuji, or Gala add sweetness and texture. Dicing them helps them cook evenly.
- 1/2 cup Granulated Sugar: Sweetens the apples to perfection.
- 1 tablespoon All-Purpose Flour or Cornstarch: This is part of our soggy bottom solution! A thickener helps absorb some moisture released by the apples during baking.
- 1 teaspoon Ground Cinnamon: The quintessential apple spice. It adds warmth and depth.
- 1/4 teaspoon Ground Nutmeg (Optional): Nutmeg complements cinnamon beautifully, adding another layer of classic spice flavor. If you’re a fan, definitely include it!
- 1 tablespoon Lemon Juice (Optional): Lemon juice brightens the apple flavor, prevents browning, and adds a touch of necessary acidity to balance the sweetness. Highly recommended!
For the Irresistible Crumble Topping:
That golden, crumbly layer is what makes these bars truly special. It’s a simple combination, but using cold butter here is just as important as in the crust for achieving that wonderful crumbly texture.
- 1 cup All-Purpose Flour: Provides the base for the crumble mixture.
- 1/2 cup Packed Light Brown Sugar: Brown sugar adds moisture and a lovely caramel-like depth of flavor to the topping, giving it that classic crumble taste.
- 1/2 cup (1 stick) Cold Unsalted Butter, cut into cubes: Again, cold butter creates structure and crispness as it melts during baking.
- 1/2 cup Rolled Oats (Optional): Oats add a chewy texture and rustic charm to the topping. If you love that classic oat crumble, don’t skip these!
For Finishing Touches:
- Powdered Sugar for dusting (Optional): A light dusting adds a touch of elegance and extra sweetness just before serving.
Crafting Your Classic Apple Crumble Bars: Step-by-Step to Soggy-Free Success
Ready to bake? Let’s walk through the process. Each step builds upon the last, culminating in a tray of perfect apple-y goodness. Pay special attention to steps 4 and 8 – they are your secret weapons against that watery filling and soggy base!
Get Ready to Bake: Prep Your Pan and Oven. Start by setting your oven to preheat at 375 degrees Fahrenheit (190 degrees Celsius). This ensures the oven is at the correct temperature the moment your bars go in, which is important for proper baking and texture development. Next, prepare your standard 9×13 inch baking pan. You can either grease and flour it lightly to prevent sticking, or, my preferred method, line it with parchment paper. Leave a bit of an overhang on the sides; this acts as ‘handles’ later, making it super easy to lift the cooled bars out of the pan before slicing.
Lay the Foundation: Making the Crust. In a medium-sized bowl, whisk together the all-purpose flour, granulated sugar, and salt for the crust. Now, add your cold, cubed butter. The key here is that the butter is cold. Use a pastry blender or your fingertips to cut the butter into the dry ingredients. Work quickly to avoid melting the butter with the heat of your hands. Continue until the mixture resembles coarse crumbs, like rocky sand. Dump this mixture into your prepared pan and press it down firmly and evenly across the bottom. You want a compact layer that will bake into a solid base.
Prep the Apple Magic: Starting the Filling. Take your peeled, cored, and diced apples and place them in a large bowl. Toss them with the granulated sugar, cinnamon, and the optional nutmeg. Give everything a good mix to ensure the apple pieces are coated. Now, here’s a crucial mini-step often overlooked: let this mixture sit for about 10 to 15 minutes. Why? This “resting” time allows the sugar to start drawing out excess moisture from the apples. You’ll see a little juice accumulating at the bottom of the bowl, and that’s exactly what we want!
The Soggy Bottom Solution: Draining and Thickening. This is where the magic happens! After the apples have sat, gently tilt the bowl over the sink or another container. Carefully drain off some of the liquid that has collected at the bottom. Don’t feel like you need to get every last drop, but pour away the obvious excess surface liquid. This removes a significant amount of the water that would otherwise make your bottom crust soggy. After draining, stir the tablespoon of flour or cornstarch and the optional lemon juice into the apples. The thickener will absorb the remaining juices as the bars bake, while the draining step prevents overload. This one-two punch is incredibly effective.
Create the Golden Crown: Making the Crumble Topping. In a separate medium bowl, combine the flour and packed light brown sugar for the topping. If you’re including them, add the rolled oats now too. Just like with the crust, add the cold, cubed butter. Use your pastry blender or fingertips to cut the butter into the dry ingredients until coarse crumbs form. Some larger clumps are fine and desirable in a crumble topping – they’ll brown up beautifully in the oven.
Assemble the Layers: Bringing It All Together. Now for the fun part – assembling! Spread your prepared apple filling evenly over the pressed crust layer in the baking pan. Make sure it’s distributed relatively flat. Then, take your crumble topping mixture and sprinkle it evenly over the top of the apple layer. Try to get good coverage so every bite has that wonderful crumble texture.
Bake Until Golden: The Oven’s Job. Carefully place the assembled bars into your preheated 375°F (190°C) oven. They will need to bake for approximately 50 to 60 minutes. You’ll know they’re ready when the crumble topping is a beautiful golden brown, and you can see the apple filling bubbling around the edges of the pan. That bubbling indicates the filling is thickening nicely as it bakes.
Patience is a Virtue: Cooling is Crucial. This step is just as important as draining the apples for preventing sogginess and ensuring clean cuts. Once baked, remove the pan from the oven and place it on a wire rack. It is absolutely essential to let the bars cool completely in the pan before you even think about cutting them. This isn’t a quick process – it can take several hours. As the bars cool, the apple filling sets up, and the crust and crumble layers firm up. Cutting too early will result in a messy, gooey situation. Trust the process!
The Finishing Flourish: Dusting (Optional). Once the bars are completely cool and set, use the parchment paper overhang (if you used it) to lift the entire slab out of the pan. Place it on a cutting board. Just before you plan to serve them, give the top a light dusting of powdered sugar using a fine-mesh sieve if desired. It adds a pretty, classic finish!
Expert Tips for the Best Apple Crumble Bars
Want to make sure your Classic Apple Crumble Bars are absolutely perfect every time? Here are a few extra pointers:
- Apple Varieties Matter: As mentioned, a mix is great! Avoid apples that turn to complete mush when cooked (like Red Delicious). Good choices include Granny Smith, Honeycrisp, Fuji, Gala, Jonagold, or Braeburn.
- Don’t Overwork the Dough: For both the crust and the crumble, stop cutting in the butter when the mixture resembles coarse crumbs. Overworking can lead to a tough texture.
- Press Crust Firmly: Use the bottom of a glass or a flat measuring cup to get the crust layer really compact and even in the pan.
- Chilling the Crust (Optional but helpful): After pressing the crust into the pan, you can pop it in the fridge for 15-20 minutes before adding the filling and topping. This helps ensure the butter stays cold and can contribute to a crispier base, though draining the apples is the primary defense against sogginess.
- Parchment Paper is Your Friend: Seriously, lining the pan with parchment paper makes lifting the cooled, set bars out incredibly easy, leading to cleaner cuts.
- Know When They’re Done: Look for that golden-brown crumble and bubbling filling. If the topping is browning too quickly but the filling isn’t bubbling, you can loosely tent the pan with foil for the remainder of the baking time.
Variations to Try
While the classic version is divine, feel free to experiment:
For a different kind of sweet treat, explore the strategy for walnut fudge brownies.
- Add other spices: A pinch of cardamom or a tiny amount of ground ginger can add lovely complexity to the apple filling.
- Nutty Crumble: Add 1/2 cup chopped pecans or walnuts to the crumble topping for extra crunch and flavor.
- Different Fruit: While this recipe is optimized for apples and the “soggy bottom” fix, you can adapt the thickener amount for other fruits. For instance, you could try Classic Cherry Crumble Bars or even mix apples with berries, though wetter fruits might need a bit more thickener. We also have a delicious Classic Peach Crumble Tart!
Storage and Make Ahead
These bars store well! Once completely cooled, cut into squares and store in an airtight container at room temperature for 2-3 days, or in the refrigerator for up to a week. You can also freeze cooled, uncut or cut bars wrapped tightly in plastic wrap and then foil for up to 3 months. Thaw at room temperature.
Serving Up Sweetness: What to Serve with Apple Crumble Bars
These Classic Apple Crumble Bars are pretty perfect on their own, but a little something extra can elevate them to pure dessert nirvana. Here are a few ideas:
- A Scoop of Ice Cream: Warm apple desserts and cold vanilla ice cream are a match made in heaven. The contrast in temperature and texture is simply divine.
- Whipped Cream: A dollop of fresh, lightly sweetened whipped cream adds a touch of lightness and creamy richness.
- Caramel Sauce: Drizzling warm caramel sauce over the top takes these bars to the next level of indulgence. Try a simple homemade sauce or your favorite store-bought version.
- A Cup of Coffee or Tea: Sometimes, all you need is a warm beverage to accompany your sweet treat. These bars are wonderful with a morning coffee or an afternoon tea.
Your Apple Crumble Bar Questions Answered (FAQ)
Got questions about making the perfect apple bars? Here are some common ones:
What kind of apples are best for apple crumble bars?
A mix is often best! Combining tart apples like Granny Smith with sweeter, firmer varieties like Honeycrisp, Fuji, Gala, Braeburn, or Jonagold gives you a balanced flavor and ensures the apples don’t turn into complete mush. Avoid soft, mealy apples like Red Delicious.
Why is my apple filling watery?
This is the classic soggy bottom culprit! Apples release a lot of juice as they cook. If you don’t allow them to sit and drain off some of the excess liquid before baking, and/or you don’t use a thickener like flour or cornstarch, that liquid will seep into your crust, making it soggy. Following steps 3 and 4 in this recipe is key to preventing this!
Can I use cornstarch instead of flour in the apple filling?
Yes, absolutely! The recipe calls for 1 tablespoon of all-purpose flour or cornstarch. Cornstarch is often a slightly more powerful thickener, resulting in a slightly clearer, more gel-like filling, while flour gives a slightly cloudier, softer set. Either works well for this recipe.
How do I know when the apple crumble bars are done baking?
Look for a few key signs: the crumble topping should be a deep golden brown, not just pale yellow. You should also see the apple filling bubbling vigorously around the edges of the pan. The internal temperature of the filling should be around 200-210°F (93-99°C), ensuring the apples are tender and the thickener has activated, though visual cues are usually sufficient.
Why do the bars need to cool completely?
Patience here is rewarded! As the bars cool, the apple filling continues to set and firm up. The butter in the crust and topping solidifies. Cutting them while they’re still warm or hot will result in a gooey, crumbly mess that won’t hold its shape, and the moisture from the hot filling can still steam the bottom crust. Cooling allows everything to become stable for clean slicing and the perfect texture.
Can I make these apple crumble bars gluten-free?
You likely can, but it would require substituting the flour in all three components (crust, filling thickener, topping) with a gluten-free all-purpose flour blend. Ensure the blend contains a binder like xanthan gum, or add a small amount if it doesn’t. The texture might be slightly different, but the apple draining trick will still be crucial for preventing a soggy bottom in a gluten-free crust.
How long do apple crumble bars last?
Stored in an airtight container, they’ll last 2-3 days at room temperature or up to a week in the refrigerator. They are best enjoyed within the first few days for optimal texture.
Enjoy Your Perfect Homemade Apple Crumble Bars!
There you have it! My go-to recipe for Classic Apple Crumble Bars that are guaranteed to have a delicious, sturdy crust, juicy-but-not-watery apples, and a perfectly crisp topping. They capture all the warmth and comfort of classic apple crumble in a convenient, sliceable bar form.
Whether you’re making them for a holiday gathering, a weekend treat, or just because, I hope you love these as much as I do. Give this recipe a try and wave goodbye to soggy bottoms forever!
More Sweet Ideas
If you enjoyed these apple crumble bars, you might want to explore other baked treats.
- For a delightful breakfast or snack, consider making cinnamon sugar jam-filled waffles, which share similar warm spice notes.
- If you liked the apple and cinnamon combination, this apple cinnamon loaf offers a moist cake-like texture.
If you make these bars, I’d love to hear about it! Leave a comment below and let me know how they turned out. And don’t forget to share this recipe with friends who struggle with soggy apple desserts!
Apple Crumble Bars
Course: DessertCuisine: AmericanDifficulty: medium750
kcalMake the best Classic Apple Crumble Bars with a simple trick to prevent a soggy bottom crust! Perfect texture every time.
Ingredients
For the Crust:
1 and 1/2 cups all purpose flour
1/2 cup granulated sugar
1/4 teaspoon salt
1 cup cold unsalted butter cut into cubes
For the Apple Filling:
6 medium apples peeled cored and diced
1/2 cup granulated sugar
1 tablespoon all purpose flour or cornstarch
1 teaspoon ground cinnamon
1/4 teaspoon ground nutmeg optional
1 tablespoon lemon juice optional
For the Crumble Topping:
1 cup all purpose flour
1/2 cup packed light brown sugar
1/2 cup cold unsalted butter cut into cubes
1/2 cup rolled oats optional
For Finishing:
Powdered sugar for dusting
Directions
- Preheat your oven to 375 degrees Fahrenheit (190 degrees Celsius). Grease and flour a 9×13 inch baking pan or line with parchment paper leaving an overhang on the sides.
- Make the crust Combine the flour sugar and salt in a medium bowl. Cut in the cold butter using a pastry blender or your fingertips until the mixture resembles coarse crumbs. Press the mixture firmly and evenly into the bottom of the prepared baking pan.
- Prepare the apple filling In a large bowl toss the diced apples with the sugar cinnamon and nutmeg if using. Let the mixture sit for about 10 to 15 minutes. This allows the apples to start releasing some of their juice.
- Solve the Soggy Bottom After the apples have sat gently tilt the bowl and carefully drain off some of the liquid that has accumulated at the bottom. You don’t need to drain it completely just remove the excess surface liquid. Stir in the 1 tablespoon of flour or cornstarch and the lemon juice if using into the apples. This combination of draining and adding a thickener is key to preventing a watery filling and a soggy bottom crust.
- Make the crumble topping In a separate medium bowl combine the flour brown sugar and optional oats. Cut in the cold butter cubes using a pastry blender or your fingertips until the mixture forms coarse crumbs.
- Assemble the bars Spread the prepared apple filling evenly over the pressed crust in the pan. Sprinkle the crumble topping evenly over the apple layer.
- Bake in the preheated oven for 50 to 60 minutes or until the crumble topping is golden brown and the apple filling is bubbling around the edges.
- Cooling is crucial for structure and preventing sogginess Allow the bars to cool completely in the pan on a wire rack before cutting into squares. This can take several hours. Cooling helps the layers set properly.
- Dust with powdered sugar just before serving if desired.


