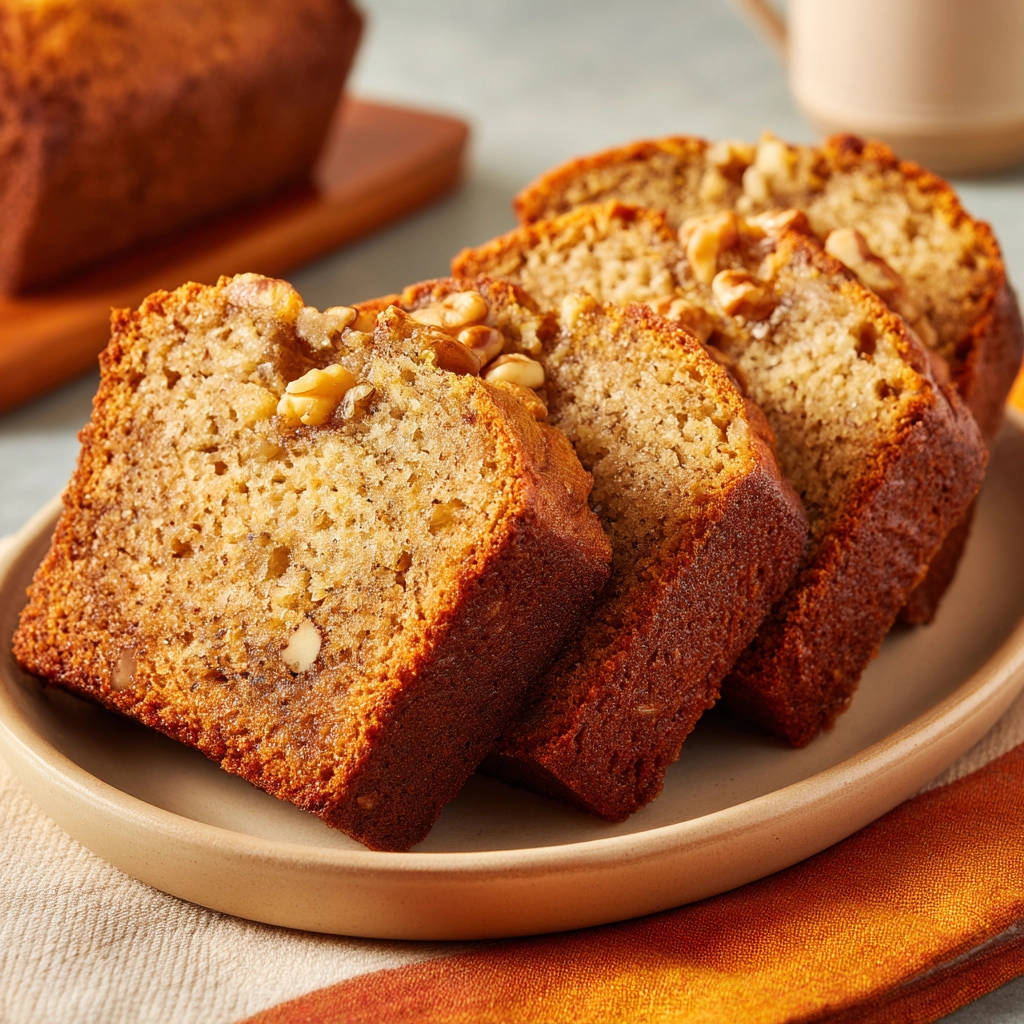
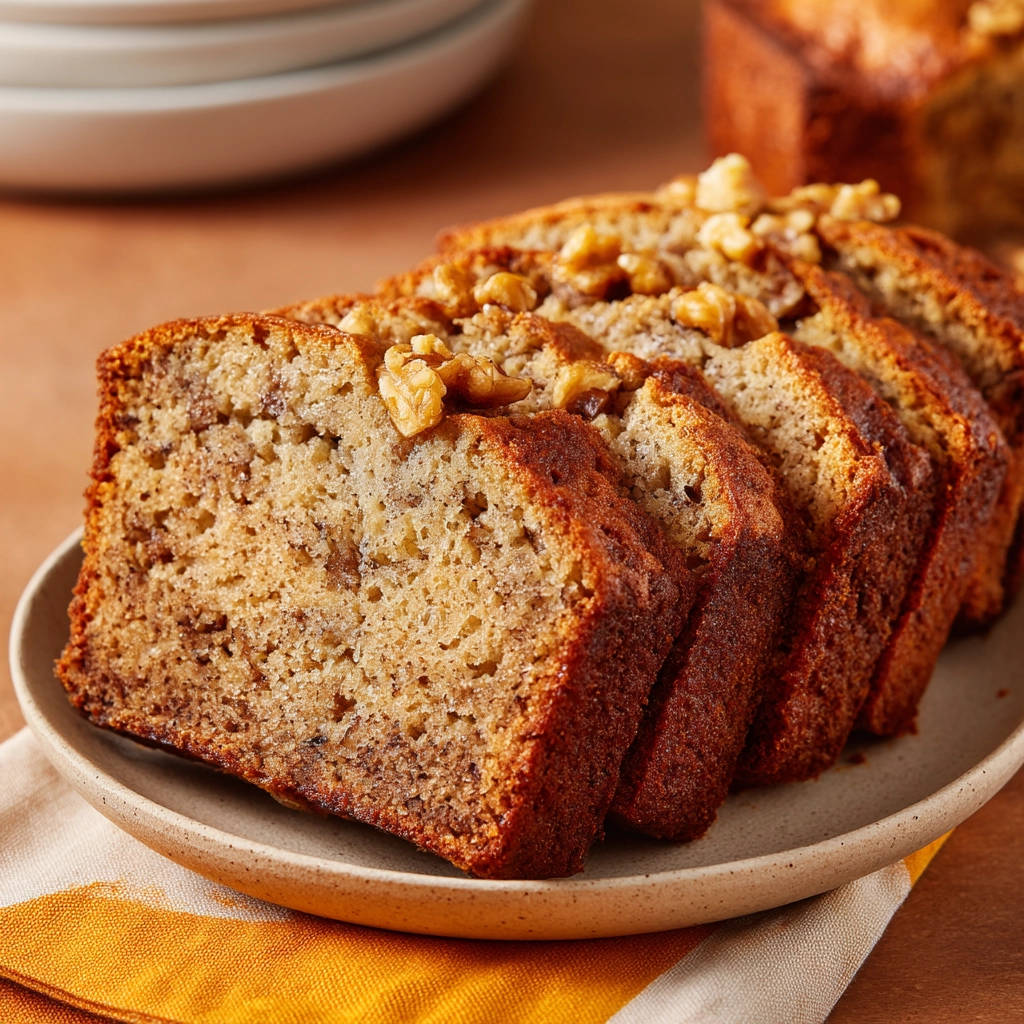
Oh, banana bread. It’s one of those timeless comforts, isn’t it? The kind of scent that fills your kitchen with instant warmth and nostalgia. We’ve all probably got a memory tied to a slice of it, whether it was mom’s special recipe or a beloved bakery treat.
But let’s be honest, we’ve also all experienced the disappointment. You slice into what looks like a perfect loaf, anticipating that sweet, tender bite, only to find it frustratingly dry and crumbly inside. It’s a culinary letdown of epic proportions!
Well, what if I told you that dry banana bread could be a thing of the past? What if there was a simple, straightforward method to achieve a perfectly moist, tender, and incredibly flavorful classic banana nut bread loaf, every single time you bake it? That’s exactly what this recipe delivers. It’s reliable, uses simple ingredients, and guarantees that delightful, melt-in-your-mouth texture we all crave.
Get ready to turn those overly ripe bananas into kitchen gold. This isn’t just another banana bread recipe; it’s your new go-to for guaranteed success.
Why You’ll Love This Moist Banana Nut Bread
Beyond just avoiding dryness, this classic banana nut bread recipe has so much to offer. It’s a truly reliable baking project that yields delicious results.
- Unbeatable Moisture: This recipe is specifically designed to prevent dryness. We lean into the moisture from very ripe bananas and use precise mixing techniques to keep the crumb tender.
- Simple Ingredients: You likely have most, if not all, of these pantry staples on hand right now. No fancy or hard-to-find items required.
- Effortlessly Delicious: The process is straightforward and forgiving, making it perfect for bakers of all skill levels.
- Customizable: While we love the classic with walnuts, it’s easy to adapt based on your preferences or what you have available.
- The Perfect Scent: Few things beat the aroma of a loaf of banana bread baking in the oven. It’s pure comfort!
Whether you need a quick breakfast on the go, a comforting afternoon snack, or something sweet to share (or not!), this moist banana nut bread is always a fantastic choice.
Gathering Your Ingredients for Classic Banana Nut Bread
One of the best things about this classic banana nut bread is that the ingredient list is wonderfully simple. You won’t need a trip to a specialty store; just a few basic items from your pantry and a few very ripe bananas will get you started. Each ingredient plays a crucial role in achieving that perfect moist texture and rich flavor.
Here’s what you’ll need and a little bit about why:
- Very Ripe Bananas: This is the star of the show and the secret weapon for moisture and flavor! You’ll need about 3 medium bananas. The key is very ripe. We’re talking bananas that are heavily speckled brown, almost black. This is when their starches have converted to sugars, providing maximum sweetness and a soft texture that mashes beautifully and incorporates seamlessly into the batter, adding essential moisture.
- Melted Butter or Vegetable Oil: You have a choice here! Both melted butter and vegetable oil work wonderfully, each contributing moisture but in slightly different ways. Melted butter adds a richer, buttery flavor, while vegetable oil tends to make the bread slightly lighter and can sometimes contribute to a more consistently moist crumb. Use 1/3 cup.
- Granulated Sugar: Just enough to enhance the sweetness of the bananas without being overly cloying. We use 1/2 cup.
- Egg: A single large egg acts as a binder, holding everything together and contributing to the bread’s structure and richness.
- Vanilla Extract: A teaspoon of pure vanilla extract adds a warm, aromatic note that complements the banana flavor beautifully.
- Baking Soda: This leavening agent is crucial for helping the bread rise and creating that tender crumb. You’ll use 1 teaspoon.
- Pinch of Salt: A small amount of salt (just a pinch!) is essential for balancing the sweetness and enhancing all the other flavors in the bread.
- All Purpose Flour: The structural backbone of our bread. You’ll need 1 and 1/2 cups. Measuring flour correctly is important – spoon it lightly into the measuring cup and level it off.
- Chopped Walnuts (Optional): If you love that classic crunch and nutty flavor, 1/2 cup of chopped walnuts is the perfect addition. Feel free to leave them out if nuts aren’t your thing, or swap them for pecans or even chocolate chips!
Gathering everything beforehand, often called mise en place, makes the baking process smooth and enjoyable.
Crafting Your Moist Classic Banana Nut Bread: Step-by-Step
Alright, ready to turn these simple ingredients into a warm, fragrant loaf? The steps are easy to follow, and we’ll walk through each one with a few helpful tips to ensure your success. Remember, the goal here is ease and a perfect, moist result!
-
Prep Your Pan and Preheat: Start by getting your oven ready. Preheat it to 350 degrees Fahrenheit (175 degrees Celsius). Preheating ensures that your oven is at the correct temperature from the moment the bread goes in, leading to even rising and baking. While the oven heats, prepare your loaf pan. A standard 9×5 inch loaf pan is ideal. To prevent sticking and ensure your beautiful loaf releases easily, generously grease the inside of the pan. You can use butter, shortening, or cooking spray. Then, add a tablespoon or two of all-purpose flour to the greased pan, tilt and tap it around until the grease is coated with a thin layer of flour, and dump out any excess. This grease-and-flour method is a classic technique for preventing baked goods from sticking.
-
Mash Those Bananas: Grab a large mixing bowl – this is where most of the magic will happen. Add your three very ripe bananas. Using a fork, mash them thoroughly. Don’t be shy! The riper the bananas, the easier they’ll mash and the more moisture and intense banana flavor they’ll contribute. Aim for a consistency that’s mostly smooth, but a few small lumps are perfectly fine and can actually add nice pockets of banana flavor in the final bread.
-
Add the Fat: Pour your melted butter or vegetable oil directly into the mashed bananas. Give it a good stir with your fork or a spoon until it’s well combined with the banana puree. This adds richness and further contributes to the moistness of the bread.
-
Wet Ingredients Unite: Now, whisk in the granulated sugar, the single egg, and the teaspoon of vanilla extract. Stir everything together until you have a well-combined wet mixture. The sugar will start to dissolve, the egg will bind the ingredients, and the vanilla will start releasing its lovely aroma.
-
Introduce the Leavening: Sprinkle the baking soda and a pinch of salt evenly over the wet banana mixture. Stir gently, just until you see the baking soda incorporated. You might notice a slight fizzing action; that’s the baking soda starting to react with the acidic bananas, which helps the bread rise.
-
Add the Flour (Gently!): This step is crucial for a tender loaf! Gradually add the 1 and 1/2 cups of all-purpose flour to the wet ingredients. You can do this in two additions. Use a spoon or a spatula to mix the flour into the wet ingredients until they are just combined. The key word here is just. Stop mixing as soon as you no longer see dry streaks of flour. A few small lumps in the batter are totally okay – in fact, they’re preferable to overmixing! Overmixing develops the gluten in the flour, which can lead to a tough, dry banana bread texture. If you are adding the chopped walnuts, gently fold them in now with a spatula until they are evenly distributed throughout the batter.
-
Pour into the Pan: Carefully pour the batter into your prepared 9×5 inch loaf pan. Use your spatula to scrape down the sides of the bowl and get every last bit of that delicious batter into the pan. Spread the top evenly with the spatula if needed.
-
Bake to Perfection: Place the pan in the preheated oven. Bake for 60 to 70 minutes. The baking time can vary depending on your oven, the pan you use, and even the moisture content of your bananas, so it’s important to check for doneness. You’ll know the bread is ready when a wooden skewer (like a toothpick or a long skewer) inserted into the very center of the loaf comes out clean, with no wet batter attached. If it comes out with a few moist crumbs, that’s perfect! If the top of your bread starts to brown too much before the center is cooked through (especially common around the 40-45 minute mark), loosely tent the pan with a piece of aluminum foil for the remaining baking time. This protects the top while the inside continues to cook.
-
Cooling Patience is Key: This step is more important than you might think for optimal texture and preventing crumbling. Once the bread is out of the oven, let it cool in the loaf pan for 10 minutes. This allows the bread to set up slightly as it cools. After 10 minutes, carefully invert the pan onto a wire cooling rack. The bread should slide out easily. Let the bread cool completely on the wire rack before slicing. Slicing while it’s slightly warm is tempting and certainly okay, but fully cooled bread will slice much more cleanly without tearing or crumbling.
Tips for Perfect Banana Nut Bread Every Time
While the recipe is designed for consistent results, a few extra tips can elevate your classic banana nut bread from great to absolutely phenomenal!
- Banana Ripeness is Non-Negotiable: I know I mentioned it, but it bears repeating! Those spotty, bruised, almost black bananas are your friends here. Don’t use yellow bananas with just a few spots; they won’t provide the necessary moisture or flavor depth.
- Avoid Overmixing the Batter: Once the dry ingredients hit the wet, mix just until combined. Overmixing develops gluten, leading to a tough, rubbery, and ultimately dry loaf. Lumps are fine!
- Proper Pan Preparation: Greasing and flouring (or using parchment paper) is essential for easy release. Nothing is more frustrating than a beautiful loaf that’s stuck in the pan.
- Know Your Oven: Oven temperatures can vary. If you frequently have issues with baking times or browning, an oven thermometer can be a great investment to ensure your oven is running true to temperature.
- The Foil Tent Trick: If the top is browning too fast, loosely tenting with foil is your savior. It prevents the top from burning while the center finishes baking.
- Cooling Time Matters: Resist the urge to slice immediately! Allowing the bread to cool in the pan then on a rack helps it set and retain moisture, resulting in a better texture.
- Ingredient Substitutions: Feel free to swap walnuts for pecans or even stir in a cup of chocolate chips for a sweeter treat. You can also experiment with adding a pinch of cinnamon or nutmeg to the dry ingredients for extra warmth.
What to Serve With Your Moist Banana Nut Bread
This classic banana nut bread is absolutely divine all on its own, perhaps with a cup of coffee or tea. However, you can certainly serve it alongside other dishes depending on the occasion.
For a simple breakfast or snack, a slice with a smear of butter or cream cheese is heavenly. It also pairs beautifully with fresh fruit or a simple yogurt parfait.
If you’re serving it as part of a brunch spread, it would be lovely alongside dishes like Baked Berry French Toast Casserole or even savory items like bacon or Easy Quiche. The sweet, moist bread provides a perfect counterpoint to richer or saltier flavors.
As a simple dessert, enjoy a slice slightly warmed, maybe with a scoop of vanilla ice cream for a truly indulgent treat.
Your Classic Banana Nut Bread Questions Answered (FAQ)
Got questions about baking the perfect loaf? Here are some answers to common inquiries:
Can I use less ripe bananas?
Technically, yes, but for the best results – meaning optimal moisture and flavor – you really want those very ripe, spotty bananas. Less ripe bananas are firmer, less sweet, and contain more starch, which won’t contribute to the moistness in the same way.
My banana bread turned out dry. What went wrong?
There are a few common culprits: The most frequent is overmixing the batter after adding the flour. This develops gluten, leading to a tough, dry texture. Another possibility is using bananas that weren’t ripe enough. Over-baking can also dry out the loaf; make sure you’re checking for doneness with a skewer.
Can I omit the nuts?
Absolutely! The recipe specifies the walnuts as optional. If you prefer plain banana bread or have nut allergies, simply leave them out. The recipe will still be wonderfully moist and delicious.
How should I store banana bread?
Once cooled completely, store the banana bread wrapped tightly in plastic wrap or in an airtight container at room temperature for up to 3-4 days. For longer storage, slice the cooled loaf, wrap individual slices or the whole loaf tightly in plastic wrap, then wrap again in aluminum foil or place in a freezer-safe bag. It can be frozen for up to 2-3 months. Thaw at room temperature.
Can I add other things like chocolate chips or spices?
Yes! This recipe is a great base for variations. Stir in 1/2 to 1 cup of chocolate chips (milk, semi-sweet, or dark) along with the nuts (or instead of). A teaspoon of cinnamon or a half teaspoon of nutmeg can be added to the dry ingredients for a warm, spiced flavor.
Can I make this recipe into muffins?
Yes, you can! Fill muffin cups about two-thirds full. The baking time will be much shorter, typically around 20-25 minutes at 350°F (175°C). Check for doneness with a toothpick inserted into the center of a muffin.
Enjoy Your Homemade Classic Banana Nut Bread!
There you have it – a simple, reliable recipe for the moistest, most delicious classic banana nut bread you’ll ever make. Say goodbye to dry, crumbly loaves and hello to perfect slices every time. This recipe is more than just a way to use up overripe bananas; it’s a guaranteed crowd-pleaser and a little bit of edible sunshine.
Bake it for breakfast, enjoy it as a snack, or share it with friends and family. However you enjoy it, I’m confident this will become your new favorite banana bread recipe.
Have you tried this recipe? What are your favorite additions? Let me know in the comments below! Happy Baking!
Classic Banana Nut Bread
Ingredients
- 3 very ripe bananas mashed well
- 1/3 cup melted butter or vegetable oil
- 1/2 cup granulated sugar
- 1 egg
- 1 teaspoon vanilla extract
- 1 teaspoon baking soda
- Pinch of salt
- 1 and 1/2 cups all purpose flour
- 1/2 cup chopped walnuts (optional)
Directions
- Preheat oven to 350 degrees F (175 degrees C). Grease and flour a 9×5 inch loaf pan.
- In a large bowl, mash the very ripe bananas thoroughly with a fork until mostly smooth. The riper the bananas, the more moisture and flavor.
- Stir the melted butter or oil into the mashed bananas.
- Mix in the sugar, egg, and vanilla extract.
- Sprinkle the baking soda and salt over the banana mixture and stir gently until just combined.
- Gradually add the flour to the wet ingredients, mixing until just combined. Do not overmix; a few lumps are fine. Overmixing develops gluten which can make the bread tough and dry. If using, gently fold in the chopped walnuts now.
- Pour batter into the prepared loaf pan.
- Bake for 60 to 70 minutes, or until a wooden skewer inserted into the center comes out clean. If the top browns too quickly, you can loosely tent it with foil during the last 15-20 minutes of baking.
- Let the bread cool in the pan for 10 minutes before turning it out onto a wire rack to cool completely. Slicing while slightly warm is okay, but fully cooled bread is easier to slice cleanly.

