
Picture this: you’ve poured your heart into a classic cherry cheesecake, only to pull it from the oven with an ugly network of cracks across the top. It happens to everyone at first. But this recipe changes everything. Dinner’s not on the table in 30 minutes, yet you’ll have a stunning classic cherry cheesecake ready with a foolproof water bath that delivers silky perfection every time.
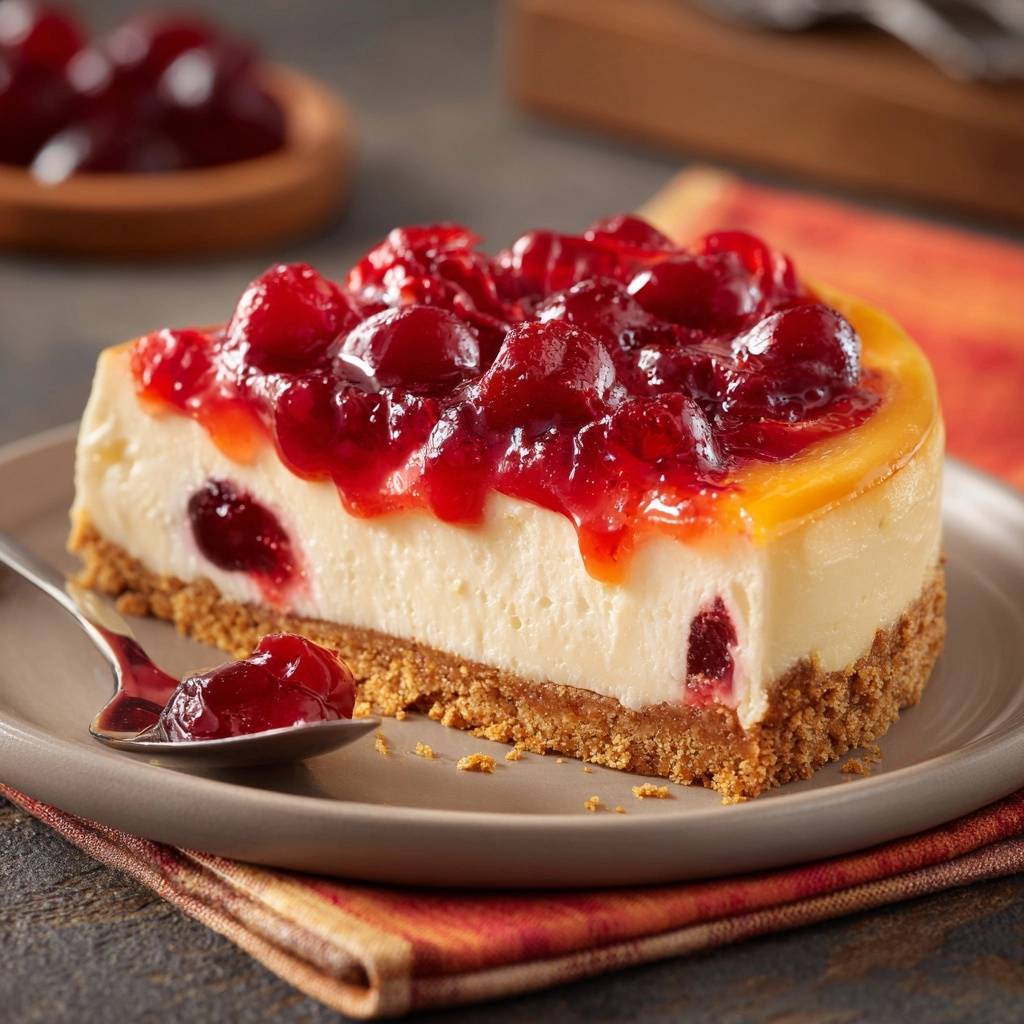
Why does this classic cherry cheesecake endure? Because that crisp graham crust snaps under your fork, the velvety filling melts on your tongue, and tart cherries cut through the richness like a dream. Modern no-bake versions can’t touch this baked beauty’s depth. You get restaurant-quality results at home, no stress.
Here’s the expertise kicker: room-temperature ingredients are non-negotiable. They blend seamlessly without trapping air bubbles that lead to cracks. Trust me, I’ve seen cold cream cheese turn into lumps that ruin the whole thing. Follow this, and your classic cherry cheesecake shines.
Why Classic Cherry Cheesecake Endures
Timeless Appeal of Creamy Layers
The graham crust gives a buttery crunch that holds up to the dense filling. Then comes the creamy heart of your classic cherry cheesecake, smooth as silk from the water bath’s gentle steam. Tart cherry pie filling adds juicy brightness, balancing every sweet bite. No-bake trends skip this magic contrast.
Historical Roots in American Desserts
Classic cherry cheesecake traces back to 1700s Europe, but America made it iconic with New York-style density. Junior’s in Brooklyn perfected the towering slices in the 1950s. Families swapped stories over traditional cherry cheesecake at holidays. Cherries evolved as the go-to topping for their vivid pop and pie-like nostalgia.
Gathering Ingredients for Graham Crust Base
Graham Cracker Crumbs Texture Role
You need 1 1/2 cups graham cracker crumbs for a sturdy base that won’t crumble under the filling. Homemade crumbs from whole crackers give finer texture than store-bought, preventing sogginess. Fine crumbs pack tightly, so moisture stays locked out. Therefore, pulse them in a food processor for perfection.
Melted Unsalted Butter Binding Power
Melt 1/3 cup unsalted butter to bind the crumbs without salt overpowering the sweet crust. Unsalted keeps flavors balanced; salted risks a savory edge. Warm the butter just enough for even mixing, but not hot, or it’ll make the crust greasy. In addition, it crisps up beautifully during baking.
Granulated Sugar Sweetening Balance
Add 1/4 cup granulated sugar for subtle sweetness and structure. It triggers browning through Maillard reaction, giving golden edges. Too little, and the crust tastes flat; too much softens it. So, measure precisely for that ideal snap.
Assembling Cream Cheese Filling Essentials
Room-Temperature Cream Cheese Smoothness
Soften 24 ounces cream cheese to room temperature for lump-free classic cherry cheesecake filling. Cold cheese refuses to blend, creating gritty bits no paddle can fix. Full-fat brands like Philadelphia deliver richest texture over generics. Therefore, let it sit out 1-2 hours for effortless smoothness.
Eggs and Sour Cream Integration
Beat in 3 large room-temperature eggs one at a time on low speed. This prevents cracks by minimizing air incorporation. Add 1 cup room-temp sour cream for tangy stability; it keeps the filling creamy without curdling. However, rushing this step toughens the result.
Vanilla Extract Flavor Anchor
Stir in 1 teaspoon pure vanilla extract to amplify cherry notes in your classic cherry cheesecake. Cheap extracts fade; pure ones bloom with warm depth. A little goes far, so don’t overdo it. In addition, it rounds out the sour cream’s bite perfectly.
Science of Crack-Free Baking Technique
Water Bath Even Heat Distribution
The water bath at 325°F uses steam for gentle, even heat, mimicking a convection oven. Wrap your springform pan in heavy-duty foil to block leaks; double layers work best. Dry ovens cause rapid top drying and cracks from uneven contraction. Therefore, hot water halfway up the sides keeps humidity high for a smooth top.
Slow Oven Cooling Shock Prevention
After baking, turn off the oven and crack the door for 1 hour. Sudden temperature drops create surface tension, splitting the top like overbaked meringue. No-bath versions fail here, puffing then collapsing. So, this gradual cool-down locks in silkiness without drama.
Pressing and Pre-Baking Crust Foundation
Firm Packing Up Springform Sides
Mix crumbs, butter, and sugar, then press firmly into the bottom and 1 inch up the sides of a 9-inch springform pan. Use a flat glass bottom for even thickness; thin spots collapse under filling. Bake 10 minutes at 325°F to set the structure. In addition, it prevents sogginess later.
Wire Rack Cooling Interlude
Cool the pre-baked crust on a wire rack for 20-30 minutes. This stops residual heat from melting the filling prematurely. Skip it, and the bottom turns mushy. Therefore, patience here pays off big.
Precise Mixing for Silky Cheesecake Batter
Beat Sugar into Cream Cheese Fully
Beat softened cream cheese and 1 cup sugar for 2 minutes until glossy smooth. Use a paddle attachment to avoid whipping in air bubbles that cause cracks. You’ll see it transform from lumpy to velvety. However, stop here; overmixing toughens it.
Incorporate Eggs Minimally
Add eggs one by one on low speed, beating just until combined, about 30 seconds each. Excess air makes the cheesecake rise and fall, cracking the surface. Low speed retains dense structure. So, restraint is your friend.
Final Sour Cream Vanilla Blend
Gently mix in sour cream and vanilla until uniform; the batter should ribbon off the paddle. Pour slowly over cooled crust for even distribution. It looks rich and pourable now. In addition, this sets up flawless baking.
Executing Water Bath and Bake Cycle
Roasting Pan Hot Water Setup
Place the filled springform in a larger roasting pan, then add hot tap water halfway up the sides. Triple-wrap foil first to seal edges tight. Carefully slide into the oven to avoid sloshes. Therefore, no leaks mean no soggy disasters.
60-Minute Jiggle Test Mastery
Bake 60 minutes until edges puff and set, but the center 2 inches still jiggles like Jell-O. Don’t rely on a toothpick; it’s about gentle motion. If you have a thermometer, aim for 150°F internally. However, overbaking dries it out fast.
Post-Bake Cooling and Chilling Protocol
1-Hour Oven Door Crack Method
Crack the oven door 4 inches and cool inside for 1 hour. This drops temp gradually, preventing shock cracks. Keep away from drafts. So, your top stays flawless.
4-Hour Refrigerator Set Time
Chill uncovered 4 hours or overnight for firm slices. Run a thin knife around edges before releasing the springform ring. Patience ensures clean cuts. In addition, flavors deepen beautifully.
Applying Luscious Cherry Pie Topping
Even Spread Just Before Serving
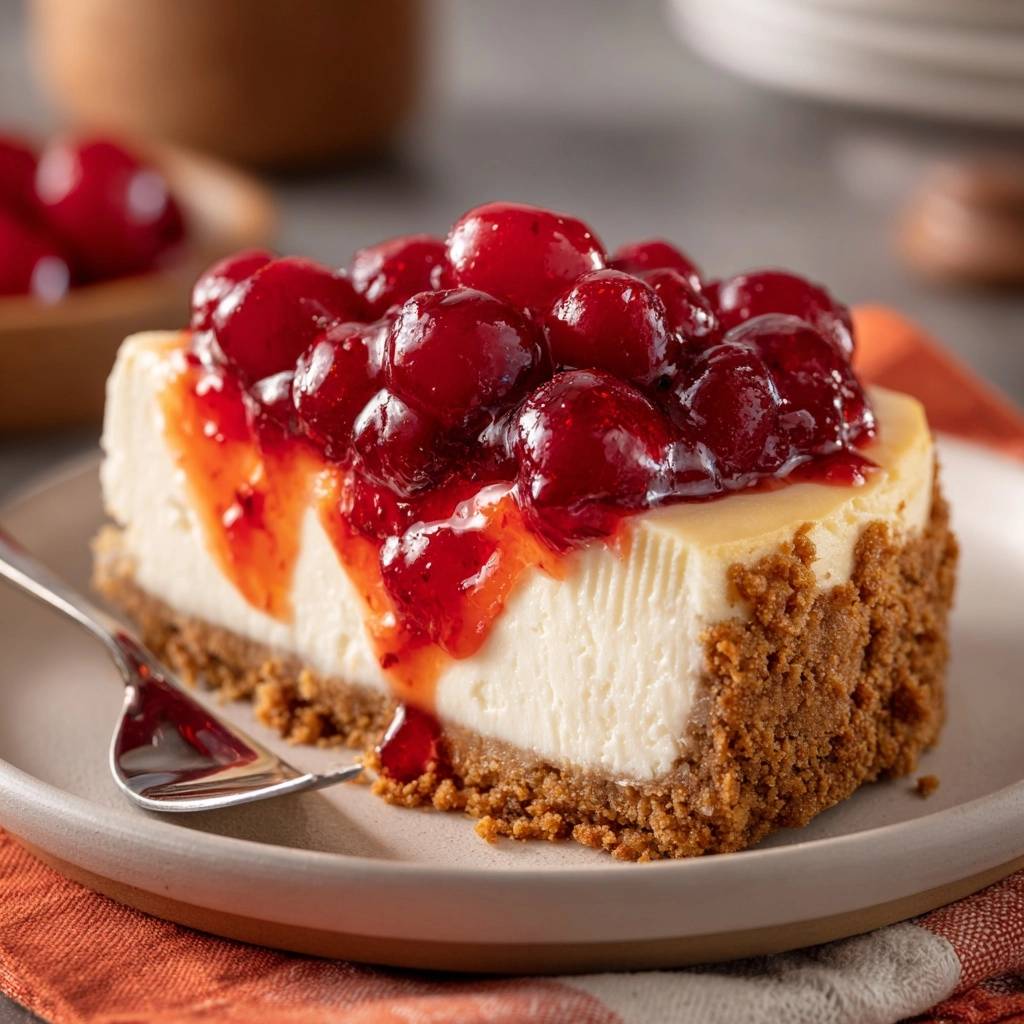
Drain two 21-ounce cans cherry pie filling slightly, then spread evenly over chilled cheesecake. Room-temp filling clings better without sliding. For cherry cheesecake topping, homemade simmers fresh cherries with sugar and cornstarch if you prefer. Therefore, it glistens and tastes brighter.
Slicing Clean Presentation Tips
Chill a sharp knife in hot water, wipe dry, then slice for flawless edges. Repeat between cuts. Pro tip: chill plates first for neater servings. So, every piece wows.
Avoiding Common Classic Cherry Cheesecake Pitfalls
Overmixing Leads to Cracks
Overbeating incorporates air, causing puffing then collapse cracks. Stick to low speed and minimal time. You’ll get dense, smooth results instead. Therefore, watch the clock religiously.
Water Bath Leak Prevention
Triple-layer foil and pour water slowly after oven placement. If leaks worry you, try a dry oven at 300°F longer. But baths yield superior texture. In addition, test foil submersion first.
Soggy Crust Fixes
Pre-bake fully and cool completely before filling. Chill crust 30 minutes extra if humid. So, it stays crisp under juicy cherries.
Make-Ahead Strategies for Cherry Cheesecake
Freezing Whole or Sliced
Freeze whole cheesecake up to 2 months: wrap tightly in plastic then foil after chilling. Thaw overnight in fridge; add cherry cheesecake topping fresh. Slices freeze well on a sheet, then bag. However, avoid refreezing for best texture.
Component Prep Timeline
Bake crust 2 days ahead and store airtight. Mix filling day-of for peak freshness. Keep canned cherries at room temp. Therefore, assembly takes minutes when ready.
Pairing Classic Cherry Cheesecake Sides
Coffee and Tea Complements
Bold roast coffee slices through the richness, highlighting cherries. Herbal teas like chamomile balance tartness without overpowering. In addition, they cleanse the palate for seconds.
Fresh Fruit and Whipped Cream
Scatter mint leaves or lemon zest for zing. Whip heavy cream with a touch of sugar and vanilla for stable dollops. So, it elevates each bite effortlessly.
Frequently Asked Cherry Cheesecake Questions
Can I Skip the Water Bath?
Yes, bake at 300°F for 75-90 minutes, but expect slight cracks and less even texture. The bath’s steam ensures superior silkiness. If skipping, cool even slower.
Best Cream Cheese Brands?
Philadelphia full-fat wins for creamy density; generics often weep or lack body. Avoid reduced-fat; it cracks more. So, splurge for pro results.
How to Fix Cracks If They Happen?
Whip sour cream with sugar, spread thin over top, then chill. Cherry topping camouflages perfectly. Therefore, no one notices your slip-up.
Graham Cracker Substitutes Work?
Digestive biscuits or finely ground nuts like pecans work; use same amount. Add extra butter for binding. Adjust sugar to taste.
Homemade Cherry Topping Recipe?
Simmer 4 cups pitted cherries, 1/2 cup sugar, 2 tbsp cornstarch slurry till thick. Cool before spreading. Bursting fresh flavor beats canned.
How do I store leftover classic cherry cheesecake?
Keep in an airtight container in the fridge up to 5 days. The cherry topping keeps it moist, but cover loosely after day 2 to avoid sogginess. It freezes well whole or sliced for 2 months; thaw in fridge overnight without topping until serving.
Why did my cheesecake crack despite the water bath?
Overmixing trapped air, or you cooled too fast outside the oven. Always add eggs minimally and do the full 1-hour door-crack cool. Check oven temp accuracy too; hotspots cause uneven baking.
Can I substitute ingredients in classic cherry cheesecake?
Swap graham crumbs for digestive biscuits or nuts, but keep volume same. Use Greek yogurt for half the sour cream if needed, thinned with milk. No low-fat cream cheese; it won’t set properly. Vanilla can be doubled for bolder flavor.

Classic Cherry Cheesecake
Course: DessertCuisine: AmericanDifficulty: easy12
servings20
minutes1
hour10
minutes360
Minutes450
kcalAmerican
Ingredients
Crust:
1 1/2 cups graham cracker crumbs
1/3 cup unsalted butter, melted
1/4 cup granulated sugar
Filling:
24 ounces cream cheese, softened to room temperature
1 cup granulated sugar
3 large eggs, room temperature
1 teaspoon vanilla extract
1 cup sour cream, room temperature
Topping:
2 cans (21 ounces each) cherry pie filling
Directions
- Preheat oven to 325 degrees F. Wrap the outside of a 9-inch springform pan with heavy-duty foil to prevent water leaks.
- Mix graham cracker crumbs, melted butter, and sugar until combined. Press firmly into the bottom and 1 inch up the sides of the prepared pan. Bake 10 minutes, then cool on a wire rack.
- Beat softened cream cheese and sugar until smooth, about 2 minutes. Avoid overmixing to prevent cracks. Add eggs one at a time, beating just until incorporated. Mix in vanilla and sour cream until smooth.
- Pour filling over crust. Place springform pan in a larger roasting pan. Fill roasting pan with hot water halfway up the side of the springform pan. This water bath ensures even, gentle baking for a crack-free top.
- Bake 60 minutes until edges are set but center jiggles slightly. Turn off oven, crack door open, and cool cheesecake inside 1 hour. This slow cool-down prevents sudden temperature shocks that cause cracks.
- Refrigerate 4 hours or overnight. Run a knife around edges before removing from pan. Spread cherry pie filling evenly over top just before serving. Slice and enjoy perfect results!
Notes
- Avoid overmixing the filling to prevent cracks. Use room temperature ingredients for best results. Slow cooling in the oven prevents temperature shocks.


