
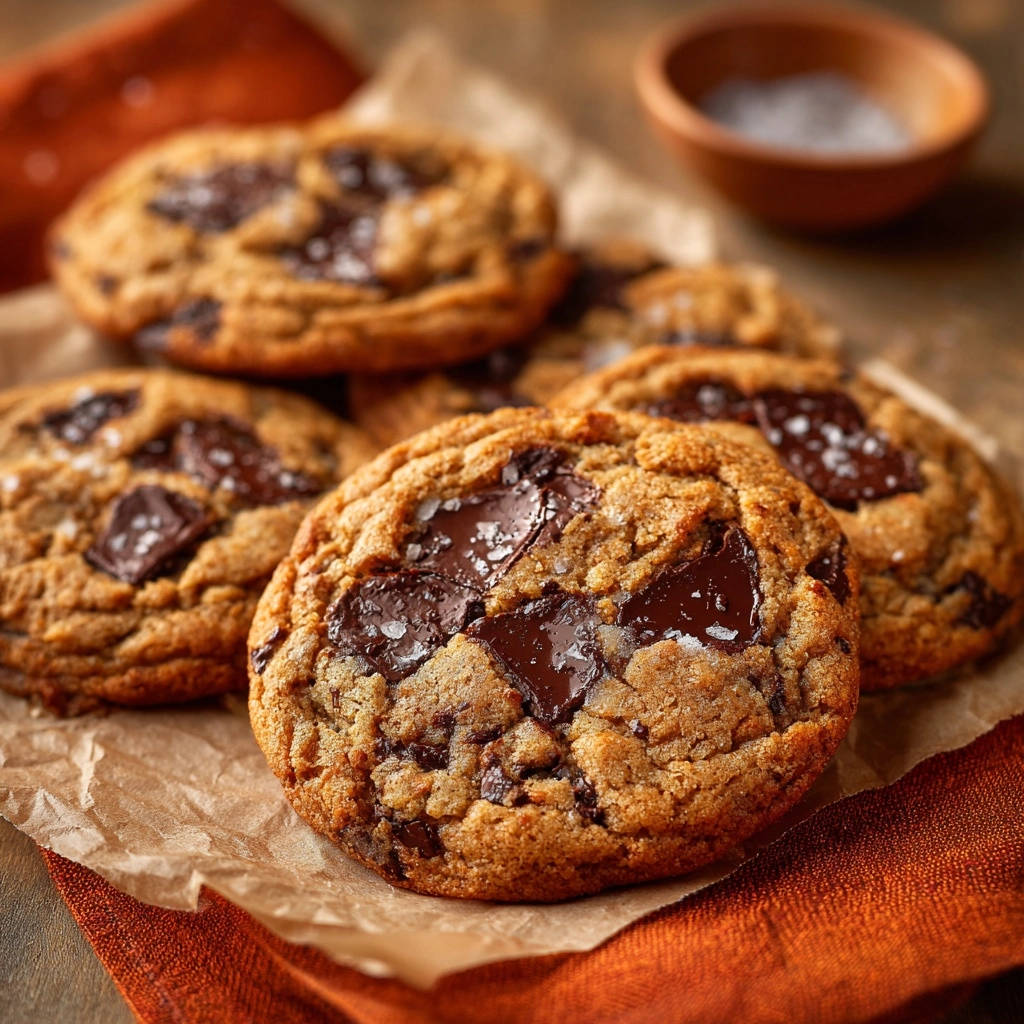
I know the struggle firsthand: trying to achieve that elusive perfect chewy chocolate chip cookie, one that holds its shape, boasts rich chocolate puddles, and isn’t crumbly or too hard. After countless batches, I finally cracked the code to making Classic Chocolate Chunk Cookies that are wonderfully soft and chewy in the middle with just the right amount of crispness on the edge, every single time.
This recipe transforms a simple pantry staple-butter-and introduces a crucial step that makes all the difference, delivering an irresistible texture and depth of flavor you’ll adore.
Beyond Basic: Why These Are Your New Favorite Cookies
These aren’t just any cookies; they’re a revelation in texture and taste, guaranteed to impress.
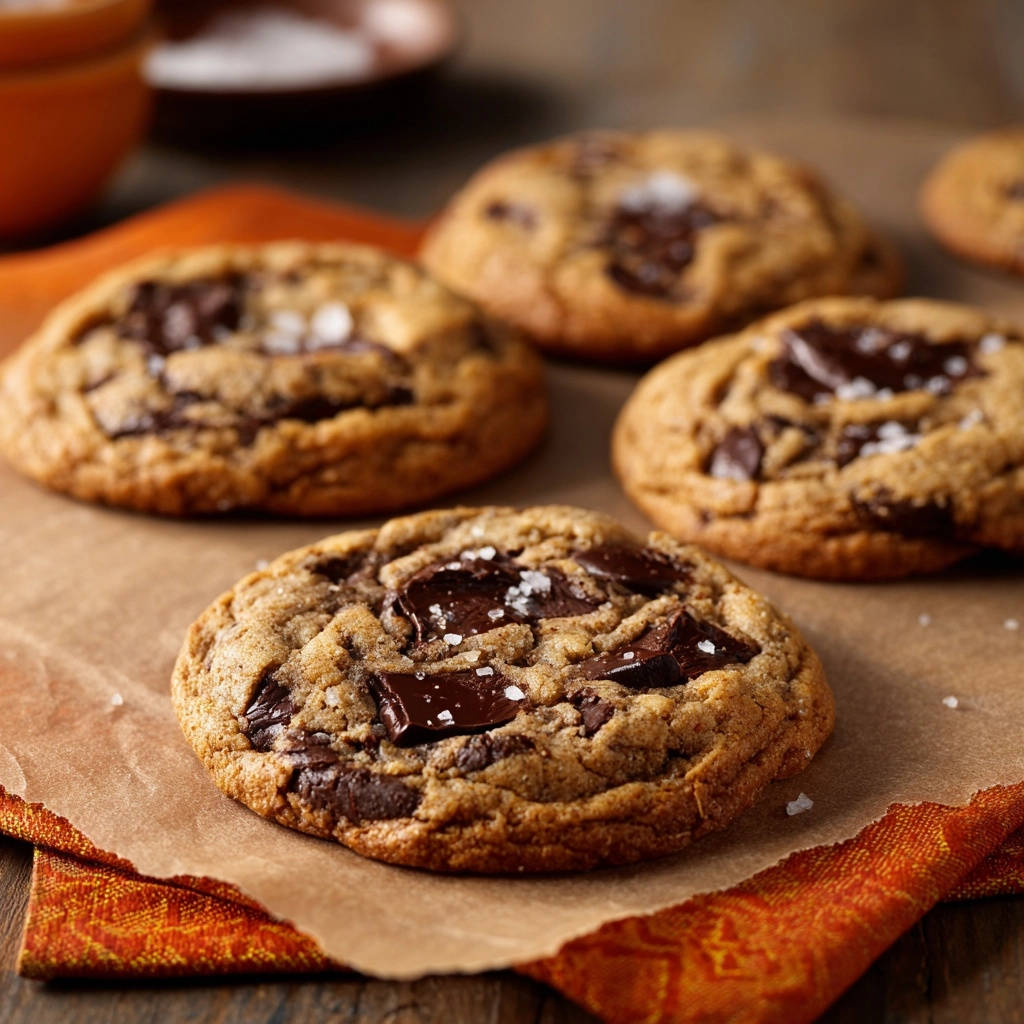
You’ll discover a perfectly soft and chewy center contrasted by subtly crisp, golden edges, a texture that is notoriously difficult to achieve consistently.
The secret lies in two key techniques: the nutty depth of browned butter and a strategic chilling step, both working in harmony to prevent spreading and lock in moisture.
This recipe provides a level of reliability and consistency, ensuring your cookies turn out beautifully every single time, making it an instant classic in your baking repertoire.
The Essential Building Blocks for Unforgettable Flavor
Crafting truly exceptional Classic Chocolate Chunk Cookies begins with understanding the role each quality ingredient plays in achieving that perfect balance of flavor and texture.
The Foundation: Butter and its Golden Transformation
Unsalted butter is paramount for precise control over the overall saltiness of your cookies, allowing you to season them perfectly.
The intentional step of browning the butter adds an extraordinary depth and nutty, caramelized notes that elevate the cookie’s flavor far beyond ordinary.
Balancing Sweetness: Brown vs. Granulated Sugar
Packed light brown sugar is crucial, contributing moisture and a delightful chewiness thanks to its molasses content.
Granulated sugar works in tandem, aiding in the cookie’s spread and creating those coveted slightly crispy edges.
Leavening & Structure: Flour, Baking Soda, and Salt
All-purpose flour provides the necessary foundational structure for your cookies without making them overly dense or tough.
Baking soda serves as the primary leavening agent, ensuring a gentle lift and contributing to the beautiful golden-brown color.
Salt is more than just a seasoning; it balances the sweetness of the sugars and meticulously enhances all the other rich flavors within the cookie.
Flavor Boosters: Eggs and Vanilla
Large eggs act as essential binders, adding vital richness to the dough and contributing significantly to the final texture.
Pure vanilla extract is indispensable for imparting that classic, warm cookie aroma and a sweet, comforting taste that defines a perfect chocolate chunk cookie.
The Star: Your Chocolate Choice for Classic Chocolate Chunk Cookies
Semi-sweet chocolate chunks are highly preferred over standard chocolate chips because they melt into luxurious, gooey “puddles” that elevate the cookie experience.
This distinct melting characteristic creates those irresistible pockets of melted chocolate throughout, distinguishing a gourmet cookie from a good one.
The Finishing Touch: Flaky Sea Salt
A delicate sprinkle of flaky sea salt on top provides a delightful textural contrast and an unexpected pop of flavor, expertly enhancing the chocolate’s inherent sweetness.
Tools for Your Classic Chocolate Chunk Cookies Journey
Having the right tools at hand is crucial for a smooth and enjoyable baking process, ensuring your Classic Chocolate Chunk Cookies come out perfectly every time.
Light-Colored Saucepan: Essential for browning butter, as its light interior allows you to easily monitor the butter’s color change and prevent burning.
Large Heatproof Bowl: Needed for cooling the browned butter and for combining your wet ingredients.
Electric Mixer (Stand or Handheld): While mixing by hand is possible, an electric mixer makes creaming sugars and eggs much easier and ensures consistent results.
Medium Bowl: For whisking together your dry ingredients before adding them to the wet mixture.
Rubber Spatula: Ideal for gently folding in chocolate chunks and scraping down the sides of the bowl without overmixing.
Plastic Wrap: Crucial for covering the dough during its essential chilling period.
Baking Sheets: You’ll need at least two, lined with parchment paper, for even baking and easy cleanup.
Parchment Paper: Prevents sticking, promotes even baking, and simplifies transfer and cleanup.
Cookie Scoop (1.5-2 tablespoons): Ensures uniformly sized cookies, leading to consistent baking and a professional appearance.
Wire Rack: For cooling the baked cookies thoroughly, preventing sogginess and allowing for air circulation.
Oven Thermometer (Optional but Recommended): Verifies your oven’s accuracy, preventing common issues like uneven baking or burnt bottoms.
Mastering the Method: Your Step-by-Step Guide to Classic Chocolate Chunk Cookies
Follow these steps precisely, especially paying attention to the unique techniques, and you’ll be rewarded with the most incredible Classic Chocolate Chunk Cookies imaginable.
Step 1: The Magic of Browned Butter
In a light-colored saucepan, melt the unsalted butter over medium heat. This initial melting should be gentle.
Continue to cook, stirring occasionally, until the butter transforms into a rich amber color and nutty browned bits beautifully appear at the bottom of the pan. This pivotal step typically takes about 5-7 minutes. Watch carefully to avoid burning.
Immediately pour the browned butter into a large heatproof bowl to halt the cooking process and let it cool for 15 minutes. This cooling is absolutely crucial before incorporating the sugars to prevent them from melting.
Step 2: Building the Wet Foundation
To the cooled browned butter, add both the packed light brown sugar and the granulated sugar. Whisk them until they are thoroughly combined, resulting in a smooth and uniform mixture.
Beat in the large eggs one at a time, ensuring each egg is fully incorporated into the mixture before adding the next. Stir in the pure vanilla extract until the entire mixture appears smooth and glossy, showcasing its rich base.
Step 3: Gently Folding in the Dry Elements
In a separate medium bowl, whisk together the all-purpose flour, baking soda, and salt. This thorough whisking ensures all leavening agents and salt are evenly distributed throughout the dry ingredients.
Gradually add these dry ingredients to the wet ingredients. Mix on low speed with an electric mixer or gently by hand until just combined. Be careful not to overmix, as excessive mixing develops gluten, leading to tough cookies.
Step 4: The Grand Finale: Folding in Chocolate Chunks
Gently fold in the semi-sweet chocolate chunks until they are evenly distributed throughout the cookie dough, ensuring every bite will contain chocolatey goodness.
For a truly bakery-worthy look, you can strategically reserve a few extra chocolate chunks to press onto the tops of the scooped dough balls right before baking.
Step 5: The Secret to Perfection: Chilling Your Dough
Cover the bowl securely with plastic wrap and refrigerate the cookie dough for at least 2 hours. This step requires patience but is non-negotiable for superior results.
This chilling step is the definitive secret for guaranteed chewiness. It allows the flavors to deepen significantly and the butter to firm up, which is absolutely crucial for preventing the cookies from spreading too thin during baking and ensures a perfectly chewy texture every time.
Step 6: Preparing for Bake-Off
When you’re ready to bake your Classic Chocolate Chunk Cookies, preheat your oven to 375°F (190°C) to ensure it reaches and maintains the correct temperature.
Line baking sheets with parchment paper. This simple step prevents sticking, promotes even baking, and makes cleanup incredibly easy.
Step 7: Shaping and Adding the Finishing Touch
Scoop rounded tablespoons of the thoroughly chilled dough onto the prepared baking sheets, ensuring you leave about 2 inches between each cookie to allow for proper spreading.
If desired, take those reserved extra chocolate chunks and press a few onto the tops of the dough balls for that irresistible, gourmet appearance. Sprinkle lightly with flaky sea salt for a delightful finish.
Step 8: Baking to Golden Perfection (Don’t Overbake!)
Bake for 10-12 minutes, or until the edges appear golden brown, but the centers still look delightfully soft and gooey. This visual cue is vital.
Do not overbake! This is another paramount key to keeping them wonderfully chewy. The cookies will continue to set and firm up beautifully as they cool on the baking sheet.
Step 9: The Patient Cool Down
Remove the Classic Chocolate Chunk Cookies from the oven and allow them to cool directly on the baking sheet for 5 minutes. This critical period allows them to set sufficiently without falling apart.
After 5 minutes, carefully transfer them to a wire rack to cool completely. Enjoy the irresistible aroma that fills your kitchen!
Elevating Your Bake: Expert Tips & Tricks for Superior Cookies
These expert tips can transform your already delicious Classic Chocolate Chunk Cookies into truly extraordinary, memorable treats.
Precision in Every Scoop: The Importance of Correct Measurement
For the most consistent and accurate results, always use a kitchen scale to measure your flour and sugars. If you’re using measuring cups, spoon the flour into the cup lightly and then level it off with a straight edge; never scoop directly from the bag, as this compacts the flour and leads to too much.
Temperature Matters: The Role of Ingredient Temperature
While the butter is intentionally browned and cooled, it’s essential to ensure your eggs are at room temperature. Room temperature eggs emulsify much better with the sugars, creating a smoother, more uniform dough structure.
The Gentle Hand: Avoiding Overmixing for Tender Cookies
Once the dry ingredients have been added to the wet, mix only until they are just combined and no streaks of flour remain. Overmixing vigorously develops gluten, which can unfortunately lead to tough, dense cookies rather than the desired soft and chewy texture.
Choose Your Chocolate Wisely
Investing in good quality semi-sweet chocolate chunks makes a noticeable difference. Superior chocolate melts more beautifully and contributes significantly to the overall rich flavor of your Classic Chocolate Chunk Cookies.
Personalize Your Batch: Creative Add-Ins and Variations
Feel free to experiment with other delightful add-ins like chopped walnuts or pecans, different types of chocolate (milk, dark, or even white chocolate), or a subtle pinch of cinnamon or espresso powder for an extra layer of flavor complexity.
Troubleshooting Common Cookie Woes: Solutions for Perfect Bites
Even experienced bakers encounter challenges. Here are solutions to common cookie woes, ensuring your Classic Chocolate Chunk Cookies turn out perfectly every time.
Why Are My Cookies Spreading Too Thin?
This common issue is most frequently due to insufficient chilling time. Make sure you adhere to the recommended refrigeration period of at least 2 hours for the dough.
Other contributing factors can include butter that was too warm (even after browning, it needs to cool adequately), an oven that isn’t hot enough, or inaccurate flour measurement, which leads to a wet dough.
Cookies Too Cakey or Dry?
Overmixing the dough is a primary culprit, as it over-develops gluten, resulting in a dense, cake-like texture. Mix only until the flour streaks have just disappeared.
Overbaking is another major reason for dry cookies. Pull them from the oven when the edges are golden but the centers still appear slightly soft and underdone; they will continue to set as they cool.
Missing That Perfect Chewiness?
Not chilling the dough for the full recommended time or, conversely, overbaking the cookies are the two main reasons for a lack of chewiness. Ensure both steps are followed with care.
Additionally, using too much granulated sugar relative to brown sugar can reduce chewiness, as brown sugar’s molasses content contributes significantly more moisture and softness.
Burned Bottom, Raw Top?
This indicates an uneven oven temperature or an oven that is running too hot. Use an oven thermometer to verify your oven’s accuracy and adjust accordingly.
Also, ensure you are using light-colored baking sheets, as dark sheets absorb more heat and can cause faster bottom burning. Using parchment paper also provides an insulating layer.
Your Burning Questions Answered: Classic Chocolate Chunk Cookies FAQs
We’ve gathered and answered the most common questions to help you confidently bake the best Classic Chocolate Chunk Cookies.
Can I Prepare the Cookie Dough in Advance?
Yes, absolutely! The dough can be prepared ahead of time and stored in an airtight container in the refrigerator for up to 3-4 days. In fact, the flavors often deepen and become even more complex over time, resulting in even more delicious Classic Chocolate Chunk Cookies.
Freezing Cookie Dough: A Time-Saving Trick?
Yes, freezing cookie dough is a fantastic time-saver! Scoop the dough into balls onto a parchment-lined baking sheet and freeze until solid. Once frozen, transfer the solid dough balls to a freezer-safe bag or container and store for up to 2-3 months. Bake from frozen, adding a couple of extra minutes to the bake time. For more delightful baked treats, explore our collection of perfect soft and chewy cookie cakes!
Brown Sugar Substitute Options?
If you find yourself without brown sugar, you can create a reasonable substitute by thoroughly mixing 1 tablespoon of molasses into 1 cup of granulated sugar. However, be aware that the resulting texture of the cookies might be slightly different due to the exact moisture content.
Adapting for Dietary Needs: Gluten-Free & Dairy-Free?
For a gluten-free version, you can successfully substitute a good quality 1:1 gluten-free baking flour blend for the all-purpose flour. For dairy-free cookies, opt for a high-quality plant-based butter substitute that is specifically designed for baking and browns well, along with dairy-free chocolate chunks.
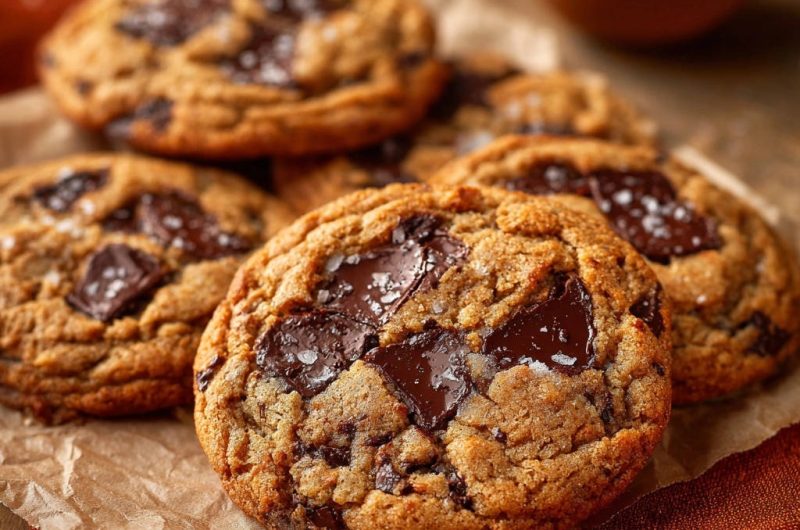
How to Achieve Those Irresistible Chocolate Puddles?
Using chocolate chunks instead of smaller chips is absolutely key, as they melt and spread more beautifully into luscious “puddles.” For maximum visual appeal, pressing a few extra chunks onto the tops of the dough balls right before baking guarantees those perfect pools of melted chocolate.
Serving, Storing, and Sharing Your Delicious Classic Chocolate Chunk Cookies
Once you’ve baked your batch of Classic Chocolate Chunk Cookies, you’ll want to know how to best enjoy and preserve them.
Serving Suggestions: The Ultimate Pairings
These Classic Chocolate Chunk Cookies are phenomenal simply enjoyed on their own, still warm from the oven. However, they truly shine when paired with a cold glass of milk, a generous scoop of vanilla bean ice cream, or alongside a comforting warm cup of coffee or tea.
Keeping Them Fresh: Storage Tips
To maintain their optimal freshness and chewiness, store completely cooled cookies in an airtight container at room temperature for up to 3-5 days. For longer storage, you can freeze baked cookies for up to a month; simply thaw them at room temperature when you’re ready to enjoy.
Sharing the Love: Gifting Your Homemade Treats
These homemade cookies make a truly perfect and thoughtful gift! Arrange them beautifully in decorative tins or bags, tied with a festive ribbon. They are sure to bring a genuine smile and appreciation to anyone lucky enough to receive them.
Your Cookie Journey Starts Now: Embrace the Deliciousness!
Now that you’re armed with the secrets to perfect Classic Chocolate Chunk Cookies, it’s time to preheat your oven and begin your delicious baking adventure. Don’t be afraid to experiment and make these your own signature treat.
We encourage you to experiment and make these Classic Chocolate Chunk Cookies your own signature treat. For another indulgent dessert, be sure to try our easy chocolate lava cake!
Classic Chocolate Chunk Cookies
Course: DessertCuisine: American CuisineDifficulty: easy18
cookies20
minutes10
minutes120
minutesAmerican Cuisine
Ingredients
1 cup (2 sticks) unsalted butter
1 1/4 cups packed light brown sugar
1/2 cup granulated sugar
2 large eggs
2 teaspoons vanilla extract
2 1/4 cups all purpose flour
1 teaspoon baking soda
1 teaspoon salt
1 1/2 cups semi-sweet chocolate chunks or chips
Flaky sea salt, for sprinkling
Directions
- In a light colored saucepan, melt the butter over medium heat. Continue to cook, stirring occasionally, until the butter turns a rich amber color and nutty browned bits appear at the bottom of the pan. This usually takes about 5-7 minutes. Immediately pour the browned butter into a large heatproof bowl and let it cool for 15 minutes.
- Add the brown sugar and granulated sugar to the cooled browned butter. Whisk until well combined. Beat in the eggs one at a time, then stir in the vanilla extract until smooth.
- In a separate medium bowl, whisk together the flour, baking soda, and salt. Gradually add the dry ingredients to the wet ingredients, mixing on low speed or by hand until just combined. Be careful not to overmix.
- Fold in the chocolate chunks until evenly distributed throughout the dough.
- This is the secret for guaranteed chewiness: Cover the bowl with plastic wrap and refrigerate the cookie dough for at least 2 hours. This chilling step allows the flavors to deepen and the butter to firm up, which is crucial for preventing the cookies from spreading too thin and ensures a perfectly chewy texture.
- When ready to bake, preheat your oven to 375°F (190°C). Line baking sheets with parchment paper.
- Scoop rounded tablespoons of chilled dough onto the prepared baking sheets, leaving about 2 inches between each cookie. If desired, press a few extra chocolate chunks onto the tops of the dough balls for a bakery worthy look. Sprinkle lightly with flaky sea salt.
- Bake for 10-12 minutes, or until the edges are golden brown but the centers still look slightly soft and gooey. Do not overbake. This is another key to keeping them chewy. They will continue to set as they cool.
- Remove from the oven and let the cookies cool on the baking sheet for 5 minutes before transferring them to a wire rack to cool completely.
Notes
- The 2-hour dough chilling step is essential for achieving a perfectly chewy texture and preventing cookies from spreading too thin. Do not overbake for best results.


