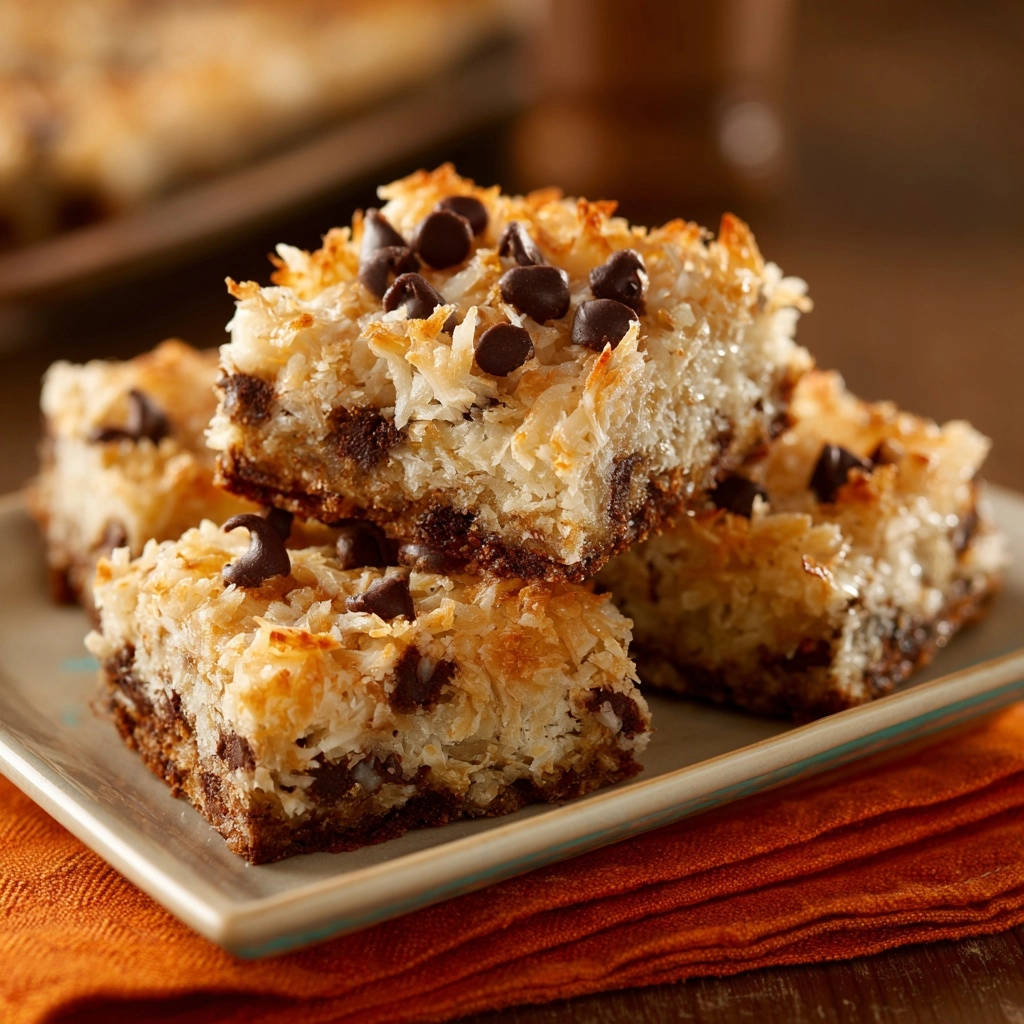
I remember the frustration of pulling what looked like beautiful bar cookies from the oven, only for them to turn into a gooey, shapeless mess upon cutting. Years of perfecting my technique have led me to this recipe for Classic Coconut Chocolate Bars, which consistently delivers perfectly set, firm, and incredibly delicious results every single time.
This recipe isn’t just about baking; it’s about guaranteeing success, ensuring your bars slice cleanly and impress everyone with their delightful layers and irresistible texture. Get ready to banish those past baking disappointments!
Say Goodbye to Gooey: Why This Recipe Is a Game-Changer
Many recipes for layered bars leave you with a sticky situation. My approach specifically tackles the common issue of bars that refuse to firm up, ensuring you achieve that ideal, satisfying slice every time.
This method focuses on precision and patience, transforming simple ingredients into a confectionery masterpiece.
The “Never Fail” Promise for Firm, Sliceable Bars
The secret lies in understanding the science of setting. This recipe guides you through a crucial cooling process that allows the sweetened condensed milk layer to properly solidify.
This methodical approach prevents the dreaded gooey center, guaranteeing bars that hold their shape beautifully from pan to plate.
Quick Prep, Rewarding Results: Your New Go-To Treat
Despite their impressive appearance, these bars require minimal active preparation time.
With just 15 minutes of hands-on work, you’ll have these delightful Classic Coconut Chocolate Bars ready for baking, leaving the oven and cooling time to do the rest.
The Essential Elements: Building Your Classic Coconut Chocolate Bars
Understanding each ingredient’s purpose is key to mastering these layered treats. Quality components contribute significantly to the final taste and texture.
The Crust Foundation: Graham Cracker & Butter
Graham cracker crumbs provide a sturdy, sweet base for these bars, offering a delightful crunch.
Melted unsalted butter binds the crumbs together, ensuring a firm foundation that won’t crumble apart when sliced.
Sweet Heart: Sweetened Condensed Milk’s Role
Sweetened condensed milk forms the luscious, chewy layer that holds the chocolate and coconut toppings in place.
It’s crucial for the rich sweetness and unique, soft-but-firm texture of the finished bars.
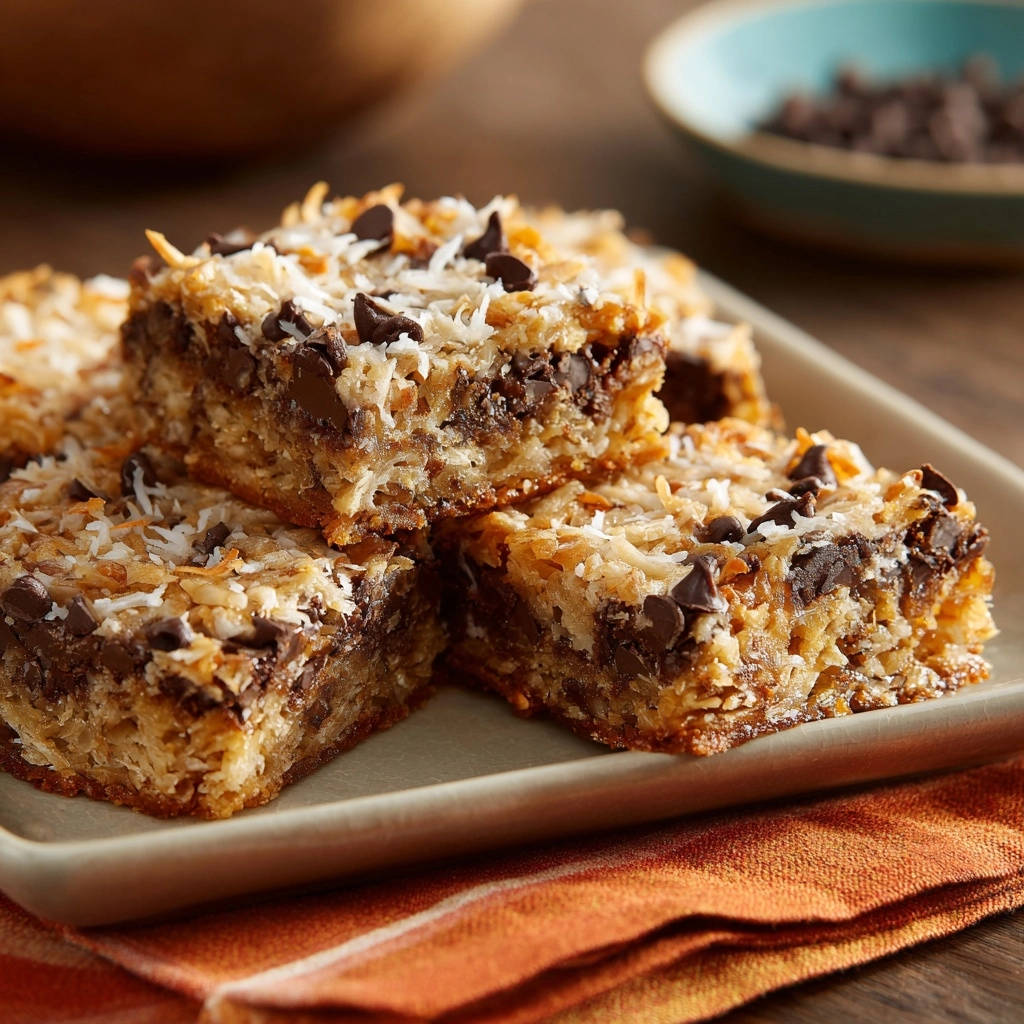
Chocolate & Coconut: The Irresistible Topping Duo
Semi-sweet chocolate chips provide a balanced sweetness and a satisfying melty texture, complementing the other flavors perfectly.
Shredded sweetened coconut adds signature flavor, a pleasing chewiness, and that iconic tropical note to your Classic Coconut Chocolate Bars.
Tools for Success: What You’ll Need for Perfect Bars
Having the right equipment makes the baking process smooth and ensures optimal results.
Essential Baking Pans & Liners
A 9×13 inch baking pan is ideal for the specified yield, allowing the bars to bake to the perfect thickness.
Parchment paper with a generous overhang is paramount for easy lifting of the entire slab, preventing sticking and simplifying the cutting process.
Mixing Bowls and Measuring Mastery
Standard mixing bowls, along with accurate measuring cups and spoons, will ensure your ingredient proportions are spot on.
A sturdy spatula or flat-bottomed measuring cup is invaluable for pressing the graham cracker crust firmly and evenly.
Crafting Perfection: A Step-by-Step Guide to Classic Coconut Chocolate Bars
- Prepare Your Pan and Preheat Oven:
Preheat your oven to 350 degrees F (175 degrees C) to ensure it reaches the correct baking temperature before the bars go in.
Line a 9×13 inch baking pan with parchment paper, leaving an overhang on the sides. This “sling” is crucial for effortless removal later. Lightly grease the parchment paper to prevent any sticking.
- Form the Graham Cracker Crust:
In a medium bowl, combine the graham cracker crumbs and melted butter. Mix thoroughly until all crumbs are evenly moistened.
Press this mixture firmly and evenly into the bottom of the prepared baking pan. A compact crust forms a solid foundation, so ensure it’s pressed down well with the back of a spoon or your fingers.
- Add the Sweetened Condensed Milk Layer:
Carefully pour the entire can of sweetened condensed milk evenly over the graham cracker crust.
Gently spread it to cover the entire surface, taking care not to disturb the crust below. This creates the gooey, binding layer.
- Layer the Chocolate Chips:
Evenly sprinkle the semi-sweet chocolate chips over the condensed milk layer.
Distribute them well so that every single slice of your Classic Coconut Chocolate Bars gets a generous amount of delicious chocolate.
- Distribute the Shredded Coconut:
Generously distribute the shredded sweetened coconut over the chocolate chips, creating the bar’s signature top layer.
Spread it out evenly to ensure consistent texture and flavor throughout.
- Bake to Golden Perfection:
Bake for 25 to 30 minutes, or until the edges of the bars are golden brown and the coconut topping is lightly toasted.
Keep a close eye on the coconut as it can brown quickly. The center should appear set, not jiggly.
- The Crucial Cooling & Setting Process:
Once baked, immediately remove the pan from the oven and place it on a wire rack. Let the bars cool completely at room temperature for at least 2 hours. This step is critical; do not rush it.
For even cleaner, more precise cuts, you can then transfer the pan to the refrigerator for an additional 30 minutes to an hour after the room temperature cooling. This full cooling process is essential for the sweetened condensed milk to properly set and firm up, ensuring your Classic Coconut Chocolate Bars are stable and easy to slice without falling apart. For a similar setting success, check out my recipe for Orange Dream Bars that finally set firmly.
- Slice and Serve:
Once completely cooled and set, use the parchment paper overhang to carefully lift the entire slab of bars out of the pan and onto a clean cutting board.
Using a large, sharp knife, cut into desired squares or rectangles. For the neatest slices, wipe your knife clean between each cut. Enjoy these perfectly formed treats!
The Golden Rule: Unlocking Perfectly Set Classic Coconut Chocolate Bars
This is the most crucial step often overlooked, but it’s what differentiates a perfect bar from a frustrating mess.
Why Cooling is Non-Negotiable for Structural Integrity
The sweetened condensed milk layer is essentially a sugar mixture that needs time to cool and recrystallize.
Rushing the cooling process prevents these sugars from firming up properly, leading to a sticky, shapeless bar that’s impossible to slice cleanly.
Room Temperature First, Then Chill: A Master Baker’s Trick
Cooling at room temperature allows the Classic Coconut Chocolate Bars to gradually release heat, preventing cracks and ensuring a stable internal structure.
The subsequent chill in the refrigerator provides an extra firm set, making for exceptionally clean and precise cuts and a wonderfully satisfying texture. This dual cooling method is a game-changer for any bar cookie, much like ensuring the perfect texture in chewy coconut macaroons.
Expert Tips: Elevate Your Classic Coconut Chocolate Bars Experience
Pressing the Crust Firmly: Ensure your graham cracker crust is tightly packed. Use the bottom of a flat-bottomed glass or measuring cup to create a very dense, stable foundation that won’t crumble.
Achieving Even Layers: When pouring the condensed milk and sprinkling toppings, do so gently and evenly. This ensures that every bite offers a consistent balance of all delicious layers.
Don’t Overbake: While a golden edge and lightly toasted coconut are desired, excessive baking can dry out the condensed milk layer. Remove the bars promptly when they reach the described doneness.
Clean Cuts Every Time: For the neatest slices, use a large, sharp chef’s knife. For ultimate precision, run your knife under hot water and wipe it clean between each cut. This prevents sticking and messy edges.
Customizing Your Topping: Feel free to experiment! Try different chocolate varieties like milk or dark chocolate chips, add a sprinkle of toasted pecans, or a drizzle of melted caramel after they’ve cooled completely.
Solving Common Challenges: Troubleshooting Your Classic Coconut Chocolate Bars
Problem: Bars Are Too Soft or Gooey
Solution: The most common cause is insufficient cooling time. You absolutely must follow the full cooling process: at least 2 hours at room temperature, followed by 30-60 minutes in the refrigerator. The bars will firm up significantly as they chill.
Solution: Another possibility is underbaking. The edges should be visibly golden, and the center should be set, not jiggly, when gently nudged. A slight jiggle is okay, but it shouldn’t be liquid.
Problem: Crust Crumbles or Sticks
Solution: Ensure you’ve melted the butter fully and mixed it thoroughly with the crumbs until the mixture is uniformly moist. Then, press it down very firmly into the pan. Also, do not skimp on lightly greasing the parchment paper before pressing the crust.
Problem: Uneven Baking
Solution: Hot spots in your oven can cause uneven browning. To counteract this, consider rotating the pan halfway through the baking time. Always ensure you’re using the correct pan size (9×13 inch) for the recipe’s proportions to ensure even heat distribution.
Serving & Storing Your Delicious Classic Coconut Chocolate Bars
Creative Serving Suggestions for Every Occasion
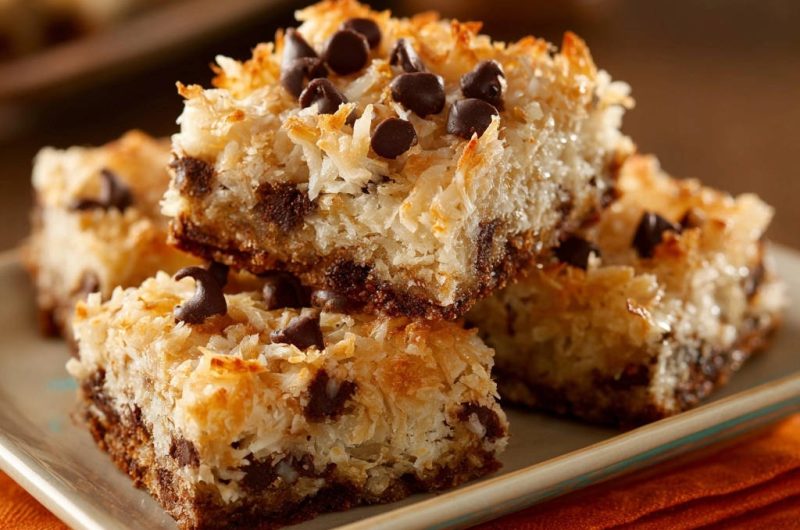
These Classic Coconut Chocolate Bars are delightful on their own, offering a perfect balance of sweet and chewy.
For an extra treat, serve them alongside a scoop of vanilla bean ice cream or a dollop of fresh whipped cream. They also make excellent additions to dessert platters for any gathering.
Optimal Storage for Freshness and Flavor
Store your Classic Coconut Chocolate Bars in an airtight container at room temperature for up to 3-4 days to maintain their texture and freshness.
For extended firmness or in warmer climates, storing them in the refrigerator for up to a week is recommended. Ensure they are fully cooled before storing to prevent condensation.
Can You Make Them Ahead? Freezing & Thawing Tips
Yes, these bars freeze beautifully! For best results, wrap individual bars or a whole slab tightly in plastic wrap, then an additional layer of aluminum foil.
They can be frozen for up to 3 months. Thaw frozen bars at room temperature for a few hours or overnight in the refrigerator before serving for optimal enjoyment.
Your Top Questions Answered About Classic Coconut Chocolate Bars
Can I use different types of chocolate?
Absolutely! While semi-sweet chocolate chips are traditional and provide a balanced flavor, you can certainly use milk chocolate, dark chocolate, or even a mix for varied sweetness. White chocolate chips also work wonderfully for a different flavor profile.
Is there a dairy-free condensed milk option?
Yes, there are several plant-based sweetened condensed milk alternatives available on the market, commonly made from coconut milk or oat milk. Using them may slightly alter the final texture, but they generally work well as a substitute to make these treats dairy-free.
How can I make these gluten-free?
To make these Classic Coconut Chocolate Bars gluten-free, simply substitute certified gluten-free graham cracker crumbs for regular ones. The rest of the ingredients in this recipe are naturally gluten-free.
What if I don’t have parchment paper?
While parchment paper is highly recommended for easy removal and clean slicing, you can thoroughly grease and flour your baking pan as an alternative. However, be aware that lifting the bars out and achieving clean cuts may be significantly more challenging without it.
Ready to Bake? Share Your Classic Coconut Chocolate Bars Success!
You’re now equipped with the ultimate recipe for Classic Coconut Chocolate Bars that are perfectly set, easy to slice, and utterly delicious. Say goodbye to messy disappointments – just pure baking joy and perfectly portioned treats!
I encourage you to try this recipe, trust the crucial cooling step, and savor the delightful results. Don’t forget to share your baking masterpieces with us; I love seeing your creations!
Classic Coconut Chocolate Bars
Course: DessertCuisine: American CuisineDifficulty: easy16
servings15
minutes25
minutes120
minutesAmerican Cuisine
Ingredients
1 1/2 cups graham cracker crumbs (about 10 full graham cracker sheets)
1/2 cup unsalted butter, melted
1 (14 ounce) can sweetened condensed milk
1 cup semi-sweet chocolate chips
1 1/2 cups shredded sweetened coconut
Directions
- Preheat your oven to 350 degrees F (175 degrees C). Line a 9×13 inch baking pan with parchment paper, leaving an overhang on the sides to easily lift the bars out later. Lightly grease the parchment paper.
- In a medium bowl, combine the graham cracker crumbs and melted butter. Press this mixture evenly into the bottom of the prepared baking pan to form the crust.
- Pour the sweetened condensed milk evenly over the crust.
- Evenly sprinkle the chocolate chips over the condensed milk layer.
- Distribute the shredded sweetened coconut over the chocolate chips.
- Bake for 25 to 30 minutes, or until the edges are golden brown and the coconut topping is lightly toasted.
- This next step is the key to perfect bars that hold their shape: once baked, remove the pan from the oven and place it on a wire rack. Let the bars cool completely at room temperature for at least 2 hours. Do not rush this step. For even cleaner cuts, you can then transfer the pan to the refrigerator for an additional 30 minutes to an hour after cooling at room temperature. The cooling process is crucial for the condensed milk to properly set and firm up, ensuring your bars are stable and easy to slice.
- Once completely cooled and set, use the parchment paper overhang to carefully lift the entire slab of bars out of the pan. Place on a cutting board and cut into squares or rectangles. Enjoy!
Notes
- Cooling completely is crucial for perfectly set bars that are easy to slice.