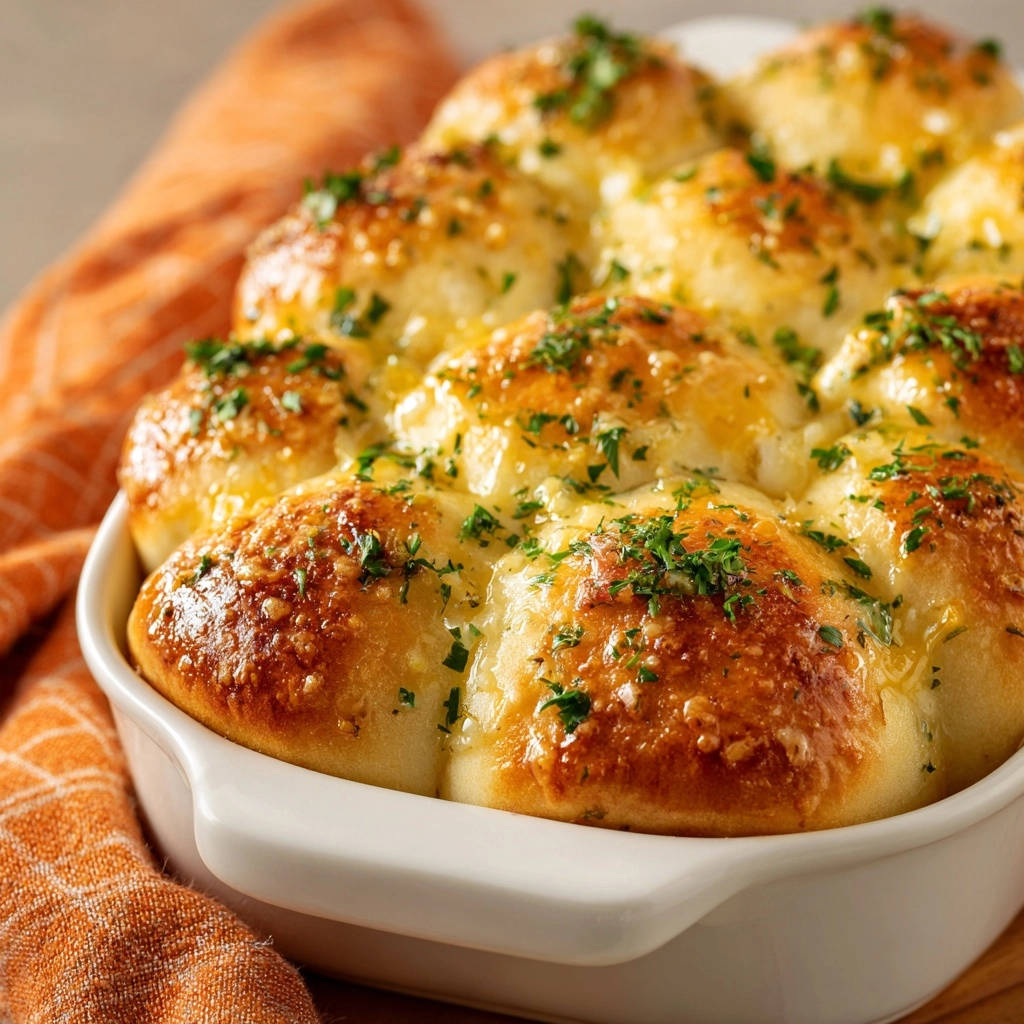
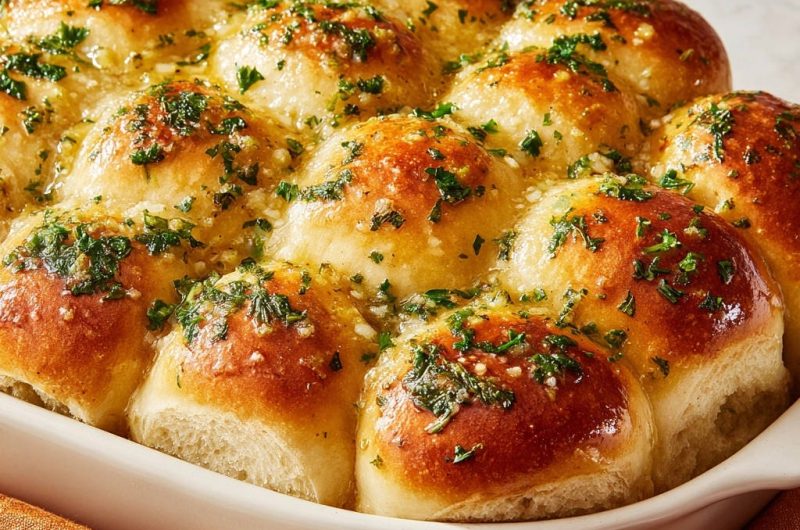
There was a time when my homemade dinner rolls would inevitably turn out disappointingly dense, a far cry from the light, airy texture I craved. That all changed when I perfected a simple technique that guarantees truly fluffy, tender Classic Garlic Butter Dinner Rolls every single time. This recipe delivers an unmatched pillow-soft crumb paired with that addictive, savory garlic butter glaze.
Why This Recipe for Classic Garlic Butter Dinner Rolls Will Be Your New Go-To
The Fluffiness Factor: Say Goodbye to Dense Rolls
The secret to these incredibly fluffy dinner rolls lies in understanding gluten development and optimal rising conditions. This recipe guides you through a precise kneading process and two crucial rises, ensuring your rolls develop that coveted light and airy texture. You’ll never settle for a heavy, tough roll again.
That Unforgettable Garlic Butter Glaze: A Flavor Revelation
What truly elevates these rolls is the generous drenching of fresh garlic and herb butter the moment they emerge from the oven. The hot rolls greedily absorb every drop, infusing them with an unparalleled savory aroma and rich flavor. It’s more than just a topping; it’s a flavor infusion.
Simplicity Meets Deliciousness: An Approachable Baking Experience
Despite their bakery-quality results, these homemade dinner rolls are surprisingly straightforward to make. I’ve broken down each step to be clear and achievable for any home baker, from beginners to seasoned pros. The process is designed to be enjoyable, leading to consistently delicious results.
Gather Your Essentials: Ingredients for Irresistibly Soft Rolls
Key Ingredients for the Dough: Beyond Just Flour
Every ingredient plays a vital role in creating perfectly soft yeast rolls. Using the right quality and understanding its function ensures success.
- Warm Milk (105-115°F): The ideal temperature is critical for activating the yeast without killing it. This warmth encourages yeast activity, leading to a good rise.
- Active Dry Yeast: This is the leavening agent responsible for the rolls’ fluffiness. Ensure your yeast is fresh and active for optimal results.
- Granulated Sugar: A small amount of sugar acts as food for the yeast, helping it to activate and multiply. It also contributes to the golden-brown crust.
- All-Purpose Flour: The foundation of our dough, all-purpose flour provides the necessary structure. Using the right amount prevents dense rolls.
- Salt: Essential for flavor, salt also helps to regulate yeast activity and strengthen the gluten structure. Don’t skip it!
- Unsalted Butter (melted and cooled): Adds richness, tenderness, and moisture to the dough. Ensure it’s cooled to avoid shocking the yeast.
Crafting the Signature Garlic Butter Topping: Flavor Secrets
The garlic butter is where these rolls truly shine. Fresh, high-quality ingredients make all the difference for this savory topping.
- Unsalted Butter (melted): The base for our fragrant topping, providing a rich, creamy foundation. Melted butter ensures even distribution.
- Garlic Cloves (minced): Freshly minced garlic delivers the most potent and aromatic flavor. Avoid pre-minced jarred garlic for best results.
- Fresh Parsley (chopped): Adds a beautiful green fleck and a fresh, herbaceous note that perfectly complements the rich garlic. Fresh herbs enhance the overall taste and appearance significantly.
Essential Tools for Your Baking Success
Having the right tools makes the baking process smooth and enjoyable. You likely have most of these in your kitchen already.
Large Mixing Bowls: You’ll need at least two – one for the dough and one for the garlic butter.
Measuring Cups and Spoons: Accuracy is key in baking, especially for flour and yeast quantities.
Whisk or Fork: For combining the yeast mixture initially.
9×13 Inch Baking Dish: The perfect size to nestle all 12 rolls for even baking and a beautiful presentation.
Plastic Wrap or Clean Kitchen Towel: Essential for covering the dough during its rises to prevent drying out.
Pastry Brush (Optional): For even distribution of the garlic butter, though a spoon works too.
Step-by-Step Guide: Crafting Your Classic Garlic Butter Dinner Rolls
Activating the Yeast: Your First Step to Fluffiness
- Combine Warm Milk, Yeast, and Sugar:
In a large bowl, whisk together the warm milk, active dry yeast, and granulated sugar. The sugar feeds the yeast, and the warm milk helps it awaken. Let this mixture rest for 5-10 minutes until a foamy layer appears on top. This foam is a visual sign that your yeast is alive and ready to work, ensuring your rolls will rise beautifully.
Forming the Dough: The Shaggy to Smooth Transition
- Add Remaining Dough Ingredients:
Pour in the melted and cooled butter, then add the all-purpose flour and salt to the yeast mixture. Using a sturdy spoon or your hands, mix everything until a rough, shaggy dough forms. At this stage, it will look a bit uneven, with dry spots and wet spots, but it’s exactly what we want.
Kneading for Perfection: The Gluten Development Secret
- Knead Until Smooth and Elastic:
Turn the shaggy dough out onto a lightly floured surface. Begin kneading it vigorously for 8-10 minutes. This is a critical step for developing the gluten, which creates the structure that traps air, leading to a light and fluffy texture. The dough should transform from sticky to smooth and elastic, springing back when lightly poked. Proper kneading is the foundation of soft, tender rolls.
The First Rise: Patience for Pillowy Rolls
- Prepare for the First Rise:
Lightly grease a clean large bowl with a small amount of oil. Transfer the kneaded dough to the bowl, turning it once to coat the entire surface. This prevents the dough from sticking as it rises. Covering the bowl tightly with plastic wrap or a clean kitchen towel creates a warm, humid environment ideal for rising.
- Allow Dough to Double in Size:
Place the covered bowl in a warm, draft-free place for 1 to 1.5 hours, or until the dough has visibly doubled in size. This slow, full first rise is absolutely critical for developing a light, airy texture and deep flavor in your rolls. A slightly warm (but not hot) oven that’s turned off, or a sunny spot, works wonderfully.
Shaping Your Rolls: Uniformity for Even Baking
- Punch Down and Divide Dough:
Once the dough has doubled, gently punch it down to release the trapped air. Turn the dough out onto a lightly floured surface. Divide the dough into 12 equal pieces. For best results, use a kitchen scale to ensure uniformity, which promotes even baking. Roll each piece into a smooth, tight ball. This creates beautifully shaped dinner rolls.
The Second Rise: Ensuring That Tender Crumb
- Arrange Rolls in Baking Dish:
Lightly grease a 9×13 inch baking dish. Arrange the shaped dough balls in the prepared dish, leaving a little space between each one. They will expand during the second rise and baking. This close arrangement allows them to bake up soft and pull-apart tender.
- Perform the Second Rise:
Cover the baking dish loosely with plastic wrap or a clean kitchen towel. Let the rolls rise again in a warm place for another 30-45 minutes, or until they look puffy and have nearly doubled in size once more. This second rise is absolutely vital for ensuring a truly tender crumb and maximum fluffiness in your finished rolls.
Baking to Golden Perfection: Oven Time Essentials
- Preheat Oven:
During the last 10 minutes of the second rise, preheat your oven to 375°F (190°C). This ensures the oven is at the correct temperature for immediate, even baking.
- Bake Until Golden Brown:
Bake the rolls for 18-22 minutes, or until their tops are beautifully golden brown. The exact baking time may vary slightly by oven, so keep an eye on them. A golden color indicates they are cooked through and have a lovely crust.
The Grand Finale: Infusing With Garlic Butter Goodness
- Prepare Garlic Butter Topping:
While the rolls are baking, prepare the iconic garlic butter topping. In a small bowl, combine the melted butter, finely minced garlic, and fresh chopped parsley. Stir it well to ensure all the flavors are evenly distributed.
- Pour Butter Over Hot Rolls:
As soon as the rolls come out of the oven, immediately pour the garlic butter mixture evenly over the hot rolls. The heat from the rolls allows them to absorb the butter and garlic quickly, infusing every nook and cranny with incredible flavor and keeping them moist and irresistible. This is a game-changer for these garlic bread rolls.
Serving Warm: The Ultimate Enjoyment
- Serve Warm and Enjoy:
Allow the rolls to cool for just a few minutes after drenching, then serve them warm. The aroma alone will have everyone rushing to the table! These garlic butter dinner rolls are best enjoyed fresh from the oven.
Chef’s Secrets: Elevate Your Dinner Roll Game
These extra tips will help you achieve perfection with your soft yeast rolls every single time.
-
Understanding Yeast Activity: The Foaming Test
The “foaming test” in step one is non-negotiable. If your yeast mixture doesn’t get foamy after 5-10 minutes, your yeast is likely old or inactive, or your milk was too hot/cold. Do not proceed; start with new yeast to avoid flat, dense rolls.
-
Mastering the Knead: Signs of a Well-Developed Dough
A well-kneaded dough should be smooth, elastic, and pass the “windowpane test.” To perform this, pinch off a small piece of dough and gently stretch it. If you can stretch it thin enough to see light through it without tearing, your gluten is perfectly developed. It should also spring back when poked.
-
Optimizing Rise Conditions: Creating the Perfect Warm Environment
Beyond a warm oven (turned off with the light on), you can create a perfect rising environment by placing the covered bowl in a warm microwave (turned off) or a slightly warm spot on your counter. Another trick is to place the bowl in a larger bowl filled with warm (not hot) water.
-
The Hot Butter Trick: Why Timing Matters for Flavor Absorption
The immediacy of pouring the garlic butter over the hot rolls is crucial. The rolls’ pores are open from the heat, allowing them to soak up every drop of that savory goodness. This ensures maximum flavor infusion and keeps the rolls wonderfully moist.
-
Don’t Overbake: Achieving the Ideal Golden Hue
Overbaking is a common culprit for dry rolls. Keep a close eye on your rolls starting around the 18-minute mark. They should be uniformly golden brown on top, but not dark or crispy. A subtle golden hue ensures they remain soft and tender inside.
-
Using Fresh Herbs: Beyond Just Parsley
While parsley is classic, feel free to experiment with other fresh herbs. A touch of finely chopped chives, rosemary, or even dill can add a delightful complexity to the garlic butter. Always use fresh herbs for the best flavor and vibrant appearance.
Troubleshooting Common Dinner Roll Dilemmas
Even the most experienced bakers encounter issues. Here are solutions to common roll-making problems.
Why Are My Rolls Dense or Hard?
Density often comes from either over-kneading (making the gluten too tight) or not kneading enough (insufficient gluten development). Too much flour can also lead to a stiff dough. Ensure your measurements are accurate and pay attention to the dough’s texture during kneading.
My Rolls Didn’t Rise Enough (or at All)!
The most common reasons for poor rising are inactive yeast (check freshness and water temperature) or a cold rising environment. Ensure your yeast foams vigorously in the first step. If your kitchen is cold, find a warmer spot for the dough to proof.
The Garlic Butter Just Sits on Top, Not Absorbing
This usually happens if the rolls have cooled too much before the butter is applied. The key is to drench them immediately when they come out of the oven, while they are still piping hot. If this happens, you can gently brush the butter on, though it may not absorb as deeply.
My Rolls are Too Dry
Dryness is almost always a sign of overbaking. Keep an eye on the rolls during the last few minutes of baking. They should be golden, not deeply browned or hardened. Remove them promptly from the oven once they reach the desired color.
Serving, Storing, and Making Ahead: Maximizing Your Rolls
Best Ways to Serve Your Fresh Rolls
These butter rolls are incredibly versatile. They are perfect alongside any meal, especially with hearty stews like our Hearty Beef Stew or a comforting pasta dish such as our Creamy Baked Pasta. They also make an excellent accompaniment to grilled meats, roasted vegetables, or simply enjoyed on their own as a savory snack.
Storing Leftover Garlic Butter Dinner Rolls
To keep your rolls fresh, store any leftovers in an airtight container at room temperature for up to 2-3 days. For longer storage, refrigerate them for up to a week. Reheat gently in the microwave or a warm oven for a soft, warm experience.
Can You Make These Rolls Ahead of Time?
Yes, you can prepare the dough ahead. After the first rise, punch down the dough, form the balls, and arrange them in the baking dish. Cover tightly with plastic wrap and refrigerate overnight (up to 24 hours). The next day, remove them from the fridge about 1-2 hours before baking to allow them to come to room temperature and complete their second rise. You can also freeze baked rolls for up to 2 months; thaw and reheat.
Frequently Asked Questions About Classic Garlic Butter Dinner Rolls
Can I Use Instant Yeast Instead of Active Dry?
Yes, you can use instant yeast. If using instant yeast, you don’t need to activate it in warm milk first. Simply mix it directly with the dry ingredients (flour, sugar, salt), then add the warm milk and melted butter and proceed with the recipe.
What if I Don’t Have Fresh Parsley?
Fresh parsley offers the best flavor and vibrant color. If you don’t have it, you can use 1 teaspoon of dried parsley flakes, though the flavor will be less intense. Alternatively, you can omit it or substitute with other fresh herbs like chives or a tiny pinch of dried oregano or Italian seasoning.
Can I Make These Rolls Gluten-Free?
This specific recipe is designed for all-purpose wheat flour to achieve its signature fluffy texture. While gluten-free flour blends exist, substituting them directly will significantly alter the texture and might require adjustments to liquid and rising times. It’s challenging to achieve the exact same result as traditional rolls without specific gluten-free bread recipes.
Is it Possible to Freeze the Dough?
Absolutely! You can freeze the shaped, unbaked dough balls. Arrange them on a baking sheet and freeze until solid, then transfer to a freezer-safe bag for up to 2-3 weeks. When ready to bake, thaw them overnight in the refrigerator, then let them rise in a warm spot until doubled before baking as usual.
Can I Adjust the Amount of Garlic?
Yes, the amount of garlic is completely adjustable to your preference. If you love a strong garlic flavor, feel free to add an extra clove or two. If you prefer a milder hint, reduce the amount. Just ensure you still use enough butter to coat the rolls thoroughly.
Ready to Bake? Share Your Classic Garlic Butter Dinner Rolls Masterpiece!
There’s nothing quite like the smell of fresh-baked Classic Garlic Butter Dinner Rolls filling your home. This recipe ensures a result that’s not just delicious, but also consistently soft, fluffy, and infused with incredible flavor. Don’t let the idea of baking rolls intimidate you any longer. Give this recipe a try, and prepare to impress everyone at your next meal. We’d love to hear about your experience in the comments below!
Classic Garlic Butter Dinner Rolls
Course: BreadCuisine: American CuisineDifficulty: easy12
rolls20
minutes22
minutes120
minutesAmerican Cuisine
Ingredients
For the Rolls:
1 cup warm milk (105-115°F)
2 and 1/4 teaspoons active dry yeast (one standard packet)
1 tablespoon granulated sugar
3 cups all-purpose flour, plus more for dusting
1 teaspoon salt
1/4 cup unsalted butter, melted and cooled
For the Garlic Butter Topping:
1/2 cup unsalted butter, melted
4 cloves garlic, minced
2 tablespoons fresh parsley, chopped
Directions
- In a large bowl, combine the warm milk, yeast, and sugar. Let it sit for 5-10 minutes until foamy. This shows the yeast is active.
- Add the melted and cooled butter, flour, and salt to the yeast mixture. Mix with a spoon or your hands until a shaggy dough forms.
- Turn the dough out onto a lightly floured surface and knead for 8-10 minutes, until the dough is smooth and elastic. It should spring back when lightly poked. This kneading is key for developing gluten, which traps air and leads to a fluffy texture.
- Lightly grease a clean large bowl with a little oil. Place the dough in the bowl, turning it once to coat. Cover the bowl with plastic wrap or a clean kitchen towel.
- For guaranteed fluffiness, let the dough rise in a warm, draft-free place for 1 to 1.5 hours, or until it has visibly doubled in size. This slow, full rise is critical for developing that light, airy texture. You can place it in a slightly warm (but not hot) oven that’s turned off, or near a sunny window.
- Once doubled, gently punch down the dough to release the air. Turn it out onto a lightly floured surface and divide into 12 equal pieces. Roll each piece into a smooth ball.
- Arrange the dough balls in a greased 9×13 inch baking dish, leaving a little space between each.
- Cover the baking dish and let the rolls rise again in a warm place for another 30-45 minutes, or until they look puffy and have nearly doubled in size once more. This second rise ensures a truly tender crumb.
- Preheat your oven to 375°F (190°C) during the last 10 minutes of the second rise.
- Bake the rolls for 18-22 minutes, or until they are golden brown on top.
- While the rolls are baking, prepare the garlic butter topping. In a small bowl, combine the melted butter, minced garlic, and chopped fresh parsley.
- As soon as the rolls come out of the oven, immediately pour the garlic butter mixture evenly over the hot rolls. The hot rolls will absorb the butter and garlic, infusing them with incredible flavor and keeping them moist.
- Serve warm and enjoy!
Notes
- This recipe emphasizes a specific kneading technique and two full rises for guaranteed fluffiness.